
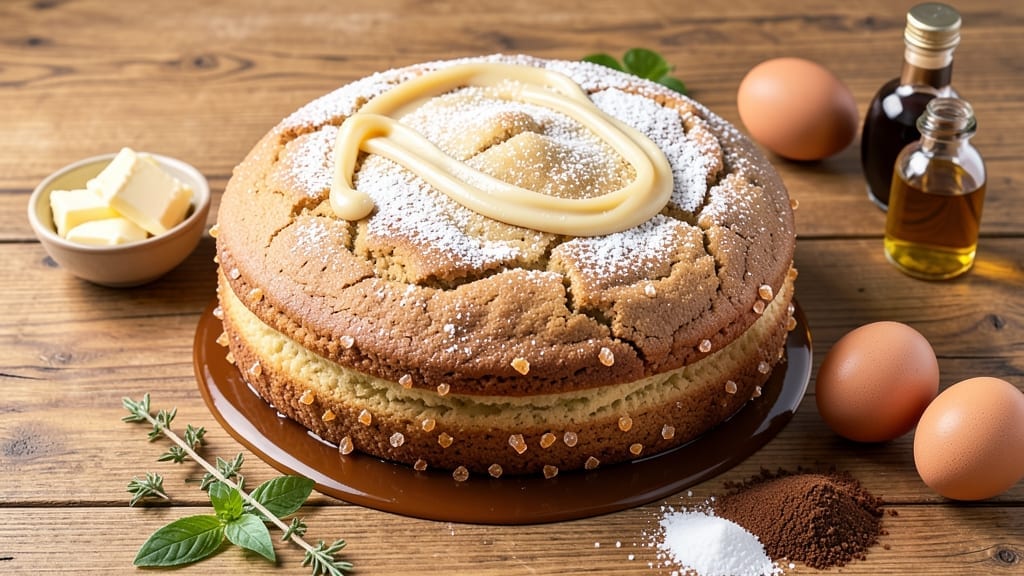
This 1 giant cookie recipe delivers a single, showstopping dessert that’s perfect for sharing—or not. 💛 The secret lies in scaling up a classic chocolate chip cookie dough with precise measurements and baking techniques to ensure a perfectly crisp edge and gooey center in one massive bite.
I’ve baked dozens of these over the years, and this method never fails to impress.
What makes this recipe work is the balance of ingredients—rich brown butter, melted dark chocolate chunks, and a touch of sea salt to enhance the sweetness. The dough is rolled into a single, thick disc before baking, ensuring even cooking and a sturdy base that holds up to slicing.
Preheating the oven and using a baking stone or inverted sheet pan creates that signature crackly crust.
By the time it emerges from the oven, you’ll have a 12-inch cookie with a golden, crackly exterior and a soft, chewy center that’s still warm and melty. The aroma alone will have everyone gathering around, and the first bite delivers that perfect mix of buttery, chocolatey, and salty goodness.
It’s the kind of dessert that feels like a celebration—without the fuss.
Serve it warm with vanilla ice cream or whipped cream, or let it cool slightly for easier slicing. This cookie is large enough to share (or not), making it ideal for parties, date nights, or whenever you want to make a statement with dessert. Here’s how to create it.
Ingredients for 1 giant cookie
Rich brown butter, sweet sugars, and chocolate chunks—this is your giant cookie lineup.
| Ingredient | Amount | Notes |
|---|---|---|
| Unsalted Butter 🧈 | 2 cups | Browned for nutty flavor |
| Granulated Sugar 🍚 | 1 ½ cups | Light brown preferred |
| Packed Brown Sugar 🍚 | ½ cup | For chewy texture |
| Large Eggs 🥚 | 2 whole | Room temperature preferred |
| Vanilla Extract 🌿 | 2 tsp | Pure vanilla extract |
| All-Purpose Flour 🌾 | 3 ½ cups | Sifted for even texture |
| Baking Soda 🧂 | 1 tsp | Freshly opened |
| Sea Salt 🧂 | 1 ½ tsp | Fine grain preferred |
| Dark Chocolate Chunks 🍫 | 2 cups | 70% cacao minimum |
| Flaky Sea Salt 🧂 | 2 tbsp | For topping |
| Vanilla Ice Cream 🍦 | 1 cup | For serving |
The butter makes all the difference here. Brown it yourself—don’t skip this step. The nutty flavor is what elevates this from ordinary to showstopping. For the chocolate, 70% cacao or higher gives that perfect balance of sweet and bitter. I grab mine from Trader Joe’s or Whole Foods—their bars are consistently high quality. The flour? King Arthur or Gold Medal are my go-tos, but any all-purpose will work. Just make sure it’s fresh—stale flour makes for a dense cookie. And that flaky sea salt? Maldon is the gold standard, but any good-quality flaky salt will do.
No brown butter? Use regular melted butter plus 1 tsp brown sugar—it won’t be as rich, but it’ll still taste great. Short on dark chocolate? Chop up a chocolate bar—just make sure it’s at least 60% cacao. No vanilla extract? Vanilla bean paste works too, or you can scrape seeds from a vanilla bean. The ice cream is totally optional, but Häagen-Dazs vanilla or Ben & Jerry’s are my top picks for that creamy, dreamy texture. If you’re feeling fancy, try salted caramel ice cream instead—it’s a match made in cookie heaven.
This dough is best made a day ahead—48 hours in the fridge gives the flavors time to meld. Store it in an airtight container, and let it sit at room temperature for 30 minutes before rolling. The cookie itself keeps for 3 days at room temperature, wrapped tightly. For longer storage, slice and freeze portions on a tray before transferring to a bag. Reheat slices in the oven for 5-10 minutes to restore that gooey center. And if you’re serving it warm? 10 minutes out of the oven is perfect—hot but not scorching.
Why You’ll Love This Recipe
- You already have the basics: butter, sugar, eggs. No fancy add-ins, no specialty flours. Just pure, reliable cookie joy that won’t break the bank. (Or your willpower.)
- No Mixer Needed: I swear by this—just cream the butter and sugars with a wooden spoon until it’s light and fluffy. No electric mixer, no stress, just elbow grease for 5 minutes. (Yes, even if your arms are tired from folding laundry.)
- Buttery-Sweet Magic: That perfect balance of melted butter, crispy edges from brown sugar, and vanilla’s warmth? It’s like a hug in cookie form. The eggs bind it just right—no dry, crumbly mess here.
- Leftovers? More Like Leftovers: This monster cookie stays fresh for days, so you can bake one and snack on it for a week. Slice it thin for breakfast toast or share it with coworkers—no one will guess it’s been sitting out.
Step-by-step instructions for one giant cookie
Here’s the method that delivers a perfectly baked giant cookie with crisp edges and a gooey center.
👨🍳 Step 1: Brown the Butter for Nutty Depth
Melt the 2 cups unsalted butter in a light-colored saucepan over medium-low heat. Watch closely as it foams and bubbles—this is when the butter starts to brown. You’re looking for a golden brown color with nutty aroma, about 5-7 minutes. Be patient; don’t rush this step or the butter will burn.
As soon as you see golden flecks forming and smell that rich, toasty aroma, immediately pour the butter into a heatproof bowl. Let it cool to room temperature (about 30 minutes) while you prepare the other ingredients. The browned butter adds incredible flavor, but it must cool completely before mixing—warm butter creates steam in the dough and affects texture.
👨🍳 Step 2: Cream Butter with Sugars
Once the browned butter is completely cool, place it in the bowl of a stand mixer fitted with the paddle attachment. Add the 1.5 cups granulated sugar and 0.5 cup packed brown sugar. Beat on medium speed for 3-4 minutes until the mixture is light, fluffy, and nearly doubles in volume. You should see ribbons form when the paddle lifts.
This creaming process incorporates air into the dough, which creates that signature crackly top and helps the cookie spread properly. I press down on the butter mixture with my fingers occasionally to check for readiness—when it holds peaks and leaves clean fingerprints, it’s ready for the next step. If the mixture feels too soft, chill it for 15 minutes before proceeding.
👨🍳 Step 3: Add Eggs and Vanilla
Add the 2 whole large eggs one at a time, mixing on low speed for 30 seconds after each addition until fully incorporated. Then add the 2 teaspoons vanilla extract and mix for another 10 seconds. The mixture will look slightly curdled, but don’t worry—this will resolve when you add the dry ingredients.
I always use room-temperature eggs for this recipe. Cold eggs can create pockets of steam in the dough, leading to uneven baking. If your eggs are straight from the fridge, let them sit in warm water for 5 minutes first. The vanilla extract should be pure, not imitation—you’ll notice the difference in the final flavor.
👨🍳 Step 4: Combine Dry Ingredients
In a separate bowl, whisk together the 3.5 cups all-purpose flour, 1 teaspoon baking soda, and 1.5 teaspoons sea salt. Sift the mixture directly into the wet ingredients. Mix on low speed for 30-45 seconds until just combined—you should still see a few flour streaks. Over-mixing develops gluten and makes the cookie tough.
Remove the bowl from the mixer and gently fold in the 2 cups dark chocolate chunks using a silicone spatula. Make sure they’re evenly distributed throughout the dough. Here’s the thing—don’t skip this step. The chocolate needs to be evenly dispersed so every bite has that rich, melty chocolate experience. If you’re using pre-portioned chocolate chunks, they’ll melt slightly during baking and create those beautiful pockets of gooey goodness.
🥘 Step 5: Shape and Bake the Giant Cookie
Preheat your oven to 350°F. Line a large baking sheet with parchment paper or a silicone baking mat. Transfer the dough to the prepared baking sheet and shape it into a 12-inch round (about 1-inch thick). I use a bench scraper to create clean edges and ensure even thickness throughout.
Bake for 25-30 minutes until the edges are deep golden brown and the center still looks slightly underdone. The cookie will continue cooking as it transfers to a wire rack. Here’s the crucial part: let it cool on the baking sheet for 10 minutes before transferring. This prevents cracking and allows the cookie to set properly. While it cools, sprinkle the top with 2 tablespoons flaky sea salt for that perfect sweet-salty contrast.
Pro Tips For Making 1 Giant Cookie
- Cream Butter Cold: Take that butter straight from the fridge—no softening needed. I used to let it sit out, and the dough always ended up greasy and hard to shape. Cold butter creates pockets for the sugar to caramelize, giving you that perfect chewy center.
- Measure Brown Sugar Right: Pack that brown sugar hard—no air gaps. I learned this after my first giant cookie spread like a pancake. Use a spoon to press it down firmly in the measuring cup, or your cookie will be dense and flat instead of tall and gooey.
- Don’t Overmix the Dough: Mix just until combined—maybe 10-12 strokes. I’ve seen people beat this dough like they’re making cake batter, and it turns out tough. Overworking it develops gluten, and your cookie will be more cracker than chew.
- Use Room-Temp Eggs: Let those eggs sit out for 30 minutes before cracking them. Cold eggs can make the dough seize up, and you’ll end up with a lumpy mess. Room-temp eggs blend in smoothly, giving you a silky texture every time.
Troubleshooting your 1 giant cookie
Dough Too Sticky
If your giant cookie dough feels impossible to handle, it’s likely too warm or has absorbed too much moisture. First, chill the dough for 30-60 minutes in the fridge—this firms it up and makes shaping easier.
For extra insurance, dust your work surface with 1-2 tablespoons flour or use parchment paper to prevent sticking. I’ve even used a lightly floured silicone mat for a non-stick surface that still feels forgiving. 💛
Uneven Baking
If your cookie’s edges brown too quickly while the center stays doughy, it’s likely too thick in spots. Use a bench scraper to create an even 1-inch thickness throughout. For better heat distribution, place the baking sheet on a preheated baking stone or an inverted sheet pan.
Rotate the pan halfway through baking if you notice uneven browning. A 350°F oven is ideal—any hotter and the outside will overcook before the center sets.
Cracked Top
Cracks usually mean the dough was too warm when baked or cooled too quickly. Let your cookie rest on the baking sheet for 10-15 minutes before transferring to a wire rack. For extra insurance, bake it on the middle rack where heat circulates evenly.
If cracks appear while baking, don’t panic—they’re just part of the charm! Just avoid opening the oven door early, as temperature fluctuations can worsen them.
Dense Texture
A dense cookie often results from overmixing the dough or using stale flour. Mix the dry ingredients just until combined—you should still see small flour streaks. For flour, use King Arthur or Gold Medal (fresh is key!).
If your dough feels too dry, add 1 tablespoon milk or heavy cream at a time until it’s pliable. Browned butter is non-negotiable here—it adds moisture and richness that melted butter can’t replicate. ⚡
Cookie Spreads Too Much
Over-spreading usually means the butter wasn’t chilled enough or the dough was too soft. Before baking, make sure your dough has rested in the fridge for at least 30 minutes. If it’s still too warm, chill it another 15 minutes.
For extra control, shape your cookie slightly thinner (¾-inch thick) and bake on the middle rack. A 350°F oven is your friend—don’t crank it higher to speed things up.
Chocolate Burns
Dark chocolate chunks can scorch if they’re too close to the heat source. To prevent this, place your baking sheet on the middle rack and avoid overcrowding. If you notice chocolate browning too quickly, reduce the oven temperature to 325°F for the last 10 minutes of baking.
For even better results, use 70% cacao chocolate—it melts more evenly than milk chocolate. Sprinkle the chunks evenly over the dough before baking to ensure they’re not clustered in hot spots.
Nutrition facts
Frequently asked questions
How long does it take to make this giant cookie?
Plan for about 2 hours total from start to finish. The dough needs 30 minutes to chill before rolling, plus 25-30 minutes in the oven. Pro tip: Make the dough a day ahead and refrigerate it—this actually improves the flavor!
Can I make this cookie without a stand mixer?
Use two large mixing bowls and a sturdy wooden spoon or silicone spatula. Cream the butter and sugars by hand for 5-7 minutes until light and fluffy. For the dry ingredients, gently fold them in with a spatula—just don’t overmix. The texture will be slightly less airy but still delicious!
How do I slice a giant cookie without it falling apart?
Wait until the cookie is completely cool (1-2 hours) before slicing. Use a sharp, 10-inch pizza wheel or serrated knife dipped in hot water and wiped dry. Cut through the center first, then work outward to prevent cracking. For extra stability, chill the cookie in the fridge for 30 minutes before slicing.
What’s the best way to serve this cookie?
Serve it warm with vanilla ice cream or whipped cream for that classic combo. For a gourmet touch, pair it with salted caramel sauce or a scoop of coffee ice cream. If you want to impress, dust the slices with powdered sugar or a sprinkle of crushed nuts before serving.
Can I make this cookie gluten-free?
Yes, but with adjustments. Replace the all-purpose flour with a 1:1 gluten-free baking flour blend (like King Arthur’s). Add ½ teaspoon xanthan gum to help bind the dough. Note that gluten-free cookies tend to be denser, so expect a slightly different texture. For best results, use a gluten-free chocolate chip alternative too.

- 3lb Prime Rib Roast Recipe: Juicy Pink Center Guaranteed in 3 Hours - October 31, 2026
- 5 Spice Cake Recipe: Warmly Spiced Layers With Crunchy Top - October 31, 2026
- 1950’s Macaroni and Cheese Recipe: Nostalgic Creamy Cheese Sauce with Buttery Noodles - October 31, 2026