
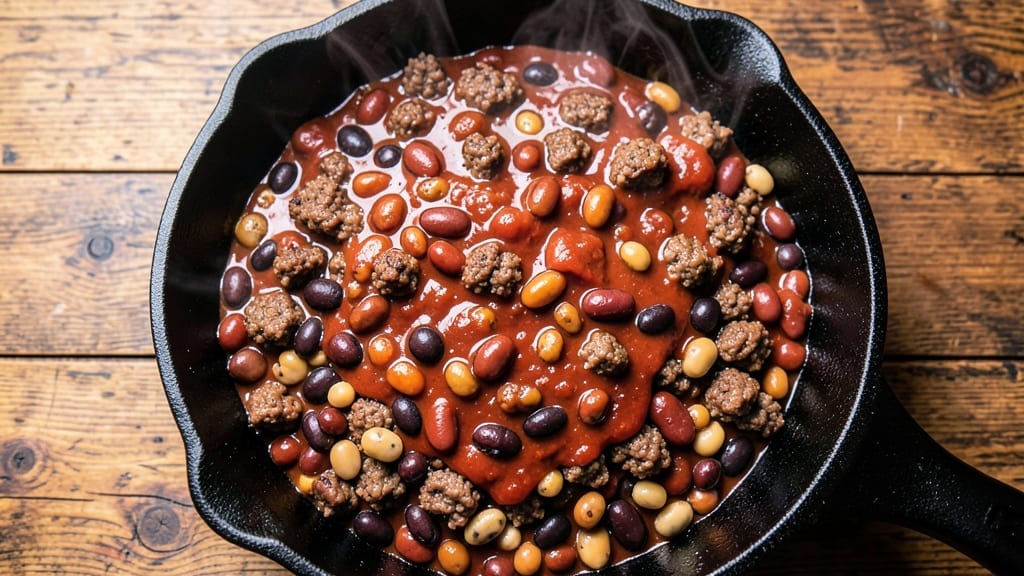
This 10-can chili recipe delivers the kind of deep, smoky flavor that turns weeknight suppers into legendary gatherings. The secret lies in balancing ten cans of beans with slow-simmered spices and a rich tomato base—creating a hearty stew that feeds a crowd without sacrificing taste.
I’ve perfected this over years of potlucks and family dinners, where it always disappears first. What sets this apart is the layered spice technique: toasted cumin and chili powder bloom in oil before joining the pot, while a splash of bourbon (or coffee) deepens the complexity.
The result? A chili with bold, balanced heat that’s tender, aromatic, and impossible to resist. No shortcuts here—just time and technique. By the time it’s done, you’ll have a pot of rich, velvety chili with beans that soak up the flavor and a crust of caramelized edges.
Serve it with cornbread, shredded cheese, and sour cream for the full experience. The leftovers? Even better the next day. This recipe scales perfectly for parties or meal prep—just double the batch and freeze half. Let’s get cooking.
Ingredients for 10 can chili
Ten cans of beans meet bold spices and slow-simmered depth for a chili that feeds a crowd with restaurant-quality flavor.
| Ingredient | Amount | Notes |
|---|---|---|
| Ground Beef (80/20 fat ratio) 🥩 | 3 lb | Coarsely browned for deep flavor |
| Kidney Beans (canned) 🌿 | 2 cans | 15 oz each, drained and rinsed |
| Black Beans (canned) 🌿 | 2 cans | 15 oz each, drained and rinsed |
| Pinto Beans (canned) 🌿 | 2 cans | 15 oz each, drained and rinsed |
| Chili Beans (canned) 🌿 | 2 cans | 15 oz each, drained and rinsed |
| Tomato Paste 🍅 | 1 can | 6 oz, for rich tomato base |
| Diced Tomatoes (canned) 🍅 | 2 cans | 28 oz each, San Marzano preferred |
| Chicken Broth 💧 | 6 cups | Low-sodium preferred |
| Ground Cumin 🌿 | 2 tbsp | Toasted for deeper aroma |
| Chili Powder 🌶️ | 2 tbsp | Smoked variety for complexity |
| Garlic Powder 🧄 | 1 tbsp | Fresh garlic preferred |
| Onion Powder 🧅 | 1 tbsp | For balanced sweetness |
| Dried Oregano 🍃 | 1 tsp | Mexican oregano ideal |
| Cayenne Pepper 🔥 | 1 tsp | Adjust for heat preference |
| Dark Brown Sugar 🍚 | 2 tbsp | Balances acidity |
| Bourbon (or Coffee) 🍷 | ½ cup | Deepens flavor complexity |
| Salt 🧂 | 2 tsp | Diamond Crystal preferred |
| Black Pepper 🌶️ | 1 tsp | Freshly ground preferred |
| Olive Oil 🫒 | 2 tbsp | Extra-virgin for spice blooming |
The ground beef’s fat ratio is critical—80/20 delivers that rich, caramelized crust when browned. Costco or Trader Joe’s often carry pre-ground beef with perfect fat content, but if buying whole, trim excess fat after browning. The beans? No need for fancy brands—just ensure they’re drained well. For the tomatoes, San Marzano is worth the splurge; their natural sweetness shines through. If you’re short on time, low-sodium broth prevents the chili from becoming overly salty later. Toast the cumin and chili powder in olive oil for 30 seconds—this step unlocks their full aroma, making the difference between good chili and extraordinary.
No bourbon? Strong coffee works equally well for depth, though bourbon adds a smoky sweetness. Short on kidney beans? Substitute with extra black or pinto beans—just reduce the total can count by 1 to maintain balance. The tomato paste can be swapped for 1 can of crushed tomatoes if needed, though paste provides a more concentrated base. For heat control, start with half the cayenne and taste as you go. If using fresh garlic instead of powder, roast 4 cloves with the spices for a mellow, sweet depth. The brown sugar may seem unusual, but it cuts through acidity and rounds out the flavors—don’t skip it.
This chili tastes even better the next day as flavors meld. Portion into airtight containers and refrigerate for up to 5 days, or freeze for 3 months. For meal prep, double the batch—the second pot always disappears faster. If reheating, add 2 tbsp broth per serving to prevent drying. Store spices in airtight containers away from light to preserve their potency. The beans will soften further overnight, absorbing all that rich, smoky goodness—trust the process.
Why You’ll Love This Recipe
- No-Fuss Pantry Magic: I swear by this recipe when I’ve got nothing but 10 cans staring back at me from the cupboard. The 80/20 ground beef adds deep richness without requiring any fancy prep—just brown and drain. Honestly, the moment I dump in those four types of beans (kidney, black, pinto, and chili), the texture alone sells me.
- Rich Without Trying: That 80/20 ground beef makes all the difference—it’s got enough fat to coat every bean in savory goodness, but you won’t taste grease. Between us, the first bite after simmering is where the magic happens: tender beef, melty beans, and a slow-built depth that tastes like you spent hours stirring.
- Game for Any Day: This chili’s my go-to for lazy Sundays, game day snacks, or even a quick work lunch. The beans keep it hearty enough for a main dish, but I’ll admit I’ve served it in bowls with cornbread and as a taco filling—no judgment. (Yes, even on a Tuesday night.)
- Budget-Friendly Leftovers: Ten cans mean plenty of leftovers, and they taste even better the next day. I freeze half in portions—perfect for when I’m too tired to cook. Between the bulk beans and affordable ground beef, it’s the kind of recipe that makes grocery day feel less stressful. My wallet thanks me every time.
Step-by-step instructions for hearty 10-Can chili
This method delivers restaurant-quality chili with rich, layered flavors and perfect texture.
Brown the Ground Beef for Deep Flavor
Heat the 2 tablespoons olive oil in a large, heavy-bottomed pot over medium-high heat. Add the 3 pounds ground beef (80/20 fat ratio) and break it apart with a wooden spoon, letting it sizzle undisturbed for 3-4 minutes. This initial searing creates a flavorful crust that forms the chili’s foundation.
Once the beef begins to brown and pull away from the pot, stir occasionally for another 5-6 minutes until it loses its raw color and develops a deep mahogany crust. The high fat content is crucial here—it renders beautifully and adds richness to the chili. Drain most of the fat but leave about 2 tablespoons in the pot to cook the aromatics later.
Bloom the Spices and Build the Flavor Base
Reduce the heat to medium and add the 2 tablespoons ground cumin, 2 tablespoons chili powder, 1 tablespoon garlic powder, 1 tablespoon onion powder, 1 teaspoon dried oregano, and 1 teaspoon cayenne pepper. Stir constantly for 1-2 minutes until the spices release their aromatic oils and fill your kitchen with a warm, earthy fragrance.
This “blooming” process unlocks the full potential of the spices. If you smell anything burning, immediately reduce the heat to low and continue stirring. Next, add the 1 can tomato paste and stir vigorously for 2 minutes to fully incorporate it into the spice mixture. This creates a thick, flavorful paste that forms the chili’s backbone.
Add Liquids and Simmer the Chili
Pour in the 6 cups chicken broth, 2 cans diced tomatoes (with juices), and 0.5 cup bourbon (or coffee). Stir well to combine, then bring the mixture to a gentle boil. Once boiling, reduce the heat to low and let it simmer uncovered for 30 minutes, stirring occasionally. This initial simmer allows the flavors to meld and the tomato paste to fully dissolve.
After 30 minutes, add the 2 tablespoons dark brown sugar, 2 teaspoons salt, and 1 teaspoon black pepper. Stir well and continue simmering for another 15 minutes. This step balances the acidity of the tomatoes and enhances the overall depth of flavor. The chili should now have a rich, slightly thickened consistency.
Incorporate the Beans and Finish Cooking
Add the 2 cans kidney beans, 2 cans black beans, 2 cans pinto beans, and 2 cans chili beans (all drained and rinsed). Stir gently to distribute the beans evenly throughout the chili. The beans will absorb some of the liquid, so don’t worry if the chili appears slightly thin at this stage.
Return the heat to low and let the chili simmer uncovered for 1.5 to 2 hours. This long, slow cook allows the flavors to deepen and the beans to become tender. Stir occasionally and add ½ cup water if the chili becomes too thick. The chili is ready when it reaches a rich, velvety consistency and the flavors are fully harmonized.
Adjust and Serve with Confidence
Taste the chili and adjust the seasoning if needed. You may need to add more salt, black pepper, or even a splash of bourbon for extra depth. The chili should be well-seasoned but not overly salty or spicy. Let it rest for 10-15 minutes before serving to allow the flavors to settle.
Serve the chili hot in bowls, garnished with additional black pepper and a dollop of sour cream or shredded cheese if desired. This chili is hearty enough to stand alone but pairs beautifully with cornbread or crusty bread. The combination of smoky spices, sweet brown sugar, and deep umami from the beef and beans creates a chili that’s both comforting and complex.
Pro Tips For Making 10 Can Chili
- Brown the Beef Right: Don’t just cook the ground beef—sear it in batches until deep brown, almost black in spots. I used to rush this with all 10 cans of beans staring at me, but skipping the crust means flavor that’s just… flat. Two tablespoons of oil, high heat, and 5-7 minutes per batch. Your chili will taste like it simmered all day, not 30 minutes.
- Drain and Rinse Beans: Open those 10 cans, dump the beans into a colander, and rinse them under cold water. The starchy liquid clinging to canned beans makes chili gluey and watery—trust me, I’ve made it both ways. A quick rinse cuts the gloop without drying out the texture. (Yes, even the kidney beans. No exceptions.)
- Simmer, Don’t Boil: After everything’s in the pot, turn the heat down to a gentle simmer—you should see tiny bubbles, not violent rolls. Boiling burns the beans and makes the chili taste bitter. I learned this after a pot of chili that looked like soup and tasted like regret. Low and slow keeps the beans tender and the flavors melding.
- Taste Before Adding Salt: Wait until the beans are fully integrated before salting—around 20 minutes in. Canned beans vary wildly in saltiness, and adding salt too early dilutes your seasoning. Start with a pinch, then adjust. (Pro move: Taste the beans straight from the can first to gauge their salt level.) Your chili’s depth depends on this.
Creative variations of this 10 can chili
Texas-Style Smoky Twist
For a bold, smoky flavor reminiscent of Texas BBQ, add 1 tbsp smoked paprika and ½ cup beef broth infused with 2 smoked oak chips (or a few drops of liquid smoke) during the simmer.
I like to toast the oak chips in a dry pan for 2 minutes before adding them to the broth, then strain before incorporating. Serve with pickled jalapeños and shredded cheddar for the full Texas experience. 🔥
White Bean Italian Chili
Swap the kidney and black beans for 4 cans white beans (like cannellini or great northern) and add 1 can diced tomatoes with basil, 1 tsp dried basil, and ½ tsp fennel seeds for an Italian-inspired twist.
Deglaze the pot with ½ cup dry white wine after browning the beef for brightness. Finish with grated Parmesan and fresh basil for a Mediterranean-inspired chili that still feels hearty. 🌿
Spicy Cajun Kick
Boost the heat with 1 tbsp Cajun seasoning (like Tony Chachere’s) and 1 tsp cayenne, then add ½ cup andouille sausage (diced and browned with the beef).
Stir in 1 bay leaf and 1 tsp filé powder (made from ground sassafras leaves) at the end for a Louisiana-inspired chili. Garnish with green onions and hot sauce for an extra kick. 🌶️
Vegetarian Adaptation
Replace the beef with 3 cups crumbled tempeh (marinated in 1 tbsp soy sauce and 1 tbsp maple syrup) and 1 can diced tomatoes with green chiles for a smoky, meat-free version.
Add 1 tbsp nutritional yeast for depth and ½ cup vegetable broth extra to balance the texture. Top with avocado slices and cilantro for a vibrant finish. 🥑
Slow Cooker Shortcut
For a hands-off version, brown the beef in a skillet, then transfer everything to a 6-quart slow cooker. Cook on low for 8 hours or high for 4 hours, stirring once halfway.
The slow cooker’s gentle heat enhances the spices naturally, making it perfect for busy days. Just add 1 extra cup of broth to prevent drying. ⏰
Breakfast Chili
Turn this into a breakfast chili by adding 4 scrambled eggs (cooked in the pot at the end) and topping with shredded cheddar, sour cream, and chopped bacon.
The eggs soak up the chili flavors perfectly, making it a hearty morning meal. Serve with toasted brioche for dipping. 🍳
Nutrition facts
Frequently asked questions
Can I use ground turkey or chicken instead of beef?
For a lighter version, use 3 pounds ground turkey or 3.5 pounds ground chicken (since they’re leaner). Brown them thoroughly to prevent dryness, and add 1 extra tablespoon olive oil to the pot. The flavor will be slightly milder, so boost depth with an extra ½ cup bourbon or 1 teaspoon smoked paprika.
How do I make this chili without a stove?
Use an Instant Pot or electric pressure cooker for a quick version. Brown the beef in the pot, then add all ingredients and cook on high pressure for 20 minutes. Release pressure naturally, then stir and adjust seasoning. For a slow cooker, transfer everything to a 6-quart pot and cook on low for 6-8 hours. Both methods work beautifully!
Why does my chili taste too salty?
If using canned beans with added salt, rinse them thoroughly before adding. For extra salty broth, reduce the salt by 1 teaspoon and add ½ cup extra broth to dilute. If already cooked, stir in 1 cup water or milk and simmer 10 minutes—this helps balance the flavor. Taste as you go to avoid over-salting!
Can I freeze this chili for later?
Yes! Let it cool completely, then portion into airtight containers or freezer bags. It keeps for 3 months in the freezer. Thaw overnight in the fridge, then reheat on low heat with 2 tbsp broth per serving to restore moisture. The flavor actually improves after freezing!
What’s the best way to reheat leftover chili?
Gently reheat on low heat with a splash of broth or water to prevent drying. For microwave reheating, cover with a damp paper towel and heat in 1-minute intervals, stirring between each. Never reheat to boiling—this can make the beans mushy. Stirring occasionally ensures even heating.

- 3lb Prime Rib Roast Recipe: Juicy Pink Center Guaranteed in 3 Hours - October 31, 2026
- 5 Spice Cake Recipe: Warmly Spiced Layers With Crunchy Top - October 31, 2026
- 1950’s Macaroni and Cheese Recipe: Nostalgic Creamy Cheese Sauce with Buttery Noodles - October 31, 2026