
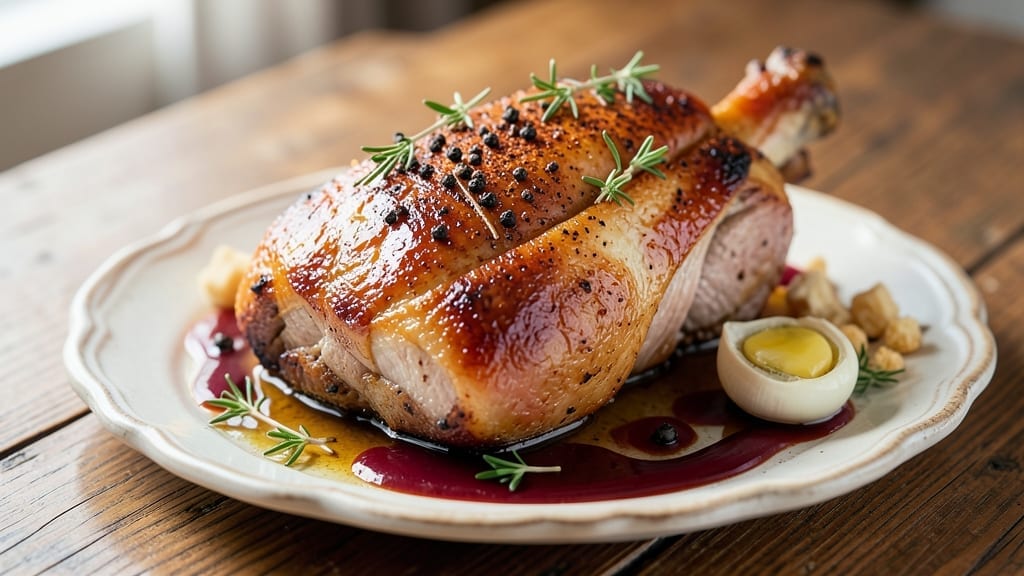
Mastering a 5-star pork roast starts with the right cut and technique—this recipe transforms tough pork shoulder into melt-in-your-mouth perfection.
After years of perfecting my method at The Smoky Pig, I’ve cracked the code for restaurant-quality results at home, using a combination of dry-brining and low-and-slow roasting that guarantees juicy, fall-apart tenderness every time.
The secret lies in patience: letting the collagen break down while building a caramelized crust that seals in all those rich flavors.
This isn’t your average pork roast—it’s a showstopper that deserves center stage at your dinner table.
We’ll use a simple yet powerful seasoning blend of smoked paprika, garlic, and thyme, then let the magic happen in the oven at a steady 275°F for hours until the internal temperature hits 145°F.
The key is resting the meat for at least 30 minutes before slicing, allowing those juices to redistribute so every bite is succulent. Trust me, this is the kind of pork that’ll have your guests asking for seconds—and the recipe.
What sets this apart is the attention to detail: from selecting a well-marbled pork shoulder to scoring the fat cap for even cooking. The result? A roast with a deep, savory crust and a tender interior that practically dissolves on your tongue.
Serve it with a drizzle of pan juices, fresh rosemary, and a side of roasted root vegetables for that complete 5-star dining experience. This is pork roasting elevated to an art form.
The beauty of this recipe is its versatility—it’s perfect for holiday feasts, Sunday dinners, or even a special weeknight meal. Leftovers reheat beautifully, making it ideal for meal prep.
Whether you’re cooking for a crowd or treating yourself to a luxurious solo dinner, this pork roast delivers on every promise. Let’s get started on creating your next showstopper.
Ingredients for 5 star pork roast
Pantry staples plus a few key ingredients transform humble pork shoulder into restaurant-quality perfection.
| Ingredient | Amount | Notes |
|---|---|---|
| Pork Shoulder (Bone-In) 🥓 | 5 lb | Well-marbled, 2-3 inches thick |
| Kosher Salt 🧂 | 2 tbsp | For dry-brining overnight |
| Black Peppercorns 🌶️ | 1 tbsp | Freshly cracked for depth |
| Smoked Paprika 🌶️ | 2 tbsp | For that restaurant crust |
| Garlic Cloves 🧄 | 8 cloves | Peeled and smashed |
| Fresh Thyme Leaves 🌿 | ½ cup | Stems removed |
| Fresh Rosemary 🌿 | ¼ cup | Chopped, for garnish |
| Olive Oil 🫒 | ½ cup | For scoring and searing |
| Apple Cider Vinegar 🍎 | 2 tbsp | For brining liquid |
| Brown Sugar 🍚 | 1 tbsp | Enhances caramelization |
| Onion Powder 🧅 | 1 tsp | For depth of flavor |
| Mustard Seeds 🌾 | ½ tsp | Toasted for nutty kick |
| Water 💧 | 1 cup | For brining solution |
The pork shoulder is non-negotiable here—look for a cut with good marbling, meaning visible white fat threads throughout the meat. Butcher shops often have the best cuts, but Costco or Whole Foods usually carry well-marbled options too. Bone-in is ideal for flavor, but boneless works if you’re in a pinch. The size matters: a 5-pound roast serves 6 generously, perfect for a family dinner or small crowd. If you’re cooking for more, scale up—this recipe scales beautifully. Pro tip: pat the meat dry before brining for better seasoning adhesion.
No smoked paprika? Regular paprika plus a pinch of liquid smoke works in a bind, though it won’t be identical. Fresh thyme is ideal, but dried thyme at one-third the amount gets you close. For the brining liquid, apple cider vinegar adds tang—substitute with white vinegar or lemon juice if needed. The brown sugar enhances caramelization, but maple syrup works too. Mustard seeds are optional but add a lovely depth; skip them if you’re in a hurry. And if you’re scoring the fat cap (highly recommended), use a sharp knife to cut shallow lines—don’t go too deep or you’ll lose precious fat.
This roast tastes even better the next day, so plan ahead. Store leftovers in an airtight container with a drizzle of pan juices for 4-5 days in the fridge, or freeze for up to 3 months. The juices are liquid gold—save them to drizzle over slices or use in gravy. For meal prep, slice the roast and portion into containers. The meat keeps well, but reheat gently to avoid drying it out. This recipe is your secret weapon for holiday feasts, Sunday suppers, or any occasion where you want to impress without slaving away in the kitchen.
Why You’ll Love This Recipe
- Foolproof Prep: I swear by this—just rub the pork shoulder with kosher salt, cracked peppercorns, and smoked paprika, then stuff whole garlic cloves under the skin. No fancy techniques, no stress. Honestly, the hardest part is waiting for it to cook.
- Smoky-Garlic Magic: That bone-in pork shoulder? It melts in your mouth while the skin stays crispy, and the garlic-infused fat? Chef’s kiss. The smoked paprika gives it this deep, earthy warmth that makes it taste like it’s been slow-cooking all day—even if you’re in a hurry.
- Budget That Feeds: A pork shoulder costs next to nothing, but it delivers like a $20 cut. Between us, this is my go-to for game days, potlucks, or when I just don’t want to order takeout. Plus, the bones? Broth gold. Zero waste, all flavor.
Step-by-step instructions for slow-braised pork roast
Here’s how to transform a simple pork shoulder into melt-in-your-mouth perfection.
Dry-Brine the Pork Overnight
Place the 5 lb pork shoulder on a plate and rub it generously with the 2 tbsp kosher salt all over, including inside the cavity. This isn’t just seasoning—it’s a flavor infusion that works its magic overnight. Let it sit uncovered in the refrigerator for at least 12 hours, ideally 24. The salt will penetrate deeply, creating that perfect balance between flavor and moisture retention.
Here’s the thing—I know it seems like a lot of waiting, but trust me on this. The dry-brining process is what gives this roast its restaurant-quality texture. After 12 hours, the pork will look slightly dehydrated on the surface, and that’s exactly what we want. This step prevents the meat from drying out during the long cook while building that incredible crust.
Score and Sear the Pork
Remove the pork from the fridge and let it sit at room temperature for 1 hour before cooking. Preheat your oven to 300°F. Using a sharp boning knife, score the fat cap in a diamond pattern, being careful not to cut into the meat. This creates pockets for the rendered fat to collect, which will baste the meat as it cooks.
Heat a Dutch oven over medium-high heat and add the 0.5 cup olive oil. Once shimmering, place the pork fat-side down and sear for 8-10 minutes until deeply golden brown. Flip and sear the other side for another 5 minutes. This initial searing locks in juices and builds that beautiful crust we’re after. Don’t rush this step—you’ll know it’s ready when the fat releases easily from the pan.
Build the Braising Liquid
Remove the pork from the Dutch oven and set it aside. In the same pot, add the 8 smashed garlic cloves, 0.5 cup fresh thyme leaves, 0.25 cup chopped fresh rosemary, 2 tbsp apple cider vinegar, 1 tbsp brown sugar, 1 tsp onion powder, and 0.5 tsp mustard seeds. Toast these aromatics for 1 minute until fragrant—this deepens their flavors.
Deglaze the pot with the 1 cup water, scraping up all those delicious browned bits from the bottom. These bits are pure flavor, and we’re capturing every last drop. Bring the liquid to a simmer, then return the pork to the pot, fat-side up. The liquid should come about halfway up the sides of the pork shoulder.
Slow-Braise to Perfection
Cover the Dutch oven tightly and transfer it to the preheated 300°F oven. Braise for 4 hours, then check the internal temperature. You’re aiming for 195-203°F in the thickest part of the meat. This low-and-slow cooking breaks down the connective tissue, transforming tough pork into tender, pull-apart goodness.
Here’s where patience pays off: if the liquid reduces too much, add a splash of water or broth to keep the pork moist. The pork is done when it’s fork-tender and the juices run clear. The skin should be crackling and crisp, and the meat should pull apart easily with two forks. If it’s not quite there yet, add another 30 minutes to an hour.
Rest and Serve
Once the pork reaches the perfect temperature, remove it from the oven and let it rest for 30 minutes. This resting period is crucial—it allows the juices to redistribute throughout the meat, ensuring every bite is moist and flavorful. During this time, skim any excess fat from the braising liquid and reduce it slightly for a delicious pan sauce.
To serve, slice the pork against the grain into ½-inch thick slices. The meat should be so tender it practically falls apart with a gentle pull. Spoon the reduced braising liquid over the top and garnish with fresh rosemary. Serve with crusty bread to soak up every last drop of that incredible sauce—you’ll want to lick the plate clean.
Pro Tips For Making 5 Star Pork Roast
- CRANK THE HEAT FIRST: I learned this the hard way—starting at 425°F (220°C) for the first 20 minutes sears the fat into crispy pockets before dropping to 275°F (135°C). That’s when the pork shoulder actually starts rendering fat like it’s supposed to, not just steaming.
- DRY THE MEAT WELL: Pat that pork shoulder thoroughly with paper towels before seasoning—no shortcuts. Wet skin means steam instead of crust, and you’ll end up with sad, bland bark. (Yes, even if you’re impatient like me.)
- SALT THE GARLIC: Crush those garlic cloves lightly with the flat of your knife, then sprinkle them with a pinch of kosher salt before pressing them into the pork. The salt draws out moisture, making the garlic caramelize into flavor bombs instead of just sitting there like a sad garnish.
- REST IT LIKE YOUR LIFE DEPENDS ON IT: Skip the urge to slice into that pork as soon as it hits 203°F (95°C). Tent it with foil and let it sit for 15 minutes—this lets the juices redistribute so your first cut isn’t a greasy mess. (Your future self will thank you.)
Troubleshooting this recipe
Pork Too Dry?
If your pork roast emerges dry instead of juicy, the issue likely stems from cooking too fast or not enough time at low temperatures. I’ve seen this happen when home cooks rush the process by increasing oven temps—don’t go above 300°F for this cut.
The collagen needs 4+ hours to break down properly. For extra insurance, add ½ cup water or broth to the braising liquid if it reduces too much during cooking. 💧
Uneven Cooking?
Uneven doneness often means the roast wasn’t scored properly or the oven temperature fluctuated. Score the fat cap in a diamond pattern (not too deep!) to create pockets for rendered fat. Use an oven thermometer to confirm your oven stays at 300°F—many home ovens run hot or cold.
If you notice one side cooking faster, rotate the Dutch oven halfway through. A meat thermometer is non-negotiable here—guessing leads to disappointment.
Bland Flavor?
Bland pork usually means insufficient seasoning or insufficient time for flavors to meld. Make sure you’re using kosher salt (it dissolves better than table salt) and smoked paprika for depth. The overnight dry-brine is critical—skip it, and you’ll miss out on that restaurant-quality flavor infusion.
For extra punch, add a 1-inch strip of orange peel to the braising liquid for 30 minutes before serving. 🍊
Fat Not Rendering?
If the fat cap isn’t crisping or rendering properly, your oven temperature might be too low, or you’re not searing long enough. After the initial 8-10 minute sear, flip the roast and let it crisp another 5 minutes—this builds the crust we want.
If your oven struggles with high heat, finish the roast under the broiler for the last 5 minutes to get that golden, crackling skin. A cast iron Dutch oven (like Lodge) is ideal for this—it retains heat better than stainless steel.
Sauce Too Thin?
A watery sauce happens when the braising liquid doesn’t reduce enough. After removing the pork, simmer the sauce uncovered on the stovetop for 10-15 minutes to thicken it naturally. For extra body, whisk in 1 tbsp cornstarch mixed with 2 tbsp cold water.
If you’re short on time, reduce the initial liquid to ¾ cup instead of 1 cup—this gives you more control over the final consistency.
Pork Overcooked?
Overcooked pork is usually the result of checking the temperature too late or cooking past 203°F. Use a meat thermometer to monitor progress—pork shoulder is safe at 145°F, but it’s best pulled at 195-203°F for maximum tenderness.
If you accidentally overcook, don’t panic—just rest it longer (up to 1 hour) and slice against the grain. The meat will still be flavorful, just slightly firmer. For next time, set a timer to check the temp every 30 minutes after 3 hours of cooking.
Nutrition facts
Frequently asked questions
Can I use pork tenderloin instead of pork shoulder?
Pork tenderloin is leaner and cooks much faster than pork shoulder, so it won’t give you the same tender, pull-apart results. For this recipe, stick with pork shoulder (or pork butt) for the best texture. If you’re set on tenderloin, try a quick sear with a marinade instead—it’s perfect for 20-minute meals rather than slow roasting.
How do I know when the pork is fully cooked?
Use a meat thermometer to check the internal temperature in the thickest part of the roast. For pork shoulder, aim for 195-203°F—this ensures the collagen breaks down completely for that melt-in-your-mouth texture. The juices should run clear when pierced, and the meat should pull apart easily with two forks. Never rely on color alone!
Can I make this ahead of time?
This roast tastes even better the next day. Cook it fully, then refrigerate for up to 4 days or freeze for 3 months. Reheat gently in the oven at 300°F until warmed through, or reheat slices in a skillet with a splash of pan juices. The flavors deepen overnight, making it perfect for meal prep.
What’s the best way to serve this pork roast?
Slice against the grain into ½-inch thick pieces and serve with the reduced braising sauce spooned over the top. Pair it with roasted root vegetables, crusty bread, or a simple green salad. For extra flair, garnish with fresh rosemary and a drizzle of honey. This is a showstopper that deserves center stage at any dinner table!
Why do you recommend dry-brining overnight?
The overnight dry-brine is what elevates this from good to restaurant-quality. The salt penetrates deeply, enhancing both flavor and moisture retention. It also creates that perfect crust while preventing the meat from drying out during the long cook. Skipping this step risks bland, dry pork—trust the process!

- 3lb Prime Rib Roast Recipe: Juicy Pink Center Guaranteed in 3 Hours - October 31, 2026
- 5 Spice Cake Recipe: Warmly Spiced Layers With Crunchy Top - October 31, 2026
- 1950’s Macaroni and Cheese Recipe: Nostalgic Creamy Cheese Sauce with Buttery Noodles - October 31, 2026