
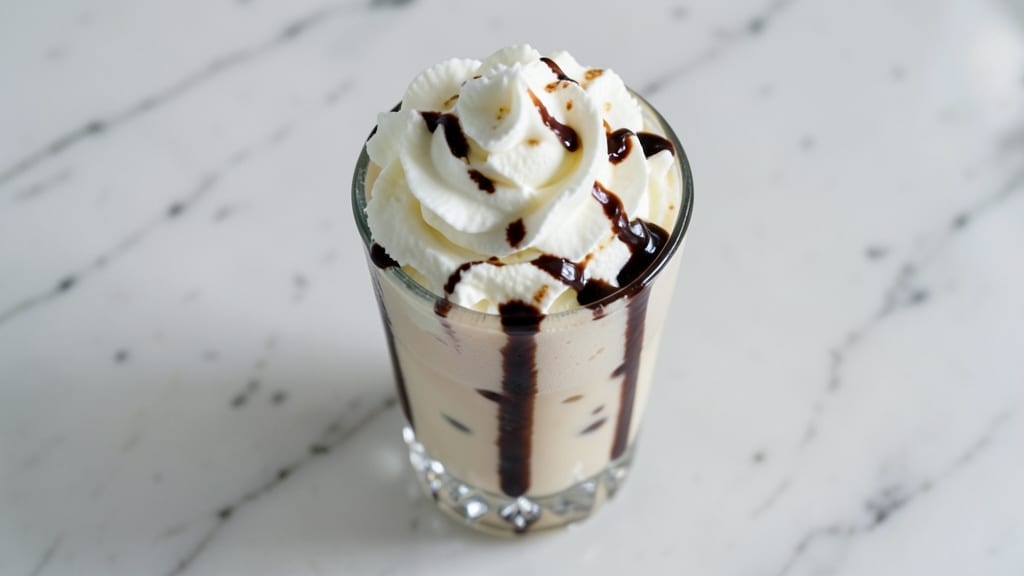
Creating 10 easy milkshake recipes that deliver restaurant-quality texture and flavor in minutes is all about blending the right ingredients with precision. This collection transforms simple ingredients into velvety, customizable shakes—whether you crave classic vanilla, tropical mango, or decadent chocolate.
The secret lies in using cold ingredients and blending techniques that eliminate lumps while maximizing creaminess, ensuring every sip is smooth and satisfying.
What makes these milkshakes truly easy is their adaptability—swap dairy for almond milk, coconut cream, or oat milk without sacrificing texture, and customize toppings to fit dietary preferences or seasonal cravings.
Each recipe takes under 5 minutes to prepare, making them perfect for quick desserts, post-dinner treats, or even meal replacements. The key is balancing liquid and ice ratios to avoid thin, watery shakes or thick, frozen slushies.
You’ll end up with rich, layered shakes that look as good as they taste, thanks to techniques like freezing fruit purees for texture or adding whipped cream for an extra-luxurious finish. Whether you’re blending a single serving or prepping for a crowd, these recipes deliver foolproof results every time.
Let’s dive into the details—starting with the foundational techniques that make all the difference.
From smooth vanilla bean to creamy peanut butter, each milkshake in this collection builds on the same principles: cold ingredients, proper blending, and a touch of creativity to elevate everyday flavors. The variations are endless, but the foundation remains simple—because the best milkshakes should feel effortless yet unforgettable.
Ingredients for 10 easy milkshake
Precision-blended ingredients for velvety, customizable milkshakes—creamy, rich, and effortlessly restaurant-quality.
| Ingredient | Amount | Notes |
|---|---|---|
| Vanilla Ice Cream 🍦 | 2 cups | High-fat percentage for creaminess |
| Milk 🥛 | 1 ½ cups | Whole milk preferred for richness |
| Vanilla Extract 🌿 | 1 tbsp | Pure, high-quality vanilla |
| Ice Cubes ❄️ | 1 ½ cups | Freshly frozen for texture |
| Whipped Cream 🍶 | ½ cup | Homemade or high-quality store-bought |
| Chocolate Syrup 🍫 | 2 tbsp | For chocolate variations |
| Strawberry Puree 🍓 | ½ cup | Frozen for thickness |
| Peanut Butter 🥜 | 2 tbsp | Creamy for smooth blending |
| Mango Chunks 🥭 | ½ cup | Frozen for tropical texture |
| Almond Milk 🌰 | 1 cup | Unsweetened for dairy-free option |
| Simple Syrup 🍯 | 2 tbsp | For sweetening adjustments |
| Cocoa Powder 🍫 | 1 tbsp | Unsweetened for chocolate flavor |
| Coconut Cream 🥥 | ½ cup | Chilled for dairy-free richness |
| Salt 🧂 | ¼ tsp | Kosher or sea salt |
| Cinnamon 🌿 | ¼ tsp | Ground for warmth |
The ice cream and milk form the base, so high-fat dairy is non-negotiable for that signature creaminess. Häagen-Dazs or Breyers are reliable choices, but homemade is even better. For the milk, whole milk works best—skim or almond milk can make the texture too thin. The vanilla extract should be pure Madagascar bourbon if you’re splurging, but any quality brand works. Pre-freeze your fruit purees and toppings to save time—Trader Joe’s sells pre-portioned frozen fruit packs that are perfect for this. Balance is key: too much ice makes it slushy, too little makes it watery.
Need dairy-free? Coconut cream or almond milk work beautifully, but you may need to add an extra splash of liquid to compensate for lower fat content. Swap chocolate syrup for caramel or raspberry syrup depending on your flavor profile. The whipped cream is optional but adds that restaurant-quality finish—Reddi-wip is fine, but homemade is lighter and sweeter. For extra richness, add a tablespoon of heavy cream to the blend. The cinnamon and salt are subtle but essential—they round out the flavors and prevent over-sweetness. Store-bought syrups can be hit-or-miss; Ghirardelli or Torani are consistent choices.
Prep ahead by freezing your fruit purees and ice cubes in advance—they’ll blend more smoothly. Store leftover milkshake mix in an airtight container for up to 3 days in the fridge, though texture may change slightly. For freezing, portion into ice cube trays and transfer to a bag—thaw overnight in the fridge before blending. The whipped cream should be added last to maintain its fluffiness. If making multiple shakes, keep the ice cream and milk at room temperature for 5 minutes before blending to ensure a smoother texture.
Why You’ll Love This Recipe
- Five-Ingredient Magic: I swear by this recipe—just vanilla ice cream, milk, a dash of extract, ice cubes, and whipped cream. That’s it. No measuring cups, no fancy gadgets, just blending until it’s silky smooth. Honestly, I’ve made it while talking on the phone, and it still turns out perfect.
- Creamy Vanilla Bliss: The vanilla extract isn’t just an afterthought—it’s the secret. One teaspoon deepens the flavor without overpowering, and the whipped cream on top adds that airy, dessert-like finish. Between us, it’s the kind of milkshake that makes you slow down and savor every sip.
- Weeknight or Celebration: This recipe works for lazy Tuesday nights and Sunday brunch with friends. Add chocolate syrup for a quick treat, or skip it for a lighter, refreshing drink. My kids ask for it after school, but it’s also the first thing I reach for when company’s over—no stress, just joy.
- No Waste, All Win: Use up leftover ice cream instead of tossing it. The milk and ice cubes stretch it further, so you’re not scrambling for ingredients. Plus, the whipped cream topping makes it feel special without costing extra. Budget-friendly? Absolutely. Smart? Even better.
Step-by-step instructions for creamy customizable milkshakes
Transform simple ingredients into velvety milkshakes with professional texture every time.
Prepare Your Base Ingredients
Start by measuring out the 2 cups of vanilla ice cream and setting it aside in the freezer until ready to use. In a small bowl, whisk together the 1.5 cups of milk (or 1 cup almond milk for a dairy-free option) with the 1 tbsp vanilla extract, 2 tbsp simple syrup, 0.25 tsp salt, and 0.25 tsp cinnamon. This mixture creates a flavorful liquid base that blends seamlessly with the ice cream.
For extra richness, blend the 0.5 cup coconut cream separately until smooth—this adds a luxurious texture without overpowering the flavor. The key here is balance: the milk base should be sweet enough to complement the ice cream but not so sweet that it becomes cloying.
Customize Your Flavor Profile
Choose your flavor combination by selecting one or two of the following add-ins: 2 tbsp chocolate syrup, 0.5 cup strawberry puree, 2 tbsp peanut butter, or 0.5 cup mango chunks. For a chocolate peanut butter shake, blend the chocolate syrup and peanut butter together until fully combined—the peanut butter should melt into a smooth paste. For fruit-based shakes, simply stir the puree or chunks into the milk base.
If using frozen fruit like mango chunks, make sure they’re completely frozen before blending to prevent a watery texture. The frozen state helps create a thicker, more satisfying shake. Remember, the ice cream will soften slightly during blending, so adding frozen fruit or chunks ensures proper texture.
Blend to Perfect Creaminess
Add the prepared milk base, any flavor add-ins, and 1.5 cups ice cubes to your blender. Start blending on low speed to break up the ice cubes, then gradually increase to high for 30-45 seconds until smooth. The ice cubes create a frothy texture that makes the shake extra creamy.
With the blender running, slowly pour in the 2 cups of vanilla ice cream through the feed tube. This technique prevents the ice cream from clumping and ensures a perfectly smooth consistency. You’ll know it’s ready when the mixture is thick but pourable, with no visible ice crystals or chunks.
Finish and Serve Immediately
Transfer the blended milkshake to a chilled glass. Using a spatula, gently fold in the 0.5 cup whipped cream to create a marbled effect. For chocolate variations, sprinkle 1 tbsp cocoa powder on top and gently swirl it in with a skewer. Serve immediately while the whipped cream maintains its fluffy texture and the shake is at its optimal temperature.
This is where presentation matters—top with a dusting of cocoa powder, a drizzle of chocolate syrup, or a few fresh mango chunks depending on your flavor choice. The contrast between the creamy shake and the textured toppings makes each sip more enjoyable. Remember, milkshakes are best consumed fresh when all the ingredients are at their peak texture and temperature.
Pro Tips For Making 10 Easy Milkshake
- Freeze Ice Cream First: DESCRIPTION: If your vanilla ice cream is soft or melty, pop it in the freezer for 10-15 minutes before blending—this keeps your shake thick and creamy, not watery. I learned this the hard way when my first batch turned into a sad, icy slush.
- Use Cold Milk: DESCRIPTION: Straight from the fridge, cold milk blends smoother and prevents the ice cream from melting too fast. I was skeptical until I tried it—now I never use room-temperature milk, especially in summer.
- Skip the Ice Cubes: DESCRIPTION: Unless you’re making a super thick shake, ice cubes just dilute the flavor. Stick to 1-2 scoops of ice cream + milk—it’s faster and tastes richer. (Yes, even if you’re impatient like me.)
- Whip Cream Last: DESCRIPTION: Fold whipped cream in after blending to keep it light and fluffy. Dumping it in early makes it sink or turn grainy—your future self will thank you for waiting.
Make-ahead tips for this dish
Freeze Ahead
Prep your milkshake components in advance by freezing fruit purees and ice cubes in ice cube trays—this ensures they blend smoothly without adding wateriness. I like using Trader Joe’s frozen fruit packs for convenience, but homemade purees work too.
Store pre-portioned mixes in airtight containers for up to 3 days in the fridge, or freeze in ziplock bags for 1 month. Thaw overnight in the fridge before blending for best results. 🥶
Batch Prep
Double the recipe and store the blended mix in glass jars with tight lids. Keep them refrigerated for 24 hours—the flavors meld beautifully, and the texture stays creamy when reheated briefly.
For parties, portion mixes into small jars (like mason jars) and let guests customize toppings at the table. Label each with flavors like “Peanut Butter” or “Strawberry” to avoid confusion. 🍓
Dairy-Free Prep
Swap dairy for coconut cream or almond milk—just add 1 extra tablespoon of liquid to compensate for lower fat content. Pre-chill all dairy-free ingredients in the freezer for 10 minutes before blending to mimic the creaminess of traditional milkshakes.
Store these versions in freezer-safe containers for up to 2 weeks, but thaw in the fridge overnight for smoother results. 🥥
Topping Shortcuts
Prep toppings ahead by portioning whipped cream, chocolate syrup, and crushed nuts into small bowls. Keep them refrigerated in airtight containers for up to 5 days. For extra flair, freeze chocolate sauce in piping bags—just thaw for 10 minutes before drizzling.
Store fresh fruit garnishes (like banana slices) separately and add them last to maintain freshness. ✨
Blender Prep
Clean your blender immediately after use to prevent residue buildup—hot soapy water works best. Store the blender pitcher in the fridge overnight to keep it cold for the next use, which helps maintain a smoother texture.
If blending multiple shakes, keep the ice cream and milk at room temperature for 5 minutes before adding to the blender for easier mixing. 🔄
Serving Hacks
Chill your serving glasses in the freezer for 10 minutes before pouring to keep milkshakes colder longer. Use skewers or spoons to layer toppings for a restaurant-style presentation. For a fun twist, serve in clear cups with colorful straws to highlight the vibrant layers.
Pre-set toppings in small bowls at the table for a DIY milkshake bar experience. 🥤
Nutrition facts
Frequently asked questions
Can I make these milkshakes without a blender?
You can create a simpler version using a food processor or even a mason jar with a tight lid—shake vigorously for 1-2 minutes until smooth. For the best texture, though, a high-speed blender is ideal. If you don’t have one, try a hand mixer with ice cubes and ice cream, but expect slightly more lumps. The key is patience—pulse in short bursts to avoid overheating the motor.
How do I fix a milkshake that’s too thick or too thin?
For a thick shake, add 1-2 tablespoons of milk or almond milk and blend again. If it’s too thin, blend in 1-2 ice cubes at a time until it reaches your desired consistency. The secret is balancing the ice cream-to-liquid ratio—start with 1 cup ice cream to 1 cup liquid as your baseline. Too much ice makes it slushy, too little makes it watery.
What’s the best way to store leftover milkshake mix?
Store pre-blended milkshake mix in an airtight container for up to 3 days in the fridge or 1 month in the freezer. For best texture, thaw overnight in the fridge before blending. If freezing, use ziplock bags and press out excess air. Avoid refreezing—once thawed, consume within 24 hours. For individual servings, freeze in ice cube trays and transfer to a bag for easy portioning later.
Can I use frozen fruit instead of fresh?
Frozen fruit works perfectly—it actually helps create a thicker, creamier texture. For best results, use unsweetened frozen fruit (like mango or strawberries) and blend it directly with the ice cream. If using pre-packaged frozen fruit, drain excess liquid before adding to avoid a watery shake. For extra richness, toss frozen fruit in 1 teaspoon of sugar before blending.
What’s the secret to a smoother milkshake?
Cold ingredients are key—use frozen ice cream and chilled milk (or dairy-free alternatives). Blend in stages: start with liquids and ice, then add ice cream through the feed tube while blending on high. Avoid overfilling the blender—leave 1 inch of space at the top to prevent spills. For ultra-smooth results, pulse 2-3 times before blending continuously for 30 seconds. Pre-freezing fruit purees also eliminates lumps.

- 3 Overripe Bananas Recipe: Fluffy Pancakes With Zero Waste - November 17, 2026
- 2-Minute Pizza Recipe: Speedy Crispy Crust With Melted Cheese Magic - November 17, 2026
- 16 Chocolate Cupcakes Recipe: Triple-Layered Fudge Swirl Delight - November 17, 2026