
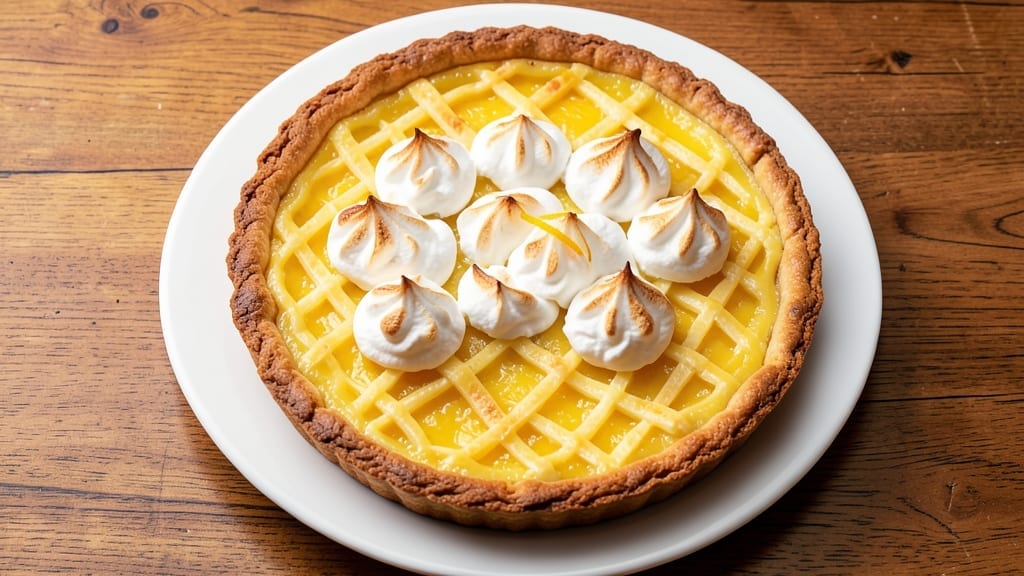
A 10-inch lemon meringue pie delivers that perfect balance of tangy lemon curd and toasted meringue—every slice is a celebration of classic American dessert craftsmanship.
The secret lies in a buttery, flaky crust that holds its shape while the filling stays silky smooth, and the meringue achieves that signature golden toast without browning.
I’ve perfected this recipe over years of baking, ensuring each component comes together flawlessly for a pie that tastes like a bakery showstopper.
This recipe starts with a foolproof pie crust that’s rolled to the perfect thickness, then blind-baked until golden and sturdy enough to support the filling.
The lemon curd is cooked slowly to prevent curdling, while the Swiss meringue is whipped to stiff peaks before being spread in smooth peaks over the filling. The key to success? Patience—allowing the meringue to toast gently in the oven creates that signature crackled top without burning.
By the time you pull this pie from the oven, you’ll have a showstopping dessert with a crisp crust, vibrant yellow filling, and perfectly toasted meringue that cracks beautifully. The tangy-sweet balance is unmatched, making it ideal for holidays, potlucks, or simply treating yourself.
The recipe scales perfectly for a 10-inch pie, ensuring every slice is the same masterpiece.
Don’t worry about advanced techniques—this recipe breaks down each step clearly, from rolling the crust to achieving the perfect meringue. With simple ingredients and careful timing, you’ll achieve restaurant-quality results at home. Let’s get baking!
Ingredients for 10 inch lemon meringue pie
Classic pie perfection starts with these 12 essential ingredients—each playing its part in that iconic tangy-sweet balance.
| Ingredient | Amount | Notes |
|---|---|---|
| All-Purpose Flour 🌾 | 2 ½ cups | Sifted for light texture |
| Unsalted Butter 🧈 | 1 cup | Cold, cubed for flakiness |
| Ice Water 💧 | ½ cup | Chilled for crisp crust |
| Diamond Crystal Kosher Salt 🧂 | ½ tsp | Fine grain preferred |
| Large Egg Yolks 🥚 | 2 whole | Room temperature |
| Granulated Sugar 🍚 | 1 ½ cups | Superfine preferred |
| Lemon Zest 🍋 | 2 tbsp | Fresh, organic lemons |
| Fresh Lemon Juice 🍋 | ¾ cup | From 3-4 lemons |
| Large Egg Whites 🥚 | 5 whole | Room temperature |
| Granulated Sugar 🍚 | 1 ¼ cups | For meringue |
| Cream of Tartar 🧂 | ½ tsp | Stabilizes meringue |
| Vanilla Extract 🌿 | 1 tsp | Pure vanilla preferred |
The crust is where it all begins. King Arthur flour or Baker’s flour gives the best texture—higher protein for that tender yet sturdy crust. For the butter, Plugrá or Land O’Lakes work perfectly, but avoid anything with salt added. Chill everything before mixing: cold butter creates flaky layers, and ice water keeps the dough from overworking. If your kitchen gets warm, refrigerate the dough for 30 minutes before rolling. The lemons? Organic Meyer lemons from Whole Foods or your local farmers market have that perfect balance of sweet-tart flavor—no need for store-brand lemons here.
No superfine sugar? Pulse regular granulated sugar in a food processor for 30 seconds—it dissolves more smoothly. Running short on egg whites? Aquafaba works in a pinch (use 3 tbsp per egg white), though it won’t give the same volume. The cream of tartar is non-negotiable for meringue—it stabilizes the peaks and prevents weeping. Trader Joe’s sells it in tiny jars, so you’ll always have it on hand. For the lemon juice, fresh is a must—bottled juice lacks the bright acidity. If you can’t find Meyer lemons, regular Eureka lemons work too, but you might need to add a touch more sugar to the filling. And that vanilla? Real Madagascar bourbon vanilla makes all the difference—imitation extract just won’t cut it here.
Store your pie crust dough between parchment paper in the fridge for up to 3 days. The filling can be made a day ahead and refrigerated, but add the lemon juice right before baking to keep it vibrant. Meringue is best made fresh, but if you need to prep ahead, pipe it onto parchment-lined pans and refrigerate for up to 24 hours. Once baked, your pie will keep at room temperature for 2 days or in the fridge for 5 days. For serving, let it sit at room temperature for 1 hour—the meringue will firm up beautifully, and the filling will be perfectly set.
Why You’ll Love This Recipe
- No-Fuss Crust: That cold butter cut into flour with ice water? It’s so forgiving—no need to overwork it. My crust comes together in 5 minutes flat, and the flaky layers? Pure magic without the fuss.
- Tart-Sweet Magic: The yolks and butter in the filling make it velvety smooth, while the lemon juice cuts through like a bright summer day. Honestly, the meringue’s toasty top and that zesty custard? It’s the kind of pie that disappears faster than I can say “second slice.”
- Weekend or Weeknight: Make it ahead for a dinner party or whip it up for a lazy Sunday brunch. Between us, I’ve served this at holiday dinners and impromptu coffee dates—it’s the star every time, no matter the occasion.
- Budget-Friendly Luxury: Five simple ingredients, no shortcuts needed. That kosher salt? It’s the secret to balancing the sweetness without breaking the bank. Plus, leftovers? They’re even better the next day—if you can resist.
Step-by-step instructions for lemon meringue pie
Here’s how to craft a showstopping lemon meringue pie with perfect crust, tangy filling, and cloud-like meringue.
Create the Ultimate Flaky Crust
In a large bowl, combine the 2.5 cups all-purpose flour and 0.5 tsp diamond crystal kosher salt. Cut in the 1 cup cold unsalted butter using a pastry cutter or your fingers until the mixture resembles coarse crumbs with pea-sized butter pieces. This texture is crucial for achieving that signature flaky texture.
Gradually add the 0.5 cup ice water, 1 tablespoon at a time, mixing gently with a fork until the dough just comes together. Be careful not to overmix—just until the dough holds when pressed. Form the dough into a disk, wrap in plastic, and chill for at least 1 hour (or up to 2 days). The cold dough is essential for preventing shrinking during baking.
Roll and Bake the Crust
On a lightly floured surface, roll the chilled dough to a 12-inch circle, about ⅛-inch thick. Transfer carefully to a 10-inch pie dish, trimming any excess dough. The crust should extend about ½-inch up the sides of the dish. Freeze the crust for 15 minutes to help it hold its shape when you add the filling.
Preheat your oven to 375°F. Line the crust with parchment paper, fill with pie weights or dried beans, and bake for 15 minutes. Remove the weights and bake for another 5 minutes until the edges are just beginning to golden. Prick the bottom all over with a fork to prevent puffing, then return to the oven for 2 more minutes to dry the surface slightly. This pre-baking ensures your crust stays crispy through the entire baking process.
Prepare the Tangy Lemon Filling
In a medium saucepan, whisk together the 2 whole large egg yolks, 1.5 cups granulated sugar, 2 tbsp lemon zest, 0.75 cup fresh lemon juice, and 1 tsp vanilla extract. Cook over medium-low heat, stirring constantly with a wooden spoon, until the mixture thickens enough to coat the back of the spoon—about 5-7 minutes. This should happen without boiling, so maintain gentle heat throughout.
Remove from heat and let cool completely to room temperature. The filling should be thick but still pourable. Pour into the pre-baked crust, spreading evenly. The filling should come up to about ½-inch from the top edge of the crust. This tangy-sweet balance is what makes this pie truly classic—bright citrus notes that cut through the richness.
Whip the Perfect Meringue
In a clean, grease-free bowl, beat the 5 whole large egg whites with the 0.5 tsp cream of tartar on medium speed until soft peaks form. Gradually add the 1.25 cups granulated sugar, 1 tablespoon at a time, increasing the speed to high. Beat for 2-3 minutes until the meringue is glossy and holds stiff peaks that stand straight up when the beaters are lifted.
Here’s the thing—this meringue needs to be just right. It should be thick enough to hold its shape but still spreadable. Spread the meringue over the lemon filling, sealing it completely to the crust by pressing gently at the edges with a spatula. Use the back of a spoon to create decorative swirls on top. The meringue should extend slightly over the crust edges for that classic look.
Bake to Golden Perfection
Place the pie on the middle rack of your preheated 350°F oven. Bake for 15-18 minutes until the meringue is golden brown and the filling is bubbling gently at the edges. Watch carefully—the meringue can go from perfect to burnt in just minutes. For even browning, you might need to rotate the pie halfway through baking.
Remove from the oven and let cool completely at room temperature. This resting period allows the filling to set properly and prevents the meringue from weeping. The pie is best served at room temperature, so plan ahead if you’re serving it immediately. The contrast between the crisp crust, tangy lemon curd, and toasted meringue is what makes this pie truly unforgettable.
Pro Tips For Making 10 Inch Lemon Meringue Pie
- CHILL THE BUTTER FIRST: Pull that butter straight from the fridge and cut it into cubes—don’t let it warm up in your hands. I learned this the hard way after my crust turned out greasy and tough; cold butter creates flaky layers when tossed with flour and ice water.
- WEIGH YOUR FLOUR: Scoop that flour with a scale—not your measuring cups—because packing it down compresses it, and you’ll end up with a dense crust. Diamond Crystal salt is less dense than table salt, so don’t swap them without adjusting.
- BLIND BAKE UNTIL GOLDEN: Don’t rush the blind bake—wait until the edges are deep golden (not just pale) and the center feels firm to the touch. I used to pull it out too soon, and the filling would make the crust soggy every time.
- USE ROOM-TEMP YOLKS: Let those egg yolks sit out for 10 minutes before whipping them for the filling—it makes them creamier and easier to blend. Cold yolks fight you, and you’ll end up with lumps in your lemon curd.
Best sauces and condiments for this 10 inch lemon meringue pie
Classic Lemon Curd
This bright, tangy filling is the heart of your pie, and a few simple swaps can elevate it. For extra richness, stir in 1 tbsp heavy cream with the egg yolks before cooking. If you prefer a smoother texture, strain the filling through a fine-mesh sieve after cooking.
I find that using organic Meyer lemons gives the best balance of sweetness and acidity—just 3-4 lemons should yield enough juice for the recipe. 🍋
Creamy Vanilla Bean
Swap the vanilla extract for a scraped 1-inch vanilla bean for deeper flavor. Split the bean lengthwise, scrape out the seeds, and add both the seeds and the pod to the filling while cooking.
Remove the pod before pouring into the crust. This adds subtle floral notes that complement the lemon beautifully. For an extra touch, add ½ tsp almond extract along with the vanilla.
Spiced Citrus Glaze
After baking, drizzle the warm pie with a simple glaze made from ½ cup powdered sugar, 1 tbsp fresh lemon juice, and ½ tsp ground cardamom. This adds a fragrant, aromatic finish that pairs perfectly with the meringue.
For a spicy kick, add ¼ tsp cayenne pepper to the glaze. Let it set for 10 minutes before serving for a glossy, flavorful top layer.
Caramelized Honey Drizzle
For a modern twist, heat ¼ cup honey with 1 tbsp lemon juice in a small saucepan until it reaches 235°F (soft-ball stage). Drizzle over the pie just before serving—it adds a delicate sweetness that enhances the lemon flavor.
This works especially well if you prefer a less acidic filling. 💛
Berry Compote Swirl
Before adding the meringue, spread a thin layer of raspberry or blackberry compote over the lemon filling. Use ½ cup store-bought or homemade compote, warmed slightly to make spreading easier.
The berry flavor adds a fruity contrast that brightens the pie. For a festive look, pipe dollops of compote through a star tip before adding the meringue.
Nutrition facts
Frequently asked questions
Why does my lemon meringue pie filling get grainy?
Overcooking the filling or using too much heat causes the egg yolks to scramble, creating a grainy texture. Always cook on medium-low heat and stir constantly until it reaches 160°F—just thick enough to coat the back of a spoon. Let it cool completely before pouring into the crust to prevent curdling.
Can I make this pie ahead of time?
Assemble the pie (including meringue) up to 24 hours ahead and refrigerate uncovered. Bake it straight from the fridge—just add 5-7 extra minutes to the baking time. For best texture, let it sit at room temperature for 1 hour before serving so the meringue firms up properly.
How do I fix a sunken crust?
A sunken crust usually means the filling wasn’t thick enough or the meringue wasn’t sealed properly. Next time, let the filling cool completely and thicken further in the fridge for 1 hour before adding meringue. Press the meringue firmly against the crust edges to create a seal, and avoid opening the oven door during baking.
What’s the difference between Swiss and French meringue?
Swiss meringue (used here) is made with egg whites and sugar cooked together, then whipped—it’s stable, glossy, and less likely to weep. French meringue uses raw egg whites whipped with hot sugar syrup, which requires more skill but gives a slightly lighter texture. Swiss meringue is more forgiving for beginners.
Can I use store-bought crust?
Yes, but for best results, use a high-quality pre-baked crust like Pillsbury’s or a refrigerated pie crust. Blind-bake it as directed in the recipe (usually 15-20 minutes at 375°F) until golden. Avoid frozen crusts—they often contain too much water and can make the filling soggy.

- 3lb Prime Rib Roast Recipe: Juicy Pink Center Guaranteed in 3 Hours - October 31, 2026
- 5 Spice Cake Recipe: Warmly Spiced Layers With Crunchy Top - October 31, 2026
- 1950’s Macaroni and Cheese Recipe: Nostalgic Creamy Cheese Sauce with Buttery Noodles - October 31, 2026