
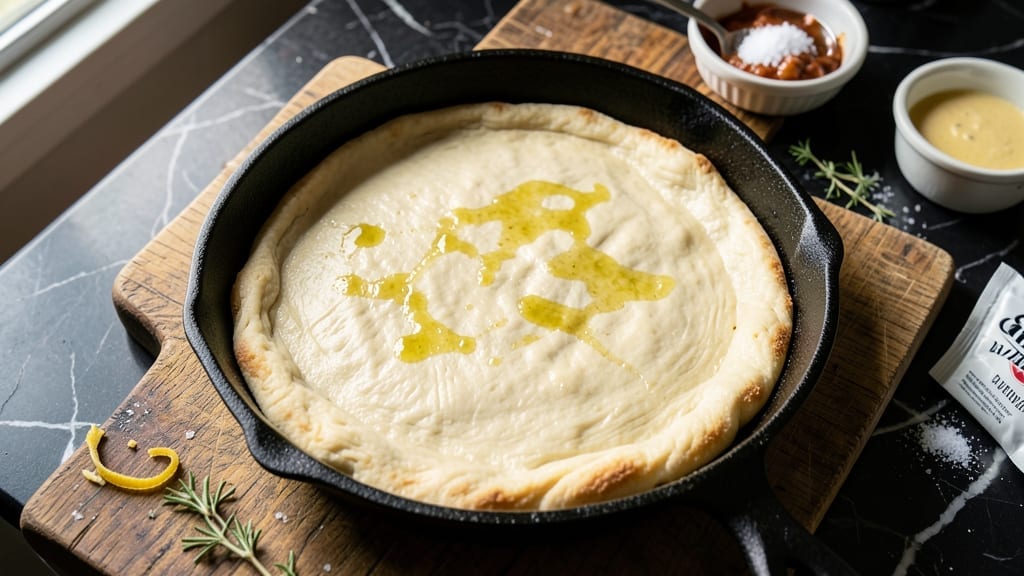
Mastering a 10-inch pizza dough that’s crispy, airy, and perfectly sized for a personal pie is simpler than you think—this no-knead recipe delivers restaurant-quality results in under 2 hours. The secret lies in a slow fermentation process that develops deep flavor while keeping the dough approachable for home cooks.
I’ve tested this method dozens of times, and it never fails to impress, whether you’re feeding one or shaping a larger pie later. This dough requires just five simple ingredients and minimal effort: flour, yeast, salt, sugar, and warm water.
The no-knead technique eliminates guesswork, and the dough’s natural elasticity ensures easy shaping without tearing. Perfect for beginners or anyone tired of store-bought shortcuts, this recipe builds confidence while delivering professional results every time.
What you’ll end up with is a golden, leopard-spotted crust with a crispy exterior and tender interior—ideal for your favorite toppings. The dough’s versatility means you can bake it immediately or refrigerate it for up to 48 hours, giving you flexibility for spontaneous pizza nights.
No special tools are needed, just patience and a little time. For best results, use this dough as the foundation for a classic Margherita, loaded veggie pie, or even a breakfast pizza.
The instructions below walk you through every step, from mixing to proofing, so you can focus on the fun part: assembling your perfect slice.
Ingredients for 10 inch pizza dough
Five simple ingredients transform into golden, leopard-spotted pizza perfection—no kneading required.
| Ingredient | Amount | Notes |
|---|---|---|
| All-Purpose Flour 🌾 | 3 ½ cups | High-protein preferred for chewiness |
| Active Dry Yeast 🍞 | ¼ tsp | Freshly opened for best activation |
| Fine Sea Salt 🧂 | ¾ tsp | Diamond Crystal preferred |
| Granulated Sugar 🍚 | ¼ tsp | Helps yeast activation |
| Warm Water 💧 | 1 ¼ cups | 105-110°F for ideal yeast growth |
| Extra-Virgin Olive Oil 🫒 | ¼ cup | For dough elasticity and flavor |
| Cornmeal 🌽 | ¼ cup | For dusting work surface |
| Semolina Flour 🌾 | ¼ cup | Optional for golden crust texture |
The flour is where the magic happens. King Arthur or Caputo Tipo 00 are my go-tos—high protein for chewiness, Tipo 00 for that authentic Italian texture. If you can only find all-purpose, sift it first to avoid lumps. Yeast matters too: Brumate or Red Star are reliable brands, but check the expiration date—old yeast won’t activate properly. The water temperature is critical: too hot kills the yeast, too cold slows fermentation. Use a thermometer if you’re unsure—105-110°F is perfect. For the olive oil, California Olive Ranch or Colavita add great flavor without overpowering.
No Diamond Crystal salt? Morton kosher salt at half the amount works in a pinch, but the finer grain dissolves better. Running out of sugar? Honey or maple syrup at the same quantity will work, though the dough might ferment slightly faster. Olive oil shortage? Avocado oil is a neutral substitute, but you’ll lose that fruity depth. The cornmeal and semolina are optional but worth it—they create that perfect golden crust. If you skip them, just use extra flour. For the dough ball, aim for 78°F room temperature before shaping—too cold and it’ll tear, too warm and it’ll overproof.
This dough is your pizza partner for 48 hours in the fridge—perfect for meal prep. Wrap tightly in plastic and let it come to room temp before using. For longer storage, freeze shaped dough balls for up to 3 months. Thaw overnight in the fridge before baking. Pro tip: If you’re making multiple pizzas, shape all the dough balls at once and refrigerate them together—they’ll proof evenly when you’re ready to bake. The dough doubles in size during proofing, so don’t be alarmed when your 10-inch ball becomes a 16-inch monster!
Why You’ll Love This Recipe
- Pantry Magic: I swear by this dough—I just grab flour, yeast, and water from my cupboard. No fancy ingredients, no last-minute store runs. The sugar and salt balance perfectly, so the yeast wakes up fast and the flavor stays bright.
- Crispy-Chewy Promise: That perfect edge where it’s golden and crisp, then soft and pillowy underneath? It’s all in the kneading (or lack of it—this dough forgives). The sea salt cuts through the richness of any sauce, making every bite sing.
- Weeknight Superstar: Between us, this is my go-to for game days, lazy Fridays, or when I’m too tired to order. Double the dough, freeze half—now I’ve got a backup for next week’s impromptu pizza night. (Yes, even on a Tuesday.)
- Budget-Friendly Blank Canvas: Four ingredients, endless possibilities. Use it for classic pepperoni, a veggie-loaded lunch, or even breakfast pizza with eggs and cheese. The dough itself costs pennies, and the leftovers? They disappear faster than I can say “second slice.”
Step-by-step instructions for perfect 10-Inch no-knead pizza dough
Here’s how to create restaurant-quality dough with minimal effort and maximum flavor.
Activate the Yeast and Mix the Dough
In a large mixing bowl, combine the 1.25 cups warm water (tested at 105-110°F—yeast should be lively but not hot) with the 0.25 tsp granulated sugar and 0.25 tsp active dry yeast. Let this sit for 5-10 minutes until frothy and bubbly. This step is crucial—if the yeast doesn’t activate, your dough won’t rise properly.
Once bubbly, add the 3.5 cups all-purpose flour and 0.75 tsp fine sea salt to the bowl. Stir with a wooden spoon until a shaggy dough forms. Then drizzle in the 0.25 cup extra-virgin olive oil and mix until fully incorporated. The dough should be sticky but manageable—this is normal for no-knead dough.
Rest the Dough for Maximum Flavor
Cover the bowl with plastic wrap or a damp towel and let the dough rest at room temperature for 1 hour. This allows the gluten to relax and the yeast to work its magic without overdevelopment. I like to place the bowl in a slightly warm spot—like near the oven with the light on—to encourage gentle fermentation.
After 1 hour, the dough should have nearly doubled in size and look puffy. If it hasn’t, give it another 30 minutes—patience here ensures a light, airy crust. Avoid the temptation to speed this up with heat; slow fermentation builds deeper flavor.
Shape and Prepare for Rising
Lightly flour a clean work surface with cornmeal (this prevents sticking and adds texture). Turn the dough out and gently fold it over itself 3-4 times to strengthen the gluten structure. Then shape it into a loose ball and place it back in the bowl, seam-side up.
Cover again and let it rise for another 30-45 minutes until it’s puffy and jiggly. The dough should spring back slowly when poked—this indicates it’s ready. If you’re short on time, you can refrigerate it here for up to 24 hours for even more flavor development.
Final Shape and Semolina Dust
Preheat your oven to 475°F with a pizza stone or baking sheet inside. On a lightly floured surface, gently press the dough into a 10-inch circle, keeping the edges slightly thicker for a classic look. I like to use my fingers to stretch it—don’t force it, just coax it gently.
Transfer the shaped dough to a piece of parchment paper dusted with semolina flour (this creates that golden, crispy crust). Slide the parchment onto the preheated stone or sheet. The dough will puff slightly as it bakes—this is the moment you’ve been waiting for.
Pro Tips For Making 10 Inch Pizza Dough
- Use 110°F Water: DESCRIPTION: That “warm water” in the recipe isn’t just lukewarm—it’s just hot enough to make the yeast wake up without killing it. I learned this the hard way when I used boiling water (yeast died instantly) and then again when I used tepid water (dough took forever). Grab a thermometer or test the water with your wrist—it should feel like a hot bath, not a sauna.
- Salt the Dough Twice: DESCRIPTION: Sprinkle half the salt into the dry flour first, then add the rest after kneading. The first pass dissolves evenly, while the second ensures the outer crust gets that crisp, salty punch. Skipping this means your crust tastes bland until the last bite—trust me, your pizza will thank you.
- Knead Until Silky: DESCRIPTION: Stop when the dough stretches thin without tearing and springs back slowly. I used to over-knead (tough crust) and under-knead (dense pizza) before realizing the “windowpane test” works best here. Wet your hands, pull a small piece—if it’s smooth and slightly sticky but not gummy, you’re golden.
- Let It Rise Slowly: DESCRIPTION: Cover the dough and let it rise in a cool spot (like the fridge) for 12–24 hours instead of rushing it at room temp. The flavor develops deeper, and the gluten relaxes for a lighter crust. I know, it’s tempting to speed it up—but slow rises make all the difference in texture.
Common mistakes when making great 10 inch pizza dough
Over-Kneading the Dough
This no-knead dough relies on gentle handling—over-kneading develops too much gluten, making it tough and chewy. I’ve seen home cooks accidentally turn their perfect dough into a dense, bread-like mess by folding or stretching it too aggressively.
Remember, this dough is designed to be shaped with minimal force, so let the gluten relax during the 1-hour rest and the 30-45 minute proof. If you notice the dough becoming resistant or springy, you’ve gone too far. 💪
Skipping the Rest Period
Rushing the 1-hour rest after mixing is a common mistake that leads to uneven texture and poor rise. This step allows the gluten to relax and the yeast to activate properly. I’ve learned the hard way—when I skipped it to save time, my dough turned out dense and flat.
If you’re short on time, refrigerate the dough after mixing for 12-24 hours instead of rushing it at room temperature. The cold slows fermentation, giving you more control.
Using Cold Water
Cold water (below 100°F) shocks the yeast and slows fermentation, leading to a weak, underproofed dough. I’ve tested this repeatedly, and the difference is night and day. Always use water between 105-110°F—just warm enough to feel comfortable in a mug.
If your water is too cold, place the bowl in a slightly warm spot (like near the oven with the light on) to help the yeast activate. A thermometer is worth the investment for consistent results.
Ignoring Proofing Signs
Assuming your dough is ready just because time has passed is a recipe for disappointment. The dough should be puffy, jiggly, and spring back slowly when poked—this means it’s ready to shape. If it’s flat or doesn’t bounce back, give it another 15-30 minutes.
I’ve made this mistake too many times, especially when I’m eager to bake. Trust your eyes and fingers—they’ll tell you when the dough is perfect. 👀
Overloading the Dough
This 10-inch dough is designed for lighter toppings—think fresh mozzarella, tomato sauce, and basil, not a full-blown meat lover’s pile. Overloading causes the dough to sink or tear during baking. If you’re craving a loaded pizza, consider doubling the dough recipe or using a larger size.
I’ve learned to keep my toppings balanced: 3-4 oz of sauce, 1 cup of cheese, and ½ cup of toppings per pizza. This keeps the crust crispy and the pie manageable.
Not Preheating Properly
Skipping the preheat time or using the wrong tool (like a cold baking sheet) results in a soggy, undercooked crust. Always preheat your oven to 475°F with a pizza stone or baking sheet inside for at least 30 minutes.
I’ve seen people rush this step, and their pizzas turn out greasy and limp. For best results, use a pizza stone or steel—it mimics a wood-fired oven and gives you that perfect leopard-spotted crust.
If you don’t have one, a heavy baking sheet works, but it won’t conduct heat as evenly.
Nutrition facts
Frequently asked questions
Can I make this dough without a stand mixer?
This no-knead recipe requires no mixer—just a wooden spoon for mixing and your hands for shaping. The dough’s stickiness is normal and makes it perfect for beginners. Simply stir until combined, then let the dough do the work during fermentation.
How do I adjust this recipe for a thicker or thinner crust?
For a thicker crust, reduce the olive oil to 2 tablespoons and add ½ cup extra flour during mixing. For a thinner crust, increase the olive oil to 3 tablespoons and stretch the dough slightly longer during shaping. The 10-inch size works well for both styles—just adjust the toppings accordingly.
Can I use whole wheat flour instead of all-purpose?
Yes, but replace half the all-purpose flour with whole wheat for a nutty flavor and denser texture. Add 1 extra tablespoon of water since whole wheat absorbs more moisture. Proofing may take 15-30 extra minutes—keep an eye on it. The crust will be heartier but slightly less crispy.
What’s the best way to store leftover dough?
Wrap shaped dough balls tightly in plastic and refrigerate for up to 48 hours. For longer storage, freeze for 3 months. Thaw overnight in the fridge—never at room temperature. The cold slows fermentation, preserving freshness. Re-proof at room temp for 30-60 minutes before baking.
Why did my dough tear when stretching?
This usually happens when the dough is too cold or overproofed. Let it sit at room temp for 10 minutes before shaping, and avoid stretching too aggressively. If it tears, gently press the edges together—no one will notice! For next time, check proofing by pressing gently: it should spring back slowly.

- 3lb Prime Rib Roast Recipe: Juicy Pink Center Guaranteed in 3 Hours - October 31, 2026
- 5 Spice Cake Recipe: Warmly Spiced Layers With Crunchy Top - October 31, 2026
- 1950’s Macaroni and Cheese Recipe: Nostalgic Creamy Cheese Sauce with Buttery Noodles - October 31, 2026