
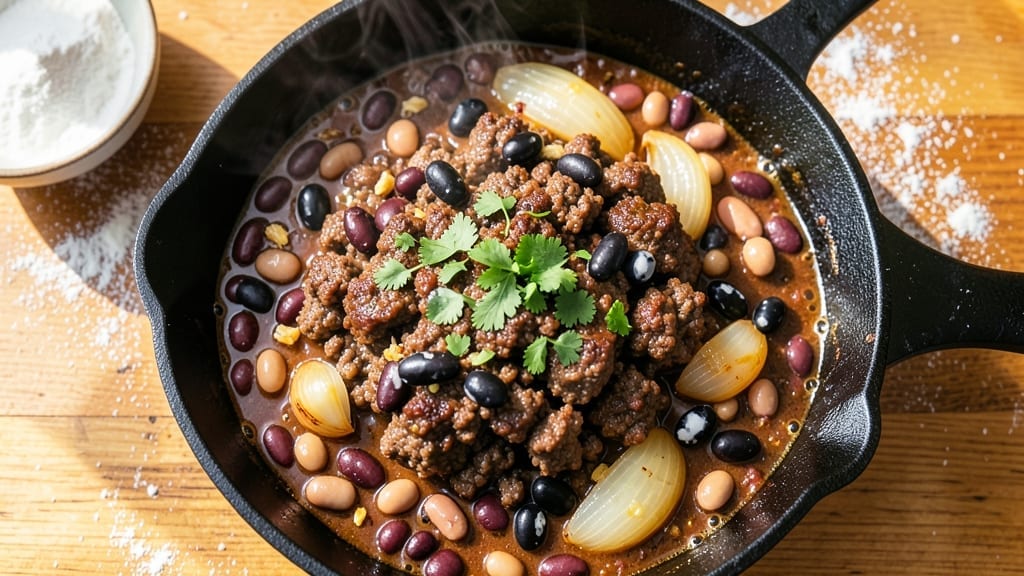
This 3-can chili recipe delivers restaurant-quality depth with minimal prep—perfect for busy weeknights when you crave hearty, smoky comfort. The secret lies in balancing three cans of beans (kidney, black, and pinto) with ground beef and a blend of spices that simmer into rich, complex flavors.
I developed this version after years of testing shortcuts that still taste homemade, and it never fails to satisfy a crowd.
The beauty of this chili is its foolproof simplicity: just 30 minutes of active time, followed by 45 minutes of simmering while you attend to other tasks.
A slow cooker or Dutch oven handles the work, and the spices—cumin, chili powder, and smoked paprika—build layers of warmth without overpowering the natural taste of the beans.
The result is a chili that’s bold yet balanced, with tender meat and beans in a sauce that’s thick enough to coat every spoonful.
By the time it’s done, you’ll have a pot of chili that smells like a campfire and tastes like a hug—smoky, slightly sweet, and packed with protein. Serve it with cornbread or over rice, and don’t forget the toppings: shredded cheese, sour cream, and fresh jalapeños for brightness.
This is the kind of meal that turns a simple dinner into a memorable experience, all without requiring a recipe box full of ingredients.
Leftovers reheat beautifully, making it ideal for meal prep or feeding a hungry family. The recipe scales easily, so double it for game day or potlucks. Here’s how to make it—simple, hearty, and impossible to resist.
Ingredients for 3 can chili
Three cans of beans, a pound of beef, and spices that build smoky depth—this chili delivers restaurant-quality flavor with minimal effort.
| Ingredient | Amount | Notes |
|---|---|---|
| Ground Beef 🥩 | 1 ½ lb | 80% lean, finely ground |
| Kidney Beans 🌿 | 1 can | 15 oz can, drained |
| Black Beans 🌿 | 1 can | 15 oz can, drained |
| Pinto Beans 🌿 | 1 can | 15 oz can, drained |
| Yellow Onion 🧅 | 1 whole | Medium size, diced |
| Garlic Cloves 🧄 | 4 cloves | Fresh, minced |
| Chili Powder 🌶️ | 2 tbsp | High-quality, not instant |
| Ground Cumin 🌿 | 1 tbsp | Freshly toasted preferred |
| Smoked Paprika 🌶️ | 1 tbsp | For authentic smoky flavor |
| Tomato Paste 🍅 | 2 tbsp | Smooth, not chunky |
| Diced Tomatoes 🍅 | 1 can | 28 oz can, fire-roasted preferred |
| Beef Broth 💧 | 2 cups | Low-sodium preferred |
| Dark Brown Sugar 🍚 | 1 tbsp | For subtle sweetness |
| Salt 🧂 | 1 tsp | Kosher or sea salt |
| Black Pepper 🌶️ | ½ tsp | Freshly ground preferred |
The ground beef is where flavor starts. 80% lean gives you that perfect balance of richness and tenderness—90% lean can dry out. Grab the pre-ground from the meat counter at Whole Foods or your local butcher for the best texture. The three cans of beans are non-negotiable—kidney, black, and pinto give you that classic chili texture and depth. If you can only find two varieties, double up on one. For the spices, Penzeys or bulk bins at natural grocery stores have the most potent options—avoid the pre-mixed packets at the checkout counter. The tomato paste? Squeeze tubes from Trader Joe’s save time and keep forever.
No kidney beans? Substitute extra pinto or black beans—just add a pinch of liquid smoke to mimic the depth. Fresh cumin seeds? Toast them in a dry pan for 30 seconds before grinding for a nutty kick. Smoked paprika is key for that campfire aroma—substitute regular paprika plus a pinch of liquid smoke if needed. The diced tomatoes can be any variety, but fire-roasted adds natural sweetness. Low-sodium broth is ideal, but if you only have regular, reduce the salt at the end. For extra richness, stir in a tablespoon of cocoa powder or a splash of coffee with the spices—trust me on this.
This chili tastes even better the next day as flavors meld. Keeps in the fridge for 4-5 days, freezes for 3 months. Portion into containers for easy lunches—just reheat with a splash of broth or water. The beans and meat thicken as they cool, so don’t worry if it seems too thin right after cooking. For serving, I always keep shredded cheddar, sour cream, and chopped cilantro on hand. The chili itself reheats beautifully—just warm on the stove or microwave until steaming.
Why You’ll Love This Recipe
- No Chopping Needed: I swear by this—just dice that onion once, dump the cans, and let the beef brown. The beans handle all the texture work while you stir.
- Deep, Rich Layers: That slow simmer turns the beef into tender chunks, while the onions caramelize just enough to give it a sweet, smoky backbone. Honestly, the first bite makes you forget it’s canned beans.
- Weeknight to Potluck: Same pot works for a rushed Tuesday or a tailgate spread—just adjust the heat. My college roommates lived on this; now my in-laws beg for it at holiday dinners.
- Leftovers That Win: The flavor actually improves after a day in the fridge. I make double batches because the kids still ask for it three days later—no complaints, just empty bowls.
Step-by-step instructions for smoky three-can chili
Here’s how to build rich, layered flavor using exactly three cans of beans.
Brown the Ground Beef Thoroughly
Heat a large Dutch oven over medium-high heat and add the 1.5 lb ground beef. Break it apart with a wooden spoon and cook for 8-10 minutes until the meat loses its raw color and becomes deep brown in spots. This step is critical—it develops the meat’s flavor and removes excess fat that would make your chili greasy.
Once the beef is fully browned, drain most of the fat from the pot, leaving about 1 tablespoon in the bottom. This small amount of fat will help carry the flavors as you build the chili. If you prefer a leaner version, you can wipe out more fat, but the chili will be slightly less flavorful.
Sauté Onions and Garlic for Depth
Add the diced yellow onion to the Dutch oven and cook over medium heat for 5-6 minutes, stirring occasionally, until the onions soften and begin to caramelize slightly at the edges. This process adds natural sweetness to balance the chili’s heat.
Next, stir in the minced garlic cloves and cook for 30 seconds until fragrant. Garlic burns quickly, so keep an eye on it—you’ll know it’s ready when the kitchen fills with that unmistakable aroma. Remove the pot from heat briefly if the garlic starts to darken too quickly.
Build the Spice Base
Return the pot to medium heat and add the 2 tbsp chili powder, 1 tbsp ground cumin, and 1 tbsp smoked paprika. Stir constantly for 30 seconds to toast the spices and release their essential oils. This step is where the chili gets its signature depth and complexity.
Next, add the 2 tbsp tomato paste and stir for 1 minute until it darkens slightly and blends smoothly with the spices. The tomato paste will thicken the chili and deepen its color. This is also the moment to add the 1 tbsp dark brown sugar—it enhances the smoky flavors and balances the heat without overpowering the dish.
Combine All Ingredients and Simmer
Pour in the 1 can diced tomatoes, 2 cups beef broth, 1 tsp salt, and 0.5 tsp black pepper. Stir well to combine, then add the 1 can kidney beans, 1 can black beans, and 1 can pinto beans. The beans should be fully submerged in the liquid—if not, add a splash of water or broth.
Bring the chili to a boil, then reduce the heat to low and let it simmer uncovered for 45-60 minutes. Stir occasionally to prevent the chili from sticking to the bottom of the pot. You’re looking for a chili that’s thick enough to coat the back of a spoon but still has a bit of body to it.
Adjust and Serve
Taste the chili and adjust the seasoning if needed. If it’s too mild, add more salt or a pinch of chili powder. If it’s too spicy, stir in a spoonful of the dark brown sugar or a splash of broth to mellow the heat. Let the chili rest off the heat for 10 minutes before serving—this allows the flavors to meld and the chili to thicken slightly.
Serve the chili hot, garnished with a sprinkle of smoked paprika or a dollop of sour cream if desired. The chili should have a rich, smoky depth with a perfect balance of heat, sweetness, and hearty bean texture. Leftovers taste even better the next day as the flavors continue to develop.
Pro Tips For Making 3 Can Chili
- CRISP THE ONION FIRST: Ditch the slow cooker’s lazy onion approach—sauté that yellow onion in a dry skillet over medium-high heat until it’s deep golden, not just soft. I learned this the hard way: mushy onions make the whole chili taste like it’s been sitting too long. Five minutes max, no oil needed.
- BROWN THE BEEF RIGHT: Skip the “cook it all together” step. Drain the grease from your ground beef after browning—yes, even if it looks greasy—and wipe the pan clean before adding the beans. The difference between a greasy chili and one with real depth is that extra effort. Five minutes now saves you from regret later.
- DRAIN BEANS TWICE: Rinse your kidney, black, and pinto beans in a colander, then drain them again into the pot. The first rinse gets rid of surface starch, the second ensures no gummy residue turns your chili into a thick paste. I was skeptical until I tried it—now I never skip it.
- SIMMER LOW AND LONG: After combining everything, crank the heat to high for the first 10 minutes to drive off raw flavors, then drop it to a bare simmer. Walking away? Good. Chili tastes better when it’s given time to meld, not when you’re hovering like a nervous parent. Two hours minimum—no shortcuts.
Common mistakes when making this dish
Skipping the Brown Step
Never skip browning the ground beef—this is where the chili gets its deep, meaty flavor. I’ve made this mistake, and the result was a chili that tasted more like a stew than the rich, smoky dish you want.
Brown the beef until it’s deep brown in spots, not just pink. This step takes 8-10 minutes but makes all the difference. 🔥
Using Low-Quality Spices
Pre-mixed chili powder packets from the grocery store checkout are your enemy. They’re often dull and lack the depth of fresh, high-quality spices. I always use Penzeys or bulk spices from natural grocery stores.
Toast your spices for 30 seconds in the pot before adding other ingredients—this releases their essential oils and builds layers of flavor. 🌶️
Overcrowding the Pot
Adding all the ingredients at once and letting the chili boil vigorously can lead to a mushy texture. Instead, build the chili in stages: brown the beef, sauté the onions and garlic, toast the spices, then add the tomatoes and broth.
This ensures each ingredient gets proper cooking time without steaming. I’ve seen chili turn into a soup because of this mistake—don’t let it happen to you!
Ignoring the Simmer Time
Rushing the simmering process is a common trap. Chili needs 45-60 minutes of gentle simmering to let the flavors meld. Skipping this step results in a chili that tastes disjointed.
Keep the heat at low and stir occasionally to prevent sticking. Patience here is key—your taste buds will thank you. ⏰
Not Adjusting Seasoning
Taste your chili before serving! Many people forget this critical step and end up with bland or overly salty chili. Adjust seasoning with salt, chili powder, or even a pinch of sugar to balance flavors.
I always let the chili rest for 10 minutes off the heat before tasting—this lets the flavors settle and gives you a more accurate reading. 💡
Using the Wrong Beans
Not all beans are created equal. Kidney, black, and pinto beans are the classic trio for a reason—they provide texture and depth. Substituting with chickpeas or lentils changes the chili’s character dramatically.
If you’re missing one variety, double up on another, but stick to the classic three-cans rule for the best results. The texture and flavor are worth the effort! 🌿
Nutrition facts
Frequently asked questions
Can I make this chili vegetarian?
Replace the ground beef with 1.5 lbs of crumbled tempeh or extra-firm tofu (pan-fried until crispy) or 1 can of lentils for protein. Boost the smoky flavor with an extra ½ tbsp smoked paprika and 1 tsp liquid smoke. The bean trio will still deliver that hearty texture—just add 1 extra can of beans to compensate for the meat loss.
How do I make this chili in a slow cooker?
Brown the beef first (it’s still critical!), then transfer everything to your slow cooker. Cook on low for 6-7 hours or high for 3-4 hours. The slow cooker’s gentle heat helps the flavors meld beautifully. Add ½ cup water if it gets too thick during cooking. The result is even more tender and flavorful than stovetop!
Why does my chili taste watery?
Watery chili usually means too much liquid or not enough simmering time. First, check if you added all ingredients at once—build the chili in stages instead. Second, simmer uncovered for the full 45-60 minutes to let moisture evaporate. If it’s still too thin, remove the lid and cook 10 more minutes on medium heat. For next time, reduce broth by ½ cup or add 1 tbsp cornstarch mixed with water as a thickener.
Can I freeze this chili?
Yes! Let it cool completely, then portion into airtight containers. Freeze for up to 3 months. Thaw overnight in the fridge and reheat on the stove with 2-3 tbsp broth to restore moisture. The flavors actually improve after freezing—just avoid refreezing thawed chili. For best results, freeze in single-serving portions so you can reheat exactly what you need.
What’s the best way to reheat leftovers?
Reheat on the stove over medium-low heat with the lid slightly ajar for 10-15 minutes, stirring occasionally. This prevents the chili from becoming mushy. For microwave reheating, use 50% power for 2-3 minutes**, stirring halfway. Always add a splash of broth or water if the chili seems dry. Leftovers taste even better the next day as flavors deepen!

- 3lb Prime Rib Roast Recipe: Juicy Pink Center Guaranteed in 3 Hours - October 31, 2026
- 5 Spice Cake Recipe: Warmly Spiced Layers With Crunchy Top - October 31, 2026
- 1950’s Macaroni and Cheese Recipe: Nostalgic Creamy Cheese Sauce with Buttery Noodles - October 31, 2026