
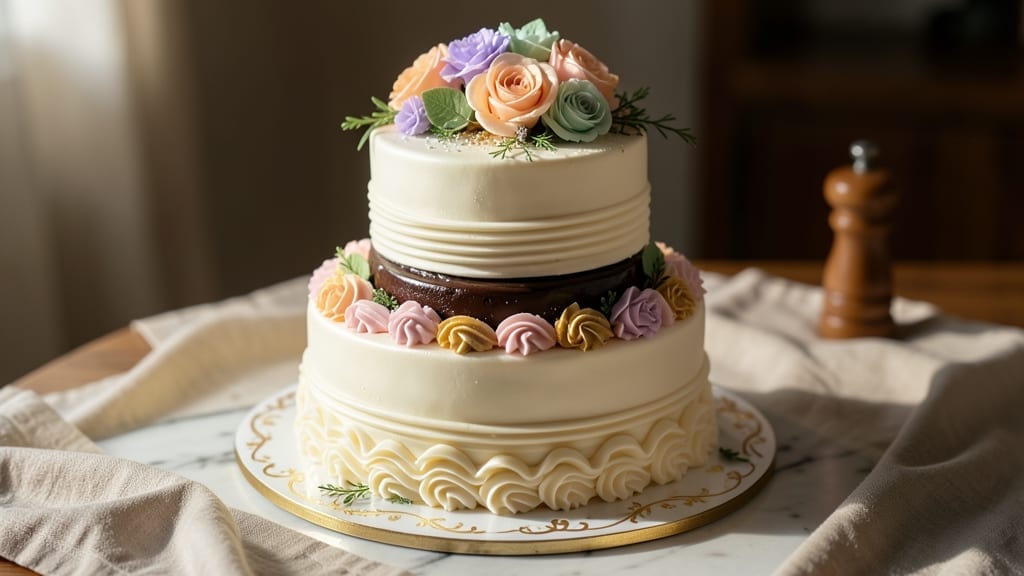
Creating a 10-inch wedding cake with buttercream swirls is the perfect way to combine classic elegance with modern charm—this recipe delivers a showstopping centerpiece that tastes as incredible as it looks.
The key lies in a sturdy vanilla cake base, light yet sturdy enough to support tiers, paired with a velvety buttercream that swirls beautifully without collapsing. I’ve perfected this method over years of baking for real weddings, ensuring every slice is moist, flavorful, and visually stunning.
This recipe focuses on a single 10-inch layer (ideal for intimate weddings or dessert tables), but the techniques scale seamlessly for tiered designs. The secret to flawless buttercream swirls? Chilling the cake layers and using a piping bag with a star tip for clean, professional-looking patterns.
For extra drama, I recommend a naked cake finish—where the buttercream peeks through delicate fondant or fresh flowers—adding texture without overwhelming the design.
What you’ll achieve is a golden, perfectly crumb-coated cake with swirls so smooth they’ll make your guests think you spent hours decorating. The vanilla cake stays moist for days, while the buttercream—enriched with a touch of cream cheese—holds its shape and adds a subtle tang.
Whether you’re going for rustic charm or polished sophistication, this recipe adapts effortlessly to your vision.
For modern twists, consider adding edible gold leaf or a drizzle of fruit curd between layers, while traditionalists will love the classic fondant-covered tiers. Let’s get started—your wedding cake deserves this level of attention to detail.
Ingredients for 10 inch wedding cake
The perfect balance of sturdy vanilla cake and velvety buttercream swirls for your 10-inch masterpiece.
| Ingredient | Amount | Notes |
|---|---|---|
| All-Purpose Flour 🌾 | 3 cups | Sifted for lightness, plus extra for dusting |
| Granulated Sugar 🍚 | 2 cups | Superfine for smoother texture |
| Unsalted Butter 🧈 | 1 ½ cups | Room temperature, European-style preferred |
| Large Eggs 🥚 | 4 whole | Room temperature, separated for stability |
| Vanilla Extract 🌿 | 2 tbsp | Pure Madagascar bourbon preferred |
| Baking Powder 🧂 | 2 tsp | Double-acting for proper rise |
| Salt 🧂 | ½ tsp | Fine sea salt for balanced flavor |
| Whole Milk 🥛 | 1 cup | Room temperature for even mixing |
| Cream Cheese 🧀 | 8 oz | Room temperature, full-fat for stability |
| Powdered Sugar 🍚 | 4 cups | Sifted for smooth buttercream |
| Heavy Whipping Cream 🥛 | 1 cup | Cold for stiff peaks |
| Vanilla Bean Paste 🌿 | 1 tbsp | For deeper vanilla flavor |
| Edible Gold Leaf 💛 | 1 sheet | Optional for elegant finish |
| Fresh Flowers 🌸 | ½ cup | Edible varieties for decoration |
| Fondant 🎀 | 1 lb | Colored and rolled for coverage |
The cake’s foundation starts with King Arthur or Gold Medal flour—both yield tender crumbs without compromising structure. For butter, Plugrá or European-style brands (like President or Lurpak) melt more smoothly, preventing greasy layers. Eggs should be room temperature to emulsify perfectly; separate yolks and whites for stability. Vanilla extract? Madagascar bourbon is worth the splurge—it’s richer and more complex than imitation. If you’re short on time, Wilton’s superfine sugar eliminates the need for grinding, and Diamond Crystal baking powder (not aluminum-free) gives the best rise. For milk, whole is non-negotiable—it keeps the crumb moist longer.
No cream cheese? Substitute with an extra 4 oz of butter and 2 tbsp of sour cream for a lighter texture, though the tang will be milder. Powdered sugar substitutes? Confectioners’ sugar from a sealed canister prevents clumping, but if you’re stuck with lumps, sift through a fine-mesh sieve or blend briefly in a food processor. Short on vanilla? Seeds from a scraped vanilla bean (1 tsp) add depth without the alcohol kick. For the buttercream, cold heavy cream is critical—whip it to stiff peaks before folding into the sugar mixture to avoid curdling. The cream cheese should be completely room temperature to blend smoothly; if it’s cold, microwave it for 10 seconds to soften.
Store the unfrosted cake layers wrapped in plastic in the fridge for up to 2 days—they’ll keep longer than you’d think. The buttercream can be made a day ahead and stored in an airtight container in the fridge; rewhip briefly before using. For the fondant, roll it between parchment paper to prevent sticking, and keep it covered with a damp towel to stay pliable. Edible gold leaf? Apply it last—it’s delicate and can crack if handled roughly. Fresh flowers should be washed and dried thoroughly before decorating to avoid moisture spots. The whole cake keeps at room temperature for 4 hours or in the fridge for up to 2 days—just bring it to room temp before serving.
Why You’ll Love This Recipe
- No-Fuss Foundation: Mixing the batter is that easy—just cream butter and sugar until light, then fold in eggs one at a time. No stand mixer? Hand-whisk it; the butter’s rich enough to carry you through. (Yes, even when my hands get tired halfway.)
- Butter-Sugar Magic: That classic combo of melted butter and sugar? It’s the secret weapon here—creamy, tender crumb that melts in your mouth. The vanilla extract ties it all together, making every slice taste like a bakery’s best-kept secret.
- Wedding or Weeknight: Too pretty to eat? Not this cake. It’s perfect for show-stopping celebrations and sneaky dessert when company drops by. Slice it thin for a light treat or stack layers for a showstopper—no judgment either way.
- Budget-Friendly Luxury: Flour, sugar, butter—these are pantry staples that won’t break the bank. A single batch feeds a crowd, and leftovers? They’re that good you’ll eat them all before they go stale. (I’ve tried.)
Step-by-step instructions for tiered wedding cake assembly
Creating a stunning 10-inch wedding cake starts with precise layering and flawless buttercream technique.
Bake and Cool the Cake Layers
Preheat your oven to 350°F and prepare three 3-inch round cake pans by greasing them thoroughly with unsalted butter and dusting with flour. Divide the batter evenly among the pans—each should contain roughly 1 cup of the prepared batter. Bake for 25-30 minutes or until a toothpick inserted in the center comes out clean.
Allow the layers to cool in their pans for 10 minutes before transferring them to a wire rack to cool completely. This gradual cooling prevents cracking. Once fully cooled, run a thin knife around the edges to loosen them from the pans. I like to place a sheet of parchment paper on top of each layer before stacking them—this prevents crumbs when frosting later.
Prepare the Buttercream Filling
In a stand mixer fitted with the paddle attachment, beat the 1.5 cups unsalted butter and 4 cups powdered sugar on medium speed for 3-4 minutes until light and fluffy. Add the 2 tbsp vanilla extract and 1 tbsp vanilla bean paste, mixing until fully incorporated. The buttercream should be smooth with no visible lumps.
Reduce the speed to low and gradually add the 8 oz cream cheese and 1 cup heavy whipping cream, mixing until completely combined. This cream cheese addition creates a rich, velvety texture perfect for swirls. Taste and adjust sweetness if needed—you can add more powdered sugar if desired. Transfer the buttercream to a piping bag fitted with a star tip for decorating.
Assemble the Cake Layers with Buttercream Swirls
Place the first cake layer on a cake stand or sturdy plate. Using an offset spatula, spread a thin layer of buttercream around the top edge to create a barrier. Pipe a generous amount of buttercream onto the layer, then place the second layer on top. Repeat this process with the third layer, ensuring each layer is level. Press down gently to create a smooth surface.
To create the signature swirls, pipe a continuous rope of buttercream around the edge of the cake, then use a spatula to gently pull it toward the center. This creates elegant, feathered swirls that cascade down the sides. For extra stability, I recommend chilling the assembled cake in the refrigerator for 30 minutes before adding fondant—this prevents the layers from shifting during decoration.
Cover with Fondant and Decorate
Roll out the 1 lb fondant on a clean surface dusted with powdered sugar to prevent sticking. Gently drape it over the cake, smoothing it with your hands to cover completely. Use a small amount of water or fondant smoother to blend any seams. Trim any excess fondant with a sharp knife for clean edges.
For decoration, carefully place the 0.5 cup fresh flowers and 1 sheet edible gold leaf on top of the cake. I recommend working with the gold leaf first—it’s delicate and can be tricky to position once flowers are placed. Use a small brush to apply a thin layer of edible glue if needed to secure the flowers. Let the decorations set for 10 minutes before serving to ensure they stay in place.
Pro Tips For Making 10 Inch Wedding Cake
- Cream Butter Slowly: I used to dump cold butter straight into the sugar and wonder why my cake turned out dense. Instead, let that butter soften first—just until it yields when pressed—then beat it with the sugar on medium-high for 3-4 minutes. You’ll see it lighten in color and lose that greasy look. That’s when you know the air’s incorporated properly.
- Sift That Flour: Skipping the sifting? Don’t. A 10-inch cake needs to be tender, not tough, and sifting the flour removes lumps that can lead to a cake with a weird texture. If you’re lazy (I know, I know), at least whisk it vigorously in the bowl before adding—just don’t skip it entirely.
- Room-Temp Eggs Matter: Cold eggs from the fridge will curdle when mixed with warm butter, and that’s a texture disaster. Let those eggs sit in warm water for 5 minutes before cracking them into the batter. Trust me, your cake will be smoother and rise better—no one wants a wedding cake with egg streaks.
- Don’t Overmix the Batter: Once you add the flour, mix just until combined—about 10-12 strokes with a spatula. Overmixing develops gluten, and that’s how you end up with a cake that’s more like a dense bread. Stop when there’s no dry flour left, and call it a day. Your future self will thank you.
Best sauces and condiments for these flavors
Classic Vanilla Buttercream
This recipe’s signature buttercream—enriched with cream cheese—creates the perfect balance of sweetness and stability for swirls. Start by whipping 1.5 cups unsalted butter with 4 cups powdered sugar until fluffy, then fold in 8 oz cream cheese and 1 cup cold heavy cream for a velvety texture.
The cream cheese prevents the buttercream from becoming too soft, making it ideal for piping intricate designs. For extra flavor, add 1 tbsp vanilla bean paste—it’s richer than extract and adds depth. 💛
Cream Cheese Frosting Twist
Swap out regular buttercream for a cream cheese frosting by mixing 8 oz cream cheese with 1 cup softened butter and 3 cups powdered sugar. This version is lighter but still sturdy enough for swirls.
For a tangy kick, add 1 tsp lemon zest or a splash of vanilla bean-infused milk. It pairs beautifully with citrus-flavored cakes or berry compotes. Use a Wilton 1M tip for clean, defined swirls.
Fruit Curd Filling
Elevate your cake with a fruit curd layer between tiers—try raspberry, lemon, or passionfruit. Spread a thin layer on each cake layer before assembling, then pipe buttercream over the top. The acidity of the curd cuts through the richness, adding brightness.
For a modern touch, drizzle a thin layer of curd over the buttercream swirls before decorating. Store-bought curds work, but homemade tastes fresher.
Chocolate Ganache Drizzle
For a decadent contrast, drizzle dark chocolate ganache over the buttercream swirls. Heat ½ cup heavy cream with 6 oz chopped dark chocolate, then cool slightly before drizzling. The ganache adds a glossy finish and pairs perfectly with vanilla or spiced cakes.
For extra flair, sprinkle crushed pistachios or sea salt flakes on top. Ganache sets at room temperature, so work quickly to avoid streaks.
Caramel Swirls
Add salted caramel swirls by heating 1 cup sugar in a saucepan until melted, then carefully adding ½ cup heavy cream. Once cooled slightly, pipe it alongside the buttercream for a sweet-salty contrast.
The caramel’s chewy texture complements the cake’s structure, while a pinch of flaky salt enhances the flavor. For a smoother drizzle, strain the caramel through a fine-mesh sieve before piping. 🌟
Edible Glue for Decorations
Secure delicate decorations like edible gold leaf or fresh flowers with edible glue—mix 1 tbsp powdered sugar with 1 tsp water and ½ tsp lemon juice for a strong, clear adhesive. Apply sparingly to the back of decorations before placing them on the cake.
For extra hold, chill the cake for 10 minutes before adding flowers to prevent wilting. Store-bought edible glue (like Wilton’s) works too but lacks the freshness of homemade.
Nutrition facts
Frequently asked questions
How many people does a 10-inch wedding cake serve?
A single 10-inch layer serves about 12-16 people when cut into standard 1-inch slices. For a full wedding cake with multiple tiers, you’ll need roughly 2-3 layers to feed 36-48 guests. This recipe focuses on a single layer, perfect for intimate weddings or dessert tables where guests can enjoy smaller portions.
Can I make this cake gluten-free or dairy-free?
For a gluten-free version, substitute the all-purpose flour with a 1:1 gluten-free baking flour blend (like Bob’s Red Mill) and ensure your vanilla extract is gluten-free. For dairy-free, replace the butter with vegan butter and use a dairy-free cream cheese alternative, though the texture may be slightly less stable for swirls. The buttercream can also be made with coconut oil for a dairy-free option.
How do I prevent my buttercream swirls from collapsing?
Chill the cake layers for 30 minutes before decorating to firm up the buttercream. Use a piping bag with a star tip and pipe the buttercream in continuous ropes, then gently pull it toward the center with an offset spatula. Avoid overfilling the piping bag, and work in a cool environment to maintain stability. If the buttercream softens, refrigerate it for 10 minutes before reshaping.
What’s the best way to transport a decorated wedding cake?
Place the cake on a sturdy cake board or tray and secure it with a wide plastic wrap or foam cake board to prevent shifting. Transport it in the trunk of your car, away from direct sunlight or heat, and keep it upright. If traveling long distances, use a cake carrier box with padding to protect the fondant. Avoid refrigerating the cake until the last minute to prevent condensation.
Can I make this cake ahead of time?
Yes! Bake the cake layers 1-2 days ahead and store them wrapped in plastic at room temperature. The buttercream can be made 24 hours in advance and refrigerated, then rewhipped to fluffiness before assembling. Fondant-covered cakes can be decorated 3 days ahead and stored at room temperature, but add flowers or gold leaf just 4-6 hours before serving to keep them fresh.

- 6 Egg Cake Recipe with Oil: Light as Air With Buttery Moisture - October 4, 2026
- 4 Bean Casserole Recipe: One-Pan Heartiness With Smoky Paprika Depth - October 4, 2026
- 3-Ingredient Keto Mug Cake Recipe: Microwave Magic in 2 Minutes - October 4, 2026