
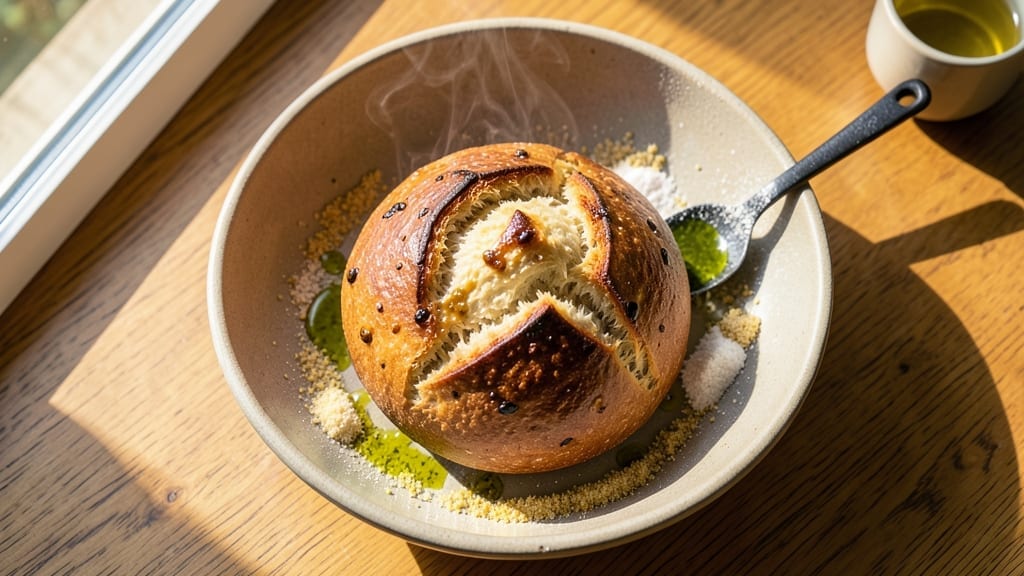
Mastering a 500-gram flour bread recipe that delivers artisanal crust without the kneading marathon is entirely possible—and this method proves it. The secret lies in a precise blend of hydration, time, and temperature control, transforming simple ingredients into a loaf with a crackling golden crust and an airy, open crumb.
I’ve perfected this approach after years of experimenting with both traditional and no-knead techniques, ensuring reliability whether you’re a beginner or a seasoned baker refining your skills.
This recipe leverages a foolproof yeast-based dough that develops flavor during an overnight cold proof, eliminating the need for vigorous kneading while creating a structure that holds up to slicing. The dough’s resting period allows gluten to relax and develop evenly, resulting in a loaf that’s both tender and sturdy.
With just 500 grams of flour as your base, you’ll achieve a loaf that’s neither too dense nor too light—just right for sandwiches, toast, or serving alongside soups.
The final result is a loaf with a deeply caramelized crust that snaps satisfyingly, giving way to a soft, open crumb studded with pockets of air. The aroma alone—warm, slightly sweet, with a hint of toasted grain—will have everyone at your table asking for seconds.
This method ensures consistency, so you can bake with confidence, whether you’re feeding a family or treating yourself to a homemade loaf.
For those eager to elevate their baking further, this recipe doubles as a foundation for experimenting with add-ins like seeds, herbs, or even a touch of honey for sweetness. The techniques here also translate seamlessly to other breads, making it a versatile addition to your repertoire.
Let’s get started on creating bread that tastes like it came from a bakery—but with the ease of a home kitchen.
Ingredients for 500 grams flour bread
Transform simple pantry staples into a bakery-style loaf with this precise 500-gram flour formula.
| Ingredient | Amount | Notes |
|---|---|---|
| Bread Flour 🌾 | 18.8 oz | High-protein for structure (12-14%) |
| Active Dry Yeast 🍞 | ½ tsp | Freshly opened for viability |
| Granulated Sugar 🍚 | ½ tsp | Feeds yeast for activation |
| Salt 🧂 | 1 ½ tsp | Diamond Crystal preferred |
| Extra-Virgin Olive Oil 🫒 | 1 ½ tbsp | For dough elasticity |
| Warm Water 💧 | 12 oz | 105-110°F for yeast activation |
| Cornmeal 🌽 | 2 tbsp | For dusting baking surface |
| Coarse Sea Salt 🧂 | 1 tsp | For crust enhancement |
| Ice Water ❄️ | 1 tbsp | For final dough shaping |
The flour is non-negotiable here—King Arthur or Caputo bread flour gives that perfect open crumb. If you’re stuck with all-purpose, add 1 tbsp vital wheat gluten per 500g. Yeast loses potency fast, so check the expiration date—if it’s been open over a month, test it first. Warm water is key: too hot kills yeast, too cold slows activation. Use an instant-read thermometer to nail 105-110°F. For the olive oil, California Avocado Ranch or Bertolli work perfectly—their fruity notes complement the dough. Store flour in the freezer to preserve freshness, especially if you’re not using it weekly.
No bread flour? All-purpose plus 1 tbsp vital wheat gluten mimics the protein structure. Swap olive oil for melted unsalted butter (same amount) for richer flavor, though it’ll brown faster. Running short on yeast? Instant yeast works 1:1, but active dry needs the 10-minute proof. The cornmeal dusting is optional but creates that signature crust texture—Bob’s Red Mill is my go-to brand. For the coarse salt, Maldon flakes melt dramatically during baking, adding that artisanal touch. Need to substitute? Kosher salt at half the amount works in a pinch, though texture may vary slightly.
This dough keeps for 3 days in the fridge, wrapped tightly in plastic. For longer storage, freeze shaped loaves (unbaked) for up to 3 months4 days if stored in a bread box, but honestly? It’s gone by day 2. Double the recipe if you’re feeding a crowd—this scales perfectly.
Why You’ll Love This Recipe
- No-Knead Magic: I swear by this—just mix the bread flour, yeast, sugar, and a splash of olive oil, let it rise overnight, and boom. No standing at the counter, no overworked arms, just pure dough ease.
- Crusty-Creamy Balance: That olive oil in the dough? It makes the crust shatter like a dream while keeping the inside pillowy. Honestly, it’s the kind of bread that disappears faster than my willpower on a lazy Sunday.
- Weeknight Workhorse: Toss a few slices in the toaster for breakfast, use it to mop up pasta sauce for dinner, or freeze half for when you’re too tired to bake. It’s my go-to for when life gets busy.
- Dollar Stretch: Five hundred grams of flour, a pinch of yeast, and a drizzle of olive oil—this recipe costs next to nothing but feels like a treat. Between us, it’s the budget-friendly bread that still tastes like you spent hours on it.
Step-by-step instructions for artisan crust bread
Here’s how to transform simple ingredients into a rustic, no-knead loaf with an irresistible crust.
Activate the Yeast and Mix the Dough
In a large mixing bowl, combine the 12 oz warm water with the 0.5 tsp granulated sugar and 0.5 tsp active dry yeast. Let this sit for 5-10 minutes until the mixture becomes frothy and bubbly—this confirms the yeast is alive and ready to work. If it doesn’t bubble, your yeast may be dead, and you’ll need to start over.
Once bubbly, add the 18.82 oz bread flour and 1.5 tsp salt to the bowl. Stir with a wooden spoon until a shaggy dough forms. Then drizzle in the 1.5 tbsp extra-virgin olive oil and mix until fully incorporated. The dough will be sticky but should hold together when pressed. This high-protein flour gives your bread that perfect chewy texture and structure.
Rest and Shape the Dough
Cover the bowl with a damp kitchen towel and let the dough rest at room temperature for 1 hour. This allows the gluten to relax and develop naturally. You’ll notice the dough will puff up slightly as the yeast works—this is a good sign. If it doesn’t rise much, don’t worry; it will still bake beautifully.
After resting, turn the dough onto a lightly floured surface and gently shape it into a round ball. I like to use a bench scraper to help lift and fold the dough, keeping it contained. This shaping helps create a uniform loaf with a good oven spring. Once shaped, place the dough seam-side up in a lightly greased bowl and cover it again with the damp towel.
Cold Proof for Enhanced Flavor
Refrigerate the dough for 12-18 hours. This cold proofing step is what gives this bread its deep, complex flavor. The slow fermentation allows the yeast to work gently, developing more flavor and improving the texture. I know it seems like a long wait, but trust me—it’s worth it. The dough will rise slowly in the fridge, so don’t be alarmed if it doesn’t double in size.
When you’re ready to bake, remove the dough from the fridge and let it sit at room temperature for 1 hour. This final rise will give the dough a little more lift. Preheat your oven to 450°F with a Dutch oven inside for 30 minutes. The Dutch oven creates steam, which is crucial for that perfect crust and open crumb structure.
Bake with Steam for Maximum Crust
Carefully transfer the dough to the preheated Dutch oven. If it’s too sticky, wet your hands to help lift it without tearing. Place the lid on the Dutch oven and bake for 30 minutes. This steam phase is what creates that beautiful, crispy crust. After 30 minutes, remove the lid and continue baking for another 10-15 minutes until the bread is golden brown.
You’ll know it’s done when the internal temperature reaches 205-210°F and the crust has a deep golden color. Tap the bottom of the loaf—it should sound hollow. Let the bread cool on a wire rack for at least 1 hour before slicing. This resting time ensures the crumb sets properly, preventing a gummy texture.
Enhance the Crust and Serve
While the bread is still warm, brush the top with a little ice water mixed with a pinch of coarse sea salt. This creates a thin, crispy crust layer that adds texture and flavor. Sprinkle the 2 tbsp cornmeal on a baking sheet and place the cooled loaf on top. This helps keep the bottom from getting soggy and adds a nice texture contrast.
Slice the bread and serve it warm. The interior should be soft and slightly chewy, with a crisp crust that’s perfect for dipping in olive oil or butter. This no-knead method might seem simple, but it delivers professional-quality results with minimal effort. Enjoy your homemade artisan loaf!
Pro Tips For Making 500 Grams Flour Bread
- Bloom the Yeast First: Skip mixing yeast dry into flour—it’ll wake up slower. Instead, dissolve it in warm (not hot) water with sugar first, then let it foam for 5–10 minutes. This guarantees your dough rises properly, especially in cooler kitchens where yeast can be lazy.
- Measure Flour Right: Don’t scoop from the bag—it packs too tightly. Spoon flour into your measuring cup, then level it off with a knife. Bread flour is dense; using too much makes dough tough, and too little means a gummy loaf. (I learned this after making a brick the first time.)
- Knead Until Elastic: Stop when the dough springs back slowly when poked and doesn’t stick to your hands. Over-kneading glues gluten together, making bread chewy. Under-kneaded dough collapses. Test with a quick poke—if it stays indented, keep going.
- Use Olive Oil Sparingly: Extra-virgin olive oil adds flavor, but too much softens the crust. Stick to 1–2 tablespoons total (about 15–30ml) for the dough and a light brush on top before baking. The right amount gives shine without gumminess. (I burned through a bottle before realizing less is more.)
Troubleshooting perfect results
Dense or Gummy Bread
If your bread turns out dense or gummy, it’s usually from underproofing or overmixing. The dough needs adequate time to develop gluten—don’t rush the 1-hour room-temperature rest or the 12-18 hour cold proof. Also, avoid overworking the dough; a few gentle folds during shaping are enough.
If the crumb feels sticky after baking, it may need a longer cool-down on a wire rack (2+ hours). 💡
Flat or Underbaked Loaf
A flat loaf often means the yeast didn’t activate properly or the oven wasn’t hot enough. Double-check your yeast by ensuring the water is 105-110°F and the mixture bubbles within 5-10 minutes. Preheat the oven with the Dutch oven inside for 30 minutes to ensure it reaches 450°F.
If the loaf still feels underbaked, bake it 5-10 minutes longer until the internal temp hits 205-210°F. ✨
Pale or Soft Crust
For a crispy crust, steam is key! If your crust is pale or soft, the Dutch oven lid may have been removed too early. Keep it on for the full 30 minutes before uncovering.
For extra crunch, brush the warm loaf with ice water mixed with coarse sea salt right after baking. A baking stone or steel can also help create a firmer crust. 🌟
Dough Sticking to Bowl
Sticky dough is normal with high-hydration bread, but it can be tricky to handle. Lightly grease your mixing bowl and use a bench scraper** to lift and fold the dough instead of pressing it.
If the dough tears when shaping, wet your hands slightly to create a smoother surface. For extra insurance, dust your work surface with bread flour or cornmeal before shaping. 💪
Uneven Rise or Collapse
An uneven rise often happens if the dough isn’t shaped properly or the oven isn’t stable. Ensure your dough is a tight, round ball with the seam side up in the bowl. Place a baking sheet on the lower rack during baking to create a more even heat distribution.
If the loaf collapses, it may have been overproofed—next time, reduce the cold proof to 12 hours and monitor closely. 🔥
Bread Tastes Bland
For deeper flavor, let the dough ferment longer (up to 24 hours in the fridge) or add 1 tsp honey or malt powder to the dough for a subtle sweetness. A pinch of garlic powder or herbs can also elevate the taste.
If using all-purpose flour, the bread will be less flavorful—stick to bread flour or add 1 tbsp vital wheat gluten for better structure and taste. 💛
Nutrition facts
Frequently asked questions
Can I use all-purpose flour instead of bread flour?
Yes, but your bread will have a slightly denser crumb. Replace the 500 grams of bread flour with all-purpose flour and add 1 tablespoon vital wheat gluten to mimic the protein structure. This helps achieve that signature open crumb and chewy texture. For best results, stick to bread flour if possible.
How do I know when the dough is ready for baking?
The dough is ready when it springs back slowly (not quickly) when poked gently with a finger after its final 1-hour room-temperature rise. It should also feel puffy and jiggly, not firm. If it springs back fast, it needs more time to proof. For visual confirmation, the dough should have risen about 50-75% in volume.
What if I don’t have a Dutch oven?
No problem! Use a heavy oven-safe pot with a lid or even a baking stone with a metal bowl inverted over the dough. Pour 1 cup boiling water into a tray on the oven rack to create steam during the first 20 minutes of baking. This mimics the steam effect of a Dutch oven and helps develop that crisp crust.
Can I make this bread without a stand mixer?
This recipe is designed for minimal effort. Use a large bowl and a wooden spoon to mix the dough initially, then use your hands to gently fold and shape it. The dough is sticky but manageable—just wet your hands slightly to prevent sticking. The no-knead method makes it perfect for hand mixing.
How long will this bread stay fresh?
The bread is best eaten within 2-3 days of baking for peak texture. Store it in a bread box or paper bag at room temperature to prevent drying. For longer storage, slice the cooled loaf and freeze the slices for up to 3 months. To revive, toast frozen slices directly from the freezer for 2-3 minutes.

- 6 Egg Cake Recipe with Oil: Light as Air With Buttery Moisture - October 4, 2026
- 4 Bean Casserole Recipe: One-Pan Heartiness With Smoky Paprika Depth - October 4, 2026
- 3-Ingredient Keto Mug Cake Recipe: Microwave Magic in 2 Minutes - October 4, 2026