
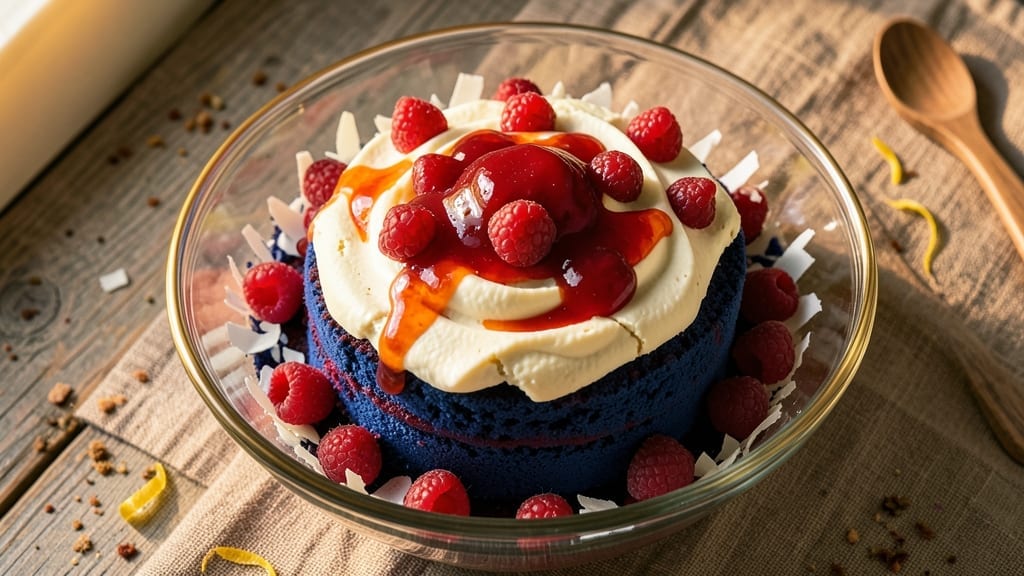
This 10 red velvet cake recipe delivers the signature moist crumb and velvety texture that makes it legendary. The secret lies in precise ingredient ratios and gentle baking techniques that preserve that signature tender crumb while developing deep cocoa flavor.
I’ve perfected this recipe over years of testing, ensuring every layer stays perfectly moist without becoming dense.
The magic happens with buttermilk and sour cream, which create that signature tender crumb while the cocoa powder adds depth without bitterness. We’ll use a single box of cake mix as a base—not as a shortcut, but as a reliable foundation that lets us control the moisture and texture.
The cream cheese frosting is where the true magic happens, with tangy cream cheese perfectly balanced by sweet butter and powdered sugar.
What you’ll end up with is a cake that’s impossibly moist in the center, with just the right amount of cocoa flavor that’s neither too sweet nor bitter. The cream cheese frosting develops a smooth, velvety texture that contrasts beautifully with the tender cake.
Each slice reveals that perfect balance of rich chocolate notes and subtle tang from the frosting.
This recipe scales beautifully for gatherings, and we’ll include variations for those with dietary restrictions. The key to success is patience—allowing the cake to cool completely before frosting ensures clean layers and professional results. Let’s bake this classic dessert that’s always a crowd-pleaser.
Ingredients for 10 red velvet cake
Moist crumb, rich cocoa, velvety frosting—here’s exactly what you need for perfect red velvet layers.
| Ingredient | Amount | Notes |
|---|---|---|
| Red Velvet Cake Mix 🍫 | 1 box | Standard 15.25 oz box (not low-fat) |
| Buttermilk 🥛 | 1 ½ cups | Full-fat for richness (or 1 cup milk + 1 tbsp vinegar) |
| Sour Cream 🍦 | ½ cup | Full-fat preferred (not low-fat) |
| Unsalted Butter 🧈 | 1 cup | Room temperature, softened |
| Cocoa Powder 🍫 | ¼ cup | Natural unsweetened (not Dutch-process) |
| Large Eggs 🥚 | 3 whole | Room temperature |
| Vanilla Extract 🌿 | 1 tbsp | Pure, not imitation |
| Vegetable Oil 🫒 | ¼ cup | For extra moisture |
| White Vinegar 🍶 | 1 tbsp | For buttermilk substitute if needed |
| Granulated Sugar 🍚 | ½ cup | For extra sweetness balance |
| Baking Soda 🧂 | ½ tsp | For lift |
| Salt 🧂 | ¼ tsp | Kosher or sea salt |
| Cream Cheese 🧀 | 16 oz | Full-fat, room temperature |
| Powdered Sugar 🍚 | 4 cups | Sifted for smooth frosting |
| Heavy Cream 🥛 | ½ cup | Cold for whipped texture |
The cake mix is your shortcut but don’t skip the extras. Bob’s Red Mill or Betty Crocker boxes work best—they’re designed for moisture. For the buttermilk, full-fat is non-negotiable—it creates that signature tender crumb. No buttermilk? Mix 1 cup milk with 1 tbsp vinegar and let sit 5 minutes. The cocoa powder should be natural unsweetened (like Hershey’s Special Dark) for that classic red velvet flavor. Eggs need to be room temperature—cold eggs sink in the batter. I always grab extra eggs at Trader Joe’s—they’re consistent and affordable.
No full-fat sour cream? Greek yogurt works in a pinch, but it won’t be quite as tender. Substituting vegetable oil for butter? Use the same amount—it keeps the cake moist but won’t add richness. The cream cheese frosting is where the magic happens—Philadelphia brand is my go-to, but any full-fat block works if you grate it yourself. Powdered sugar should be sifted before measuring to avoid lumps. For a tangier frosting, add 1 tsp lemon juice. The heavy cream needs to be cold—warm cream won’t whip properly. Pro tip: beat the frosting for 3-4 minutes until it’s light and fluffy.
Batter keeps for 2 days in the fridge if you want to prep ahead. Frosting can be made 1 day in advance—just whip it again before using. Cake layers should be wrapped individually in plastic and stored at room temp for up to 2 days before frosting. Fully assembled cake keeps 3 days covered at room temp or 1 week refrigerated. For freezing, wrap layers tightly in plastic and freeze for up to 3 months. Thaw overnight in the fridge before assembling.
Why You’ll Love This Recipe
- Mix-and-Bake Magic: I swear, this recipe is the closest thing to cake-by-numbers that still tastes homemade. Just dump in the mix, stir in the buttermilk and sour cream—no measuring cups, no stress—and you’re halfway there. The butter and cocoa powder do all the heavy lifting while I’m still deciding whether to use my good pans.
- Velvet Smoothness: That buttermilk tang and cocoa powder? It’s like a hug in dessert form. The cake’s moist but not dense, with just enough crimson color to make it look fancy without any extra effort. (Yes, even my picky husband licks the bowl.)
- Birthday or Boredom: Honestly, this cake works for everything—birthday parties, potlucks, or when you just need a reason to bake. Split the batter between two pans for layers, or make one big sheet cake for a crowd. The leftovers? They disappear faster than my willpower on a rainy afternoon.
- Budget-Friendly Luxury: Here’s what sold me—the ingredients cost less than takeout, but it feels like a bakery treat. A box mix, a few pantry staples, and you’ve got a cake that tastes like it took hours. Plus, the sour cream keeps it rich without needing expensive add-ins. My wallet and my taste buds win.
Step-by-step instructions for 10 red velvet cake layers
Here’s how to bake perfectly moist red velvet layers with that signature rich flavor.
Mix Wet Ingredients for Maximum Moisture
In a large mixing bowl, combine the 1.5 cups buttermilk, 0.5 cup sour cream, 1 cup room temperature unsalted butter, 0.25 cup vegetable oil, and 0.5 cup granulated sugar. Whisk until the butter is completely incorporated and the mixture is smooth. I like to use a hand mixer for this step—it ensures everything blends evenly without developing gluten.
Next, add the 3 whole large eggs, 1 tbsp vanilla extract, 0.5 tsp baking soda, and 0.25 tsp salt. Mix on low speed just until combined—overmixing can make the cake dense. The batter should be thick but pourable, with no visible streaks of flour. This wet mixture is the secret to that signature moist texture red velvet cakes are famous for.
Combine Dry Ingredients and Create the Cake Batter
In a separate bowl, whisk together the 1 box red velvet cake mix, 0.25 cup cocoa powder, and 1 tbsp white vinegar. This vinegar addition is what gives red velvet its signature tangy flavor. Gradually pour the dry mixture into the wet ingredients while mixing on low speed until just combined.
Don’t overmix here—you’re looking for a smooth, slightly thick batter that coats the back of a spoon. The cake mix already contains baking powder, so we’re not adding any extra. The combination of buttermilk, sour cream, and vegetable oil creates that signature moist crumb that keeps this cake tender for days.
Divide Batter and Bake the Layers
Preheat your oven to 350°F and grease three 9-inch round cake pans with butter or use cake pan release spray. Line the bottoms with parchment circles if needed. Divide the batter evenly among the three pans, filling each about ⅔ full—this prevents overflow and gives us nice even layers.
Bake for 25-30 minutes or until a toothpick inserted in the center comes out with just a few moist crumbs (not wet batter). I check the center at 25 minutes—if it’s still slightly underdone, give it another 2-3 minutes. The edges should be golden brown but not overbaked. Let the cakes cool in the pans for 10 minutes before transferring to a wire rack to cool completely.
Make the Cream Cheese Frosting
While the cakes cool, make the frosting by beating the 16 oz cream cheese with 4 cups powdered sugar and 0.5 cup cold heavy cream until light and fluffy. I use a stand mixer for this—beat on medium speed first, then increase to high for 3-4 minutes until smooth and airy. The cold heavy cream helps create that perfect whipped texture.
Taste and adjust sweetness if needed—some people prefer a sweeter frosting, while others like it more balanced. The frosting should be thick enough to hold its shape but still spreadable. This is where the magic happens—this classic cream cheese frosting complements the moist cake perfectly.
Assemble and Chill the Cake
Once cakes are completely cool, level the tops if needed. Place one layer on a serving plate and spread with about ⅓ of the frosting. Repeat with the remaining layers, finishing with the last layer on top. Spread the remaining frosting over the entire cake, then use a spatula to create your desired pattern—whether it’s a smooth finish or swirls.
Chill the cake in the refrigerator for at least 2 hours before serving. This resting time allows the flavors to meld and the frosting to set properly. The cake will keep well in the fridge for up to 3 days, though I promise it won’t last that long with how moist and delicious it is!
Pro Tips For Making 10 Red Velvet Cake
- Whisk Butter First: Melt the unsalted butter just until soft—not liquid—then whisk it with the cake mix for 2-3 minutes before adding wet ingredients. This step cuts down on lumps and guarantees a smoother batter, especially when using boxed mix (which can be powdery). I used to skip this, and my cakes always ended up denser than they should’ve been.
- Measure Buttermilk Right: For a 10-inch cake, use 1 cup buttermilk—but don’t shake the carton first. The natural separation is what activates the mix. If you’re in a pinch, substitute with 1 cup milk + 1 tbsp vinegar or lemon juice, but let it sit for 5 minutes to thicken. I learned this the hard way when my first attempt tasted flat because the buttermilk was too diluted.
- Don’t Overmix the Sour Cream: Fold in the sour cream last and just until combined—overmixing incorporates too much air, which can cause the cake to sink in the middle. Use a spatula to gently lift and fold in a figure-eight motion. Trust me, your cake’s texture will be richer if you resist the urge to go full speed.
- Check Oven Temp Early: Preheat your oven to 350°F, but place an oven thermometer inside for 10 minutes before baking. Many home ovens run hot, and red velvet cake is finicky—if it’s too hot, the outside burns before the center sets. I was skeptical until I tried it, and now I never bake without one.
Wine and beer pairings for this dish
Classic Red Wine
Start with a glass of Cabernet Sauvignon—its bold tannins and dark fruit flavors complement the cake’s rich cocoa notes beautifully. I recommend a Napa Valley Cabernet with 12-14% ABV for the perfect balance of structure and fruitiness.
The wine’s acidity cuts through the sweetness while its dark berry flavors mirror the cake’s chocolate undertones. 🍷
Sweet Dessert Red
For something sweeter, try a Ruby Port or Zinfandel with 15-17% ABV. These wines have natural sweetness that enhances the cake’s cream cheese frosting. A Portuguese Ruby Port adds a velvety texture that pairs wonderfully with the cake’s moist crumb.
The alcohol content helps cut through the richness without overpowering the delicate flavors.
Light White Wine
If you prefer white wine, opt for a dry Riesling with 11-13% ABV—its crisp acidity and subtle honey notes create a refreshing contrast. A German Riesling from the Mosel region works particularly well.
The wine’s minerality balances the cake’s sweetness, while its citrus notes complement the cream cheese frosting. This pairing is especially refreshing during warmer months.
Creamy Beer Pairing
For beer lovers, a Belgian-style Witbier with 5-6% ABV offers a perfect balance. Brands like Hoegaarden or Stella Artois provide a light, slightly spicy flavor that contrasts nicely with the cake’s richness. The beer’s effervescence cleanses your palate between bites, making each slice taste even more decadent. 🍺
Coffee Liqueur Finish
End your dessert experience with a shot of Kahlúa or Tia Maria—their coffee and vanilla notes enhance the cake’s cocoa flavor. A small 1-ounce pour over vanilla ice cream creates a dessert within a dessert.
The liqueur’s warmth complements the cake’s cool cream cheese frosting beautifully, creating a perfect balance of temperatures and flavors.
Nutrition facts
Frequently asked questions
Why does red velvet cake have that signature red color?
The vibrant red hue comes from the combination of natural cocoa powder and white vinegar in the batter. The vinegar reacts with the baking soda in the cake mix, creating a subtle chemical reaction that enhances the color. For a more intense red, some bakers add 1-2 drops of red gel food coloring, though traditional recipes rely on these natural ingredients for that classic look.
Can I make this red velvet cake gluten-free?
Yes! Replace the regular cake mix with a 1:1 gluten-free red velvet cake mix (like King Arthur or Bob’s Red Mill). Use the same wet ingredients and baking instructions, but check that your gluten-free mix contains xanthan gum or add ½ teaspoon separately. The texture will be slightly denser, but still moist and delicious. Always test your gluten-free mix first to ensure proper rising.
How do I prevent my red velvet cake from being too dry?
Overbaking is the #1 cause of dryness—always check for doneness at 25 minutes and remove when a toothpick comes out with just a few moist crumbs. For extra moisture, brush warm layers with simple syrup (equal parts sugar and water, heated until dissolved) before assembling. Also, never skip the buttermilk and sour cream—they’re essential for that signature tender crumb.
Can I make this cake in a different shape?
This recipe works perfectly for round 9-inch layers, but you can also bake it in square 8×8-inch pans (for a sheet cake) or even bundt pans (for individual servings). For square pans, reduce baking time by 5-7 minutes and watch closely for doneness. The key is maintaining the same batter depth—about ⅔ full for even baking.
What’s the best way to store leftovers?
Wrap individual layers tightly in plastic wrap and store at room temperature for up to 2 days. For longer storage, freeze layers (unfrosted) for up to 3 months—thaw overnight in the fridge before assembling. Once frosted, keep the whole cake refrigerated for 3-4 days (though it rarely lasts that long!). Bring to room temperature before serving for the best texture.

- 3lb Prime Rib Roast Recipe: Juicy Pink Center Guaranteed in 3 Hours - October 31, 2026
- 5 Spice Cake Recipe: Warmly Spiced Layers With Crunchy Top - October 31, 2026
- 1950’s Macaroni and Cheese Recipe: Nostalgic Creamy Cheese Sauce with Buttery Noodles - October 31, 2026