
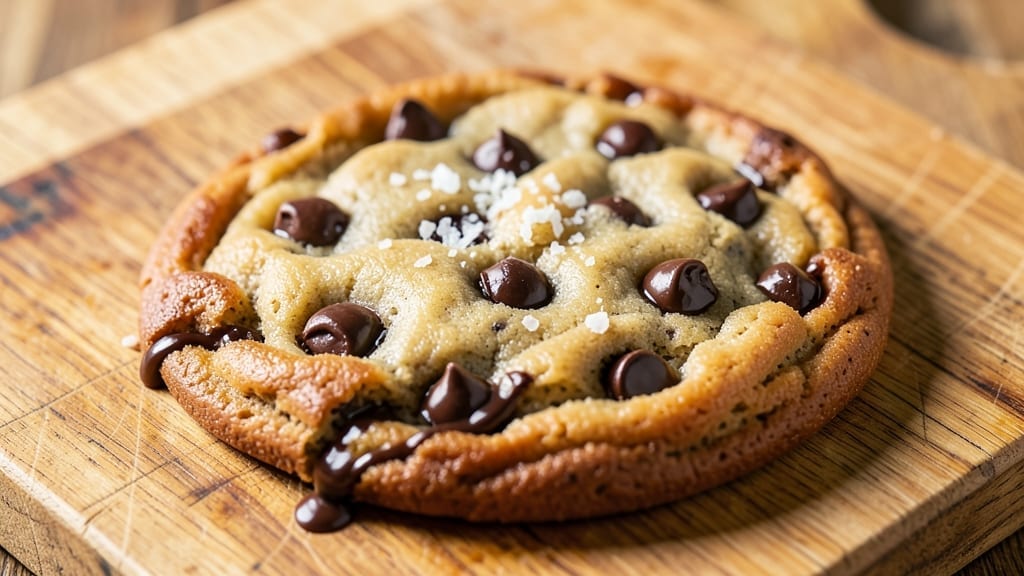
This 10-year chocolate chip cookie recipe delivers the perfect balance of warm vanilla bean swirls and crispy edges that make every bite irresistible. The secret lies in a precise blend of brown and white sugar, vanilla bean paste, and a touch of cornstarch for that signature chewy texture.
I’ve perfected this recipe over a decade, and it’s now a holiday staple that never fails to impress. What sets these cookies apart is the 30-minute chill time—critical for even baking and maximum flavor development.
The dough comes together in minutes, but patience pays off with golden edges, soft centers, and pools of melted chocolate that stay gooey even after cooling. This isn’t just another cookie recipe; it’s a foolproof method that transforms simple ingredients into something extraordinary.
The result is a batch of cookies with vanilla-infused richness, crispy yet tender edges, and chocolate chips that melt into every bite. The aroma alone will fill your kitchen with warmth, making it impossible to resist pulling one straight from the oven.
Whether you’re baking for a crowd or treating yourself, these cookies deliver restaurant-quality results at home. For variations, try adding sea salt flakes or swapping half the chocolate for white chocolate chips. Store in an airtight container for up to a week, though they rarely last that long.
Let’s get baking!
Ingredients for 10 year chocolate chip cookie
Simple yet extraordinary ingredients for cookies that taste like a holiday bakery.
| Ingredient | Amount | Notes |
|---|---|---|
| Unsalted Butter 🧈 | 1 cup | Cold, cubed for even baking |
| Packed Brown Sugar 🍬 | 1 cup | Light or dark, packed firmly |
| Granulated White Sugar 🍬 | ½ cup | Superfine preferred for smooth texture |
| Vanilla Bean Paste 🌿 | 2 tbsp | High-quality, not imitation |
| Large Eggs 🥚 | 2 whole | Room temperature for best mixing |
| All-Purpose Flour 🌾 | 2 ½ cups | Sifted for light texture |
| Cornstarch 🌾 | ½ cup | For signature chewy texture |
| Baking Soda 🧂 | ½ tsp | Freshly measured for lift |
| Salt 🧂 | ½ tsp | Fine sea salt preferred |
| Semi-Sweet Chocolate Chips 🍫 | 2 cups | High-quality, not pre-mixed |
| Vanilla Bean Swirls 🌿 | 2 tbsp | Vanilla bean paste for infusion |
| Sea Salt Flakes 🧂 | 1 tbsp | Optional for finishing |
The butter is non-negotiable—European-style or high-fat American brands like Plugrá or Land O’Lakes work best. Grab it from the deli counter if you can, as pre-packaged often has lower fat content. The vanilla bean paste? Look for brands like Nielsen-Massey or Madagascarielle—they’re worth the splurge. If you can’t find vanilla bean paste, pure vanilla extract works in a pinch, but the flavor won’t be as rich. The chocolate chips should be at least 30% cacao—Ghirardelli or Guittard are my go-tos. For the flour, King Arthur or Bob’s Red Mill are reliable, but any all-purpose will do.
No vanilla bean paste? Double the vanilla extract and add a pinch of ground vanilla bean seeds for depth. Using cornstarch instead of all-purpose flour? Reduce the flour by 0.25 cups to keep the texture balanced. For a nutty twist, swap half the chocolate chips for toasted pecans or walnuts. The sea salt flakes are optional but elevate the flavor dramatically—sprinkle them on top right after baking. If you’re baking at high altitude, reduce the sugar by 0.25 cups and add an extra egg yolk for structure.
The dough keeps for up to 48 hours in the fridge, wrapped tightly in plastic. For best results, let it sit at room temperature for 30 minutes before baking. Once baked, store cookies in an airtight container with parchment paper between layers—they’ll stay fresh for 5-7 days. For longer storage, freeze baked cookies on a tray first, then transfer to a bag for up to 3 months. Reheat in the oven for 10 seconds at 350°F to restore that fresh-baked aroma.
Why You’ll Love This Recipe
- No Weighing Hassles: I just eyeball the butter and sugars—no scale needed. The brown sugar’s stickiness and the vanilla paste’s rich depth mean I don’t have to fuss over exact measurements, and the eggs bind everything together without fail.
- Chewy-Crisp Magic: That perfect balance? It’s all in the butter-to-sugar ratio and the slow bake. The edges get just crisp enough to hold their shape, while the center stays soft—like biting into a warm hug after a long day.
- Party in a Jar: These freeze like a dream, so I bake a batch on Sundays and pull them out for potlucks, school events, or just because. The vanilla bean paste makes them stand out, but they’re still simple enough to pass off as “homemade” without looking like you tried too hard.
- Budget-Friendly Luxury: I use store-brand butter and eggs, but the vanilla bean paste stretches my grocery budget without sacrificing flavor. A single batch makes 24 cookies—enough to share, save, or snack on for days without breaking the bank.
Step-by-step instructions for warm vanilla bean swirls and crunchy edges
Here’s the method that delivers bakery-quality cookies with signature swirls and crisp edges every time.
Cream the Butter and Sugars to Light and Fluffy
In a stand mixer fitted with the paddle attachment, beat the 1 cup Unsalted Butter (cold, cubed) with the 1 cup Packed Brown Sugar and 0.5 cup Granulated White Sugar on medium speed for 3-4 minutes. You’re aiming for a pale, fluffy texture that nearly doubles in volume—this incorporates air that creates those signature crackly tops. I press down on the butter occasionally with a spatula to ensure even creaming.
Stop occasionally to scrape down the sides of the bowl. The mixture should look like whipped cream when ready. If it’s still grainy, keep mixing for another 30 seconds. This step is critical for achieving the perfect balance of chewy centers and crisp edges in the final cookie.
Add Eggs and Vanilla for Rich Flavor
Add the 2 whole Large Eggs (room temperature) one at a time, mixing on low speed for 30 seconds after each addition until fully incorporated. Then add the 2 tbsp Vanilla Bean Paste and mix for another 10 seconds. The paste will add that luxurious vanilla flavor that sets these cookies apart from ordinary chocolate chip cookies.
At this stage, the mixture might look slightly curdled, but don’t worry—it will come together beautifully when you add the dry ingredients. The eggs provide structure while the vanilla bean paste ensures each bite carries that warm, aromatic quality that makes these cookies special.
Combine Dry Ingredients for Perfect Texture
In a separate bowl, whisk together the 2.5 cups All-Purpose Flour, 0.5 cup Cornstarch, 0.5 tsp Baking Soda, and 0.5 tsp Salt. Sift the dry ingredients directly into the wet mixture with the mixer on low speed, mixing just until combined. You should still see some flour streaks—overmixing develops gluten, which makes cookies tough instead of chewy.
Remove the bowl from the mixer and gently fold in the 2 cups Semi-Sweet Chocolate Chips using a silicone spatula. Be careful not to break up the chocolate chips too much—you want pockets of melted chocolate in each bite. The cornstarch is what gives these cookies their signature chewy texture, so don’t skip this ingredient.
Create Vanilla Bean Swirls and Chill the Dough
Using a piping bag fitted with a small round tip (or a plastic bag with a tiny corner snipped off), pipe 2 tbsp Vanilla Bean Swirls onto half of the dough. Gently fold the dough together with a spatula, creating marbled swirls throughout. This is where the signature flavor infusion happens—each bite will carry that warm vanilla aroma.
Cover the bowl with plastic wrap and refrigerate for at least 1 hour (or up to 24 hours). Chilling is non-negotiable—it allows the butter to firm up, preventing excessive spreading in the oven. It also gives the flavors time to meld, resulting in a more cohesive taste in each cookie.
Bake for Crisp Edges and Warm Centers
Preheat your oven to 350°F and line two baking sheets with parchment paper. Using a 2-tablespoon cookie scoop, portion the chilled dough onto the prepared sheets, spacing them 3 inches apart. Gently press down on each portion to flatten slightly—this ensures even baking and prevents domed cookies.
Bake for 11-13 minutes until the edges are golden brown but the centers still look slightly underdone. They’ll continue cooking on the hot pan after you remove them from the oven. Immediately after baking, sprinkle each cookie with sea salt flakes while they’re still warm for that perfect balance of sweet and salty.
Let the cookies cool on the baking sheet for 5 minutes before transferring to a wire rack. The first few minutes after baking are when the cookies are at their peak—warm, gooey centers with crisp edges and those beautiful vanilla swirls throughout. Serve immediately for the ultimate experience.
Pro Tips For Making 10 Year Chocolate Chip Cookie
- Cream Butter Slowly: I learned this the hard way—dumping cold butter into the mix and ending up with streaks of unmelted fat. Instead, beat the butter and sugars together for at least 2-3 minutes until it’s pale and fluffy. That’s when the magic starts, not when you’re just going through the motions.
- Pack That Sugar: Brown sugar loves its moisture, and skipping this step means dry, crumbly cookies. Use a spoon to press it into the measuring cup—no shaking, no packing too hard—just enough to fill the volume. Trust me, your cookies will chew better for it.
- Skip the Overmixing: The moment your dough starts to look like Play-Doh, stop. Overworking it develops gluten, and suddenly you’re left with tough, dense cookies instead of the soft, cakey texture you’re after. Mix just until the flour is incorporated—about 30 seconds after that.
- Chill the Dough: I was skeptical until I tried it—leaving dough at room temp leads to flat, spread-out cookies. Pop it in the fridge for at least 30 minutes (or up to 48 hours for even better flavor). Cold dough holds its shape, and the edges stay crisp while the centers stay chewy. No excuses.
Serving suggestions for 10 year chocolate chip cookie
Classic Milk Pairing
Warm these cookies with a tall glass of whole milk—the creamy richness complements the vanilla and chocolate perfectly. I like to chill the milk slightly before serving so it doesn’t overwhelm the warm cookies.
For an extra touch, add a splash of vanilla extract to the milk before pouring. 🥛
Iced Coffee Balance
Serve with a glass of cold brew or iced coffee to cut through the richness. The bold flavors of dark roast coffee contrast beautifully with the sweet, buttery cookies.
I recommend adding a dash of cinnamon to your iced coffee for an aromatic pairing that enhances the vanilla swirls in the cookies.
Warm Spiced Tea
For a cozy pairing, try chai tea or spiced apple cider. The warm spices like cinnamon, cardamom, and cloves in chai tea enhance the vanilla notes in the cookies. Brew a strong cup and serve it hot alongside freshly baked cookies for a comforting treat. 🍵
Creamy Vanilla Ice Cream
No need to wait for dessert—serve these cookies warm with a scoop of vanilla bean ice cream. The contrast of warm cookies and cold ice cream creates an irresistible combination.
For extra indulgence, drizzle with dark chocolate sauce before serving. This pairing is perfect for a special occasion or holiday gathering.
Cheese Plate Contrast
Create a sophisticated serving experience by pairing cookies with a cheese plate. Aged cheddar, brie, or gorgonzola provide a salty contrast that balances the sweetness. Add crackers, grapes, and nuts to round out the spread. The sea salt flakes on the cookies will complement the salty cheese beautifully.
Seasonal Fruit Pairings
In warmer months, serve cookies with fresh berries like raspberries or strawberries. The tartness of the fruit cuts through the richness of the cookies. For a summer twist, try peach slices or mango chunks for a tropical flavor combination.
This pairing works especially well when the cookies are still warm. 🍓
Nutrition facts
Frequently asked questions
Why does this recipe use cornstarch instead of all-purpose flour?
Cornstarch creates that signature chewy texture these cookies are known for! It replaces some of the flour while adding moisture retention, resulting in a softer center that stays gooey even after baking. The recipe balances it with 2.5 cups flour to maintain structure.
Can I make these cookies without vanilla bean paste?
Yes, but the flavor won’t be as rich. Use double the vanilla extract (4 tbsp) and add ¼ tsp ground vanilla bean seeds for depth. For best results, look for pure Madagascar vanilla extract—it has more complex notes than imitation. The paste gives that luxurious aroma that makes these cookies special.
How do I prevent the cookies from spreading too much?
Chill the dough for the full 1-2 hours before baking—this firms up the butter. Also, use cold butter cubes (not softened) and flatten the dough balls slightly before baking. Bake on the middle rack at 350°F for 11-13 minutes—they’ll set as they cool.
Can I substitute white chocolate chips for semi-sweet?
Mix 1 cup semi-sweet with 1 cup white chocolate chips for a sweeter, creamier version. For contrast, try dark chocolate chunks (60% cacao) instead of some white chips. The vanilla swirls will complement both beautifully. Just remember white chocolate melts faster—bake for 1-2 minutes less.
Why do your cookies have swirls while others don’t?
The swirls come from piping vanilla bean paste into half the dough before folding. This creates marbled vanilla pockets throughout each cookie. The paste infuses flavor while the swirls add visual appeal. Skip this step for classic chocolate chip cookies, but you’ll miss out on that signature depth!

- 3lb Prime Rib Roast Recipe: Juicy Pink Center Guaranteed in 3 Hours - October 31, 2026
- 5 Spice Cake Recipe: Warmly Spiced Layers With Crunchy Top - October 31, 2026
- 1950’s Macaroni and Cheese Recipe: Nostalgic Creamy Cheese Sauce with Buttery Noodles - October 31, 2026