
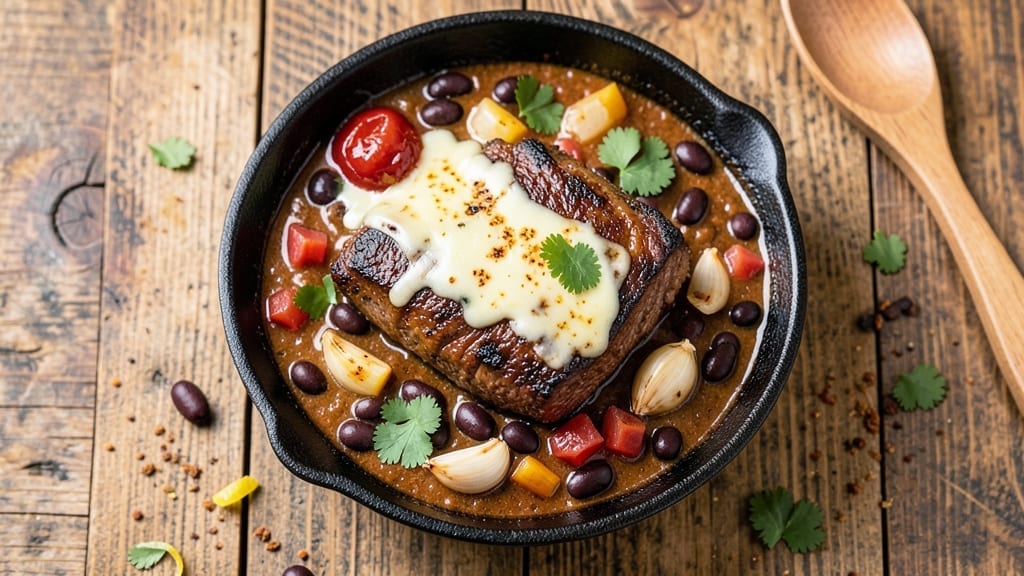
The 24th Street Cafe Bakersfield chili recipe delivers the same hearty, deep-roasted beef and bean masterpiece that made this California staple legendary. This isn’t your average chili—it’s a slow-simmered, chunky masterpiece with layers of smoky flavor that comes from hours of careful roasting and simmering.
The secret lies in the deep caramelization of the beef and the perfect balance of spices that transform simple ingredients into something extraordinary.
What sets this Bakersfield chili apart is its foolproof technique that ensures tender beef, perfectly softened beans, and a rich, thick sauce that clings to every bite. Unlike quick chili recipes, this version requires patience—allowing the flavors to develop over 3-4 hours of simmering creates depth that can’t be rushed.
The result is a dish that’s hearty enough for a crowd but packed with enough flavor to satisfy even the pickiest eaters.
By the time you’re done, you’ll have a pot of chili that’s restaurant-quality—deep red, aromatic, and loaded with chunks of beef that practically melt in your mouth. The beans are tender but still hold their shape, and the sauce is thick enough to coat a spoon without being gluey.
This is the kind of chili that turns weeknight dinners into memorable meals, with every bite delivering that signature Bakersfield flavor.
Serve it with all the classic toppings—shredded cheese, chopped onions, and crispy crackers—or keep it simple and let the chili shine on its own.
The beauty of this recipe is its versatility: it’s perfect for game day gatherings, cozy family dinners, or even a comforting solo meal when you need a taste of home. Let’s get started on recreating this California classic in your own kitchen.
Ingredients for 24th street cafe bakersfield chili
Sixteen ingredients to recreate that legendary Bakersfield chili depth and richness.
| Ingredient | Amount | Notes |
|---|---|---|
| Chuck Roast 🥩 | 3 lb | Well-marbled, cut into 1-inch chunks |
| Kidney Beans 🌱 | 2 cups | Dried, soaked overnight (or 2 cans, drained) |
| Black Beans 🌱 | 1 cup | Dried, soaked overnight (or 1 can, drained) |
| Yellow Onion 🧅 | 2 whole | Chopped, medium dice |
| Garlic Cloves 🧄 | 6 cloves | Peeled, smashed for deeper flavor |
| Tomato Paste 🍅 | ½ cup | High-quality, no sugar added |
| Chili Powder 🌶️ | 2 tbsp | Smoked paprika blend preferred |
| Ground Cumin 🌿 | 1 tbsp | Toasted for richer aroma |
| Dried Oregano 🍃 | 1 tsp | Mexican oregano if available |
| Bay Leaves 🌿 | 2 whole | Fresh if possible, removed before serving |
| Beef Broth 💧 | 4 cups | Low-sodium, homemade preferred |
| Red Wine 🍷 | 1 cup | Bold dry red, like Cabernet Sauvignon |
| Dark Brown Sugar 🍯 | 2 tbsp | For subtle caramelization |
| Salt 🧂 | 1 ½ tsp | Diamond Crystal preferred |
| Black Pepper 🌶️ | ½ tsp | Freshly cracked |
| Olive Oil 🫒 | 2 tbsp | Extra-virgin for roasting |
The beef is non-negotiable here—chuck roast with good marbling is your best bet. I always grab mine from Costco when I’m making a big batch, but the regular supermarket stuff works fine for this recipe. Look for pieces with visible fat—it renders down beautifully during the roasting process, creating that signature rich sauce. The beans? Dried is ideal (soak overnight for best texture), but canned in a pinch. Just drain and rinse them well. For the spices, Penzeys or bulk bins at Whole Foods have the best quality—none of that dusty grocery store stuff. Toast your cumin seeds in a dry pan for 30 seconds before grinding; it makes all the difference.
No red wine? Beef broth with a splash of balsamic works in a pinch, though it won’t have the same depth. The tomato paste can be swapped for crushed tomatoes (1 can, drained), but you’ll lose some of that concentrated umami. For the beans, pinto beans make a great substitute if you’re out of kidney or black. The onions and garlic are where you can get creative—red onions add sweetness if you prefer, and garlic powder at half the amount works if you’re fresh out. The brown sugar might seem odd, but it’s what gives that signature Bakersfield caramelized flavor—don’t skip it. For the broth, homemade is best, but even the good-quality low-sodium store-bought stuff will work.
This chili tastes even better the next day as the flavors meld together. Store it in the fridge for up to 5 days—the sauce thickens beautifully over time. For freezing, portion into quart-sized containers and it keeps for 3 months. I always make a double batch because it disappears fast—game day, potlucks, or just because. The roasted beef chunks reheat perfectly, though I like to add a splash of broth when warming to keep it moist. And if you’ve got leftovers, chili cheese fries are the ultimate way to use them up.
Why You’ll Love This Recipe
- Slow-Cooker Simplicity: I swear by this recipe when I forget to thaw the chuck roast before bed. Toss the frozen meat in with the onions and garlic, add water, and let it do its magic—no chopping, no fuss, just deep, tender flavor by dinner.
- Garlic-Kissed Depth: That first bite of chili where the slow-cooked roast meets the caramelized onions and layers of minced garlic? It’s the kind of rich, savory punch that makes you reach for seconds without thinking.
- Tailgate or Tuesday: This chili is my go-to for game day crowds or when I’m too wiped to cook. The beans hold up perfectly, the meat stays juicy, and honestly? It’s the only chili my picky teenagers won’t complain about.
- Leftovers That Shine: Between us, my freezer’s always stocked with this chili because it improves the next day. Reheat it with a splash of broth, crack some tortilla chips on top, and suddenly, you’ve got a whole new meal for lunch. Zero waste, all win.
Step-by-step instructions for 24th Street cafe Bakersfield chili
Here’s how to build that iconic deep, smoky flavor with tender beef and hearty beans.
Roast the Chuck Roast for Maximum Flavor
Preheat your oven to 425°F and place a large Dutch oven in there to heat up. While it’s heating, rub the 3 lb chuck roast with 2 tablespoons olive oil until completely coated. This helps create a crispy exterior while keeping the meat juicy inside.
Add the roast to the hot Dutch oven and roast for 30 minutes, turning occasionally, until it develops a deep brown crust. Here’s the thing—this initial roast builds flavor that infuses into the chili later. Don’t skip this step; it’s what makes this chili taste like it came from Bakersfield’s famous cafe.
Sauté Onions and Garlic for the Base
Remove the roast from the Dutch oven and set it aside. In the same pot, add 2 tablespoons olive oil and place it over medium heat. Add the chopped 2 whole yellow onion and cook for 8-10 minutes until they soften and begin to caramelize—you’ll smell that sweet, rich aroma developing.
Add the 6 cloves smashed garlic cloves and cook for another 1 minute until fragrant. Here’s where the flavor foundation gets built. The onions should be soft enough to mash slightly with the back of a spoon, but not mushy. This step ensures your chili has that deep, savory backbone.
Build the Chili Base with Wine and Broth
Deglaze the Dutch oven with 1 cup red wine, scraping up all those beautiful browned bits from the bottom. Let it simmer for 3-4 minutes until the alcohol smell dissipates. This step is crucial—it removes the harshness of the wine while adding depth to the flavor.
Add 4 cups beef broth, 0.5 cup tomato paste, 2 tablespoons chili powder, 1 tablespoon ground cumin, 1 teaspoon dried oregano, 2 whole bay leaves, 2 tablespoons dark brown sugar, 1.5 teaspoons salt, and 0.5 teaspoon black pepper. Stir everything together and bring to a gentle boil.
Simmer with Beef and Beans
Return the roast to the Dutch oven and add the 2 cups kidney beans and 1 cup black beans. The beans should be soaked overnight if using dried, or drained if using canned. Partially cover the pot and simmer for 2.5 hours on low heat, stirring occasionally.
Here’s the moment that matters: After about 2 hours, check the beef. It should be fork-tender, falling apart easily. If it’s not quite there, add ½ cup water and continue cooking. The beans should be tender but still hold their shape—this chili needs texture, not mush.
Finish and Adjust for Perfect Texture
Remove the 2 whole bay leaves and adjust the seasoning if needed. Taste the chili and add more salt if necessary—this is where you fine-tune the balance between rich, smoky, and slightly sweet. The chili should be thick enough to coat the back of a spoon but still have a nice, hearty consistency.
Let the chili rest for 15 minutes before serving. This allows all the flavors to meld together perfectly. Serve it hot with shredded cheese, sour cream, and fresh cilantro if you like. The result should be a deep, complex chili with layers of flavor that make every bite satisfying.
Pro Tips For Making 24th Street Cafe Bakersfield Chili
- Brown the Chuck Roast: DESCRIPTION: Don’t just toss in raw meat—sear those chuck roast chunks until they’re deep brown, almost crusty, in a hot pot. I learned this the hard way: skipping this step means your chili will taste more like stewed meat than the rich, caramelized base 24th Street’s version has.
- Soak Those Beans: DESCRIPTION: Drain and rinse your kidney and black beans after soaking, even if they’re canned. I used to skip this, and the chili always ended up muddier. A quick rinse removes excess starch, keeping the texture smooth and letting the flavors shine.
- Simmer Slow and Low: DESCRIPTION: After the initial sear, drop the heat to a bare simmer—just enough to see tiny bubbles. I used to crank it up to speed things along, but that turns the chili into a watery mess. Low and slow (2–3 hours) builds depth, just like the original.
- Toast the Garlic: DESCRIPTION: Don’t just chop and add—sauté those garlic cloves in the pot’s fat until they’re golden, not just fragrant. I was skeptical until I tried it: it adds a nutty richness that cuts through the beans and beef, making the chili taste like it’s been simmering all day.
Common mistakes when making perfect results
Skipping the Roast
I cannot stress this enough—skipping the initial roast is the biggest mistake you can make. That 30-minute roast at 425°F creates a deep, caramelized crust that infuses the chili with smoky depth.
If you’re tempted to skip it for time, at least sear the beef in a hot pan for 5 minutes per side before proceeding. The flavor difference is night and day. 🔥
Under-Soaking Beans
Using dried beans? Soak them overnight—I mean it. If you’re in a rush, at least soak them for 8 hours with a pinch of baking soda to soften them faster. Under-soaked beans will stay tough and grainy, ruining the texture.
Canned beans? Drain and rinse thoroughly to remove excess sodium and starch. Don’t skip this step—it’s what keeps your chili from turning into a mushy mess.
Ignoring the Wine
That 1 cup red wine isn’t just for flavor—it’s the secret to depth. If you omit it, your chili will taste flat. No wine? Use ½ cup beef broth + ½ cup balsamic vinegar as a substitute, but it won’t be the same.
Let the wine simmer until the alcohol burns off (3-4 minutes); this removes harshness and leaves behind rich, fruity notes that balance the spices.
Rushing the Simmer
This chili needs 2.5 hours of low-and-slow simmering—no shortcuts. If you crank the heat, the beef will dry out and the beans will turn mushy. After 2 hours, check the beef: it should fall apart easily.
If it’s still tough, add ½ cup water and keep simmering. Patience here is key—rushing leads to rubbery meat and a thin sauce. Trust the process.
Overlooking the Rest
Letting the chili rest for 15 minutes before serving is non-negotiable. This allows the flavors to meld and the sauce to thicken naturally. Skipping it? You’ll end up with a watery, unevenly seasoned mess.
Use this time to taste and adjust—add salt if needed, but don’t overdo it. The chili will only get better as it sits, so resist the urge to dig in immediately. ✨
Using Low-Quality Spices
Cheap, dusty spices will make your chili taste bland. Invest in Penzeys or bulk spices from a reputable store. Toast your cumin seeds in a dry pan for 30 seconds before grinding—this amplifies their aroma tenfold.
Fresh bay leaves add complexity, so don’t use dried if fresh are available. The spices are the soul of this chili; cut corners here, and you’ll regret it.
Nutrition facts
Frequently asked questions
Why does this chili recipe use red wine?
The 1 cup red wine adds depth and complexity that you just can’t get from broth alone. It brings fruity notes that balance the smoky spices and caramelized beef. Let it simmer for 3-4 minutes to burn off the alcohol before adding other ingredients. No wine? A mix of ½ cup beef broth + ½ cup balsamic vinegar works in a pinch, though it won’t be identical.
Can I make this chili in a slow cooker?
Brown the beef first in a skillet, then transfer everything to your slow cooker. Cook on low for 7-8 hours or high for 4-5 hours. The slow cooker method works well, but you’ll lose some of the deep caramelization from the initial roasting step. For best results, sear the beef separately before adding to the slow cooker.
What’s the best way to reheat leftovers?
Reheat gently on the stove over low heat with a splash of beef broth to restore moisture. Never microwave directly from the fridge—this can make the chili rubbery. For best texture, reheat just until hot (5-7 minutes on low), then let it sit for 2-3 minutes before serving. The chili actually tastes better the next day as flavors meld!
How can I make this vegetarian?
Replace the beef with 2 cups portobello mushrooms (sliced and roasted) plus 1 cup lentils (cooked). Use vegetable broth instead of beef broth and add 1 extra tablespoon smoked paprika for depth. The texture will be different but still hearty. For extra protein, stir in ½ cup crumbled tempeh at the end of cooking.
What makes this Bakersfield-style chili different?
Three key elements: deep-roasted beef (not just seared), the red wine for complexity, and the long simmer time (2.5+ hours). Traditional Bakersfield chili also uses kidney beans as the primary bean for texture, and the brown sugar adds that signature caramelized sweetness. These elements create that iconic rich, smoky flavor profile.

- 3lb Prime Rib Roast Recipe: Juicy Pink Center Guaranteed in 3 Hours - October 31, 2026
- 5 Spice Cake Recipe: Warmly Spiced Layers With Crunchy Top - October 31, 2026
- 1950’s Macaroni and Cheese Recipe: Nostalgic Creamy Cheese Sauce with Buttery Noodles - October 31, 2026