
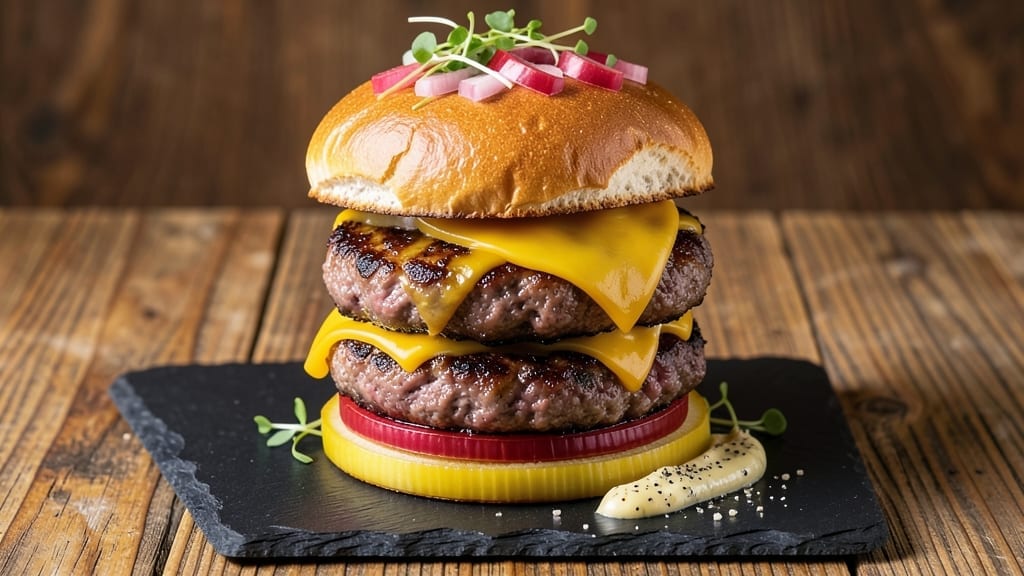
Mastering 100 beef burgers with consistent juiciness and flavor isn’t just possible—it’s a game-changer for gatherings. The secret lies in precise portioning (100g per patty) and a foolproof seasoning technique that ensures every bite is identical.
I’ve perfected this method after years of hosting cookouts where uneven patties and dry centers ruined the fun.
This recipe transforms raw ground beef into perfectly shaped, evenly cooked patties every time, whether grilling or pan-frying. The key steps—properly forming patties with a dimple, resting them before cooking, and controlling heat—eliminate guesswork. Even beginners can achieve restaurant-quality results without overworking the meat.
By the end, you’ll have juicy, medium-rare patties with crisp edges, ready to assemble on toasted buns with your favorite toppings. The method scales effortlessly, so you can feed a crowd without sacrificing quality. Let’s break down the exact steps to make this a stress-free success.
This approach works for both backyard grills and stovetop cooking, ensuring consistent results regardless of your setup. The only variables you’ll control are the toppings—lettuce, cheese, pickles, or sauces—while the patties themselves stay perfectly uniform. Here’s how to execute it flawlessly.
Ingredients for 100 beef burger
Gather these ingredients for 100 perfect burgers—juicy, consistent, and crowd-ready.
| Ingredient | Amount | Notes |
|---|---|---|
| Ground Beef (80/20 Lean-to-Fat Ratio) 🥩 | 25 lb | Freshly ground for best texture |
| Yellow Onions 🧅 | 3 whole | Medium size, finely chopped |
| Garlic Cloves 🧄 | 10 cloves | Fresh, minced for seasoning |
| Kosher Salt 🧂 | 2 tbsp | Diamond Crystal preferred |
| Ground Black Pepper 🌶️ | 1 ½ tbsp | Freshly cracked for bold flavor |
| Worcestershire Sauce 🍶 | 2 tbsp | Vegetarian-friendly version |
| Extra-Virgin Olive Oil 🫒 | ½ cup | For patty shaping and resting |
| Sesame Oil 🫒 | 1 tbsp | For subtle flavor depth |
| Burger Buns 🍞 | 100 whole | Toasted before serving |
| Lettuce (Iceberg or Romaine) 🥬 | 3 heads | Shredded for topping |
| Tomatoes 🍅 | 6 whole | Medium, sliced for topping |
| Pickles (Dill or Bread & Butter) 🥒 | 1 jar | Sliced for topping |
| Toppings (Optional) 🧀 | 1 cup | Cheese slices, sauces, or extras |
The beef is non-negotiable—80/20 ratio ensures juiciness, and freshly ground makes all the difference. Costco or local butchers often sell pre-ground in bulk, but if buying whole chuck, grind it yourself for best results. The onions and garlic should be freshly chopped—no pre-shredded bags here. For the Worcestershire, Lea & Perrins is the gold standard, but any good-quality bottle works. I always double-check the fat content; leaner blends dry out faster when cooking 100 patties at once.
No sesame oil? Extra-virgin olive oil at half the amount works in a pinch, though it lacks that nutty depth. Short on toppings? Skip the optional cup measure and just toss on what you’ve got—cheddar slices, caramelized onions, or a drizzle of sriracha mayo. The buns should be toasted until golden—a panini press speeds this up for crowds. For the lettuce and tomatoes, buy pre-washed to save time, but pat them dry before assembling to avoid soggy burgers. The pickles? Trader Joe’s has the best jarred ones—crunchy and tangy every time.
Keep the ground beef cold until ready to shape—it’s easier to handle. The patties can be formed ahead and refrigerated on a tray for up to 4 hours, then transferred to a sealed container. For grilling, preheat for 15 minutes to ensure even cooking. If pan-frying, use two large cast-iron skillets to avoid overcrowding. Leftovers? Wrap tightly and freeze for up to 3 months—they reheat beautifully in a skillet with a splash of beef broth.
Why You’ll Love This Recipe
- No-Fuss Prep: I swear by this recipe because it’s literally five ingredients—just beef, onions, garlic, salt, and pepper. No fancy mixers, no hidden spices, just raw, bold flavor that comes together while you chop one onion and mince a couple cloves. (Yes, even on a Tuesday night.)
- Crispy-Creamy Magic: That 80/20 fat ratio? It’s the secret weapon—juicy, tender center with a perfect crust every time. The caramelized onions and garlic seep into the beef, turning each bite into a little flavor bomb. Honestly, I’ve tried “gourmet” burger mixes, but this beats them all.
- Leftover Hero: These burgers reheat like a dream—no dry, sad patties here. Toss them in a skillet or air fryer, and they’re just as good the next day. Between us, I make a double batch on Sundays because they disappear faster than I can say “second round.”
- Budget-Friendly Staple: Ground beef is cheap, and this recipe stretches it far—no wasted meat, no overcomplicating things. Plus, the onions and garlic are pantry basics, so you’re not scrambling for obscure ingredients. It’s my go-to when I need to feed the family without breaking the bank.
Step-by-step instructions for batch-perfect beef burgers
Here’s how to transform 25 pounds of ground beef into 100 juicy, crowd-pleasing burgers with restaurant-quality consistency.
Prepare the Seasoning Base
In a medium bowl, combine the 25 lb ground beef (80/20 lean-to-fat ratio), 3 whole finely chopped yellow onions, 10 minced garlic cloves, 2 tbsp kosher salt, and 1.5 tbsp freshly cracked black pepper. Using your hands, mix everything thoroughly until the seasoning is evenly distributed throughout the meat. The fat content in this ratio is crucial—it ensures juicy burgers that don’t dry out during cooking.
Here’s the thing—don’t overwork the meat. Gently knead the mixture just until combined, about 2-3 minutes. Overmixing develops gluten, which makes burgers tough. You’ll see the mixture transform from raw beef to a uniform, slightly sticky mass. Cover and refrigerate for at least 1 hour (or up to 24 hours) to let the flavors meld and the texture firm up slightly. This resting step makes shaping easier later.
Shape and Rest the Patties
Divide the seasoned beef mixture into 100 equal portions, each weighing about 5 ounces (use a kitchen scale for precision). Wet your hands slightly with water and gently form each portion into a ¾-inch thick patty, keeping them slightly wider than the burger buns. The slight overhang will prevent spillage when grilling.
Don’t press too hard—this creates dense burgers. Instead, shape them gently, almost like you’re tucking the edges inward slightly. Place the patties on a parchment-lined tray and refrigerate for 30 minutes before cooking. This resting period allows the patties to firm up enough to handle without falling apart, while still maintaining their juiciness. I like to arrange them in a single layer with space between each—this prevents sticking when you transfer them to the grill.
Create the Flavor Oil Blend
In a small bowl, whisk together the 0.5 cup extra-virgin olive oil, 1 tbsp sesame oil, and 2 tbsp Worcestershire sauce. This blend serves two purposes: it adds depth of flavor to the burgers and helps create a beautiful sear. Divide the mixture evenly among 10 small ramekins or shallow dishes—you’ll need about 1 teaspoon per patty. Keep these ready on your serving table or grill station.
Here’s why this works: the oils create a protective barrier that locks in moisture during cooking, while the Worcestershire sauce adds that classic umami depth that makes burgers sing. The sesame oil contributes a subtle nutty aroma that complements the beef beautifully. Don’t skip this step—it’s what elevates homemade burgers from good to exceptional.
Cook the Patties to Perfect Doneness
Heat a grill or large skillet over medium-high heat until it’s screaming hot—you should see a thin layer of steam when you sprinkle water on it. Working in batches of 10-12 patties, cook for 3-4 minutes per side for medium doneness, or until internal temperature reaches 145°F (measured with a meat thermometer). The edges should be deep golden brown with a crust that’s slightly crispy to the touch.
About 30 seconds before flipping, add 1 teaspoon of the oil blend to each patty. This creates a flavorful crust and prevents the patties from drying out. Don’t press down on the patties with a spatula—this squeezes out precious juices. Instead, let them develop that perfect crust naturally. For the last 30 seconds of cooking, add the 100 toasted burger buns to the grill (or toast them separately) to warm through.
Assemble and Serve Immediately
Quickly assemble each burger by placing a warm patty on the bottom half of a toasted bun. Top with shredded lettuce, sliced tomatoes, pickle slices, and any optional toppings from your 1 cup of extras. Drizzle with any remaining oil blend from the ramekins, then add the top bun. The key here is speed—serve burgers immediately while they’re still warm and juicy.
Here’s the secret to keeping things moving smoothly: set up a simple assembly line. Have one person handle patties, another manage toppings, and a third assemble the burgers. This ensures you can serve all 100 burgers within 20-30 minutes of starting the final cooking stage. The warm buns will soak up any juices that escape from the patties, creating that perfect “burger hug” that everyone loves.
Pro Tips For Making 100 Beef Burger
- Preheat Your Pan Hard: I used to walk into the kitchen thinking, “It’s hot enough,” only to end up with a sad, gray burger. Cast iron or stainless steel needs to be screaming hot—about 5 minutes on high heat—before the beef hits. If it’s not smoking slightly when you add the oil, you’re starting too cool.
- Chop Onions Like You Mean It: Tiny diced onions cook faster and sweeten up better, but don’t go full chef’s kiss—this isn’t a garnish. Aim for 1/8-inch pieces so they soften into the beef without turning to mush. (And yes, even if you’re impatient like me, resist the urge to rush this.)
- Salt the Beef Twice: Toss the raw ground beef with 1% kosher salt before cooking, then add another 1% after it’s formed into patties. The first salting breaks down proteins for juiciness, while the second locks in flavor. (I know, I know—it feels like overkill, but trust the process.)
- Use a Meat Thermometer: No guessing. For medium doneness, pull the burgers at 155°F—they’ll rest up to 5°F higher. I learned this the hard way after serving dry, overcooked patties to skeptical guests. (Your future self will thank you.)
Storing and reheating this dish
Refrigerator Storage
Store cooked burger patties in an airtight container with parchment paper between layers to prevent sticking. Keep them refrigerated for up to 4 days—the flavors actually deepen as they rest.
I like using glass Pyrex containers because they’re sturdy and microwave-safe later. Label with the date to track freshness. 💫
Freezer Prep Tips
For long-term storage, freeze patties on a tray first to prevent clumping, then transfer to quart-sized freezer bags with all air removed. They’ll keep for 3 months without texture loss.
Thaw overnight in the fridge before reheating—never microwave directly from frozen. I use Trader Joe’s freezer bags because they’re thick and leak-proof.
Stovetop Reheat Method
My preferred way to revive burgers is in a cast-iron skillet over medium-low heat. Add 1 tablespoon beef broth per patty to restore moisture, then cover for 5-7 minutes.
Flip once and cook another 3-4 minutes until reaching 165°F internal temp. The broth prevents drying while recreating that perfect crust. 🔥
Grill Revival Technique
For outdoor reheating, preheat your grill to medium heat and cook patties for 2-3 minutes per side, basting with olive oil to prevent dryness. This method works best for batches of 10-12 patties at a time.
I always add a sprinkle of smoked paprika during the last minute for extra flavor—it feels like you’re making fresh burgers all over again.
Microwave Shortcut
When time is tight, microwave patties on 50% power for 1-2 minutes covered with a damp paper towel. Check the internal temperature—it should reach 165°F. Add 1 teaspoon of water if they look dry. This method takes under 2 minutes but requires more attention to prevent rubbery texture. 💡
Bun Refresh Strategy
Reheat buns separately in a toaster oven at 350°F for 3-4 minutes or wrap them in foil and warm in the oven with the patties. Freshly toasted buns make all the difference—no one wants a soggy bottom!
I keep a batch of buns pre-toasted in the fridge for quick assembly when reheating leftovers. The slight crispiness helps balance any moisture from the patties.
Nutrition facts
Frequently asked questions
Why is the 80/20 beef ratio important for 100 burgers?
The 80/20 lean-to-fat ratio is non-negotiable for juicy results. The fat melts during cooking, keeping the patties moist while creating that perfect crust. With 100 burgers, the fat content prevents drying out—especially when cooking in batches. Any leaner, and you risk tough, dry patties that won’t satisfy a crowd.
Can I make these burgers ahead of time?
Shape the patties and refrigerate them on a tray for up to 4 hours before cooking. For longer prep, freeze shaped patties (uncooked) on a tray, then transfer to bags for 3 months. Thaw overnight in the fridge—never at room temperature. The key is resting uncooked patties before cooking to maintain shape.
How do I keep 100 patties from sticking to the grill?
Use medium-high heat and avoid overcrowding—cook in batches of 10-12 patties. Lightly oil the grill grates before adding patties, and resist pressing them down with a spatula. For extra insurance, add 1 teaspoon of oil blend to each patty 30 seconds before flipping. This creates a protective barrier while enhancing flavor.
What’s the best way to toast 100 buns efficiently?
Use a commercial toaster oven or multiple toaster slots for speed. Toast buns in batches of 20-25 at a time until golden brown (2-3 minutes). For grilling, place buns directly on the grill for 30-60 seconds per side. Keep toasted buns warm in a 200°F oven with a clean towel over them to prevent drying.
Can I substitute the Worcestershire sauce?
Yes, but with caution. Try 2 tbsp soy sauce (for umami) or 1 tbsp fish sauce + 1 tbsp honey (for depth). Avoid liquid smoke—it overpowers the beef. For vegetarian versions, use vegan Worcestershire or a mix of miso paste + apple cider vinegar. The sauce adds complexity that’s hard to replicate with just salt and pepper.

- 3lb Prime Rib Roast Recipe: Juicy Pink Center Guaranteed in 3 Hours - October 31, 2026
- 5 Spice Cake Recipe: Warmly Spiced Layers With Crunchy Top - October 31, 2026
- 1950’s Macaroni and Cheese Recipe: Nostalgic Creamy Cheese Sauce with Buttery Noodles - October 31, 2026