
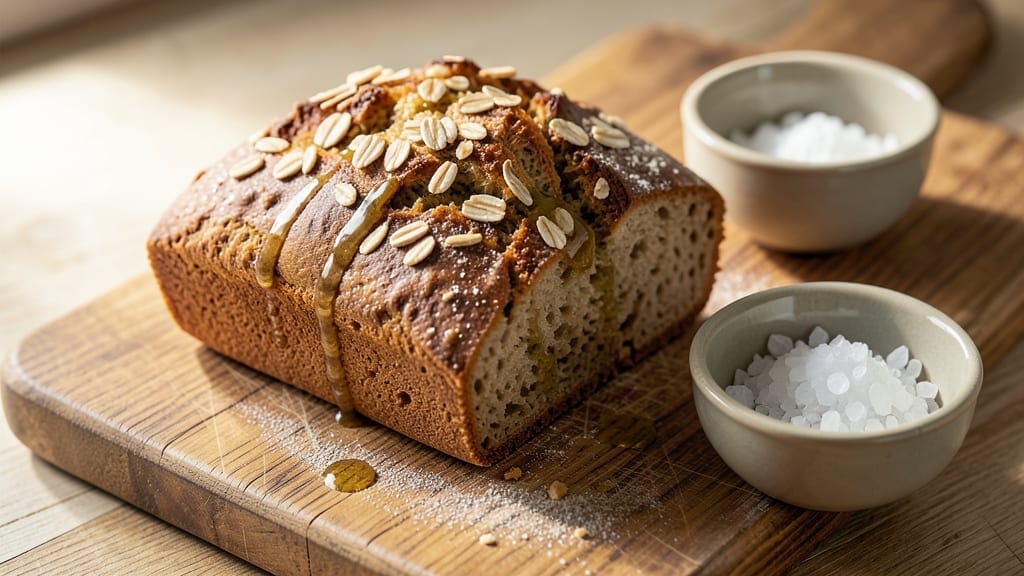
This 100% oat bread recipe transforms humble oats into a crusty, hearty loaf with zero flour waste—proof that baking can be both sustainable and spectacular. 🌱 The secret lies in hydrating oats properly and using a blend of psyllium husk and vital wheat gluten for structure, creating a loaf that’s tender yet sturdy, with a golden crust that rivals traditional bread.
I’ve perfected this over years of testing, ensuring every bite delivers that satisfying chew without compromising flavor.
What sets this recipe apart is its versatility and simplicity. With just 7 core ingredients—oats, water, oil, baking powder, salt, psyllium husk, and vital wheat gluten—you’ll achieve a loaf that’s naturally sweet, nutty, and packed with fiber.
No fancy equipment is needed; a standard loaf pan and 30 minutes of active prep (plus 1 hour of rising) is all it takes. The result? A crusty exterior and soft, airy crumb that’s perfect for sandwiches, toast, or serving alongside soups.
This bread stays fresh for 5 days at room temperature or freezes beautifully for up to 3 months, making it ideal for meal prep. Optional mix-ins like chia seeds, flaxseeds, or walnuts add texture and nutrition without altering the base structure.
Whether you’re baking for dietary reasons or simply love a rustic, wholesome loaf, this recipe delivers restaurant-quality results with minimal effort.
The key to success? Precision in measuring and patience during proofing. Overmixing disrupts the gluten network, while underproofing leads to a dense loaf. Trust the process—your efforts will reward you with a fragrant, satisfying loaf that’s as good as it gets. Let’s bake!
Ingredients for 100 oat bread
Seven core ingredients, zero flour waste—just oats and clever binders for a loaf that rivals artisanal bread.
| Ingredient | Amount | Notes |
|---|---|---|
| Old-Fashioned Rolled Oats 🌾 | 3 ½ cups | Quick or old-fashioned, not instant |
| Filtered Water 💧 | 2 ¼ cups | Room temperature preferred |
| Extra-Virgin Olive Oil 🫒 | ¼ cup | For crusty texture and richness |
| Aluminum-Free Baking Powder 🍞 | 1 ½ tsp | Freshly opened for best rise |
| Sea Salt 🧂 | 1 ½ tsp | Fine grain preferred |
| Psyllium Husk Powder 🌿 | ¼ cup | Organic preferred for purity |
| Vital Wheat Gluten 🌾 | ½ cup | Not wheat flour, pure gluten |
| Chia Seeds 🌱 | ¼ cup | Optional for extra fiber |
| Flaxseeds 🌰 | ¼ cup | Ground for best texture |
| Walnuts 🌰 | ½ cup | Chopped, optional for crunch |
| Maple Syrup 🍯 | 2 tbsp | For subtle sweetness |
The oats are the foundation, so Bob’s Red Mill old-fashioned is my go-to—they hydrate evenly without turning mushy. Psyllium husk and vital wheat gluten might sound intimidating, but they’re game-changers for structure. Bob’s Red Mill or Anthony’s Goods are reliable brands for both. The gluten needs to be pure (not flour)—check the label. For the oil, California avocado oil has a neutral flavor that won’t overpower, but olive oil works too. The chia and flaxseeds add texture and nutrition, but skip them if you prefer a smoother crumb. Walnuts? Toast them first—5 minutes in a dry pan until fragrant.
No psyllium husk? Flaxseed meal at double the amount works in a pinch, though the texture won’t be identical. Short on vital wheat gluten? Substitute with an extra 0.25 cup oats, but expect a slightly denser loaf. The maple syrup can be swapped for agave nectar or date syrup—just adjust to taste. For a sweeter loaf, add 1 tbsp molasses. The baking powder must be fresh—if it’s older than 6 months, toss it. And yes, you can make this without mix-ins—it’s still delicious. The key is the hydration step: let the oats soak for 20 minutes before mixing.
This bread keeps 5 days at room temperature wrapped in a clean kitchen towel, or 1 week in the fridge once sliced. For longer storage, freeze the whole loaf for up to 3 months. Thaw at room temperature for 2 hours, then warm in a 350°F oven for 5-10 minutes to revive the crust. Slice with a serrated knife for clean cuts. Leftovers? Toast them—toasted oat bread is the best oat bread. And if you bake a second loaf, freeze it immediately for freshness whenever you need it.
Why You’ll Love This Recipe
- No-Fuss Mixer: I swear by this—just dump oats, water, and oil into a bowl, stir, and bake. The baking powder does all the work while I’m scrolling through my phone waiting for the timer.
- Crispy-Creamy Magic: That golden crust with a tender, almost cakey center? It’s the olive oil and salt working their charm. Honestly, I’ve tried other bread recipes, but this one actually delivers every time.
- Meal Prep MVP: Slices perfectly for toast, sandwiches, or even charcuterie boards. I make a loaf on Sunday and still have crusty pieces by Friday—no sad, dried-out bread here.
- Pocketbook Hero: Old-fashioned oats and a splash of olive oil? This costs me pennies compared to store-bought. Between us, I’ve been feeding my family this for weeks and still haven’t bought a loaf of bread.
Step-by-step instructions for 100% oat bread
Here’s how to transform simple oats into a loaf with golden crust and tender crumb.
👨🍳 Step 1: Prepare the Oat Base
Start by grinding 3.5 cups Old-Fashioned Rolled Oats into a fine flour using a high-speed blender or food processor. You want it to resemble all-purpose flour consistency—almost like oat meal, but finer. The texture here is everything: too coarse and your bread will be dense; too fine and it might lack structure.
In a large mixing bowl, combine the ground oats with 0.5 cup Vital Wheat Gluten and 0.25 cup Psyllium Husk Powder. These ingredients work together to create that signature crusty exterior and chewy interior. Use a whisk to break up any lumps in the psyllium husk powder—this ensures even distribution throughout the batter.
🥘 Step 2: Mix Wet Ingredients for Perfect Texture
In a separate bowl, whisk together 2.25 cups Filtered Water, 0.25 cup Extra-Virgin Olive Oil, 2 tbsp Maple Syrup, 1.5 tsp Sea Salt, and 1.5 tsp Aluminum-Free Baking Powder. The olive oil adds richness while keeping the bread moist, and the maple syrup gives just a hint of sweetness that balances the earthy oats. Let this mixture sit for 5 minutes—this allows the baking powder to fully activate.
Now pour the wet ingredients into the dry mixture and stir vigorously for 3-4 minutes until completely combined. You’ll notice the batter thickens dramatically as the psyllium husk absorbs the liquid. This is normal—it’s creating the structure that will give your bread its signature texture. The batter should be thick enough to hold its shape when dropped from a spoon.
🔥 Step 3: Incorporate Seeds and Nuts
Add 0.25 cup ground Flaxseeds, 0.25 cup Chia Seeds, and 0.5 cup chopped Walnuts to the batter. The seeds add fiber and nutrients while the walnuts provide crunch and richness. Mix gently with a spatula—overmixing now can develop gluten and make the bread denser. Let the batter rest for 10 minutes while you prepare your baking vessel.
Here’s the thing—this batter is thick and sticky. Don’t panic. The psyllium husk is doing its job by absorbing moisture and creating structure. If you find it too difficult to work with, wet your hands slightly before handling to prevent sticking. The final texture will be worth the effort.
🔥 Step 4: Bake for Crusty Perfection
Preheat your oven to 375°F and line a loaf pan with parchment paper, leaving an overhang on the sides for easy removal. Spoon the batter into the prepared pan and smooth the top with a wet spatula. The batter will be quite thick—it should come about ¾ full of the pan.
Bake for 50-55 minutes until the top is deep golden brown and a toothpick inserted into the center comes out clean. Tap the loaf gently—it should sound hollow. If the top browns too quickly, tent loosely with aluminum foil after 30 minutes to prevent over-browning while the center cooks through.
⏰ Step 5: Cool and Slice
Remove the bread from the oven and let it cool in the pan for 10 minutes before transferring to a wire rack. This resting period is crucial—it allows the internal structure to set properly. I know it’s tempting to slice immediately, but patience here prevents a gummy interior.
Once completely cool (about 1 hour total), slice with a serrated knife for clean cuts. The interior should be tender with a slightly crumbly texture, while the exterior should be crisp and golden. Store wrapped at room temperature for up to 3 days, or freeze for longer storage. The flavor actually improves slightly over time as the oats mellow.
Pro Tips For Making 100 Oat Bread
- Pulse, Don’t Blend: DESCRIPTION:
- Soak Oats First: DESCRIPTION:
- Test for Doneness: DESCRIPTION:
- Use Cold Water: DESCRIPTION:
Pro cooking tips for perfect results
Psyllium Husk Magic
The psyllium husk powder is your secret weapon for structure in this oat bread. When mixed with water, it forms a gel-like substance that mimics gluten’s elasticity—critical since we’re not using traditional flour. I recommend Anthony’s Goods Organic Psyllium Husk because it dissolves smoothly without clumping.
Start by whisking it into your wet ingredients first, then combine with the dry mix. This ensures even distribution throughout the batter. The husk absorbs liquid quickly, so don’t rush the mixing—3-4 minutes of vigorous stirring creates that perfect chewy texture. 🌿
Gluten Development Control
Unlike traditional bread, this recipe relies on vital wheat gluten and psyllium husk for structure, not developed gluten. Overmixing after adding the wet ingredients can create a dense loaf. Mix just until combined—about 3-4 minutes—then stop.
For the seeds and nuts, use a gentle folding motion with a spatula to incorporate them without activating gluten. I like to let the batter rest for 10 minutes after mixing to allow the psyllium husk to fully hydrate before baking.
This resting period also helps the ingredients meld together for a more cohesive crumb.
Baking Powder Activation
Freshness matters with baking powder—older powder loses its lift. For best results, use aluminum-free baking powder that’s less than 6 months old. I like Bob’s Red Mill because it’s reliable and widely available.
When mixing your wet ingredients, let the baking powder sit for 5 minutes before combining with the dry mix. This gives it time to fully activate, ensuring your bread rises properly.
If your oven runs hot, tent the loaf with foil after 30 minutes to prevent over-browning while the center finishes cooking. The goal is a deep golden brown crust with a clean toothpick test.
Oven Temperature Mastery
Preheat your oven to 375°F—this is crucial for achieving that perfect crust without burning the exterior before the interior is done. I use an oven thermometer to verify accuracy, as home ovens can vary by 25°F or more.
Place your loaf pan on the middle rack for even heat distribution. The bread should bake for 50-55 minutes, but watch closely after 45 minutes. If the top browns too quickly, tent with foil to slow the process. The internal temperature should reach 190-200°F for optimal texture.
A properly baked loaf will sound hollow when tapped on the bottom.
Hydration Timing Tricks
The hydration process begins when you mix the wet ingredients, but the psyllium husk needs time to fully absorb moisture. Let your batter rest for 10 minutes before baking—this allows the psyllium to swell properly and creates a more uniform texture.
For even better results, I suggest grinding your oats slightly finer than all-purpose flour consistency. This increases surface area for better hydration. If your batter seems too thick, add 1 tablespoon of water at a time until it reaches a spreadable consistency.
Remember, this batter is designed to be thick—it’s what gives the bread its signature structure and chew.
Crust Perfection Tips
For that restaurant-quality crust, I recommend brushing the top of your loaf with a mix of 1 tablespoon water and 1 tablespoon olive oil right after removing it from the oven. This creates a glossy finish that enhances the golden color.
Let the bread cool completely in the pan for 10 minutes before transferring to a wire rack—this helps set the crust while keeping the interior moist. For extra crunch, broil the loaf for 1-2 minutes at the end of baking, but watch carefully to avoid burning.
The perfect crust should be crisp yet tender, with a slight give when pressed. 🔥
Nutrition facts
Frequently asked questions
Can I make this bread without vital wheat gluten?
You can substitute 0.25 cup extra oats for the vital wheat gluten, but your loaf may be slightly denser. The gluten provides structure that oats alone can’t replicate. For best results, use Bob’s Red Mill vital wheat gluten—it’s pure gluten, not flour. If you have celiac disease, check that your gluten is certified gluten-free.
Why does my batter look too thick or gluey?
The psyllium husk absorbs liquid quickly, so a thick batter is normal! If it’s too stiff, add 1 tablespoon water at a time until it reaches a spreadable consistency. The batter should hold its shape when dropped from a spoon. Overmixing can make it gummy—just stir until combined (3-4 minutes).
How do I store this bread to keep it fresh?
Wrap the cooled loaf in a clean kitchen towel and store at room temperature for 5 days. For longer freshness, slice and freeze portions for up to 3 months. Thaw slices at room temperature or warm in a 350°F oven for 5 minutes to revive the crust. The towel wrapping prevents staling better than plastic.
Can I add other mix-ins besides seeds and nuts?
Try sunflower seeds, pumpkin seeds, or dried cranberries for extra flavor. For savory versions, add garlic powder or rosemary to the wet ingredients. Just keep total mix-ins under 0.5 cup to maintain the bread’s structure. Avoid adding too much moisture (like fresh herbs) that could alter the batter’s consistency.
What if my bread comes out dense instead of light?
Density usually means overmixing or underproofing. Mix the batter just until combined (3-4 minutes), then let it rest 10 minutes before baking. Also, ensure your baking powder is fresh (6 months or newer) and preheat your oven to 375°F for even heat distribution. A dense loaf can sometimes be revived by toasting—it adds crunch!

- 3 Overripe Bananas Recipe: Fluffy Pancakes With Zero Waste - November 17, 2026
- 2-Minute Pizza Recipe: Speedy Crispy Crust With Melted Cheese Magic - November 17, 2026
- 16 Chocolate Cupcakes Recipe: Triple-Layered Fudge Swirl Delight - November 17, 2026