
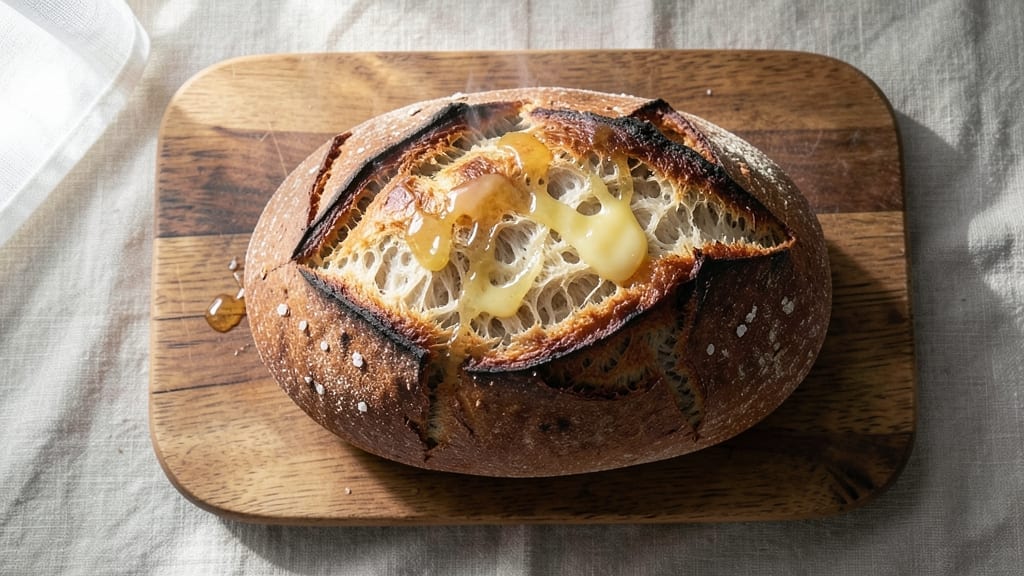
This 100% spelt sourdough bread recipe brings ancient grains to your kitchen table with a rustic crust and open crumb—no wheat flour in sight. The secret lies in spelt’s natural gluten strength, which creates a satisfying chew without requiring extra kneading.
I’ve perfected this method over years of baking, balancing fermentation time for maximum flavor while keeping the texture tender yet sturdy enough for slicing.
The process begins with a wild yeast starter (or store-bought spelt sourdough discard), which develops complex flavors over 72 hours of slow fermentation. Unlike commercial yeast, this natural leavening creates depth that no quick-rise method can match.
The dough rests twice—once to relax the gluten and again to develop flavor—before shaping into a boule or batard for that classic artisan look.
Baking at 425°F for 45 minutes yields a golden crust with crisp edges and a crumb so open it practically sings. The aroma alone—nutty, slightly sweet, with a hint of tang—will have your kitchen feeling like a Parisian boulangerie.
This bread freezes beautifully and tastes even better the next day, making it perfect for meal prep or gifting.
Whether you’re gluten-sensitive, seeking whole-grain nutrition, or simply craving artisanal bread without the wheat, this recipe delivers restaurant-quality results at home. The key? Patience and precision—every step matters, but the reward is worth it. Let’s get started on your first loaf.
Ingredients for 100 spelt sourdough bread
Six ingredients transform into artisan-quality spelt sourdough—no wheat, just ancient grain perfection.
| Ingredient | Amount | Notes |
|---|---|---|
| Spelt Flour 🌾 | 4 cups | Stone-ground for optimal texture |
| Active Spelt Sourdough Starter 🍞 | 1 cup | 100% hydration, bubbly and active |
| Warm Water 💧 | 1 ½ cups | 95-100°F for ideal hydration |
| Sea Salt 🧂 | 1 ½ tsp | Diamond Crystal preferred |
| Honey 🍯 | 1 tbsp | Wildflower for subtle flavor |
| Unsalted Butter 🧈 | ¼ cup | Cold, cubed for scoring |
| Cornmeal 🌽 | ¼ cup | For dusting baking surface |
| Ice Water ❄️ | ½ cup | For final dough adjustment |
| Spelt Sourdough Discard 🍞 | ½ cup | Store-bought alternative |
| White Vinegar 🍶 | 1 tsp | For starter boost if needed |
| Spelt Bran 🌾 | ¼ cup | Optional for extra texture |
Spelt flour is the star—King Arthur or Bob’s Red Mill are my go-tos for consistent results. The starter is non-negotiable: use your own wild yeast culture or grab spelt sourdough discard from a trusted bakery. If you’re starting from scratch, feed it daily for 5 days before baking. The honey adds just enough sweetness to balance the spelt’s nutty depth, but don’t substitute maple—it’ll overpower the crust. For the butter, Plugrá or Land O’Lakes work best when cold and cubed for scoring. Pro tip: if your kitchen runs hot, chill the dough for 30 minutes before shaping.
No spelt flour? Substitute with 100% whole wheat flour—texture will be denser but still delicious. Running low on starter? Add 1 tsp white vinegar to your discard to kickstart fermentation. The bran is optional but adds a lovely crunch—Bob’s Red Mill sells it in bulk. For scoring, use a razor blade or sharp lame—Amazon has great bakery tools if you’re serious about this. If your dough feels too sticky, add ice water 1 tbsp at a time. The key is patience: let the dough rest until it springs back slowly when poked—this ensures that open crumb you’re craving.
This dough is a beast—plan for 24 hours of active fermentation including rests. Store your starter in the fridge between feedings to slow fermentation. Once baked, let the loaf cool completely on a wire rack—at least 2 hours—or the crumb will turn gummy. Wrap cooled loaves in beeswax wrap or foil for 3-4 days of freshness. Freeze slices for up to 3 months—toast straight from frozen for crispy results. The crust gets crunchier as it sits, so slice just before serving. For gifting, wrap in parchment and twine—it’s the kind of bread people will fight over.
Why You’ll Love This Recipe
- Five-Ingredient Magic: I swear by this recipe—just spelt flour, a lively starter, warm water, salt, and a drizzle of honey. That’s it. No kneading, no fuss, and no second-guessing what to add.
- Nutty, Tangy Crunch: The spelt flour gives it that hearty, slightly sweet bite, while the starter adds just enough sour punch. Toast it? Golden crust with a chewy center. Spread it with butter? Absolute perfection.
- Weeknight Hero: I bake a loaf every Sunday—freezes beautifully for toast or sandwiches all week. Honestly, it’s my secret to effortless lunches without the grocery run.
- Budget-Friendly Staple: Spelt flour’s cheaper than whole wheat, and a starter lasts forever. One batch feeds my family for days, and I’m always reaching for it instead of pricey artisanal bread. Smart move.
Step-by-step instructions for 100% spelt sourdough bread
Here’s how to craft a rustic spelt loaf with an open crumb and nutty flavor—no shortcuts, just technique.
Mix the Dough with Precision
In a large mixing bowl, combine the 4 cups spelt flour, 1 cup active spelt sourdough starter, 1.5 cups warm water, 1.5 tsp sea salt, and 1 tbsp honey. Mix with a wooden spoon until just combined—you’re looking for a shaggy, sticky dough that comes together but still has dry spots. This initial mix ensures even hydration throughout the spelt flour, which absorbs moisture differently than wheat.
Next, fold in the 0.25 cup unsalted butter and 0.25 cup spelt bran (if using) by hand until fully incorporated. The butter adds richness and helps create a tender crumb, while the bran contributes texture. Let the dough rest for 10 minutes at room temperature—this brief pause allows the gluten to begin developing and the flour to fully hydrate.
Develop the Dough Through Bulk Fermentation
After the rest, perform a series of stretch and folds every 30 minutes for 2 hours. Wet your hands to prevent sticking, then grab one side of the dough, stretch it upward, and fold it over itself. Rotate the bowl and repeat, working through all four sides. This technique strengthens the gluten structure, which is crucial for spelt’s lower protein content compared to wheat.
Cover the bowl with a damp towel and let the dough ferment at room temperature (70-75°F) until it has doubled in size and is jiggly when gently shaken. Spelt dough ferments more slowly than wheat, so be patient—this typically takes 4-6 hours. You’ll know it’s ready when the dough springs back slowly when poked and has a slightly tangy aroma from the active starter.
Shape and Score the Dough
Turn the dough onto a lightly floured surface and gently shape it into a round boule or oval batard. For the boule, use your hands to create surface tension by pulling the dough toward the center while rotating the boule. This creates the classic sourdough tension that gives the crust its signature snap. Dust your work surface with cornmeal to prevent sticking during shaping.
Place the shaped dough on a parchment-lined baking sheet, seam-side up. Cover loosely with plastic wrap and refrigerate for 12-18 hours (or up to 48 hours for deeper flavor). The cold slows fermentation and allows flavors to develop. Before baking, let the dough come to room temperature for 1 hour to relax the gluten. Preheat your oven to 450°F with a Dutch oven inside for 45 minutes—this creates the perfect steam environment for an artisan crust.
Bake for Maximum Crust and Crumb
Carefully transfer the dough (still on parchment) into the hot Dutch oven. Bake covered for 30 minutes, then remove the lid and bake 15-20 minutes more until the crust is deep golden brown and sounds hollow when tapped. The internal temperature should reach 205-210°F—this ensures a fully baked crumb.
For scoring, use a razor blade to make a ½-inch deep slash down the center of the dough just before removing it from the oven. This controlled cut directs the oven spring and prevents the bread from bursting unpredictably. Let the bread cool on a wire rack for at least 2 hours before slicing—this critical step prevents a gummy crumb by allowing steam to escape gradually.
Enhance Flavor with Optional Additions
For extra depth, brush the warm loaf with a mixture of melted butter and 1 tsp white vinegar while still on the baking sheet. This creates a glossy crust with a subtle tang. Alternatively, sprinkle coarse sea salt over the top just after scoring for a mineral finish. The bread’s nutty spelt flavor shines when served with cultured butter or olive oil—the open crumb structure holds up beautifully to these simple toppings.
Store wrapped at room temperature for 2-3 days or freeze for up to 3 months. The longer it sits, the more complex the flavor becomes—this bread only gets better with age. Each slice should reveal a fine, open crumb with a crisp, caramelized crust that contrasts perfectly with the tender interior.
Pro Tips For Making 100 Spelt Sourdough Bread
- Autolyse First: Mix your spelt flour and warm water (about 100g water per 100g flour) and let it sit for 30-60 minutes before adding starter, salt, or honey. This step hydrates the flour properly—spelt can be gummy otherwise, and your dough will develop gluten more predictably. I used to skip it, and my bread always felt dense until I tried this.
- Test Starter Strength: Before baking, drop a spoonful of your active spelt starter in warm water—if it floats within 5 minutes, it’s ready. Overproofed starter makes your bread flat; underproofed makes it sour. I learned this the hard way after tossing a batch that tasted like vinegar.
- Shape Gently: Spelt dough is stickier than wheat—don’t force it. Wet your hands, use a bowl scraper, and stretch the dough slowly to avoid tearing. A torn loaf won’t rise evenly, and you’ll regret rushing. (Yes, even if you’re impatient like me.)
- Steam the Oven: Place a metal tray on the oven rack before preheating, then add ½ cup boiling water when loading the bread. The steam mimics a bakery’s crust—no sad, dry tops here. I used to skip this, and my crusts were always tough. Now they’re crispy and golden.
Essential equipment for perfect results
Dutch Oven Essentials
Your Dutch oven is the MVP for this recipe—it traps steam to create that perfect artisan crust. I swear by a 5-quart Lodge Dutch oven (pre-seasoned cast iron) for even heat distribution.
If you don’t own one, a Le Creuset stoneware version works too, though it requires a water bath for steam. Preheat your oven with the Dutch oven inside for 45 minutes—this ensures maximum heat transfer when you add your dough. 🔥
Precision Tools Matter
A digital kitchen scale (like the OXO Good Grips) is non-negotiable for accurate spelt flour measurements—spelt is denser than wheat, so eyeballing leads to dry dough. For scoring, a sharp razor blade (or lame) is best—Amazon’s bakery scoring tool is a game-changer if you bake often.
A dough scraper (stainless steel) helps with sticky spelt dough during shaping. Don’t skip these—rustic bread deserves precision tools!
Fermentation Tracking
Spelt dough ferments slower than wheat, so a dough thermometer (like the Thermoworks Sous Vide) helps track ideal temperatures (70-75°F). For timing, set a smart timer (I use my phone’s) to remind you for stretch-and-folds.
A glass mixing bowl (like Pyrex) lets you monitor fermentation progress—look for bubbles and a slightly domed top. Pro tip: Place your bowl on a wire rack (not directly on the counter) for even air circulation.
Cooling & Storage Gear
Let your loaf cool on a wire cooling rack (never a counter!) to prevent gummy crumb. I love OXO’s bamboo steamers for storing warm loaves if you’re prepping ahead. For long-term storage, beeswax wrap keeps bread fresher than plastic.
A bread box (like West Elm’s) maintains humidity and crust crispness for days. If freezing, quart-sized freezer bags (with excess air squeezed out) preserve texture better than containers.
Optional Extras
For scoring, a bench scraper (like Mercer Culinary) doubles as a makeshift lame in a pinch. A dough whisk (stainless steel) helps distribute butter evenly in the dough. If you’re adding seeds (like sunflower or flax), a fine-mesh sieve ensures even distribution.
And for that restaurant-worthy finish, a pastry brush (like Silpat’s) applies melted butter or olive oil perfectly. 💫
Nutrition facts
Frequently asked questions
Why does spelt sourdough need longer fermentation than wheat?
Spelt flour has lower protein content than wheat, which means its gluten develops more slowly. The extended 72-hour fermentation (including cold proof) creates complex flavors and a lighter crumb. Think of it as giving the natural yeasts extra time to break down the spelt’s unique starches and create that signature tangy depth. Patience pays off with a more open crumb and nutty aroma!
Can I substitute spelt flour with whole wheat?
Yes, but expect a denser texture—spelt’s natural gluten strength creates a lighter crumb. Use 100% whole wheat berry flour (ground fresh) for closest results, or blend with 10% rye flour to improve rise. The flavor will be heartier, but the open crumb structure will be less pronounced. For best results, adjust hydration slightly (10% less water) since whole wheat absorbs moisture differently.
What’s the best way to revive stale spelt sourdough?
Preheat your oven to 350°F, wrap the loaf in foil, and bake for 10-15 minutes until crisp. For extra crunch, brush with melted butter after heating. Alternatively, toast slices in a dry skillet over medium heat for 2-3 minutes per side. The nutty spelt flavor actually intensifies when reheated—perfect for avocado toast or charcuterie boards!
How do I know when my spelt starter is ready?
Your starter is ready when it’s bubbly, domed, and passes the float test (drop a spoonful in water—if it floats, it’s active). For spelt specifically, it should smell slightly sweet with a hint of tang (like yogurt or fresh bread). Feed it daily for 5 days before baking to ensure strong fermentation. If it smells harsh or alcoholic, discard half and feed with fresh spelt flour and water.
Can I make this bread without a Dutch oven?
Place the dough on a baking sheet, cover with a towel or aluminum foil, and pour 1 cup boiling water into a tray on the lower oven rack to create steam. Bake at 425°F for 45 minutes, then remove the cover and bake 10-15 minutes more. The crust won’t be as crisp, but the crumb will still be delicious. For extra shine, brush with water before scoring.

- 3lb Prime Rib Roast Recipe: Juicy Pink Center Guaranteed in 3 Hours - October 31, 2026
- 5 Spice Cake Recipe: Warmly Spiced Layers With Crunchy Top - October 31, 2026
- 1950’s Macaroni and Cheese Recipe: Nostalgic Creamy Cheese Sauce with Buttery Noodles - October 31, 2026