
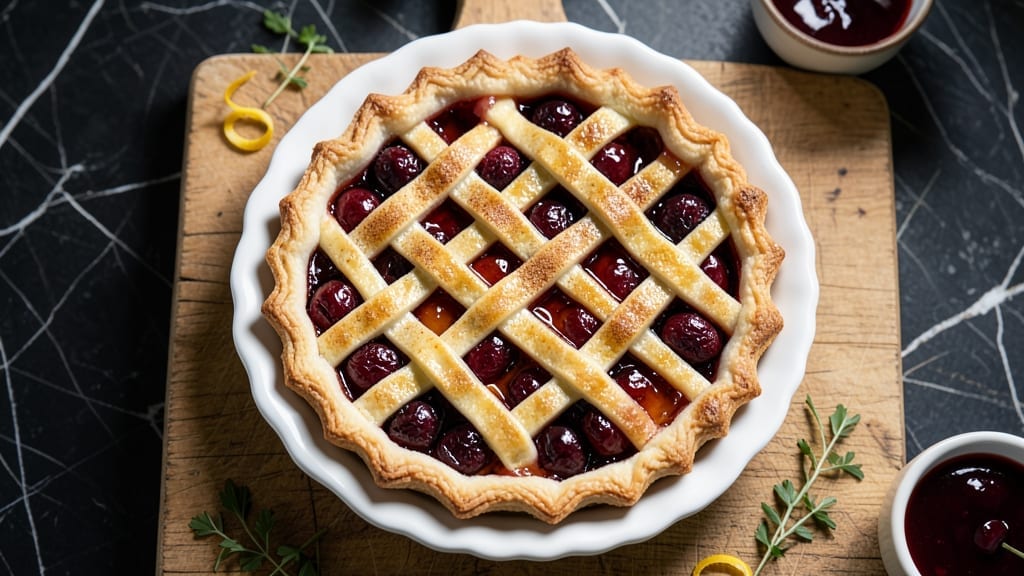
This 6-inch cherry pie recipe delivers all the classic comfort of a traditional pie in a perfectly portable size—ready in just 45 minutes.
The secret lies in a foolproof lattice crust that stays crisp while the filling bubbles with juicy, spiced cherries, creating a balance of textures that makes every bite irresistible.
I developed this recipe after years of perfecting mini desserts for potlucks and family gatherings, where the demand for individual-sized pies always outpaced the traditional 9-inch versions.
The beauty of this recipe is its simplicity: you can use store-bought crusts for convenience or roll out your own for that homemade touch.
A thickened cherry filling—simmered with cornstarch and a touch of vanilla—ensures a perfect set without turning mushy, while a lattice design adds visual appeal and keeps the crust flaky. The 45-minute timeline includes prep and baking, making it ideal for weeknight desserts or last-minute celebrations.
What you’ll end up with is a pie that’s golden, fragrant, and bursting with flavor—each slice offering the perfect mix of tender crust, juicy cherries, and a hint of spice.
The lattice pattern not only looks stunning but also creates pockets of airy, crispy edges that contrast beautifully with the soft filling. Serve warm with a scoop of vanilla ice cream or a dollop of whipped cream for the ultimate comfort experience.
This recipe scales effortlessly for parties—just double the filling and crust—and the 6-inch size makes it perfect for picnics, office gatherings, or anytime you crave a single serving of pure dessert satisfaction. The technique is beginner-friendly, but the results feel like a bakery masterpiece. Let’s get baking!
Ingredients for 6 inch cherry pie
The magic of this 6-inch cherry pie lies in its perfect balance of juicy filling and crisp lattice crust.
| Ingredient | Amount | Notes |
|---|---|---|
| Fresh Pitted Tart Cherries 🍒 | 2 ½ cups | Frozen works perfectly, no thawing needed |
| Granulated Sugar 🍚 | ¾ cup | Superfine for faster dissolving |
| Cornstarch 🌾 | 2 tbsp | For perfect thickened filling |
| Vanilla Extract 🌿 | 1 tsp | Pure, high-quality vanilla |
| Lemon Juice 🍋 | 2 tbsp | Freshly squeezed for brightness |
| Cinnamon 🌶️ | 1 tsp | Ground, aromatic variety |
| Salt 🧂 | ¼ tsp | Fine sea salt for balance |
| Unsalted Butter 🧈 | ½ cup | Cold, cubed for lattice |
| All-Purpose Flour 🌾 | 1 ¼ cups | Plus 1 tbsp for rolling |
| Ice Water 💧 | ⅓ cup | For dough elasticity |
| Egg Yolk 🥚 | 1 whole | For egg wash |
| Heavy Cream 🥛 | 1 tbsp | Optional for lattice brushing |
The cherries are the star—fresh or frozen, they need to be pitted and juicy. Trader Joe’s frozen cherries work perfectly if you’re short on time, but fresh from a local orchard? Absolutely worth the extra effort. The sugar and cornstarch duo is non-negotiable for that perfect thickened filling—no gummy texture here. I always grab Bob’s Red Mill cornstarch for its fine grind, which dissolves beautifully. For the crust, King Arthur flour gives that tender, flaky texture, but any all-purpose will do in a pinch. The key is keeping everything cold until the last minute—this isn’t a recipe for shortcuts.
No vanilla extract? Vanilla bean paste works just as well, or you can use vanilla sugar at half the amount. Running low on cornstarch? Arrowroot powder is a 1:1 substitute. The lemon juice is crucial—it brightens the cherries and balances the sweetness. If you’re using frozen cherries, don’t thaw them—just toss them straight into the simmering filling. For the crust, if you’re making it from scratch, chill the dough for at least 30 minutes before rolling. Store-bought crusts work too, but homemade makes all the difference in that crisp lattice design.
This pie is best served warm, straight from the oven—golden crust, bubbling filling. Store leftovers in an airtight container at room temperature for up to 2 days, though I’ve never had any last that long. For the crust, wrap it tightly in plastic wrap to maintain crispness. The filling reheats beautifully—just warm in the microwave for 20-30 seconds and enjoy. Freezing isn’t recommended for the crust, but you can freeze the filling separately for up to 3 months—just bake fresh crust when ready.
Why You’ll Love This Recipe
- No Pitting Drama: I’ll be real—pitting cherries is a nightmare. But here, you grab pre-pitted ones (or just toss whole cherries in the oven for 10 minutes to soften), and suddenly this pie feels like a weekend project, not a chore. That lemon juice? It keeps the filling bright without extra fuss.
- Sweet-Tart Magic: That first bite of warm, juicy cherries with just a hint of vanilla and a whisper of lemon? It’s like summer in a slice. The cornstarch thickens the filling perfectly—no gummy texture, just that just-right balance where every spoonful is crave-worthy.
- Weeknight Dessert Hack: Slice it into wedges, and it’s the easiest way to impress guests who think you’re a baking genius. Too big for one? Pop the rest in the fridge for up to 3 days—still delicious cold, and way better than store-bought.
- Budget-Friendly Luxury: Fresh cherries might seem pricey, but a single can of tart cherries (or frozen) stretches this recipe into multiple pies. Plus, the sugar and cornstarch are pantry staples, so you’re basically making gourmet dessert for pennies. (Yes, even on a Tuesday night.)
Step-by-step instructions for 6-Inch cherry pie
Here’s how to create a perfect mini cherry pie with a flaky crust and luscious filling.
Prepare the Cherry Filling
In a medium saucepan, combine the 2.5 cups fresh pitted tart cherries, 0.75 cup granulated sugar, 2 tbsp cornstarch, 1 tsp vanilla extract, 2 tbsp lemon juice, 1 tsp cinnamon, and 0.25 tsp salt. Stir gently to coat the cherries evenly with the sugar mixture.
Place the saucepan over medium-high heat and bring the mixture to a gentle boil, stirring constantly to prevent scorching. Once boiling, reduce the heat to medium-low and let it simmer for 5-7 minutes until the filling thickens noticeably. You’ll know it’s ready when it coats the back of a spoon smoothly and the cherries have softened slightly. Remove from heat and let cool completely before filling the crust.
Make the Pie Crust Dough
In a large mixing bowl, combine the 1.25 cups all-purpose flour and 0.25 tsp salt. Cut in the 0.5 cup cold unsalted butter using a pastry cutter or your fingers until the mixture resembles coarse crumbs with pea-sized butter pieces remaining.
Gradually add the 0.33 cup ice water, 1 tbsp at a time, mixing gently with a fork until the dough just comes together. Be careful not to overmix—just until the dough holds when pressed. Turn the dough onto a lightly floured surface and knead lightly 3-4 times, then divide into two equal discs. Wrap each in plastic wrap and refrigerate for 30 minutes to firm up.
Roll and Assemble the Crusts
Preheat your oven to 375°F. On a lightly floured surface, roll out one disc of dough to a 7-inch circle, about 1/8-inch thick. Transfer to a 6-inch pie dish and gently press into the bottom and up the sides. Trim any excess dough hanging over the edge.
Pour the cooled cherry filling into the crust, mounding it slightly in the center. Roll out the second disc of dough to a 6-inch circle and cut into 1/2-inch strips using a sharp knife or pizza cutter. Arrange the strips in a lattice pattern over the filling, leaving the center open for steam to escape. Brush the lattice with the 1 tbsp heavy cream for extra shine.
Bake to Golden Perfection
Place the assembled pie on a baking sheet lined with parchment paper to catch any drips. Bake for 35-40 minutes until the crust is deep golden brown and the filling is bubbling gently. The edges should be set but the center should still have a slight jiggle when shaken.
Remove from the oven and let cool for 10 minutes before slicing. The filling should be thick and glossy, with a beautiful deep red color. Serve warm with vanilla ice cream or whipped cream for that classic comfort experience everyone loves.
Pro Tips For Making 6 Inch Cherry Pie
- Prep Cherries Fast: Dump those pitted cherries straight into a bowl with 1 tablespoon lemon juice and 2 tablespoons sugar—let them sit 10 minutes while you roll dough. This jumpstarts the juices and softens them slightly, so they thicken better during baking. (Yes, even if you’re impatient like me.)
- Skip the Overmixing: When combining cherries with cornstarch and sugar, stir just until the cornstarch dissolves—no need for a smooth paste. Lumps will break down during baking, and overworking the filling makes it gummy. Trust me, no one will notice.
- Bake Until Bubbly: Pull the pie when the edges are golden and the filling’s edges are set, but the center still jiggles like Jell-O. Overbaking turns cherries into sad, leathery chunks. If unsure, check at 35 minutes—most 6-inch pies need 40-45 total.
- Vanilla Last: Stir in vanilla extract after removing the pie from the oven while it’s still hot. The heat opens up the flavor, making it smell like a bakery instead of just a splash of extract. (My grandmother swore by this, and she was right.)
Flavor customization for these flavors
Spiced Variations
Swap the cinnamon for ½ tsp ground cardamom and ¼ tsp nutmeg for a Middle Eastern twist—this pairing adds warm, floral notes that complement the tart cherries beautifully. I also recommend adding 1 tbsp orange zest to the filling for a bright citrus kick that cuts through the richness. 🌶️
Boozy Enhancements
For an adult-friendly version, stir 2 tbsp brandy or 1 tbsp cherry liqueur (like Luxardo) into the hot filling just before removing it from heat. The alcohol cooks off, leaving behind deep, fruity aromatics.
A splash of 1 tbsp port wine in the filling also adds complexity—just reduce it by 1 tbsp water to maintain balance.
Fruity Complements
Add ½ cup diced peaches or apricots to the filling for a mixed berry effect. I like using Trader Joe’s frozen peaches for convenience—they soften perfectly during simmering. For a tropical touch, fold in ¼ cup diced mango and a pinch of ground ginger for warmth.
These additions work best with slightly less sugar (½ cup instead of ¾ cup).
Crunchy Toppings
Sprinkle ½ cup chopped pecans or walnuts over the lattice strips before baking for texture contrast. Toast them first in a dry pan over medium heat for 3-4 minutes until fragrant.
For a sweeter crunch, use ½ cup crushed graham crackers mixed with 1 tbsp brown sugar—sprinkle this over the filling before adding the lattice.
Herbal Infusions
Replace vanilla with 1 tsp almond extract for a nutty depth, or add 1 tbsp fresh rosemary finely chopped to the filling for an earthy aroma. I’ve also experimented with ½ tsp dried thyme, which pairs surprisingly well with the tartness.
For a floral note, infuse the filling with 1 tsp rosewater—just a whisper adds complexity without overpowering.
Sweet-Savory Balance
Add ¼ tsp smoked paprika to the filling for a subtle smokiness that enhances the cherries’ natural depth. A pinch of sea salt on top of the lattice before baking also amplifies flavors.
For a tangy twist, stir 1 tbsp balsamic vinegar into the filling alongside the lemon juice—it adds a sophisticated depth that’s perfect for dinner parties.
Nutrition facts
Frequently asked questions
Can I use frozen cherries instead of fresh?
Frozen cherries work perfectly—just don’t thaw them first. Toss them straight into the simmering filling where they’ll soften beautifully. For best results, look for unsweetened frozen cherries to maintain proper filling balance and avoid excess moisture.
How do I prevent the lattice crust from burning?
Brush the lattice strips with 1 tablespoon heavy cream before baking to create a protective barrier. This also adds shine! For extra insurance, place a small pie weight or dried beans in the center of the filling before baking to absorb excess moisture that could make the crust soggy.
Can I make this pie ahead of time?
Yes! Assemble the pie (unbaked) up to 24 hours ahead and refrigerate. When ready to bake, remove from the fridge 30 minutes before going into the oven. For storage, keep leftovers covered at room temperature for 2 days or refrigerate for up to 5 days. The filling reheats well in the microwave for 20-30 seconds.
What’s the best way to slice a lattice crust without it falling apart?
Let the pie cool completely for 1 hour before slicing—this lets the filling set properly. Use a sharp chef’s knife and dip it in hot water between slices to prevent sticking. For extra stability, chill the pie for 10 minutes after baking before slicing.
Can I use a 9-inch pie dish instead?
Not for this recipe—it’s specifically designed for the 6-inch size which gives perfect proportions. The filling quantity and crust thickness are calculated for mini pies. If you want a larger version, double the filling and crust ingredients but increase baking time by 15-20 minutes.

- 3lb Prime Rib Roast Recipe: Juicy Pink Center Guaranteed in 3 Hours - October 31, 2026
- 5 Spice Cake Recipe: Warmly Spiced Layers With Crunchy Top - October 31, 2026
- 1950’s Macaroni and Cheese Recipe: Nostalgic Creamy Cheese Sauce with Buttery Noodles - October 31, 2026