
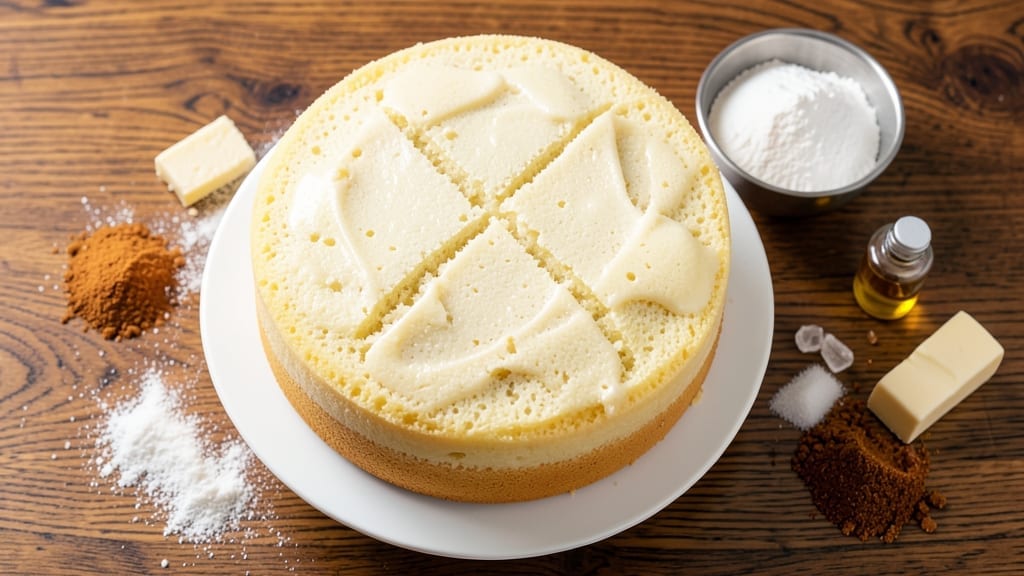
A 12-egg sponge cake delivers the kind of light-as-air layers that make every slice feel like a cloud. The secret lies in the eggs—whipped to ribbon stage—which create structural stability without heaviness. This recipe transforms basic ingredients into a professional-quality cake that’s perfect for celebrations or everyday indulgence.
The process focuses on precision: folding dry ingredients into egg foam gently to maintain air pockets, then baking at the right temperature for even rise. No steam baths, no complicated techniques—just a foolproof method that yields tender, moist layers with minimal effort.
Once baked, the result is a golden, domed cake that slices cleanly and holds its shape. Serve it plain with whipped cream, layered with fruit compote, or as the base for your dream layer cake. The texture stays light and springy for days when stored properly.
For smaller gatherings, this recipe scales down beautifully—just adjust the egg quantity proportionally while maintaining the whipping technique. The key to success is patience in the folding stage and consistent oven temperature throughout baking.
Ingredients for 12 egg sponge cake
Twelve eggs, precise measurements, and patience create this professional-quality sponge cake.
| Ingredient | Amount | Notes |
|---|---|---|
| Large Eggs 🥚 | 12 whole | Room temperature, separated carefully |
| Granulated Sugar 🍚 | 2 cups | Superfine preferred for smooth texture |
| All-Purpose Flour 🌾 | 3 cups | Sifted, plus extra for dusting |
| Unsalted Butter 🧈 | 1 cup | Cold, cut into small cubes |
| Vanilla Extract 🌿 | 1 tbsp | Pure Madagascar bourbon preferred |
| Cream of Tartar 🧂 | ¼ tsp | For egg white stability |
| Salt 🧂 | ¼ tsp | Fine sea salt preferred |
| Cake Flour 🌾 | 1 cup | For ultra-tender crumb |
| Cornstarch 🌾 | 1 tbsp | For structural reinforcement |
| Lemon Zest 🍋 | 1 tbsp | Fresh, organic preferred |
| Vegetable Oil 🫒 | ¼ cup | Light, neutral flavor |
The eggs are the foundation—room temperature is critical for proper whipping. Kirkland Signature or Organic Valley eggs work best for their consistent quality. Separate whites and yolks immediately after cracking to prevent contamination. The yolks should be pale yellow and uniform—any discoloration suggests older eggs. For the flour, Bob’s Red Mill cake flour is ideal, but sifted all-purpose works in a pinch. The butter needs to be cold but not frozen to create proper fat layers during baking.
No vanilla extract? Vanilla bean paste at half the amount adds depth. The cream of tartar stabilizes egg whites—omit only if using fresh, high-quality eggs. For a gluten-free version, replace all-purpose flour with a 1:1 gluten-free blend and add an extra 0.25 tsp xanthan gum. The lemon zest can be substituted with 1 tsp lemon extract if fresh isn’t available, though the flavor will be subtler. For a richer cake, increase butter to 1.25 cups and reduce oil by 0.125 cup—this creates a denser crumb that holds fillings better.
Store the cake in an airtight container at room temperature for 3 days or refrigerate for up to 1 week. For longer storage, wrap tightly in plastic and freeze for 3 months. Bring to room temperature before serving to restore texture. The cake freezes best when fully baked and cooled—slice before freezing for individual portions. To revive, wrap frozen slices in a damp towel and microwave for 10-15 seconds.
Why You’ll Love This Recipe
- No Fuss, No Fail: I swear by this recipe when I’m tired but still want something impressive. Twelve eggs might sound like a lot, but they whip up light and airy with zero stress—just fold in the flour and sugar, and let the oven do the work.
- Butter-Soft Magic: That rich, tender crumb? Pure egg and butter harmony. The vanilla ties it all together without overpowering, and honestly, the first slice makes me question why I ever bought store-bought cake again.
- Bakes for Anything: Slice it warm for breakfast with jam, stack it for a birthday cake, or freeze layers for a last-minute dessert. It’s my go-to for potlucks—no one ever guesses it’s just flour, sugar, and eggs.
- Budget Baking Wins: A dozen eggs and a stick of butter stretch farther than you’d think. The recipe feeds a crowd but costs next to nothing, and leftovers? They disappear faster than I can say “second cup of coffee.”
Step-by-step instructions for ultra-light 12 egg sponge cake
Mastering this technique delivers flawless, airy layers that hold their shape without collapsing.
Separate Eggs and Stabilize the Whites
Begin by separating the 12 whole large eggs carefully, ensuring no yolk fragments contaminate the whites. Transfer yolks to a large mixing bowl and whites to a spotless, grease-free bowl. Add the 0.25 teaspoon cream of tartar and 0.25 teaspoon salt to the whites—this creates stable, glossy peaks when whipped.
Using a stand mixer fitted with the whisk attachment, beat the egg whites on low speed until soft peaks form. Gradually increase to medium-high and whip for 5-7 minutes until stiff, glossy peaks form that hold their shape when the whisk is lifted. The bowl should feel cool to the touch—this indicates proper stabilization. If you see dry strands forming, stop immediately as the whites are overmixed.
Whip Yolks and Sugar to Ribbon Stage
In the same mixing bowl with the yolks, add the 2 cups granulated sugar and 1 tablespoon vanilla extract. Beat on medium-high speed for 8-10 minutes until the mixture is pale, thick, and forms ribbons when the whisk is lifted. This process incorporates air and creates the signature light texture. Scrape down the sides of the bowl every 2 minutes to ensure even mixing.
Fold one-third of the whipped egg whites into the yolk mixture using a spatula, working gently to maintain air incorporation. This step prevents deflation of the whites when combined with the heavier yolk mixture. The batter should lighten noticeably as you incorporate the first portion of whites.
Combine Dry Ingredients and Fold
In a separate bowl, sift together the 3 cups all-purpose flour, 1 cup cake flour, 1 tablespoon cornstarch, and 1 tablespoon lemon zest. This combination creates the ultra-tender crumb while adding subtle citrus brightness. Gradually fold the dry ingredients into the yolk mixture in three additions, using a spatula to cut through the center and fold from the bottom up.
After incorporating the dry ingredients, gently fold in the remaining two-thirds of the whipped egg whites. Work carefully to maintain the airy structure—avoid overmixing at this stage. The final batter should be smooth, thick, and hold its shape when spooned. If it appears too thin, let it rest for 10 minutes before proceeding to allow the flour to fully hydrate.
Incorporate Butter and Oil for Moisture
Cut the 1 cup cold unsalted butter into small cubes and add them to the batter. Using a rubber spatula, gently fold the butter into the mixture until fully incorporated. The butter should melt slightly but remain in small, even pieces throughout the batter. Next, add the 0.25 cup vegetable oil and fold until completely distributed.
This step ensures the cake remains moist without becoming dense. The butter adds richness while the oil prevents dryness. The batter should now be thick, glossy, and hold its shape when lifted with a spatula. If it appears too stiff, fold in 1-2 tablespoons of reserved egg whites to adjust the consistency. Transfer the batter to a piping bag fitted with a large star tip for even distribution.
Bake in Layers for Perfect Rise
Preheat your oven to 350°F and line three 9-inch round cake pans with parchment paper. Divide the batter evenly among the pans, piping it into the center of each and spreading it to the edges with a spatula. Bake for 25-30 minutes until the tops spring back when touched lightly and a toothpick inserted into the center comes out clean.
Immediately after removing from the oven, invert the cakes onto a wire rack to cool completely. This prevents soggy bottoms and maintains the delicate structure. Once cooled, layer with your preferred filling—this cake’s stability makes it perfect for multi-layered creations without collapsing.
Pro Tips For Making 12 Egg Sponge Cake
- Separate yolks first: Split your 12 eggs into yolks and whites before doing anything else—this keeps your whites clean for whipping. I learned this the hard way when greasy yolks ruined a perfectly fluffy batch.
- Whip yolks warm: Beat egg yolks with sugar over a double boiler (or warm bowl) until pale and thick—about 5-7 minutes. Cold yolks won’t emulsify properly, and you’ll end up with a dense, gummy cake.
- Sift flour aggressively: Sift the flour twice with a fine-mesh sieve—once before folding, once after—so it blends like silk. I used to skip this, and my cakes always had those dreaded little flour clumps.
- Don’t overmix butter: Fold in softened butter just until combined—no need to turn it into cookie dough. Overworking it makes the cake heavy, and you’ll regret the extra elbow grease later.
Essential equipment for perfect results
Stand Mixer Essentials
Your stand mixer is the workhorse for this recipe—I recommend a KitchenAid Artisan Series with a whisk attachment for optimal performance. The whisk must be spotless and grease-free to achieve proper egg white stability.
I use my mixer on medium-high speed for whipping, but avoid overmixing by stopping when stiff peaks form. For smaller batches, a hand mixer works, though you’ll need to whip whites in two batches to maintain control. 💡
Precision Scales
A digital kitchen scale (like the OXO Good Grips) ensures accurate measurements, especially for the 12 eggs and 2 cups sugar. Eggs vary in size—weighing them guarantees consistent results.
For the dry ingredients, measure flour by weight (3 cups = ~375g) rather than volume to prevent packing. The lemon zest should be finely grated using a microplane for even distribution. 🍋
Baking Pans
Use three 9-inch round cake pans with removable bottoms for even baking. I prefer Wilton Perfect Results pans—they distribute heat uniformly and prevent sticking. Grease pans lightly with vegetable oil spray (like Misto) and dust with flour before adding batter.
For a domed finish, bake until the tops spring back when touched—this indicates proper rise. 🧁
Piping Bag
A disposable piping bag with a large star tip (like Wilton 1M) helps distribute batter evenly into pans. This creates consistent layers without overmixing. If piping isn’t an option, use a large offset spatula to spread batter gently.
For multi-layer cakes, pipe batter directly onto parchment-lined trays to avoid sticking. ✨
Thermometer
An infrared thermometer (such as Thermoworks Thermapen ONE) ensures your oven maintains 350°F accurately. Oven temperatures fluctuate—this tool prevents under- or overbaking. Insert a toothpick into the center of a cake to check doneness; it should emerge clean.
For even cooling, invert cakes onto a wire rack immediately after baking. ⏰
Mixing Bowls
Use two large, stainless-steel mixing bowls (like Pyrex mixing bowls)—one for egg whites and one for yolks. The whites bowl must be completely grease-free to achieve stiff peaks.
For folding, a heatproof silicone spatula (like OXO Good Grips) prevents deflation of the batter. Keep bowls and tools nearby to streamline the process. 🥄
Nutrition facts
Frequently asked questions
Why does this recipe use 12 eggs instead of the usual 6-8?
Twelve eggs create a lighter, more stable structure perfect for multi-layer cakes. The extra egg whites provide more air pockets, resulting in taller, domed layers that hold fillings beautifully. This is ideal for professional-quality cakes that need to support heavy toppings or multiple layers without collapsing.
Can I make this cake with fewer eggs?
Yes, but the texture will change. For a 6-egg version, reduce all ingredients proportionally (including flour and sugar) and use a 9-inch pan instead of three. The cake will be denser but still delicious. For a 9-egg version, use two 8-inch pans—just maintain the same whipping technique for best results.
Why do the instructions emphasize folding instead of mixing?
Folding preserves the air incorporated during egg whipping, which is critical for that signature light-as-air texture. Overmixing collapses bubbles and creates a dense, heavy cake. The gentle “cut-and-fold” method maintains structure while evenly distributing dry ingredients. Think of it like folding whipped cream—gentle movements keep everything airy!
How do I know when the egg whites are properly whipped?
Look for stiff, glossy peaks that hold their shape when the whisk is lifted. The bowl should feel cool to the touch, and the whites should form sharp peaks that don’t flatten immediately. If you see dry strands or the mixture looks grainy, it’s overmixed—stop immediately and proceed with what you have.
Can I substitute cake flour with all-purpose?
Yes, but the texture will be slightly denser. Replace the 1 cup cake flour with 1 cup all-purpose flour and add 1 tablespoon cornstarch to compensate. For best results, sift the flour thoroughly to prevent lumps. The cake will still be delicious but may have a slightly chewier crumb.

- 3lb Prime Rib Roast Recipe: Juicy Pink Center Guaranteed in 3 Hours - October 31, 2026
- 5 Spice Cake Recipe: Warmly Spiced Layers With Crunchy Top - October 31, 2026
- 1950’s Macaroni and Cheese Recipe: Nostalgic Creamy Cheese Sauce with Buttery Noodles - October 31, 2026