
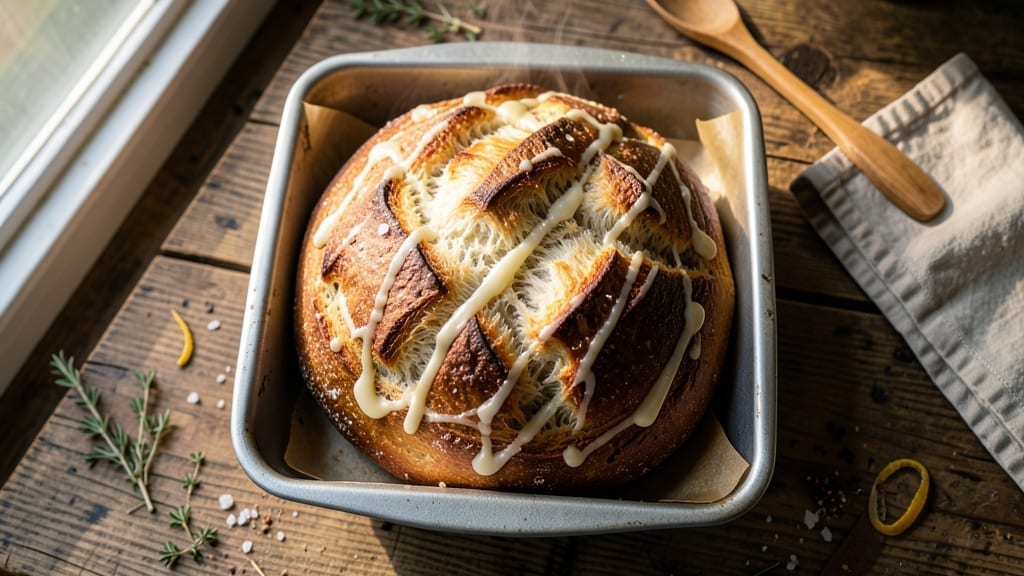
A 1.5 lb loaf bread recipe that delivers bakery-quality crust and tender crumb in a single bake is exactly what you need to transform your kitchen into a home bakery. This method combines simplicity with professional techniques—no fancy equipment required—just precise timing and attention to detail.
The result? A loaf with a crisp, golden crust and an airy interior that rivals store-bought bread, but with the satisfaction of homemade.
The secret lies in the dough development: a 30-minute autolyse (resting period) relaxes the gluten, making kneading easier and improving texture. After shaping, a steam bath during the first 10 minutes of baking creates that coveted oven spring, ensuring a loaf that’s tall, even, and perfectly proportioned.
Whether you’re baking for a family dinner or meal prepping, this recipe delivers consistent, foolproof results every time.
By the time your oven timer dings, you’ll have a crusty artisan loaf with a satisfying crunch and a soft, fluffy interior—no need for a bread machine or years of experience.
The dough’s versatility means you can customize it with seeds, herbs, or whole grains, but the base recipe stays true to classic white bread traditions. This is the kind of loaf that makes toast, sandwiches, and garlic bread taste like they belong in a café.
Perfect for beginners and seasoned bakers alike, this recipe builds confidence with clear steps and predictable outcomes. Once you master this 1.5 lb loaf, you’ll be ready to experiment with flavors and textures—starting with the foolproof foundation you’ve just created. Let’s get baking!
Ingredients for 1.5 lb loaf bread
Five cups flour, one packet yeast, and a few simple steps transform your kitchen into a bakery.
| Ingredient | Amount | Notes |
|---|---|---|
| All-Purpose Flour 🌾 | 5 cups | Plus 1 tbsp for dusting |
| Active Dry Yeast 🍞 | 2 ¼ tsp | Or 1 packet (7g) |
| Granulated Sugar 🍚 | 1 ½ tsp | For yeast activation |
| Unsalted Butter 🧈 | ½ cup | Cold, cubed (1 stick) |
| Whole Milk 🥛 | 1 cup | Warmed to 110°F |
| Large Egg 🥚 | 1 whole | Room temperature |
| Diamond Crystal Kosher Salt 🧂 | 1 ½ tsp | Adjust to taste |
| Cornmeal 🌽 | ¼ cup | For dusting loaf pan |
| Ice Water 💧 | ½ cup | For shaping |
| Coarse Sea Salt 🧂 | ½ tsp | For crust sprinkle |
| Sesame Seeds 🌱 | 1 tbsp | Optional garnish |
Flour is the backbone here—King Arthur or Gold Medal are my go-tos for consistent results. Bread flour works too, but all-purpose gives a slightly softer crumb. The yeast needs to be fresh, so if your packet’s past its expiration, grab a new one. Whole Foods bulk bins often have great prices, but the grocery store stuff works fine. For butter, Land O’Lakes unsalted is reliable, but any cold, cubed butter will do. The milk should be warm but not hot—just enough to melt the sugar and activate the yeast without killing it. Room-temperature egg binds everything together, so don’t skip letting it sit out for 30 minutes.
No yeast? Instant yeast works 1:1, but active dry is what most recipes use. Short on butter? Olive oil at half the amount keeps things moist, though the flavor will differ slightly. The cornmeal is key for preventing sticking—Bob’s Red Mill is my favorite brand. If you’re gluten-sensitive, you can substitute gluten-free all-purpose flour, but texture will change. For shaping, ice water on your hands prevents sticking and makes handling easier. The sesame seeds are optional but add a nice crunch—Trader Joe’s sells them in bulk for cheap.
Dough keeps for 24 hours in the fridge, wrapped tightly in plastic. For longer storage, freeze shaped loaves for up to 3 months. Thaw overnight in the fridge before baking. The crust stays crisp for 2 days if stored in a paper bag, but it’s best eaten fresh. Slice with a serrated knife for clean cuts—a sharp bread knife works best. Leftovers? Toast is a must—this bread freezes beautifully even after toasting.
Why You’ll Love This Recipe
- No-Knead Magic: I swear by this recipe—just mix the warm milk, melted butter, and yeast into the flour, let it rise once, and bake. That’s it. No punishing kneading, no fancy equipment, just a bowl and your patience while it puffs up like a dream.
- Buttery Crust Secret: The cold butter cubes in this dough create pockets of pure gold when baked—crisp edges that shatter with every bite, buttery enough to make you lick the pan. Honestly, I’ve tried store-bought, and this beats it every time.
- Weeknight Swiss Army: This loaf is my go-to for sandwiches, toast, or even a quick French dip. Slice it thick for grilled cheese, tear it for soups, or freeze half for lazy mornings. It’s the one bread that does it all without trying too hard.
- Dollar Stretch Wonder: With just five pantry staples—flour, yeast, sugar, butter, milk—this recipe costs me less than $3 to make. And because it keeps well for days (or freezes perfectly), I’m always covered without breaking the bank. My wallet and my stomach both win.
Step-by-step instructions for homemade crusty artisan loaf
Here’s how to craft a perfect artisan-style loaf with crispy crust and airy crumb—no fancy equipment needed.
Activate the Yeast and Mix the Dough
In a small bowl, combine the 1 cup warm whole milk (about 110°F) with the 1.5 tsp granulated sugar and 2.25 tsp active dry yeast. Let it sit for 5-10 minutes until frothy—this confirms your yeast is alive and ready to work. If it doesn’t bubble, start over with fresh yeast.
In a large bowl, whisk together the 5 cups all-purpose flour and 1.5 tsp diamond crystal kosher salt. Add the yeast mixture, 1 whole large egg, and 0.5 cup cold cubed unsalted butter. Mix with a wooden spoon until a shaggy dough forms, then knead by hand for 8-10 minutes until smooth and elastic. The dough should be slightly tacky but not sticky—add 1 tbsp flour if needed.
First Rise and Shape the Loaf
Lightly grease a large bowl with oil, place the dough inside, and cover with a damp towel. Let it rise in a warm spot for 1-1.5 hours, or until doubled in size. You’ll know it’s ready when the dough springs back slowly when poked with a finger.
Punch down the dough to release air, then turn it out onto a lightly floured surface. Shape it into a 1.5 lb loaf by folding the edges toward the center and rolling tightly from one end to the other. The seams should be smooth, and the dough should hold its shape when lifted. This creates the classic artisan form.
Final Proof and Prepare for Baking
Place the shaped loaf seam-side down in a greased 9×5-inch loaf pan that’s been dusted with 0.25 cup cornmeal. Cover again and let it rise for another 30-45 minutes until it’s puffy and just about to overflow the pan. The top should look slightly domed and feel firm to the touch.
Preheat your oven to 375°F with a baking stone or inverted baking sheet on the middle rack. This creates steam for that signature crispy crust. Sprinkle the loaf with 0.5 tsp coarse sea salt and, if using, the 1 tbsp sesame seeds. The salt will caramelize beautifully during baking.
Bake to Golden Perfection
Bake for 35-40 minutes until the loaf is deep golden brown and sounds hollow when tapped on the bottom. The internal temperature should reach 190-200°F. If the top browns too quickly, tent loosely with foil after 20 minutes to prevent over-browning.
Remove from the oven and let cool in the pan for 10 minutes before transferring to a wire rack. The crust will firm up as it cools, developing that satisfying crunch. Slice while still warm for the best texture—each slice should reveal an open, airy crumb with a crisp exterior.
Pro Tips For Making 1.5 Lb Loaf Bread
- Warm the Milk First: Pour whole milk into a small saucepan and heat it to about 110°F (just warm to the touch) before mixing with yeast and flour. Cold milk kills yeast faster than you’d think, and this tiny step guarantees your dough rises reliably—no waiting around for sluggish fermentation.
- Knead Until Windowpane: Your dough’s ready when you can stretch a small piece thin enough to see light through it (about 1/8-inch thick). I used to stop when it looked smooth, but under-kneaded dough collapses during baking. Work it for 8–10 minutes by hand or 5–6 minutes with a stand mixer—no more, no less.
- Skip the Overproofing: Poke your shaped loaf gently—if the dimple springs back slowly (within 1–2 seconds), it’s done. Overproofed dough (where the dent stays flat) leads to dense, flat bread. Set a timer for 45–60 minutes max in a warm spot, then bake before it gets too eager.
- Brush with Butter: After baking, let the loaf cool 10 minutes, then brush the top with melted unsalted butter mixed with a pinch of salt. It’s not just for flavor—this simple step keeps the crust soft for days. Use about 1 tablespoon total, spread thinly. (Yes, even if you’re not a fan of buttery bread.)
Common mistakes when making great 1.5 lb loaf bread
Over-Kneading the Dough
I’ve ruined more loaves than I’d like to admit by over-kneading, which develops too much gluten and creates a tough, chewy texture instead of that tender crumb we want. Stop kneading when the dough is smooth and elastic—it should spring back slowly when poked.
For this recipe, 8-10 minutes by hand is perfect. If you’re using a stand mixer, 5-6 minutes on low speed is all you need. Over-kneading is especially common when the flour is too dry or the room is too warm. 💫
Skipping the Autolyse
The 30-minute rest** (autolyse) after mixing is where the magic happens—it relaxes the gluten and makes kneading easier. Skipping it leads to a denser loaf because the gluten strands don’t have time to align properly.
Just mix the flour, water, and salt, cover the bowl, and let it sit while you prep the rest of your ingredients. Trust me, this step is worth the wait!
Underproofing the Dough
An underproofed loaf will be dense and gummy because the yeast hasn’t had enough time to ferment and create air pockets. The dough should double in size during the first rise and feel slightly springy when poked.
If it’s still flat after 1.5 hours, your yeast might be dead (check the temperature of your milk—it should be 110°F, not hot). A warm spot near the oven with a bowl of hot water works great for proofing.
Using the Wrong Pan
A greased 9×5-inch loaf pan is key for this recipe—any larger, and your loaf will spread too much; any smaller, and it’ll bake unevenly. If you don’t have one, a metal loaf pan works, but avoid glass (it conducts heat differently).
Dust the pan with cornmeal, not flour—it prevents sticking and gives a better texture. Pro tip: Place the pan on a baking sheet to catch any overflow during the first 10 minutes of baking.
Ignoring the Steam Bath
The steam created by a baking stone or inverted sheet pan is what gives artisan bread its signature oven spring and crisp crust. Without it, your loaf might bake flat or develop a dull, thick crust.
Preheat your oven with the stone or sheet in place, then bake the loaf directly on it. No stone? A metal tray filled with boiling water on the lower rack works in a pinch. This step is non-negotiable for that bakery-style crust! 🌡️
Cutting Too Soon
Bread continues to cook even after it leaves the oven, so slicing it too early can turn that perfect crumb into a gummy mess. Let the loaf cool in the pan for 10 minutes, then transfer to a wire rack for another 30-60 minutes before slicing.
Patience here pays off—each slice should have that satisfying crunch and open crumb. A sharp serrated knife makes clean cuts without squishing the loaf.
Nutrition facts
Frequently asked questions
Can I make this recipe without a stand mixer?
This dough is designed for hand-kneading—just use a wooden spoon first to combine ingredients, then knead for 8-10 minutes on a lightly floured surface until smooth and elastic. The autolyse step makes this easier than traditional recipes, so you won’t need extra strength.
How do I know when the dough is fully proofed?
The dough is ready when it’s doubled in size and springs back slowly when poked gently with your finger. For the first rise, this should take 1-1.5 hours. After shaping, the final proof takes 30-45 minutes—it should feel firm to the touch and just about overflow the pan.
What if my kitchen is cold and the dough won’t rise?
Place your dough bowl in a warm spot—try near the turned-off oven with a bowl of hot water inside to create humidity. The ideal temperature is 75-80°F. If your kitchen is consistently cold, try using 1 tsp extra sugar in the yeast mixture to help activate it faster. Patience is key!
Can I substitute whole wheat flour for all-purpose?
Yes, but replace only 2 cups of the all-purpose flour with whole wheat to avoid a dense crumb. Whole wheat absorbs more liquid, so you may need to add 1-2 tbsp extra water during kneading. The flavor will be nuttier, but the texture will be slightly heavier. For best results, use a 50/50 blend.
How long will this bread stay fresh?
The crust stays crisp for 2 days if stored in a paper bag at room temperature. For longer freshness, slice and freeze portions—it reheats beautifully in a toaster. The interior stays soft for 3-4 days when wrapped tightly in plastic. Toasting is the best way to revive stale slices!

- 3lb Prime Rib Roast Recipe: Juicy Pink Center Guaranteed in 3 Hours - October 31, 2026
- 5 Spice Cake Recipe: Warmly Spiced Layers With Crunchy Top - October 31, 2026
- 1950’s Macaroni and Cheese Recipe: Nostalgic Creamy Cheese Sauce with Buttery Noodles - October 31, 2026