
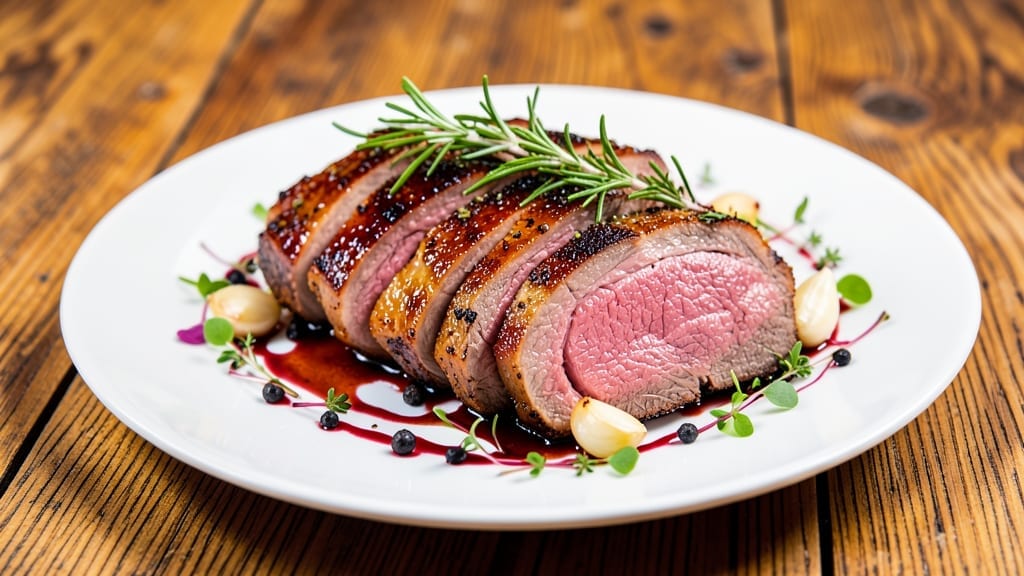
A 12-hour roast beef recipe transforms tough cuts into melt-in-your-mouth perfection through low-and-slow cooking. This method breaks down connective tissue while building deep, savory flavors that elevate any dinner table.
The key lies in precise seasoning, controlled temperature, and patience—each step designed to ensure tender, juicy beef that practically falls apart at the touch of a fork.
Professional chefs and home cooks alike rely on this technique to achieve restaurant-quality results without specialized equipment. A simple brine enhances moisture retention, while a dry rub of herbs and spices creates a flavorful crust.
The roast cooks gently in the oven, allowing fat to render slowly and flavors to meld into a rich, harmonious profile. Safety is paramount, so we’ll include critical guidelines to ensure your roast is both delicious and safe to eat.
By the time you carve into this masterpiece, you’ll be rewarded with slices so tender they glide off the bone, bathed in natural juices and infused with aromatic spices. The texture is buttery and succulent, while the aroma fills your home with an irresistible invitation to gather around the table.
This isn’t just a roast—it’s a centerpiece that turns an ordinary meal into an unforgettable experience.
Pair it with classic sides like red wine reduction, roasted root vegetables, or a crisp baguette to complete the meal. Whether you’re hosting a holiday feast or simply craving a showstopping dinner, this recipe delivers foolproof results every time. Let’s get started on creating your most impressive roast beef yet.
Ingredients for 12 hour roast beef
Sixteen ingredients transform a tough cut into buttery, fork-tender roast beef perfection.
| Ingredient | Amount | Notes |
|---|---|---|
| Beef Chuck Roast 🥩 | 4 lb | Bone-in preferred for flavor |
| Kosher Salt 🧂 | ½ cup | Diamond Crystal preferred for clarity |
| Fresh Black Peppercorns 🌶️ | 2 tbsp | Coarsely cracked, not ground |
| Fresh Rosemary 🌿 | ¼ cup | Finely chopped, fresh only |
| Fresh Thyme 🌿 | ¼ cup | Leaves only, stems removed |
| Garlic Cloves 🧄 | 8 cloves | Smashed but not minced |
| Extra-Virgin Olive Oil 🫒 | ¼ cup | High-quality, fruity variety |
| Red Wine 🍷 | 1 cup | Bold, dry variety like Cabernet |
| Beef Broth 🍲 | 1 cup | Low-sodium preferred |
| Yellow Onion 🧅 | 1 whole | Peeled, quartered, skin on |
| Carrots 🥕 | 4 whole | Whole, unpeeled |
| Fresh Parsley 🌿 | ⅛ cup | Chopped, for garnish |
| Baguette 🥖 | 1 whole | Crusty, for serving |
| Red Wine Vinegar 🍷 | 2 tbsp | For pan deglazing |
The beef is non-negotiable here—chuck roast with good marbling is your best bet. Costco or Whole Foods often have excellent cuts, but check the fat cap for thickness. Bone-in adds flavor, but boneless works if you’re short on time. The fresh herbs should be vibrant—wilting means they’re past their prime. For the wine, Cabernet Sauvignon or Merlot add depth, but any bold red will do. If you’re feeling fancy, grab a bottle of dry sherry to deglaze instead—it adds a lovely complexity.
No red wine? Beef broth plus a splash of balsamic vinegar works in a pinch. Fresh herbs not available? Dried rosemary and thyme at one-third the amount will suffice, though fresh is ideal. The onions and carrots can be swapped for potatoes or celery root if you prefer. For the crusty baguette, French-style from the bakery section is perfect—it soaks up the juices beautifully. If you’re making this ahead, the roast actually tastes better the next day as flavors meld.
Prep the beef the night before—pat it dry and let it sit uncovered in the fridge for 24 hours to dry-brine. The herbs and spices can be mixed 1 week ahead and stored in an airtight container. Once cooked, let the roast rest 30-45 minutes before carving—this keeps it juicy. Leftovers keep 4-5 days in the fridge or 3 months frozen. For serving, slice against the grain and arrange on the baguette with extra juices spooned over the top.
Why You’ll Love This Recipe
- Herb-Packed Magic: That rosemary and thyme? They don’t just happen—they infuse the beef until every bite tastes like a hug from a French countryside kitchen. Honestly, the crust alone makes me close my eyes and pretend I’m in a Parisian bistro.
- Leftovers That Win: This recipe actually begs for seconds—or thirds. The meat stays tender for days, so it’s my go-to for meal prep, potlucks, or whenever I need to feed a crowd without stress. (Yes, even on a Tuesday night.)
- Budget-Friendly Luxury: A chuck roast is cheaper than steak but tastes like a celebration—no fancy cuts or overpriced spices needed. Between us, this is how I make restaurant-quality beef without breaking the bank. The salt and pepper do all the heavy lifting.
Step-by-step instructions for slow-cooked roast beef
Here’s how to transform a tough cut into melt-in-your-mouth perfection with just 12 hours of patience.
Prepare the Roast with Herbs and Seasoning
Remove the beef chuck roast from the refrigerator and let it sit at room temperature for 30 minutes—this ensures even cooking. Preheat your oven to 300°F and position the rack in the lower third of the oven for even heat circulation.
In a small bowl, combine the 0.5 cup kosher salt, 2 tablespoons fresh black peppercorns, 0.25 cup finely chopped fresh rosemary, 0.25 cup fresh thyme leaves, and the 8 smashed garlic cloves. Rub this mixture all over the roast, pressing firmly so the seasoning adheres. Let the seasoned roast rest for another 15 minutes before cooking—this helps the flavors penetrate deeply.
Sear the Roast for Maximum Flavor
Heat the 0.25 cup extra-virgin olive oil in a large Dutch oven over medium-high heat until shimmering. Add the roast and sear on all sides for 3-4 minutes per side until deeply browned. This step creates a flavorful crust that locks in juices during the long cook.
Remove the roast from the Dutch oven and set it aside. Add the 1 whole yellow onion and 4 whole carrots to the pot, coating them with the rendered beef fat. Let them sear for 2 minutes until lightly caramelized—this builds even more depth of flavor.
Deglaze and Add Liquids
Pour in the 1 cup red wine and scrape up all the browned bits from the bottom of the Dutch oven with a wooden spoon. This deglazing step captures all the meaty flavors that would otherwise burn. Let the wine simmer for 3-4 minutes until reduced by half.
Add the 1 cup beef broth and return the roast to the Dutch oven. Bring the liquid to a gentle simmer, then cover tightly with the lid. The liquid should come about halfway up the sides of the roast—this ensures proper moisture during cooking.
Slow-Cook to Fork-Tender Perfection
Transfer the Dutch oven to the preheated oven and cook for 10 hours at 300°F. After 6 hours, check the internal temperature—it should be around 170°F. If it’s not there yet, continue cooking. You’re aiming for that magical moment when the meat becomes so tender it practically falls apart.
Here’s the thing—this long cook time breaks down the tough collagen in the beef chuck, transforming it into rich, gelatinous juices that keep the meat incredibly moist. Don’t be tempted to rush it; patience is key to achieving that buttery texture.
Rest and Serve with Confidence
Once the internal temperature reaches 200°F and the meat is fork-tender, remove the roast from the oven and transfer it to a cutting board. Tent loosely with foil and let it rest for 30-45 minutes. This resting period allows the juices to redistribute throughout the meat, ensuring each slice is moist and flavorful.
While the roast rests, skim any excess fat from the cooking liquid and reduce it by simmering uncovered for 5-7 minutes. Strain the sauce if you prefer a smoother finish, then deglaze the Dutch oven with 2 tablespoons red wine vinegar to add brightness. Slice the roast against the grain into ½-inch thick portions and serve with the reduced sauce, crusty baguette, and a sprinkle of fresh parsley for freshness.
Pro Tips For Making 12 Hour Roast Beef
- Trim the Fat First: A 12-hour roast needs room to breathe—literally. Trim a thin layer of fat from the top and sides of the chuck roast before seasoning. I learned this the hard way: leaving the thick fat cap on traps steam, turning your crust into sad, damp skin. The fat’s still there to baste with—just not smothering the meat.
- Salt in Layers: Don’t just sprinkle salt once. After the initial dry-brine (1-2 hours before cooking), add another layer of kosher salt right before searing—press it into the meat, especially the thickest parts. The first coat seasons deep, but the second guarantees that crust. (Yes, even if you’re impatient like me.)
- Rotate the Pan: Your oven’s hot spots are real. After the initial sear, rotate the roasting pan 180 degrees halfway through cooking. I used to ignore this and ended up with one side slightly overdone while the other lingered. A quick flip evens things out—no guesswork, just consistent tenderness.
- Save the Rosemary: Fresh rosemary needs a little help. Strip the needles from the stems and bruise them gently with your fingers before sprinkling over the beef. This releases the oils without turning the meat into a pine forest. (Pro tip: Tuck some sprigs under the meat too—they’ll infuse flavor where it counts.)
Essential equipment for great 12 hour roast beef
Dutch Oven
A 5-7 quart Dutch oven is your secret weapon for this recipe—it distributes heat evenly and locks in moisture during the long cook. I swear by the Le Creuset Signature or Lodge Cast Iron models for their durability and heat retention.
The deep sides prevent spills, and the tight-fitting lid creates a steam environment that keeps the beef tender. 💫
Meat Thermometer
Never guess the doneness—use a high-quality instant-read thermometer like the Thermoworks Smoke or Meater. These probe deep into the roast to check the internal temperature at 170-200°F without opening the oven, which could disrupt cooking. I keep mine in my oven door for easy access during the long cook.
Carving Tools
For perfect slices, invest in a sharp carving knife (I recommend the Victorinox 8-inch) and a long-handled carving fork. The knife should glide through the meat effortlessly, while the fork stabilizes the roast.
A meat slicer like the Dexter-Russell is ideal if you’re serving a crowd—it makes clean, even slices every time.
Basting Brush
A silicone basting brush (like the OXO Good Grips) helps spread the pan juices over the roast during the last hour of cooking. This adds moisture and flavor without opening the oven.
I dip it in the reduced sauce and brush it all over the meat every 30 minutes for extra richness.
Roasting Pan
If you prefer a roasting pan over a Dutch oven, choose one with low, wide sides (like the All-Clad Stainless Steel) to prevent spills. The pan should fit comfortably in your oven while allowing room for the roast to cook evenly.
Line it with parchment paper for easy cleanup—trust me, you’ll thank yourself later. 🔥
Resting Rack
A wire cooling rack (placed over a baking sheet) is essential for resting the roast. It allows air to circulate, preventing sogginess. I use the OXO Good Grips rack—it’s sturdy and easy to clean. Tent the roast loosely with foil to keep it warm while it rests for 30-45 minutes before carving.
Nutrition facts
Frequently asked questions
Can I use a different cut of beef for this recipe?
While chuck roast is ideal for its fat content and flavor, you can also use brisket or short ribs—just adjust the cook time. Avoid lean cuts like sirloin, as they won’t become tender with this method. For brisket, aim for 10-12 hours at 275°F instead of 300°F. The key is collagen-rich cuts that break down beautifully with slow cooking.
Why does the recipe call for such a long cook time?
The 12-hour cook transforms tough connective tissue into rich, gelatinous juices that keep the meat incredibly moist. This low-and-slow method mimics traditional braising but with a dry heat finish. The collagen melts over time, creating that signature buttery texture. Patience is key—rushing will leave you with dry, chewy beef.
What if my oven isn’t exactly 300°F?
Oven temperatures can vary by 25°F—use an oven thermometer to check accuracy. If your oven runs hot, reduce to 275°F and add 1-2 extra hours. If it runs cold, increase to 325°F and reduce time by 1 hour. The goal is 170-200°F internal temp, not strict timing. Adjust based on your thermometer readings.
Can I make this recipe in a slow cooker instead?
Transfer the seared roast and veggies to a 6-quart slow cooker, add the wine and broth, then cook on Low for 10-12 hours. The texture will be slightly more tender, but the flavor will be just as rich. For extra crispiness, broil for 5 minutes at the end. Just monitor the liquid—add ½ cup broth if needed to prevent drying.
How do I fix overcooked (dry) beef?
If the beef is slightly dry, slice it thinly and serve with extra pan juices or a red wine reduction. For severely overcooked meat, shred it and use in tacos, sandwiches, or stews where moisture from other ingredients helps. Prevention is key—always use a meat thermometer and never skip the 30-minute rest before carving.

- 6 Egg Cake Recipe with Oil: Light as Air With Buttery Moisture - October 4, 2026
- 4 Bean Casserole Recipe: One-Pan Heartiness With Smoky Paprika Depth - October 4, 2026
- 3-Ingredient Keto Mug Cake Recipe: Microwave Magic in 2 Minutes - October 4, 2026