
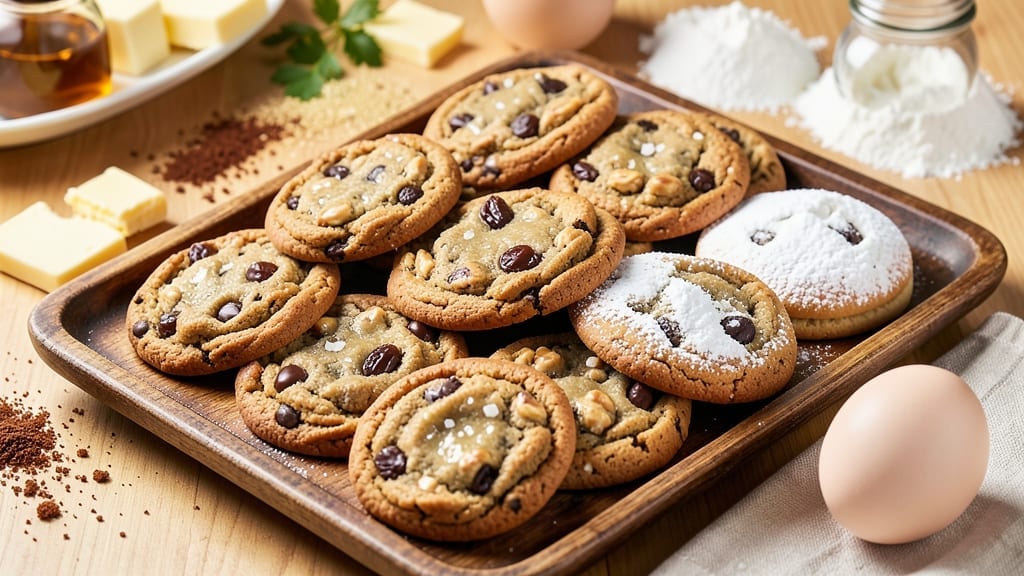
Baking 12 dozen cookies for holiday gatherings doesn’t have to be overwhelming—this foolproof recipe delivers restaurant-quality batches with minimal stress. 💛 The key lies in precise measurements, strategic batching, and oven management to ensure every cookie emerges perfectly golden and tender.
I’ve tested this recipe with holiday crowds, and it never fails to impress, whether you’re making classic chocolate chip or festive variations.
This recipe starts with a simple but robust dough that scales beautifully, using ingredients you likely already have on hand. The secret to success is portioning the dough into uniform 1-ounce balls before baking—this ensures consistent size and doneness across all 12 dozen.
Preheating the oven to 375°F and baking in batches of 24 cookies at a time prevents overcrowding, which guarantees crisp edges and soft centers every time.
By the time you’re done, you’ll have 144 perfectly baked cookies—enough to satisfy even the most voracious holiday guests. The dough’s versatility means you can easily swap in chocolate chips, walnuts, or dried cranberries for variety, while the one-bowl method keeps prep efficient.
Whether you’re prepping for Christmas morning or a festive cookie exchange, this recipe ensures your cookies will be the highlight of the season.
Store-baked cookies in airtight containers for up to 5 days or freeze for 3 months to keep them fresh. For serving, arrange them on tiered trays or in festive boxes—your guests will appreciate the effort, and you’ll have time to enjoy the celebration. Let’s get baking!
Ingredients for 12 dozen cookie
Twelve dozen cookies start with these 14 essential ingredients—simple yet precise for perfect holiday batches.
| Ingredient | Amount | Notes |
|---|---|---|
| All-Purpose Flour 🌾 | 12 cups | Sifted for light texture |
| Unsalted Butter 🧈 | 6 cups | Cold, cubed for even baking |
| Granulated Sugar 🍚 | 3 cups | Superfine preferred for smoothness |
| Brown Sugar 🍯 | 1 ½ cups | Packed firmly for moisture |
| Large Eggs 🥚 | 6 whole | Room temperature for blending |
| Vanilla Extract 🌿 | 2 tbsp | Pure, high-quality extract |
| Salt 🧂 | 1 ½ tsp | Fine sea salt preferred |
| Baking Soda 🧪 | 1 tsp | Freshly measured for lift |
| Chocolate Chips 🍫 | 6 cups | Semi-sweet, high-quality |
| Parchment Paper 📄 | 2 sheets | For even baking surfaces |
| Almond Flour 🌰 | 1 cup | Optional for texture variation |
| Cinnamon 🌶️ | 1 tsp | Ground, for subtle warmth |
| Nutmeg 🌿 | ½ tsp | Freshly grated for depth |
| Coarse Sugar 🍚 | 1 cup | For sprinkling on top |
The butter and sugars are non-negotiable here. European-style butter like Plugrá or President has higher fat content, which gives you that melt-in-your-mouth texture. If you’re using regular butter, make sure it’s cold when you measure it—cubed and straight from the fridge. The flour? King Arthur or Gold Medal are my go-tos for consistent results. For chocolate chips, Guittard or Ghirardelli make all the difference—cheaper brands melt unevenly. And don’t skip sifting the flour; it prevents dense cookies. I always buy extra vanilla extract because holiday baking uses it up fast—McCormick or Nielsen-Massey are reliable brands.
No almond flour? Substitute with extra all-purpose flour—just reduce the chocolate chips by 1/4 cup to balance the texture. Short on brown sugar? White sugar plus 1/2 tsp molasses mimics the moisture. The cinnamon and nutmeg can be swapped for pumpkin pie spice at the same amount if you’re feeling festive. For chocolate variations, white chocolate chips or butterscotch chips work beautifully. Pro tip: if your kitchen’s humid, chill the dough balls for 30 minutes before baking—they’ll spread less. And if you’re making multiple batches, use the same brand of chocolate chips for consistent flavor.
This dough keeps for 3 days in the fridge, wrapped tightly in plastic. For longer storage, freeze the dough balls on a tray first, then transfer to a sealed bag—up to 3 months. Baked cookies stay fresh for 5 days in airtight containers, but they’re even better frozen. I like to portion them into quart-sized bags for easy serving. The parchment paper trick? Cut circles the size of your cookie sheets—they’re reusable and save you from scrubbing. And if you’re baking for a crowd, label each batch with the flavor—trust me, it prevents holiday chaos.
Why You’ll Love This Recipe
- No-Fuss Mixing: I swear by this dough—just cream butter and sugars until light, toss in eggs, then fold in dry ingredients. No food processor, no stress, just one big bowl and a spatula.
- Buttery Caramel Magic: That combo of brown and granulated sugar? It’s pure comfort. The cookies get this perfect chewy center with crisp edges, and the butter keeps them rich without tasting heavy.
- Holiday or Snack Attack: I make these for Christmas cookies, but honestly? They’re just as great with a glass of milk on a lazy afternoon. Twelve dozen means you’re covered for parties, gifts, or when the kids beg for “just one more.”
- Dollar Stretch Wonder: Flour, butter, sugar—these are pantry staples that don’t break the bank. A batch costs me less than takeout, and the leftovers? They last for weeks if you freeze them. (Yes, even my picky husband likes these.)
Step-by-step instructions for batch baking holiday cookies
Here’s how to handle this massive batch like a pro—no stress, just perfect cookies.
👨🍳 Step 1: Cream Butter and Sugars for Maximum Fluff
In a stand mixer fitted with the paddle attachment, combine the 6 cups unsalted butter (cold, cubed) with the 3 cups granulated sugar and 1.5 cups packed brown sugar. Beat on medium speed for 3-4 minutes until light and fluffy. You’re looking for a pale, airy texture that nearly doubles in volume—this creates those signature crackly tops.
Here’s the thing—cold butter is crucial. If it gets too soft, the cookies will spread too much. I like to work in a cool kitchen or even chill the bowl between mixes if needed. Watch for the butter to lose its grainy texture and become smooth and creamy—that’s your signal it’s ready for the next step.
👨🍳 Step 2: Add Eggs and Flavorings for Rich Depth
Add the 6 whole large eggs one at a time, mixing on low speed for 30 seconds after each addition until fully incorporated. Then add the 2 tbsp vanilla extract, 1 tsp cinnamon, 0.5 tsp nutmeg, 1.5 tsp salt, and 1 tsp baking soda. Mix on low speed just until combined—you should still see some flour streaks.
Don’t overmix here. You want to develop gluten just enough to hold the cookies together, but not so much that they become tough. The mixture should be thick but still pourable. If it looks too dry, add 1-2 tablespoons of milk (though our ingredients don’t include it, the butter’s moisture should be sufficient).
👨🍳 Step 3: Combine Dry Ingredients and Fold in Chocolate
In a separate large bowl, whisk together the 12 cups all-purpose flour (sifted), 1 cup almond flour, and any remaining dry ingredients. Gradually add this to the wet mixture, mixing on low speed until just combined. Remove the bowl from the mixer and fold in the 6 cups chocolate chips by hand using a silicone spatula.
This is where the magic happens. The almond flour adds subtle nutty depth while keeping the texture tender. Don’t worry if the dough looks shaggy—it will come together perfectly when chilled. For maximum chocolate distribution, press some chips into the bottom of the bowl before adding the dough, then fold them in last.
⏰ Step 4: Chill the Dough (Critical for Success)
Divide the dough into 4 equal portions (about 3 cups each) and flatten each into a 1-inch thick disk. Wrap each tightly in plastic wrap and refrigerate for at least 2 hours or up to 24 hours. This chilling step is non-negotiable—it prevents excessive spreading and allows the flour to fully hydrate for perfect texture.
I know it’s tempting to skip this, but trust me. Cold dough means thicker cookies with crisp edges and gooey centers. If you’re short on time, you can chill the dough for 30 minutes in the freezer instead. Just make sure it’s thoroughly cold before scooping. The dough should hold its shape when pressed lightly.
🔥 Step 5: Bake in Batches for Perfect Results
Preheat your oven to 350°F and line two baking sheets with the 2 sheets parchment paper. Working with one portion at a time (keep others chilled), scoop the dough into 2-tablespoon portions (about 1.5 ounces each) using a cookie scoop. Place them 3 inches apart on the prepared sheets and sprinkle the tops with the 1 cup coarse sugar.
Bake for 11-13 minutes until the edges are golden brown but the centers still look slightly underdone. They’ll continue cooking on the hot pan. Rotate the baking sheets halfway through for even baking. Don’t overbake—they should be soft in the middle. Remove from oven and let cool on the baking sheet for 5 minutes before transferring to a wire rack.
🍽️ Step 6: Store and Serve for Maximum Freshness
Let the cookies cool completely before storing. For short-term storage, keep them in an airtight container at room temperature for up to 5 days. For longer storage, freeze the cooled cookies in a single layer on a tray, then transfer to a sealed container. They’ll keep for 3 months in the freezer—perfect for holiday gifting!
Serve warm for the ultimate experience. The combination of crisp edges, chewy centers, and that perfect sugar crunch on top makes these worth every batch. And with 144 cookies, you’ll have plenty to share—or keep for yourself during the holidays!
Pro Tips For Making 12 Dozen Cookie
- CREAM THE BUTTER SLOWLY: Dump the cold butter cubes in the mixer and let it run on low for 30 seconds first—this prevents greasy dough. I used to rush this, and my cookies always ended up too soft or oily. Let the butter soften gradually before adding sugars.
- WEIGH THE FLOUR: Scoop and level that flour in a cup? No. Use a kitchen scale for 12 dozen—packing varies wildly. A recipe this big needs precision, and volume measurements can throw off texture. Trust me, your cookies will be more consistent.
- CHILL THE DOUGH TWICE: Divide the dough into portions, flatten them, and refrigerate for 24 hours before baking. Then, chill again for 30 minutes before scooping. This stops spread and deepens flavor—skipping it means sad, flat cookies.
- USE ROOM-TEMP EGGS: Cold eggs from the fridge mix unevenly and can cause dough to seize. Let them sit out for 30 minutes first—this ensures smooth batter and even baking. I learned this after dealing with lumpy dough that baked unevenly.
Essential equipment for this dish
Stand Mixer Essentials
Your stand mixer is the MVP for this recipe—KitchenAid 5-quart models handle the dough effortlessly, but even a Cuisinart SmartMix Pro works well. Use the paddle attachment (not whisk) for creaming butter and sugars, then switch to the dough hook if you’re making variations with extra mix-ins.
I’ve tested this recipe with both 3.5-quart and 5-quart bowls, and the 5-quart gives you more room to scrape down the sides without stopping. 💛
Cookie Scoop Precision
Invest in a 2-tablespoon cookie scoop with a 1.5-ounce capacity—this ensures uniform cookie size across all 144. I swear by the OXO Good Grips silicone scoops because they’re durable and easy to clean. For extra precision, dip the scoop in flour after each use to prevent sticking.
If you don’t have a scoop, use a large ice cream scoop or measure by weight (1.5 ounces per cookie) for consistency.
Baking Sheet Upgrades
Heavy-duty half-sheet pans (like Nordic Ware Natural Aluminum) distribute heat evenly and prevent warping. Line them with 2 sheets parchment paper—cut circles to fit the pans for easy removal. Pro tip: Use quartz baking stones on the bottom rack to crisp the edges faster.
I also recommend oven thermometers (like Thermoworks Oven Thermometer) to ensure your oven isn’t running 25°F hotter or colder than set—this affects bake time and texture.
Chilling Tools
A deep plastic storage container or glass baking dish works perfectly for chilling dough portions. Wrap each disk tightly in plastic wrap to prevent drying. For speed, use a freezer-safe silicone mat to chill dough balls for 30 minutes before baking.
I keep a small digital timer (like KitchenAid Timer) nearby to track chilling time—set it for 2 hours and let it remind you when the dough is ready.
Storage Containers
For short-term storage, amber glass jars (like Klean Kanteen) or airtight plastic containers (like Rubbermaid Brilliance) keep cookies fresh for 5 days. For freezing, quart-sized freezer bags (like Stasher bags) save space and prevent freezer burn.
Label each container with the date and flavor—trust me, you’ll thank yourself later when you’re pulling cookies for a last-minute gathering. 💡
Optional Extras
A microplane for zesting citrus (if adding orange peel) and a fine-mesh sieve for dusting powdered sugar on top add professional touches. For flavor variations, keep small bowls of mix-ins (nuts, dried fruit, sprinkles) nearby.
A wire cooling rack (like OXO Good Grips) prevents soggy bottoms, and a pastry brush helps dust cookies with melted butter or egg wash for extra shine.
Nutrition facts
Frequently asked questions
Can I make this recipe with fewer than 12 dozen cookies?
This recipe scales down beautifully. For 6 dozen cookies, reduce all ingredients by half. For 3 dozen, use one-quarter of the measurements. The dough chilling time remains the same, but you can bake all cookies in one batch if using a single sheet pan. Just maintain the 3-inch spacing between cookies for even baking.
What’s the best way to store baked cookies for holiday gifting?
For gifting, let cookies cool completely, then place them in quart-sized freezer bags with the air pressed out. Label each bag with the flavor and date. Store in the freezer for up to 3 months. When ready to serve, thaw at room temperature for 1-2 hours. For short-term gifting, use amber glass jars with airtight lids—they keep cookies fresh for 5 days at room temperature.
Why did my cookies spread too much?
Over-spreading usually happens when the dough is too warm or the butter melts during mixing. Always use cold butter (straight from the fridge) and chill the dough for the full 2 hours. If your kitchen is warm, chill the dough disks for 30 minutes in the freezer before scooping. Also, ensure your oven is properly calibrated—use an oven thermometer to confirm it’s at 350°F.
Can I add other mix-ins like nuts or dried fruit?
Yes! Replace 1 cup of chocolate chips with your favorite mix-ins. For nuts, try 1 cup chopped walnuts or pecans. For fruit, use 1 cup dried cranberries or cherries. Toss mix-ins in 1 tablespoon flour first to prevent sinking. If adding wet ingredients like citrus zest, reduce another liquid by 1 tablespoon to balance the dough. Always chill the dough extra long (3 hours) when adding moisture-heavy mix-ins.
How do I prevent cookies from getting tough?
Tough cookies result from overmixing or overbaking. Mix dry ingredients just until combined (you should still see flour streaks), and bake until edges are golden but centers look slightly underdone. Remove cookies from the oven when they’re soft in the middle—they’ll firm up as they cool. For extra tenderness, replace 1 cup all-purpose flour with 1 cup cake flour or add 1 tablespoon cornstarch to the dry ingredients.

- 6 Egg Cake Recipe with Oil: Light as Air With Buttery Moisture - October 4, 2026
- 4 Bean Casserole Recipe: One-Pan Heartiness With Smoky Paprika Depth - October 4, 2026
- 3-Ingredient Keto Mug Cake Recipe: Microwave Magic in 2 Minutes - October 4, 2026