
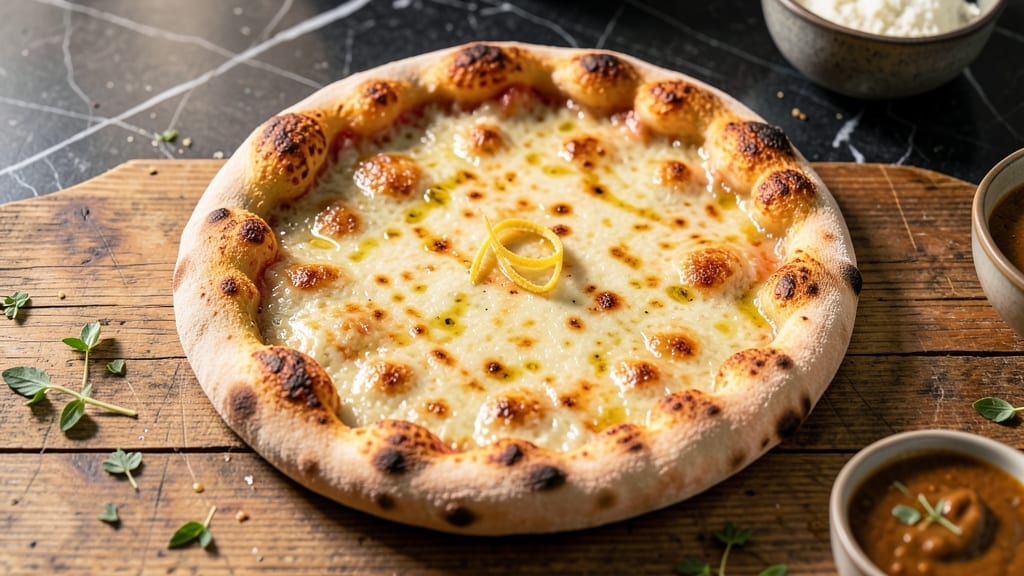
A 12-inch pizza crust with chewy centers and perfectly blistered edges is within reach—no pizza stone or expensive tools required. This recipe delivers authentic Neapolitan-style results using just flour, water, yeast, and salt, with a technique that ensures crispy yet tender dough every time.
The secret lies in high hydration and a quick, hot bake that transforms simple ingredients into a restaurant-worthy crust.
What sets this recipe apart is the 30-minute prep followed by a 10-minute bake, making it ideal for weeknight dinners or weekend gatherings. The dough develops flavor during a short cold proof, while the high heat of your oven creates those coveted charred edges without burning the center.
No stretching skills? No problem—this dough is forgiving and shapes easily, even for beginners.
By the time you pull it from the oven, you’ll have a golden, blistered crust with a chewy interior that holds up perfectly to your favorite toppings. The aroma alone will have everyone gathered around the table, and the texture—crispy yet pliable—is exactly what separates homemade pizza from store-bought.
This is the foundation for a pizza that tastes like it came from a brick oven.
Pair it with classic marinara and mozzarella for a Neapolitan-style pie, or load it up with pepperoni and fresh basil for a New York favorite. The crust stands up to both, proving its versatility. Ready to master this? Let’s get started.
Ingredients for 12 inch pizza crust
Four simple ingredients create a chewy, blistered pizza crust with restaurant-style perfection.
| Ingredient | Amount | Notes |
|---|---|---|
| All-Purpose Flour 🌾 | 3 ½ cups | Unbleached, high-protein preferred |
| Active Dry Yeast 🍞 | ¼ tsp | Freshly opened for best results |
| Granulated Sugar 🍚 | ½ tsp | Activates yeast quickly |
| Kosher Salt 🧂 | 1 ½ tsp | Diamond Crystal preferred |
| Warm Water 💧 | 1 ¼ cups | 110°F, not boiling |
| Extra-Virgin Olive Oil 🫒 | 1 tbsp | For dough elasticity |
| Cornmeal 🌽 | ¼ cup | For dusting pizza peel |
| Semolina Flour 🌾 | ¼ cup | Optional for crust texture |
Flour is the foundation—King Arthur or Caputo Tipo 00 if you want to splurge, but all-purpose works perfectly fine. The yeast needs to be freshly opened—check the date, and if it’s been sitting in your pantry for months, toss it. Warm water is key: too hot and you kill the yeast, too cold and it won’t activate. 110°F is ideal, so if you don’t have a thermometer, let tap water sit for 10 minutes after boiling. The olive oil adds tenderness, but don’t overdo it—just enough to make the dough silky. For the best blistered edges, cornmeal or semolina on your peel is non-negotiable.
No yeast? Instant yeast works 1:1, but active dry is traditional. Running short on sugar? Honey at half the amount gives a slightly different flavor but works in a pinch. Salt substitutes? Maldon flakes or sea salt add texture, but kosher holds up best in dough. The dough should be sticky but not wet—if it’s too dry, add a splash of water; if too wet, a sprinkle of flour. And if you’re worried about hydration, remember: this dough is designed to be high-moisture for that authentic chew.
Dough keeps beautifully in the fridge for up to 48 hours—wrap tightly in plastic to prevent drying. For longer storage, freeze shaped dough balls for up to 3 months. Thaw overnight in the fridge before baking. The secret to blistered edges? Preheat your oven to 500°F for at least 30 minutes—a pizza stone or inverted baking sheet works best. If you don’t have one, a heavy metal pan will do in a pinch, but the edges won’t blister as dramatically.
Why You’ll Love This Recipe
- No-Knead Magic: I’ll admit, I was skeptical about yeast dough without kneading—until I tried this. Just mix the flour, yeast, sugar, and salt with warm water, let it rest, and boom. The dough stretches like butter, no aching forearms required.
- Crispy-Center Chew: That perfect balance? The edges get golden and crispy while the middle stays pillowy. Honestly, it’s the kind of texture that makes you pause mid-slice—like the dough is begging you to take another bite.
- Game for Any Night: Weeknight dinner? Sunday family meal? This crust handles it all. I’ve topped it with everything from classic pepperoni to a veggie-loaded breakfast pizza—no judgment here, just delicious flexibility.
- Pantry Goldmine: Five ingredients, zero specialty items. The yeast activates fast, the sugar feeds it just right, and the salt? It’s the secret to flavor that actually matters. Plus, a batch lasts me days—leftover crust gets reheated in seconds or turned into garlic knots.
Step-by-step instructions for 12-Inch pizza crust recipe
Here’s how to craft a perfectly chewy, blistered-edge pizza crust without any fancy equipment.
Activate the Yeast for Maximum Rise
In a large bowl, combine the 1.25 cups warm water (about 110°F) with the 0.5 tsp granulated sugar and 0.25 tsp active dry yeast. Let it sit for 5-10 minutes until you see plenty of bubbles forming on the surface and a foamy head develops. This confirms your yeast is alive and ready to work.
If the mixture doesn’t bubble after 10 minutes, your yeast is likely dead—start over with fresh yeast. The warm water should feel like bathwater to your wrist, not hot enough to burn. Too hot water kills yeast instantly, while too cold water won’t activate it properly.
Mix the Dough with Wet and Dry Ingredients
Add the 3.5 cups all-purpose flour and 1.5 tsp kosher salt to the yeast mixture. Using a wooden spoon or dough whisk, stir until a shaggy mass forms. Then add the 1 tbsp extra-virgin olive oil and mix again until the dough comes together.
At this stage, you might need to use your hands to bring everything into a cohesive ball. The dough should be slightly sticky but not wet. If it’s too sticky, add 1-2 tablespoons more flour; if too dry, add 1 teaspoon more water. The goal is a smooth, elastic dough that doesn’t stick to your fingers when lightly dusted with flour.
Knead the Dough for Optimal Texture
Turn the dough onto a lightly floured surface and knead for 8-10 minutes until smooth and elastic. I like to use the “windowpane test” to check doneness—stretch a small piece of dough thin enough that you can see light through it without tearing. When it passes this test, your gluten development is perfect for chewy pizza crust.
If the dough feels too tough or resists stretching, you’ve over-kneaded it. If it’s too slack and stretches easily, knead for another 2-3 minutes. The dough should feel like well-worked playdough—smooth, slightly tacky, and springy when pressed. This kneading step builds the gluten network that gives pizza its signature chewiness.
Let the Dough Rise for Maximum Flavor
Place the dough in a lightly oiled bowl, cover with a clean kitchen towel or plastic wrap, and let it rise in a warm place for 1-2 hours or until doubled in size. I like to use my oven with the light on for consistent warmth—this creates ideal conditions without needing a proofing box.
You’ll know it’s ready when the dough has expanded to about twice its original size and springs back slowly when poked. The edges should look puffy and the surface slightly domed. If it rises too quickly (within 30 minutes), your kitchen is too warm—cover it with a damp towel to slow the process. Proper rising time develops the best flavor and texture.
Shape and Prepare for Baking
Punch down the risen dough to release air, then divide it into two equal pieces (about 1.75 cups each) if making two 12-inch pizzas. On a lightly floured surface, gently stretch one piece into a 12-inch circle by pressing from the center outward. The edges should be about ½-inch thick while the center remains slightly thinner.
Transfer the shaped crust to a pizza peel dusted with 0.25 cup cornmeal and 0.25 cup semolina flour (this prevents sticking and adds that professional look). If making a second pizza, repeat with the remaining dough. Let the shaped crust rest for 10-15 minutes before adding toppings—this final relaxation prevents shrinking during baking.
Pro Tips For Making 12 Inch Pizza Crust
- WEIGH YOUR FLOUR: That 1-cup measure in your recipe isn’t precise—flour packed vs. scooped varies by 30 grams. Use a kitchen scale for the 12-inch crust; 450 grams of all-purpose flour gives you consistent, reliable dough every time. (Yes, even if you’re impatient like me—I used to eyeball it and wonder why some crusts turned out dense.)
- LET THE YEAST BATH: Mix the yeast with warm water and sugar first, then wait exactly 5 minutes before adding flour. If it doesn’t foam by then, your yeast is dead—start over. (I learned this the hard way after making a sad, flat pizza at a party. No second chances.)
- SALT THE WATER: Add the kosher salt to the warm water when activating the yeast—it dissolves better and seasons the dough from the start. Skip this, and you’ll end up chasing flavor later. (Your future self will notice the difference, trust me.)
- CHILL THE DOUGH: After shaping, refrigerate the 12-inch dough for at least 24 hours—it develops flavor and makes stretching easier. I know, I know, but trust the process: cold dough stretches like butter, and the crust gets that perfect chewy bite. (Short on time? Do 4 hours minimum—just don’t skip it.)
Regional styles of this dish
Neapolitan Style
For the authentic Italian experience, keep your dough ball small and high-hydration like this recipe. Preheat your oven to 500°F with a pizza stone or steel inside for 60 minutes—this mimics Neapolitan brick ovens.
After shaping, bake for just 90-120 seconds for perfect charred edges while keeping the center soft. Top with San Marzano tomatoes, fior di latte mozzarella, and fresh basil. The high heat creates those signature blisters without burning.
New York Thin Crust
This style prioritizes a crispy, foldable edge with a slightly chewy center. After shaping, bake at 475°F for 12-15 minutes on a preheated pizza stone. Use garlic-infused olive oil> brushed on the dough before adding toppings for that classic NY flavor.
Load it with pepperoni slices, red onions, and a sprinkle of oregano>—the thin crust handles heavy toppings beautifully while staying crisp.
Chicago Deep Dish
Transform this recipe into a deep-dish masterpiece by pressing the dough into a 9-inch cast iron skillet> (oiled generously). Bake at 375°F> for 10 minutes> to create a sturdy crust base. Layer with mozzarella chunks, sauce on top>, and a sprinkle of Parmesan>.
The high hydration dough holds up perfectly to the weight of fillings, giving you that signature buttery, flaky texture. Finish with a sprinkle of crushed red pepper> for heat.
California Flatbread
Skip the yeast entirely for this quick version—just mix 2 cups flour, 1 tsp salt, and ½ cup olive oil> into a shaggy dough. Roll it thin and bake at 450°F> for 8-10 minutes>.
Top with goat cheese, roasted red peppers, and a drizzle of balsamic glaze>. The lack of yeast makes this style crispy and light, perfect for gourmet toppings like caramelized onions> or fresh arugula>. 🌶️
Detroit-Style Pan Pizza
Use a 10-inch cast iron pan> (or deep pizza pan) and brush it with ½ cup butter> before pressing the dough into the edges. Bake at 425°F> for 15 minutes> to create a caramelized, crispy crust.
Top with cheese pulled to the edges> and a thin layer of sauce>—this style is all about the buttery, airy crust. Add pepperoni> and sausage> for a hearty meal that’s crispy on the outside and tender inside.
Nutrition facts
Frequently asked questions
Can I make this 12-inch pizza crust without a pizza stone?
While a pizza stone creates the best blistered edges, you can achieve great results with a preheated baking sheet or even a cast iron skillet. For best results, place your crust on the hot surface and bake at 500°F for 10-12 minutes. The key is ensuring your oven is fully preheated—this mimics the high heat of a pizza stone.
Why does my dough keep sticking to the surface?
High hydration dough like this recipe is naturally sticky, but proper technique prevents sticking. Always use cornmeal or semolina flour on your pizza peel or baking sheet—these create a non-stick barrier. If the dough still sticks, your surface isn’t hot enough or you need to dust more generously. For shaping, use a light dusting of flour only on your work surface, not the dough itself.
Can I make this dough ahead of time?
Yes! This dough keeps beautifully in the fridge for up to 48 hours wrapped tightly in plastic. For longer storage, shape the dough into balls and freeze them for up to 3 months. Thaw overnight in the fridge before shaping—never at room temperature. The cold proof actually enhances flavor development, making your pizza even more delicious.
How do I know when my dough is properly risen?
Your dough is ready when it’s doubled in size and springs back slowly when poked gently. The edges should look puffy and the surface slightly domed. If it rises too quickly (under 30 minutes), your kitchen is too warm—cover it with a damp towel to slow the process. Proper rising time is crucial for that perfect chewy texture.
What’s the best way to shape a 12-inch pizza without tearing?
Start by letting the dough rest for 10-15 minutes after punching it down. Then, use your fingers to gently press from the center outward, rotating the dough as you go. If it resists, let it rest another 5 minutes. For extra help, use a rolling pin to gently roll the edges thinner while keeping the center slightly thicker. Remember: this dough is designed to be stretchy, not fragile!

- 3lb Prime Rib Roast Recipe: Juicy Pink Center Guaranteed in 3 Hours - October 31, 2026
- 5 Spice Cake Recipe: Warmly Spiced Layers With Crunchy Top - October 31, 2026
- 1950’s Macaroni and Cheese Recipe: Nostalgic Creamy Cheese Sauce with Buttery Noodles - October 31, 2026