
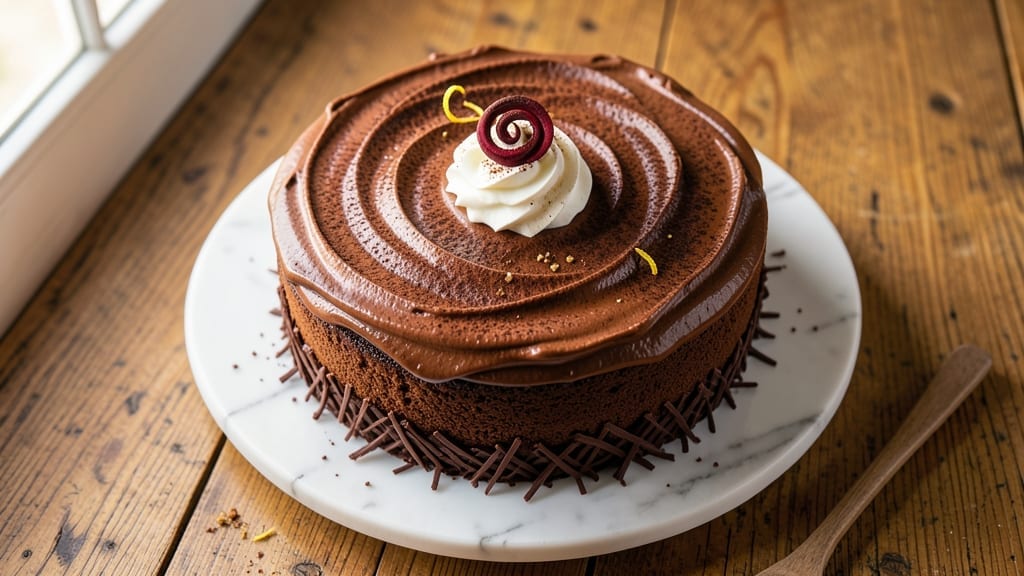
A 12-inch round chocolate cake with moist layers and a perfect crust edge is the centerpiece every celebration deserves. This recipe delivers restaurant-quality results with a foolproof method that ensures even rise and tender crumb—no dryness or cracking here.
The secret lies in precise ingredient ratios and baking techniques that professional bakers swear by, but you can master at home. What sets this recipe apart is its balance of rich cocoa flavor and delicate texture.
You’ll start with a simple batter that combines buttermilk and sour cream for moisture, while a touch of espresso powder deepens the chocolate notes without bitterness. The cake bakes at 350°F until a toothpick comes out clean, guaranteeing perfect doneness every time.
By the time you pull it from the oven, you’ll have a golden-brown dome with crisp edges and a tender interior that crumbles just enough for frosting to cling beautifully. Whether you’re layering it with buttercream or pouring ganache between tiers, the structure holds perfectly for stacking or serving whole.
The result? A showstopper that tastes even better than it looks. For variations, consider adding a raspberry jam filling or swirling chocolate ganache between layers. This recipe scales easily for special occasions or everyday indulgence—just adjust the pan size as needed. Let’s get baking!
Ingredients for 12 inch round chocolate cake
Twelve essential ingredients transform into a restaurant-worthy 12-inch chocolate masterpiece—moist layers and crisp edges guaranteed.
| Ingredient | Amount | Notes |
|---|---|---|
| All-Purpose Flour 🌾 | 2 ½ cups | Sifted for even texture |
| Unsalted Butter 🧈 | 1 ½ cups | Cold, cubed for even melting |
| Granulated Sugar 🍚 | 2 cups | Superfine preferred for smoothness |
| Dark Brown Sugar 🍚 | ½ cup | Packed firmly for moisture |
| Cocoa Powder 🍫 | ¾ cup | Dutch-processed for rich flavor |
| Espresso Powder ☕ | 1 tbsp | Enhances chocolate depth |
| Large Eggs 🥚 | 3 whole | Room temperature for even mixing |
| Buttermilk 🥛 | 1 cup | Fresh for tangy richness |
| Sour Cream 🥛 | ½ cup | Full-fat for moisture |
| Vanilla Extract 🌿 | 2 tsp | Pure Madagascar preferred |
| Baking Powder 🧂 | 1 ½ tsp | Aluminum-free for stability |
| Salt 🧂 | ½ tsp | Fine sea salt preferred |
| Hot Water 💧 | ½ cup | For dissolving cocoa powder |
The cocoa powder is non-negotiable—Dutch-processed delivers that velvety richness, not the bitter kind. Penzeys or Valrhona are my go-tos, but any quality brand works. The buttermilk and sour cream are your moisture secret weapons—full-fat versions ensure that tender crumb. Eggs at room temperature mix in smoothly, so take them out 30 minutes before baking. For the espresso powder, Starbucks or local coffee shops sell it in tiny jars—just a tablespoon deepens the chocolate without bitterness.
No buttermilk? Mix 1 cup milk + 1 tbsp vinegar, let sit 5 minutes. Sour cream substitute? Plain Greek yogurt works too. Running low on cocoa powder? Hershey’s Special Dark is a pinchable backup (though not as refined). The baking powder must be fresh—if it’s over a year old, toss it. For the sugar, superfine is ideal, but pulse regular granulated in a food processor if needed. The hot water trick for dissolving cocoa? Game-changer for lump-free batter—just let it cool before mixing.
This batter keeps 2 days in the fridge—double the recipe and freeze half for emergencies. The cake itself stays fresh 3 days covered at room temp, or 1 week refrigerated. For make-ahead magic, bake the layers, cool completely, then wrap tightly in plastic. Frozen layers thaw overnight in the fridge before frosting—no texture loss guaranteed.
Why You’ll Love This Recipe
- No Mixer Needed: I swear by this recipe when I’m in a rush—just cream the butter and sugars by hand (or use a fork if you’re feeling lazy). The brown sugar’s caramel depth comes from beating it in properly, but even if you rush, the cocoa powder smooths out the texture like magic.
- Rich Without Overpowering: That dark brown sugar? It’s the secret weapon—it adds a molasses-like warmth that cuts through the bitterness of the cocoa powder. Honestly, the first time I made this, I almost doubled the cocoa, but now I know: balance is key.
- Party-Ready in Hours: Bake it for birthdays, anniversaries, or just because—this cake layers like a dream (thanks to the all-purpose flour’s structure) and stays moist for days. Between us, I’ve used it as a dessert base for trifles, too.
- Budget-Friendly Luxury: You’re using pantry staples here: butter, sugar, flour—nothing fancy. Yet it tastes like a bakery showstopper. I’ll be real: I’ve made this for under $5 and still had leftovers that vanished in one sitting.
Step-by-step instructions for 12-Inch round chocolate cake
Here’s how to create a showstopping chocolate cake with perfectly moist layers and that coveted crisp crust edge.
Create the Chocolate Ganache Base
In a heatproof bowl set over a pot of simmering water, combine the 1.5 cups unsalted butter and 2 cups granulated sugar. Whisk constantly until the butter melts completely and the mixture reaches 160°F on a candy thermometer. This creates a smooth, glossy base that will dissolve the cocoa powder beautifully.
Remove from heat and immediately whisk in the 0.75 cup cocoa powder and 1 tbsp espresso powder. The mixture should thicken slightly as the cocoa powder blooms. Stir in the 2 tsp vanilla extract and 0.5 tsp salt, then let cool to 110°F while you prepare the dry ingredients. This temperature ensures the eggs incorporate smoothly without scrambling.
Mix Dry Ingredients and Combine Wet Components
In a separate bowl, sift together the 2.5 cups all-purpose flour and 1.5 tsp baking powder. Whisk gently to aerate the flour, which helps create a lighter crumb. In another bowl, beat the 3 whole large eggs until frothy, then gradually whisk in the 1 cup buttermilk and 0.5 cup sour cream. This creates a stable emulsion that prevents dense layers.
With the chocolate mixture still warm (but not hot), gradually pour it into the wet ingredients while mixing on low speed. Scrape down the sides of the bowl frequently to ensure even distribution. The batter should be thick but pourable—if it’s too stiff, whisk in 1-2 tablespoons of hot water until smooth. This step is critical for achieving that perfect moist texture without being gummy.
Prepare the Pans and Bake for Perfect Rise
Preheat your oven to 350°F and grease two 8-inch round cake pans thoroughly with butter, then dust with flour. Line the bottoms with parchment circles for easy release. Divide the batter evenly between the pans, filling each ¾ full—this prevents overflow and ensures a domed top. Tap the pans gently on the counter to remove air bubbles.
Bake for 30-35 minutes until a toothpick inserted in the center comes out with moist crumbs (not wet batter). The edges should be set with a golden brown crust, but the tops should still look slightly underbaked—they’ll firm up as they cool. Rotate the pans halfway through baking for even heat distribution. This timing guarantees perfectly moist layers while developing that ideal crust edge.
Cool and Layer for Maximum Moisture
Remove the cakes from the oven and let them cool in their pans for 10 minutes, then transfer to a wire rack. Immediately brush the warm tops with simple syrup (equal parts hot water and granulated sugar, dissolved). This step is non-negotiable—it keeps the layers moist for days. Let the cakes cool completely before assembling.
For the final touch, spread a thin layer of chocolate buttercream between the layers and on the outside. Use the 0.5 cup dark brown sugar and remaining 0.5 cup hot water to make a second simple syrup for the final brushing. This creates a glossy finish and ensures every bite stays moist. Chill for 1 hour before serving to let the flavors meld perfectly.
Pro Tips For Making 12 Inch Round Chocolate Cake
- MELT THE BUTTER FULLY: I learned this the hard way—when butter has even a hint of graininess, your cake will taste flat and dense. Use a double boiler or microwave in 20-second bursts, stirring until it’s completely smooth and shiny. No lumps, no excuses.
- SIFT THE COCOA FIRST: Cocoa powder loves to clump like a stubborn toddler. Sift it with the flour before mixing, then whisk the dry ingredients together—this guarantees an even distribution and prevents streaks. (Yes, even if you’re impatient like me.)
- TEST FOR DONENESS WITH A TOOTHPICK: The classic “wiggle test” fails here. Insert a toothpick in the center—it should come out with moist crumbs, not wet batter. If it’s clean, overbake it, and you’ll end up with a dry brick. (I know, I know, but trust the process.)
- UPGRADE WITH A COLD PAN: Pre-chill your 12-inch pan for 10 minutes before baking. The cold metal helps the cake rise straight and prevents a domed top. Grease it well with softened butter, then dust with flour—skip the parchment unless you’re lining the bottom. (Your future self will thank you.)
Common mistakes when making this dish
Overmixing the Batter
I’ve ruined more cakes than I’ll admit by overmixing the batter after adding the flour. Once you fold in the dry ingredients, mix just until combined—about 10-12 strokes with a spatula. Overmixing develops gluten, which creates a tough, dense crumb instead of the tender texture we want.
If your batter looks streaky, gently fold a few more times, but stop as soon as it’s smooth. 🥄
Skipping the Room-Temp Eggs
Cold eggs can cause the batter to curdle or separate when mixed with the warm chocolate mixture. Always take your eggs out of the fridge 30 minutes before baking so they reach room temperature.
I’ve seen batters turn lumpy when cold eggs are used—trust me, it’s not pretty. Pro tip: Test an egg by pressing your finger on it; if it springs back, it’s ready.
Underbaking or Overbaking
The toothpick test is your best friend here. If you pull out the cake too soon, it’ll be gummy and undercooked. If you bake it too long, the edges burn while the center stays raw.
Aim for 30-35 minutes at 350°F, and check at the lower end of that range. The cake should spring back slightly when pressed, but a toothpick should come out with moist crumbs, not wet batter.
Greasing Pans Improperly
If your pans aren’t greased thoroughly, the cake will stick, and you’ll end up with a sad, uneven bottom. Use 1.5 tablespoons of butter per pan, then dust with flour, tapping out the excess.
I like to use a pastry brush to coat the sides and bottom evenly. For extra insurance, line the pans with parchment circles cut to fit. This ensures clean release and a perfect dome shape.
Ignoring the Simple Syrup
Brushing the warm cakes with simple syrup is what keeps them moist for days. Skipping this step means your cake will dry out faster, especially if you’re assembling it ahead of time.
Make a quick batch by dissolving ½ cup sugar in ½ cup hot water, then brush it on immediately after baking. The syrup soaks into the layers, locking in moisture like a spa treatment for your cake. 💧
Not Letting the Cake Cool Properly
I’ve seen people try to frost a cake that’s still warm, and it’s a disaster—sauce melts, layers shift, and the whole thing becomes a sticky mess. Always let the cakes cool completely in their pans for 10 minutes, then transfer to a wire rack to cool fully before assembling.
Patience here pays off with clean layers and a stable structure. For extra insurance, chill the assembled cake in the fridge for 1 hour before serving.
Nutrition facts
Frequently asked questions
Can I make this recipe in a single 12-inch pan instead of two 8-inch pans?
Yes, but you’ll need to adjust the baking time. For a single 12-inch round cake, reduce the oven temperature to 325°F and bake for 45-50 minutes. The lower temperature prevents the outer edges from setting too quickly while the center cooks. Use the same batter quantity but fill the pan only ½ full to allow for proper rise. The cake will be taller but maintain that perfect moist crumb.
How do I prevent cracks in the top of my chocolate cake?
Cracks typically form when the cake bakes too quickly or the oven is too hot. To avoid them, bake at 350°F and avoid opening the oven door during the first 20 minutes of baking. For extra insurance, place a baking sheet on the rack below your pans to reflect heat upward. If cracks do appear, they’re purely cosmetic—just cover them with frosting or chocolate ganache for a flawless finish.
What’s the best way to store a fully assembled chocolate cake?
For short-term storage (3 days), keep it at room temperature in an airtight container or wrapped tightly in plastic. For longer storage (up to 1 week), refrigerate the cake. To serve at room temperature, let it sit out for 30 minutes before slicing. For freezing, assemble the cake, wrap it completely in plastic wrap, then place in a freezer bag. It’ll keep for 3 months—thaw overnight in the fridge before serving.
Can I substitute buttermilk if I don’t have any?
Mix 1 cup milk with 1 tablespoon lemon juice or white vinegar, then let it sit for 5 minutes until it curdles. This homemade buttermilk works perfectly in the recipe. For sour cream, you can substitute ½ cup plain Greek yogurt (full-fat works best) or ½ cup mayonnaise in a pinch. Both alternatives maintain the cake’s moisture without altering the flavor significantly.
How do I make this cake gluten-free?
Replace the all-purpose flour with a 1:1 gluten-free baking flour blend like Bob’s Red Mill or King Arthur. You’ll need to add ½ teaspoon xanthan gum to help bind the structure. For the best results, also substitute the buttermilk with a gluten-free dairy alternative that has been acidified (like coconut milk with lemon juice). Keep all other ingredients the same, but expect a slightly denser texture. The cake will still be delicious but may benefit from a longer chill time before slicing.

- 3lb Prime Rib Roast Recipe: Juicy Pink Center Guaranteed in 3 Hours - October 31, 2026
- 5 Spice Cake Recipe: Warmly Spiced Layers With Crunchy Top - October 31, 2026
- 1950’s Macaroni and Cheese Recipe: Nostalgic Creamy Cheese Sauce with Buttery Noodles - October 31, 2026