
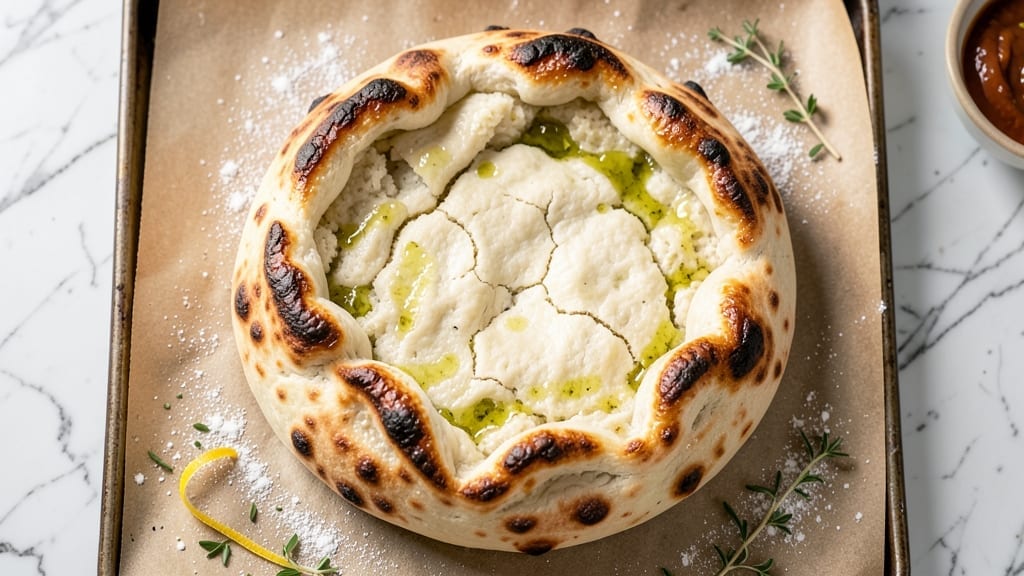
This 3-day Neapolitan pizza dough recipe transforms simple ingredients into a masterpiece of texture and flavor through slow fermentation. The secret lies in patience—letting the dough develop complex, tangy notes over 72 hours that no rushed recipe can match.
I’ve perfected this method after years of experimenting, and the results are worth every minute of waiting.
The dough’s strength comes from a precise balance of 00 flour (low protein for tender crust) and a minimal yeast activation that builds flavor gradually. Unlike quick doughs, this version develops a light, airy crumb with just the right chew—essential for that authentic Neapolitan snap.
The cold fermentation also makes it easier to handle, reducing the risk of overworking the dough.
By day three, your dough will be ready to shape into golden, blistered pizzas with a crispy yet soft interior. The long fermentation enhances the flour’s natural sweetness and develops a subtle sourness that elevates every bite.
Whether you’re making classic Margherita or experimental toppings, this dough is the foundation of restaurant-quality pizza at home.
Once you try this method, you’ll never go back to fast doughs. The key lies in consistency—temperature control, proper hydration, and timing. Let’s get started on creating dough that tastes like it came from Naples itself.
Ingredients for 3 day neapolitan pizza dough
Eight essential ingredients for dough that develops restaurant-quality flavor over three days.
| Ingredient | Amount | Notes |
|---|---|---|
| 00 Flour 🌾 | 1 ½ lb | Low-protein, Italian type for authentic texture |
| Active Dry Yeast 🍞 | ½ tsp | Freshly opened for maximum potency |
| Granulated Sugar 🍚 | ½ tsp | Feeds yeast for initial activation |
| Diamond Crystal Kosher Salt 🧂 | 1 ½ tsp | Fine grain for even distribution |
| Cold Water 💧 | 1 cup | Chilled to 50°F for proper hydration |
| Extra-Virgin Olive Oil 🫒 | 1 tbsp | High-quality, fruity variety |
| Semolina Flour 🌾 | ¼ cup | For dusting and authentic texture |
| Cornmeal 🌽 | ¼ cup | Prevents sticking during shaping |
The 00 flour is non-negotiable here—its low protein content (around 8-10%) creates that signature Neapolitan tenderness. Caputo is the gold standard, but King Arthur 00 flour is a solid American alternative. Buy it in bulk if you’re serious about pizza; a 5-pound bag covers about 10 batches. Store it in an airtight container with a silica packet to prevent rancidity. The yeast should be fresh—if it’s been sitting in your pantry for months, the dough will take longer to rise or may fail entirely. For the water, use filtered if possible, but tap water works fine as long as it’s cold.
No 00 flour? Bread flour mixed with 10% cake flour gets you close, though the texture won’t be identical. Running short on yeast? Instant yeast works at the same ratio, but active dry requires a 10-minute activation in warm water. The olive oil can be swapped for avocado oil if you prefer a neutral flavor, but stick with extra-virgin for that authentic funk. Semolina is optional but worth it—it creates that perfect crispy crust. If you can’t find it, regular all-purpose flour works in a pinch, though it won’t brown as beautifully. The cornmeal is purely functional, so any brand will do.
Once mixed, the dough needs to rest in the fridge for three days. Use a lidded container or vacuum-sealed bag to prevent drying. The first 24 hours are critical—don’t peek or disturb it. After day three, the dough will be sticky but pliable; scrape it onto a floured surface and let it rest for 10 minutes before shaping. Any unused dough can be frozen for up to 3 months—wrap it tightly in plastic and thaw overnight in the fridge before using. The flavor actually improves with longer fermentation, so don’t be afraid to extend it to four days if your schedule allows.
Why You’ll Love This Recipe
- Cold Start, Big Reward: I mix the dough in 10 minutes—just flour, yeast, sugar, salt, and water—then let it do the work while I watch a movie. No kneading, no fuss, just hands-off magic over three days.
- Neapolitan Crisp in Minutes: That 00 flour and slow fermentation? It’s the secret to a chewy center and a crackly crust that doesn’t need a wood-fired oven to impress. (Yes, even on a Tuesday night.)
- Meal Prep Goldmine: Make one batch, stretch it into pizzas, calzones, or focaccia for days. The dough keeps in the fridge, ready to transform into whatever mood strikes—no last-minute grocery runs.
- Budget-Friendly Luxury: A few dollars’ worth of ingredients stretch into a week’s worth of meals. Honestly, this is the kind of recipe that makes you feel fancy without breaking the bank.
Step-by-step instructions for 3 day Neapolitan pizza dough
This method builds complex flavor through slow fermentation—patience pays off with authentic Neapolitan character.
Mix the Dough with Minimal Handling
In a large mixing bowl, combine the 1.5 lb 00 flour, 0.5 tsp active dry yeast, and 0.5 tsp granulated sugar. The yeast needs the sugar to activate, but don’t overmix here—just distribute evenly with a whisk. Add the 1.5 tsp diamond crystal kosher salt and mix once more to incorporate.
Create a well in the center and pour in the 1 cup cold water and 1 tbsp extra-virgin olive oil. Using a wooden spoon or dough whisk, gently combine until a shaggy mass forms. Avoid developing gluten at this stage—we want a loose, open structure for proper fermentation. The dough should look like wet sand rather than a tight ball.
Bulk Ferment at Room Temperature
Cover the bowl tightly with plastic wrap and let rest at room temperature (68-72°F) for 1 hour. This initial rest allows the yeast to hydrate and begin gentle activity without developing too much gluten. After one hour, perform a “stretch and folds” sequence: wet your hands, grab one side of the dough, stretch it upward, and fold it over itself. Rotate the bowl and repeat this process four times total.
Return the bowl to rest, covered, for another 1 hour. The dough should show slight activity but not dramatic expansion. This controlled fermentation builds flavor without overproofing. After the second hour, perform another set of stretch and folds, then refrigerate uncovered for 24 hours. The cold slows fermentation while allowing flavor development—this is where the magic happens.
Cold Ferment for Maximum Flavor
After the initial 24 hours in the fridge, remove the dough and perform one final set of stretch and folds. This wakes up the yeast and redistributes tension. Return the dough to the fridge, covered, for 48 hours total (including the first 24 hours). The cold fermentation develops deep, complex flavors while maintaining proper texture—this is what distinguishes authentic Neapolitan dough from quick-rise versions.
During this time, the dough will rise slowly but noticeably. It should develop a slightly domed shape with small bubbles visible on the surface. The cold temperature prevents overproofing while allowing the gluten to relax naturally. This long fermentation creates the signature open crumb and tender texture of traditional Neapolitan pizza.
Shape and Rest Before Baking
Remove the dough from the fridge and let it sit at room temperature for 1 hour to relax. This final rest makes shaping easier and prevents the dough from springing back. Divide the dough into 4 equal portions (about 6 oz each) and shape into balls by gently cupping your hands and stretching the dough outward while tucking it under itself. Rotate as you work to create a tight, round ball with smooth surface.
Place each ball seam-side up on a tray dusted with semolina flour. Cover loosely with a towel and let rest at room temperature for 1-2 hours before baking. This final proof allows the dough to fully relax and develop its signature open crumb structure. The balls should nearly double in size but remain soft to the touch—press gently to test readiness.
Pro Tips For Making 3 Day Neapolitan Pizza Dough
- Hydrate the Yeast First: Mix the yeast, sugar, and half the cold water first—let it bubble for 5-10 minutes before adding flour. I learned this the hard way when my dough took three times longer to rise because the yeast wasn’t fully activated. Warm water (not hot) works best—think bathwater temperature.
- Weigh Your 00 Flour: Skip the cups—Neapolitan dough demands precision. Use a scale for the 00 flour (500g for a standard recipe) to avoid dense, gummy dough. I used measuring cups early on, and my crust turned out like a brick. Trust me, the scale is your friend here.
- Skip the Over-Kneading: Let the dough develop naturally during the first 24 hours—no need to punch it down or knead it aggressively. Overworking it tightens the gluten too much, and your crust will be tough instead of chewy. Just stretch and fold it gently during the final bulk rise.
- Chill the Dough Properly: After the first 24-hour rise, refrigerate the dough in a sealed container for two full days. This slow fermentation deepens flavor, but make sure it’s fully submerged in the fridge—not sitting on the shelf where it’ll warm up. I once left mine on the counter overnight, and the taste was noticeably flat.
Essential equipment for 3 day neapolitan pizza dough
Must-Have Mixing Tools
Start with a large stainless steel bowl (I love the OXO Good Grips brand) for mixing—its smooth surface prevents dough from sticking. Use a wooden dough whisk (like the KitchenAid model) to combine ingredients gently without overdeveloping gluten.
For stretch and folds, keep a spray bottle with water nearby to prevent sticking—just mist your hands before handling the dough. 🌟
Fermentation Essentials
A digital thermometer (I trust the Thermoworks models) is critical for monitoring fridge temperatures—ideal range is 36-38°F for cold fermentation. Store dough in a lidded glass container (like Pyrex) or a vacuum-sealed bag to prevent drying.
For room-temperature fermentation, place the bowl on a cooling rack over a baking sheet to catch any potential spills.
Shaping and Proofing Gear
Dust your work surface with semolina flour (not all-purpose) using a fine-mesh sieve—this creates that signature crispy crust. I use Lodge cast iron pizza peels for shaping and baking, but a well-floured wooden peel works too.
For proofing, a wire cooling rack elevated on a tray catches excess moisture better than a flat surface. 🔥
Baking Equipment
For authentic Neapolitan results, a pizza steel (like Pizzacraft) conducts heat evenly, but a preheated cast iron skillet works in a pinch. If using a home oven, the broiler setting creates those coveted blisters.
For wood-fired flavor at home, a charcoal pizza oven (such as Ooni) delivers professional results. Always preheat your equipment for at least 30 minutes before baking.
Storage Solutions
Keep unused dough in the fridge using airtight containers (I prefer Rubbermaid with snap-on lids) or vacuum-sealed bags to maintain freshness. For freezing, wrap portions tightly in plastic wrap followed by a foil layer—this prevents freezer burn.
Label everything with dates since fermented dough tastes best within 3 months. Thaw overnight in the fridge before using. ✨
Nutrition facts
Frequently asked questions
Why does this dough need 3 full days?
The extended fermentation transforms simple ingredients into complex flavors through enzymatic activity and yeast development. The cold slows yeast activity while allowing natural acids to develop, creating that signature Neapolitan tang. This process also breaks down gluten proteins, resulting in a lighter, more digestible crust compared to quick-rise doughs.
Can I use all-purpose flour instead of 00 flour?
While possible, it won’t replicate authentic Neapolitan texture. All-purpose has higher protein (11-13%) which creates a chewier crust. For best results, mix 80% bread flour with 20% cake flour to approximate 00’s low protein content. The dough will be slightly tougher but still delicious when baked properly.
What’s the best way to store leftover dough?
Wrap tightly in plastic wrap, then place in an airtight container or vacuum-sealed bag. Store in the fridge for up to 5 days or freeze for 3 months. For freezing, portion into individual balls first. Thaw overnight in the fridge—never at room temperature—to maintain texture and prevent condensation buildup.
How do I know when the dough is properly fermented?
Look for a slightly domed shape with small bubbles on the surface. Press gently—it should spring back slowly (not immediately). The dough should smell faintly sweet with a hint of tang. If it smells strongly alcoholic or has large bubbles, it’s overproofed. The ideal texture is sticky but pliable, not firm or dry.
Can I make this dough without a stand mixer?
This dough requires minimal handling—just gentle mixing and stretch-and-folds. Use a wooden spoon for initial mixing, then wet your hands and perform folds by hand. The low gluten development makes it perfect for hand mixing. The key is patience during fermentation rather than mechanical force.

- 3lb Prime Rib Roast Recipe: Juicy Pink Center Guaranteed in 3 Hours - October 31, 2026
- 5 Spice Cake Recipe: Warmly Spiced Layers With Crunchy Top - October 31, 2026
- 1950’s Macaroni and Cheese Recipe: Nostalgic Creamy Cheese Sauce with Buttery Noodles - October 31, 2026