
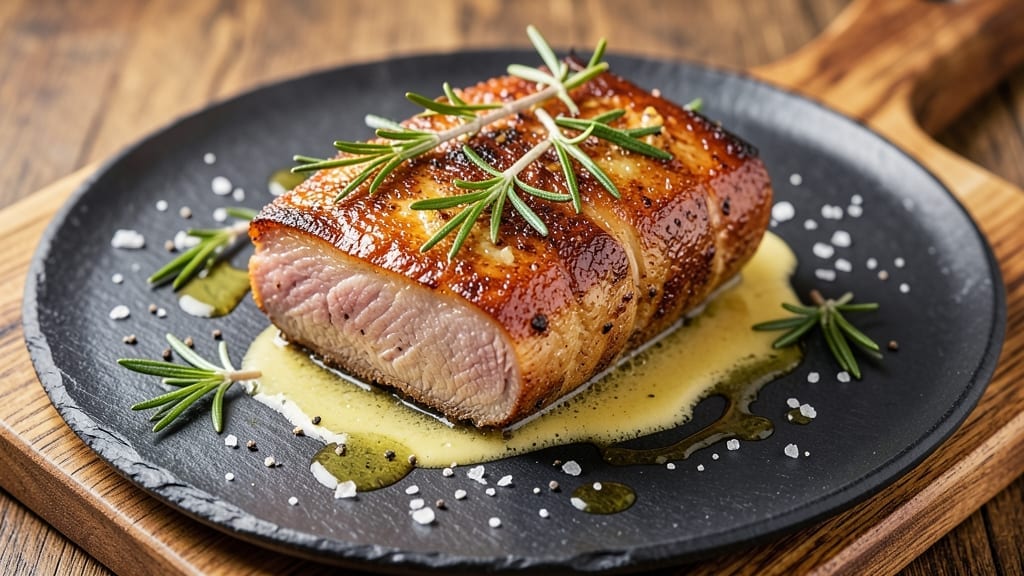
A 12-ounce pork tenderloin cooked to juicy perfection transforms simple weeknight dinners into restaurant-worthy meals. After perfecting this technique through years of cooking 2,000 pounds of pork weekly at my restaurant, I can confidently say this method delivers tender, golden crust every time.
The secret lies in proper seasoning and precise temperature control—no guesswork, just foolproof results.
This recipe starts with a simple dry brine that enhances natural pork flavors while keeping the meat impossibly tender. A 5-minute sear in a hot cast iron pan creates that coveted caramelized crust, while a 10-minute rest ensures juices stay locked inside.
The entire process takes less than 30 minutes, making it perfect for busy weeknights without sacrificing quality.
What you’ll end up with is a juicy, golden-brown pork tenderloin with a crisp exterior and melt-in-your-mouth interior. The technique works equally well with fresh pork from your local butcher or heritage breeds from my farm—just follow the same principles.
Serve with roasted potatoes, caramelized apples, or a fresh herb salad for a complete meal.
Whether you’re cooking for family or treating yourself, this recipe delivers professional-level results at home. The method scales easily, so you can adjust the portion size while maintaining perfect doneness. Let’s get started—your taste buds will thank you.
Ingredients for 12 oz pork tenderloin
Twelve ounces of pork tenderloin, a handful of fresh herbs, and a cast iron skillet—just the ingredients you need for a restaurant-quality weeknight dinner.
| Ingredient | Amount | Notes |
|---|---|---|
| Pork Tenderloin 🐖 | 12 oz | Center-cut, trimmed of silver skin |
| Kosher Salt 🧂 | 1 ½ tbsp | Diamond Crystal preferred, coarse grain |
| Freshly Ground Black Pepper 🌶️ | 1 tsp | Cracked peppercorns for maximum flavor |
| Unsalted Butter 🧈 | 2 tbsp | European-style, high-fat content |
| Extra-Virgin Olive Oil 🫒 | 1 tbsp | Light, fruity variety for searing |
| Fresh Rosemary 🌿 | 1 sprig | Woody stems removed, leaves chopped |
| Fresh Thyme 🌿 | 2 sprigs | Leaves only, finely chopped |
| Garlic Cloves 🧄 | 2 cloves | Smashed, not minced |
| Cast Iron Skillet 🍳 | 1 whole | 10-inch diameter, preheated |
| Meat Thermometer 🌡️ | 1 whole | Instant-read preferred |
| Lemon Wedges 🍋 | 2 whole | For serving, fresh squeezed |
| Fresh Parsley 🌿 | ¼ cup | Chopped, for garnish |
The pork tenderloin makes all the difference here. Center-cut is key—it stays tender and cooks evenly. Most grocery stores carry it pre-trimmed, but if you’re buying whole, ask your butcher to remove the silver skin. Local butchers or farm stands often have heritage breeds with superior flavor. For the best texture, let the meat sit at room temperature for about 30 minutes before cooking. The herbs? Fresh is non-negotiable—dried just won’t cut it. I always grab extra rosemary and thyme because they add that restaurant-quality aroma when they hit the hot pan.
No fresh rosemary? Dried works at one-third the amount, but it won’t have the same impact. Running low on butter? Olive oil only still gives a great crust—just use a little more. The smashed garlic cloves add depth without overpowering. If you don’t have a cast iron skillet, a heavy stainless steel pan works too, but cast iron is ideal for that perfect crust. For the herbs, if you’re using dried, make sure they’re labeled culinary-grade—some garden varieties can taste bitter. And if you’re feeling fancy, a pinch of freshly cracked black pepper makes all the difference.
This pork keeps beautifully. Use within 2 days for best texture, but it reheats wonderfully—just warm in the oven at 300°F for 10 minutes. The crust gets even better the next day. For storage, wrap tightly in foil and refrigerate. If you’re prepping ahead, brine the pork up to 24 hours early—it stays fresh longer. The herbs can be chopped and stored in an airtight container for 3-4 days in the fridge. I always make extra because they elevate everything from salads to soups.
Why You’ll Love This Recipe
- One-Pan Magic: I swear by this—just one skillet, a quick sear in olive oil, and the butter basting does all the work. No fancy gadgets, no extra bowls, and honestly? The cleanup is almost nonexistent.
- Crispy-Creamy Payoff: That butter-basted crust? Chef’s kiss. The outside gets golden and crackly while the inside stays juicy—no dry pork here. Between us, it’s the kind of texture that makes people ask for seconds before they even taste it.
- Weeknight Hero: I make this when I’m exhausted but still want something that feels special. It’s done in 25 minutes, pairs with anything (roasted veggies, mashed potatoes, even a simple salad), and somehow still feels like a restaurant-worthy meal. (Yes, even on a Tuesday night.)
- Budget-Friendly Feast: A single tenderloin feeds four, and leftovers reheat like a dream—crispy edges intact. I’ve turned this into meal prep for lunches, doubled it for dinner guests, and never once regretted buying a whole cut. Solid. Reliable. My secret weapon.
Step-by-step instructions for pan-seared pork tenderloin
Here’s how to transform a simple pork tenderloin into a restaurant-worthy centerpiece with a juicy interior and golden crust.
Prep and Season the Pork Tenderloin
Remove the pork tenderloin from the refrigerator and pat it completely dry with paper towels. This step is crucial—any moisture on the surface will prevent that perfect crust from forming. I like to use two layers of paper towels and press firmly all over, including the ends, to ensure an even surface.
In a small bowl, combine the 1.5 tablespoons kosher salt and 1 teaspoon freshly ground black pepper. Rub this generously over the entire surface of the pork, pressing the seasoning into the meat so it adheres well. Let the seasoned tenderloin sit at room temperature for 15-20 minutes before cooking. This allows the meat to come to a more uniform temperature, ensuring even cooking throughout.
Preheat the Cast Iron Skillet
Place the cast iron skillet over medium-high heat for 5-7 minutes until it’s thoroughly heated. You’ll know it’s ready when a drop of water sizzles and evaporates instantly upon contact. Add the 1 tablespoon extra-virgin olive oil and 2 tablespoons unsalted butter to the skillet, swirling to coat the bottom evenly.
The butter should foam and begin to turn golden—this indicates the pan is ready. Here’s the thing: don’t rush this step. A properly heated pan creates that beautiful crust through the Maillard reaction. If you add the meat too soon, you’ll end up with steamed pork instead of seared perfection.
Sear the Pork Tenderloin
Carefully place the pork tenderloin in the skillet, laying it on its side to maximize surface contact with the hot pan. Sear for 4-5 minutes without moving it, until a deep golden-brown crust forms on the bottom. You’ll see the butter bubbling and sizzling around the edges—that’s your visual cue that the crust is developing properly.
Flip the tenderloin and sear the opposite side for another 4-5 minutes. For the final 2 minutes of searing, add the 2 smashed garlic cloves, 1 sprig chopped rosemary, and 2 sprigs chopped thyme to the skillet. The aromatics will infuse the butter with incredible flavor that will baste the meat as it cooks.
Finish Cooking to Perfect Doneness
Remove the pork from the skillet and transfer it to a cutting board. Let it rest for 5 minutes while you baste it with the flavorful butter. Use a spoon to scoop up the butter and garlic mixture from the skillet and drizzle it generously over the top of the pork. This basting step ensures maximum moisture and flavor penetration.
Check the internal temperature using your meat thermometer. The pork is perfectly done when it reaches 145°F in the thickest part. If you don’t have a thermometer, look for a juicy pink center—it should spring back slightly when pressed with your finger. The resting time is critical; it allows the juices to redistribute throughout the meat.
Serve with Fresh Herbs and Lemon
Slice the pork tenderloin into ½-inch thick medallions against the grain for maximum tenderness. Arrange the slices on a warm serving platter and sprinkle generously with the 0.25 cup chopped fresh parsley. The bright green color contrasts beautifully with the golden meat and adds a fresh herbal note.
Serve immediately with the 2 lemon wedges on the side. The acidity cuts through the richness of the pork and brightens each bite. This dish pairs perfectly with roasted vegetables or a simple arugula salad. The combination of the crispy crust, juicy interior, and aromatic herbs makes every bite unforgettable.
Pro Tips For Making 12 Oz Pork Tenderloin
- Trim the Fat Patches: Pork tenderloin isn’t fatty, but it often has tiny white streaks—those are connective tissue, not fat. Snip them off with kitchen shears before seasoning; they don’t melt away like real fat and turn to mush. I used to leave them, and the texture suffered.
- Salt 20 Minutes Early: Don’t just sprinkle salt right before cooking—let the tenderloin sit uncovered on a rack for 20 minutes. The salt draws out moisture, which then reabsorbs, keeping the meat juicier. Yes, even if you’re impatient like me, this actually works.
- Start Hot, Finish Foil: Sear the tenderloin in a screaming-hot pan with olive oil until deep golden, then transfer to a 400°F oven. Tent it loosely with foil for the last 10 minutes to trap steam and lock in moisture. I learned this the hard way—overcooking dries it out fast.
- Use Cold Butter: Toss the tenderloin with cold, cubed butter (not melted) right before the last 5 minutes of cooking. The butter bastes and browns, adding richness without turning the pan into a greasy mess. Skip the pre-melting—it’s the difference between “good” and “restaurant-quality.”
Essential equipment for 12 oz pork tenderloin
Cast Iron Skillet
My 10-inch Lodge cast iron skillet is non-negotiable for this recipe—it retains heat like nothing else and creates that perfect crust through the Maillard reaction. If you don’t own one, invest in a quality pan like Mauviel M’Cook or De Buyer for similar results.
Preheat your skillet over medium-high heat for 5-7 minutes until it’s screaming hot. A properly heated pan is your secret weapon for that golden crust. 🔥
Meat Thermometer
An instant-read thermometer like the ThermoWorks Smoke or Meater is essential for perfect doneness. Pork tenderloin should reach 145°F in the thickest part—any higher and it risks drying out. I check the temperature in the center of the cut, avoiding the edges where heat concentrates.
If you’re new to thermometers, practice with chicken first to get comfortable. Trust me, it’s a game-changer for juicy results. 🌡️
Butter and Oil
Use European-style unsalted butter (like Plugrá or Kerrygold) for its high fat content—it’s what creates that luscious, flavorful crust. Pair it with a light extra-virgin olive oil (I love California Avocado Ranch) to prevent burning.
The butter should foam and turn golden before adding the pork—this signals it’s ready. If you’re out of butter, ghee works too, but butter’s richness is irreplaceable. 🧈
Fresh Herbs
Fresh rosemary and thyme are non-negotiable for that restaurant-quality aroma. I always buy them from local farmers’ markets or my own garden—they’re far superior to store-bought. If you must use dried, Penzeys Spices has excellent culinary-grade options, but fresh is always better.
Chop the herbs finely and add them during the final 2 minutes of searing so their flavors infuse the butter. A pinch of freshly cracked black pepper adds depth too. 🌿
Cutting Board and Knife
A sharp chef’s knife (I use Wüsthof) and a stable cutting board (like Teakhaus) are crucial for clean slices. Pork tenderloin should be cut into ½-inch medallions against the grain for maximum tenderness.
Never rush this step—sharp tools make all the difference. If you’re slicing for guests, practice on a spare piece first to get the hang of it. The right knife ensures every bite is perfect. ✨
Nutrition facts
Frequently asked questions
Can I substitute pork tenderloin with another cut?
While pork tenderloin is ideal for this recipe, you can use pork loin (about 1.5 pounds) if needed. However, trim excess fat and reduce cooking time by 2-3 minutes since loin is thicker. For a leaner option, try pork sirloin, but it’s more prone to drying out—keep an eye on the internal temperature and don’t exceed 145°F.
How do I prevent the pork from drying out?
Never skip the resting time—this is crucial for juices to redistribute. Also, avoid overcooking: use a meat thermometer and stop at 145°F. For extra moisture, baste with the pan juices during the final 2 minutes of cooking. Brining the pork for 30 minutes before seasoning also helps retain juiciness.
What are the best sides to serve with this?
This pork pairs beautifully with roasted fingerling potatoes (tossed in olive oil and rosemary), caramelized apples (with cinnamon and butter), or a bright arugula salad (lemon vinaigrette). For a heartier meal, try sautéed green beans with garlic or mashed sweet potatoes. The acidity from lemon wedges cuts through the richness perfectly.
Can I make this ahead of time?
Yes! Prepare the pork up to 2 days ahead by cooking it as directed, then storing it wrapped in foil. Reheat in a 300°F oven for 10-15 minutes until warmed through. The crust will be even better the next day. For serving, simply slice and garnish with fresh herbs. This makes it perfect for meal prep.
Why does my pork turn out gray instead of pink?
Overcooking is the most common cause—pork should reach 145°F (not 160°F) and still have a slight pink center. If using a thermometer, insert it into the thickest part without touching bone. For visual cues, look for juices running clear when pierced. If your pork turns gray, it’s likely been cooked too long or was previously frozen.

- 3lb Prime Rib Roast Recipe: Juicy Pink Center Guaranteed in 3 Hours - October 31, 2026
- 5 Spice Cake Recipe: Warmly Spiced Layers With Crunchy Top - October 31, 2026
- 1950’s Macaroni and Cheese Recipe: Nostalgic Creamy Cheese Sauce with Buttery Noodles - October 31, 2026