
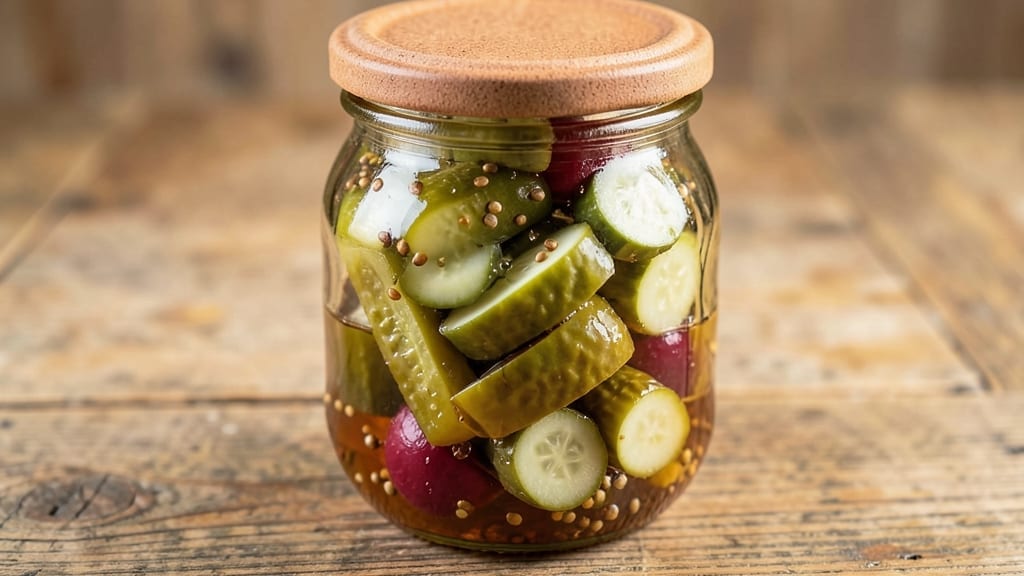
This 13-day sweet pickle recipe transforms simple cucumbers into addictive, crunchy treats with a perfect balance of sweetness and tang. The fermentation process develops complex flavors while preserving that satisfying crunch, making them ideal for snack drawers, gifts, or charcuterie boards.
I’ve perfected this method to ensure safe, flavorful results every time—no prior fermentation experience required.
The secret lies in the 13-day fermentation timeline, which allows natural sugars to caramelize while lactic acid bacteria create that signature tang. You’ll use just five core ingredients—cucumbers, sugar, vinegar, water, and salt—but optional spices like mustard seeds or dill elevate the flavor profile.
The process is hands-off once you prep the jars, with minimal daily attention needed.
By day 13, you’ll have crisp, sweet pickles with a glossy sheen and a texture that’s neither too soft nor rubbery. The sweetness mellows over time, creating a perfect balance for sandwiches, burgers, or snacking straight from the jar.
Proper storage extends their shelf life for months, making them a pantry staple worth the wait.
Ready to dive in? This recipe includes safety tips for fermentation, troubleshooting advice, and variations to customize the flavor. Let’s get started with your first batch—your snack drawer will never be the same.
Ingredients for 13 day sweet pickle
Five core ingredients plus optional spices transform cucumbers into addictive fermented treats.
| Ingredient | Amount | Notes |
|---|---|---|
| Fresh Kirby Cucumbers 🥒 | 2 lb | Small, uniform size preferred |
| Granulated White Sugar 🍚 | 1 ½ cups | Organic preferred for purity |
| White Vinegar 💧 | 1 cup | Distilled for consistency |
| Non-Iodized Salt 🧂 | ½ cup | Diamond Crystal preferred |
| Filtered Water 💧 | 4 cups | Chlorine-free preferred |
| Mustard Seeds 🌶️ | 1 tbsp | Yellow or brown variety |
| Fresh Dill Weeds 🌿 | ¼ cup | Chopped, stems removed |
| Garlic Cloves 🧄 | 4 cloves | Minced for flavor depth |
| Black Peppercorns 🌶️ | ½ tsp | Crushed lightly |
| Red Wine Vinegar 🍷 | ¼ cup | For depth of flavor |
| Clean Quart Mason Jars 🍶 | 2 pieces | With airtight lids |
The cucumbers are the foundation—look for Kirby variety at farmers markets or specialty stores like Whole Foods for that perfect crunch. Organic sugar is ideal (no weird additives), but regular white sugar works too. For vinegar, distilled white ensures consistency, but apple cider vinegar adds subtle flavor. Diamond Crystal salt dissolves better than table salt, which is crucial for fermentation balance. If you can’t find non-iodized salt, rinse regular salt first to remove iodine. The jars? Ball or Kerr brand are my go-tos—they seal like a dream and last forever.
No mustard seeds? Celery seeds at half the amount work in a pinch. Fresh dill is ideal, but dried dill at one-third the quantity gets you close. The garlic can be garlic powder (reduce to 1 tsp), but fresh is worth the extra minute. No red wine vinegar? Extra white vinegar works, but add 1 tsp of balsamic vinegar for depth. For the water, boiled and cooled is safest—kills any lurking bacteria. If you’re short on time, filtered tap water is fine, just let it sit out overnight to off-gas chlorine. The key is keeping everything sterile—no cutting boards in the dishwasher, no dirty hands.
Once fermented, these pickles keep for months in the fridge—up to a year if frozen. Store them submerged in their liquid to maintain crispness. Portion into smaller jars for gifts or snacking convenience. The flavor actually improves over time, so don’t rush eating them all! For long-term storage, freeze in portions—just thaw overnight in the fridge. Pro tip: Label your jars with the date so you track that 13-day magic. And if you make extra? They’re the ultimate host gift—everyone loves sweet pickles.
Why You’ll Love This Recipe
- No Special Tools Needed: I swear by this recipe because it’s the kind of thing you can do with a mason jar, a spoon, and whatever you’re already using to measure sugar. No fancy funnels, no sterilizing pots—just slice, pack, and pour. That’s it. Honestly, I’ve made it in my kitchen while chatting with a friend on the phone because it’s that simple.
- Sweet-Tart Magic: The balance here is chef’s kiss—crisp cucumbers with just enough sugar to caramelize the edges and vinegar to keep it bright. No cloying sweetness, no harsh sourness; it’s that perfect in-between that makes you reach for seconds. Plus, the salt cuts through the sugar like a whisper, leaving you wanting more.
- Meal Prep MVP: I make a big batch on Sundays, and it lasts me all week—on sandwiches, in salads, or just as a snack when I’m craving something crunchy. The 13-day shelf life means I’m never scrambling to buy pickles last-minute, and the flavor actually gets better as it sits. (Yes, even on a Tuesday night.)
- Pantry Staple Power: Between us, this recipe is dirt cheap to make. You’re using basic ingredients you probably already have—sugar, vinegar, salt—and the cucumbers stretch far. I’ve fed a crowd for under $10, and everyone’s left happy. It’s my go-to for potlucks, picnic sides, or just keeping my fridge stocked without breaking the bank.
Step-by-step instructions for fermented sweet pickles
Here’s how to transform simple cucumbers into sweet, crunchy pickles with perfect flavor balance.
Prepare the Brine Solution
In a medium saucepan, combine the 4 cups filtered water, 1.5 cups granulated white sugar, 1 cup white vinegar, and 0.5 cup non-iodized salt. Bring to a gentle boil over medium heat while stirring until the sugar and salt dissolve completely. You’ll see the sugar crystals disappear and the liquid become completely clear.
Once fully dissolved, remove from heat and let the brine cool to room temperature. This cooling process is crucial—adding hot brine to your cucumbers can start the fermentation process too quickly, leading to soft pickles. I like to place the saucepan in an ice bath to speed up the cooling if I’m impatient to get started.
Sterilize and Prepare the Jars
While the brine cools, wash the 2 clean quart mason jars and their lids thoroughly with hot, soapy water. Then sterilize them by placing them in a large pot of boiling water for 10 minutes. This step prevents any unwanted bacteria from contaminating your sweet pickles. After sterilizing, keep the jars hot until you’re ready to use them.
Meanwhile, carefully wash the 2 lb fresh Kirby cucumbers, removing any dirt or debris. Using a sharp knife, trim off the blossom ends (the tiny flower end of each cucumber) and cut each cucumber into ½-inch thick slices. Look for uniform pieces—they’ll ferment evenly and look more attractive in your jars.
Layer the Cucumber Mixture
In each sterilized mason jar, create a flavor base by adding 2 cloves minced garlic, ½ tablespoon mustard seeds, 1 tablespoon chopped fresh dill weeds, and ¼ teaspoon crushed black peppercorns. Then, begin layering the cucumber slices, packing them tightly into the jar. Leave about 1 inch of headspace at the top of each jar.
Here’s a pro tip: Use a wooden spoon to press down on the cucumbers as you layer them. This ensures they stay submerged in the brine and ferment evenly. You’ll want to see the brine covering the cucumbers completely—this prevents mold growth and ensures proper fermentation.
Add Brine and Seal the Jars
Once your cucumbers are layered, carefully ladle the cooled brine into each jar until the cucumbers are completely submerged by at least 1 inch. Add the ¼ cup red wine vinegar to each jar, swirling gently to distribute it throughout the brine. This vinegar addition creates the signature sweet-tangy flavor profile.
Seal each jar tightly with the sterilized lids. Wipe the rims clean with a damp paper towel to ensure a proper seal. Give each jar a gentle shake to help distribute the flavors throughout the brine. Place the jars on a stable surface where they won’t be disturbed during the fermentation process.
Ferment for 13 Days
Let the jars sit at room temperature for 13 days, away from direct sunlight. I place mine in a cool pantry where the temperature stays consistently around 70°F. After about 3 days, you’ll start to see small bubbles forming in the brine—this is the natural fermentation process at work.
After 7 days, give each jar a gentle shake to redistribute the flavors. By 13 days, your pickles should have developed a beautiful golden color and a sweet, tangy flavor. Taste one to check the flavor—it should be sweet with just a hint of tang. If they’re not sweet enough, you can leave them fermenting for a few more days, but they’ll continue to develop flavor over time.
Pro Tips For Making 13 Day Sweet Pickle
- Trim Thick Ends First: Kirby cucumbers have stubborn thick ends that never soften right—cut those off before slicing the rest. I used to waste time forcing them open later; now I just snip the tough spots and work with clean, even slices from the start.
- Boil Brine Hard: Don’t simmer the sugar-vinegar brine—boil it fast for 2–3 minutes to fully dissolve the sugar. I learned this the hard way when lazy simmering left grainy bits clinging to my pickles. A quick boil guarantees smooth syrup every time.
- Pack Tight, But Not Brutal: Stuff the jar firmly with cucumbers, but leave a ½-inch headspace—no mashing or bending. Overpacking traps air, and underpacking lets them float. My first batch had floaters; now I use a wooden spoon to gently press them down in layers.
- Add Garlic Late: Toss whole garlic cloves in after the cucumbers go into the jar—they’ll soften and infuse flavor without burning. I used to add them to the brine, and they’d turn bitter. Now they stay crisp and aromatic, like they’re supposed to.
Common mistakes when making your 13 day sweet pickle
Over-Salting the Brine
Using too much salt (more than ½ cup) can overwhelm the natural fermentation process, creating an environment where bad bacteria thrive instead of lactic acid bacteria.
This leads to a harsh, unbalanced flavor and potential spoilage. I’ve ruined batches by doubling the salt—always measure carefully using a kitchen scale for precision. 🧂
Skipping Sterilization
Unsterilized jars or equipment introduce harmful bacteria like mold or botulism-causing clostridium, which can ruin your pickles or worse. Always boil jars and lids for 10 minutes before use. I keep a separate pot just for sterilizing jars—it’s worth the extra step for safety. ⚠️
Uneven Cucumber Slices
Thick slices ferment slower and stay crunchy, while thin slices soften too quickly. Aim for ½-inch thick, uniform slices—use a mandoline slicer for consistency. I’ve seen batches where some slices were mushy while others stayed rock-hard because of uneven cutting. 🥒
Not Submerging Cucumbers
Cucumbers exposed to air develop mold or ferment unevenly. Always leave 1 inch of headspace filled with brine. If needed, add a sterilized fermentation weight or a clean cloth-covered weight to keep slices submerged. I’ve had to toss jars where cucumbers peeked above the brine. 💧
Rushing the Fermentation
Skipping the full 13-day process results in underdeveloped flavor and texture. The first 7 days are critical for lactic acid bacteria to work—don’t taste-test early! I once opened jars at day 5 and regretted it when the flavor was flat. Patience pays off with perfect sweet-tangy balance. ⏳
Ignoring Temperature
Fermenting above 75°F speeds up spoilage, while below 65°F slows beneficial bacteria. Keep jars in a consistent 70°F environment, like a pantry. I’ve had batches fail in summer heat—now I use a cooling rack under jars for better control. 🌡️
Nutrition facts
Frequently asked questions
Why does this recipe use a 13-day fermentation period?
The 13-day timeline is perfect for developing that signature sweet-tangy flavor while maintaining crisp texture. During this period, natural sugars caramelize and lactic acid bacteria create the signature tang without over-fermenting the cucumbers. Shorter fermentation (under 7 days) leaves them bland, while longer (over 2 weeks) can make them too soft.
Can I use regular table salt instead of non-iodized salt?
Technically yes, but iodine in table salt can inhibit fermentation. If you must use it, rinse the salt first to remove iodine. For best results, stick with non-iodized salt—it dissolves better and maintains proper fermentation balance. A kitchen scale helps ensure precise measurements.
How do I know when the pickles are ready at day 13?
Your pickles should have a golden hue, be fully submerged in the brine, and smell sweet with a mild tang. Taste one—they should be sweet with just a hint of acidity. If they’re too tart, leave them 2-3 more days. Never rush this step! The flavor develops gradually over the full 13 days.
What if mold appears during fermentation?
If you see any mold (fuzzy spots), discard the batch immediately—it’s unsafe to eat. This usually happens from improper sealing or contamination. Always use sterilized jars, keep cucumbers submerged, and store in a cool (70°F) environment. Never taste-test before day 13 to avoid introducing contaminants.
Can I make these pickles with other vegetables?
While cucumbers are ideal, you can experiment with carrots, radishes, or green beans—just adjust the fermentation time (they may need 10-12 days). For best texture, slice vegetables uniformly. The flavor profile will differ, but the sweet-tangy method works across many veggies.

- 3lb Prime Rib Roast Recipe: Juicy Pink Center Guaranteed in 3 Hours - October 31, 2026
- 5 Spice Cake Recipe: Warmly Spiced Layers With Crunchy Top - October 31, 2026
- 1950’s Macaroni and Cheese Recipe: Nostalgic Creamy Cheese Sauce with Buttery Noodles - October 31, 2026