
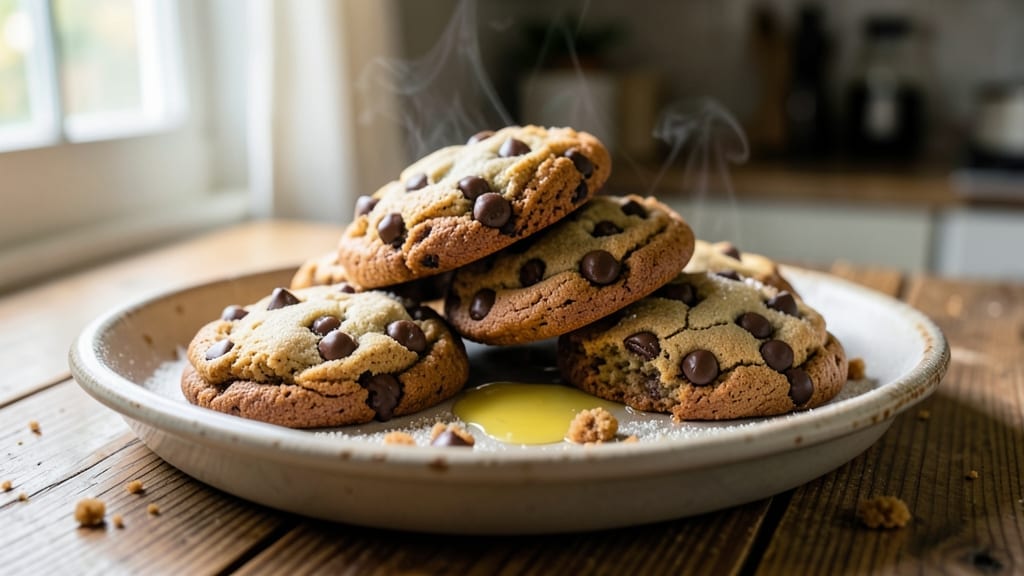
This 15 chocolate chip cookie recipe delivers the perfect balance of crunchy edges and chewy centers—a classic combination that never disappoints. 💛 The secret lies in precise ingredient ratios and baking techniques that transform simple pantry staples into irresistible treats.
I’ve baked these dozens of times, refining the method to ensure every batch turns out just right, with melty chocolate pockets and a golden-brown crust.
What sets this recipe apart is its foolproof approach to texture control. By combining brown and white sugar, we create a caramelized depth that enhances the cookie’s structure, while a touch of cornstarch ensures that chewy center without sacrificing crispness.
The dough rests for 30 minutes—a critical step that allows flavors to meld and prevents excessive spreading. This isn’t just another cookie recipe; it’s a restaurant-quality experience you can bake at home.
By the time you pull these from the oven, you’ll have 15 perfectly formed cookies with edges that crackle under your teeth and centers that yield slightly when pressed. The aroma alone—warm, buttery, with hints of vanilla and toasted sugar—will have everyone gathering in the kitchen.
These cookies stay fresh for days, making them ideal for gifting, bake sales, or satisfying that afternoon craving.
The best part? This recipe scales effortlessly. Double the batch for a crowd, or freeze half for later. Whether you’re a baking novice or a seasoned pro, these cookies deliver consistent, crowd-pleasing results every time. Let’s get started on creating your perfect batch.
Ingredients for 15 chocolate chip cookie
Fifteen perfect cookies start with these twelve essential ingredients—each playing its part in that magical crunchy-chewy balance.
| Ingredient | Amount | Notes |
|---|---|---|
| Unsalted Butter 🧈 | 1 cup | Room temperature, full-fat preferred |
| Granulated White Sugar 🍚 | ¾ cup | Superfine for even baking |
| Light Brown Sugar 🍚 | ¾ cup | Packed firmly, not leveled |
| Cornstarch 🌾 | 1 tbsp | For chewy texture |
| Large Eggs 🥚 | 2 whole | Room temperature, beaten |
| Pure Vanilla Extract 🌿 | 2 tsp | High-quality, not imitation |
| All-Purpose Flour 🌾 | 3 cups | Sifted, spooned lightly |
| Baking Soda 🧂 | 1 tsp | Freshly opened |
| Diamond Crystal Kosher Salt 🧂 | 1 tsp | Adjusts to taste |
| Chocolate Chips 🍫 | 2 ½ cups | Semi-sweet, 60% cacao |
| Flaky Sea Salt 🧂 | ½ tsp | For finishing cookies |
| Toasted Walnuts 🥜 | ½ cup | Chopped, optional crunch |
The butter is where it all begins—Plugrá or Land O’Lakes are my go-tos, but any good-quality unsalted works. Room temperature is non-negotiable; cold butter means tough cookies. The sugars? Superfine white and packed brown give you that perfect caramelized depth without graininess. Pro tip: Toast your walnuts in a dry pan for 3-4 minutes until fragrant—they’ll add a whole new dimension. For chocolate chips, Ghirardelli Semi-Sweet melts like a dream, but any 60% cacao will do. If you’re feeling fancy, toss in a few dark chocolate chunks for contrast.
No vanilla extract? Vanilla bean paste works 1:1, or scrape seeds from a pod into the dough. Short on cornstarch? Swap for 1 tbsp potato starch—same chewy magic. The baking soda and salt are non-negotiable for that perfect rise and flavor, but if you’re using a baking mix, check it first—some already have leavening. For chocolate alternatives, chopped white chocolate or butterscotch chips add sweetness without the bitterness. And if you’re gluten-sensitive? King Arthur Measure for Measure flour replaces all-purpose 1:1.
Butter and eggs stay fresh for 3 days in the fridge, but the dough? Roll it into a log, wrap tightly in plastic, and it’ll keep for 5 days or 3 months frozen. Baked cookies? Store in an airtight container with parchment between layers—they’ll stay crisp for 5 days or 2 months frozen. For gifting, freeze fully cooled cookies on a tray, then transfer to bags. The aroma alone when you pull them from the freezer? Worth every minute.
Why You’ll Love This Recipe
- The secret’s in the ratio: creamed butter with both white and brown sugar gives that perfect balance—crisp edges that shatter, but a chewy center that melts in your mouth. (Yes, even on a Tuesday night.) My kids fight over the last one, and I don’t blame them.
- Fewer Ingredients, Same Magic: I swear by this recipe because it skips the flour and relies on cornstarch—no extra trips to the pantry, just butter, sugars, and eggs. The dough comes together in three minutes of mixing, and honestly? That’s all it takes to make something that tastes like it belongs in a bakery.
- Butter-Sugar Crunch: The secret’s in the ratio: creamed butter with both white and brown sugar gives that perfect balance—crisp edges that shatter, but a chewy center that melts in your mouth. (Yes, even on a Tuesday night.) My kids fight over the last one, and I don’t blame them.
- Bakes Like a Dream: No spreading, no waiting forever—these cookies hold their shape while still staying soft. I’ve made them for holiday gifts, last-minute teacher appreciation, and even as a quick dessert after dinner. The 15-minute bake time? A total lifesaver.
Step-by-step instructions for double batch chocolate chip cookies
Here’s how to make 15 perfect cookies with crispy edges and chewy centers every time.
🍳 Step 1: Cream Butter and Sugars to Peak Fluffiness
In a stand mixer fitted with the paddle attachment, beat the 1 cup unsalted butter on medium speed until completely smooth and free of lumps. This should take about 1 minute—you’re looking for a uniform, pale yellow texture. Here’s the thing: room temperature butter is non-negotiable. If it’s too cold, it won’t cream properly, and if it’s too soft, it’ll melt into a greasy mess.
Gradually add the 0.75 cup granulated white sugar and 0.75 cup light brown sugar, mixing on medium speed for 3-4 minutes until light and fluffy. You’ll know it’s ready when the mixture nearly doubles in volume and leaves clean streaks on the bowl when you lift the paddle. This creaming process incorporates air, which creates those beautiful crackly tops and helps the cookies spread just enough for that perfect balance of crispy and chewy.
👨🍳 Step 2: Incorporate Eggs, Vanilla, and Dry Ingredients
Add the 2 whole large eggs, one at a time, mixing on low speed for 30 seconds after each addition. The mixture might look slightly curdled, but don’t worry—it’ll come together. Next, add the 2 teaspoons pure vanilla extract and mix for another 10 seconds. Here’s where it gets fun: the vanilla should disappear completely, leaving just a subtle aroma that’ll permeate your whole kitchen.
In a separate bowl, whisk together the 3 cups all-purpose flour, 1 teaspoon baking soda, 1 teaspoon diamond crystal kosher salt, and 1 tablespoon cornstarch. Sift the flour mixture into the wet ingredients and mix on low speed for 30-45 seconds until just combined. You should still see a few flour streaks—overmixing develops gluten, which makes cookies tough instead of chewy. Stop mixing as soon as the dry ingredients disappear.
🥘 Step 3: Fold in Chocolate and Walnuts for Maximum Crunch
Remove the bowl from the mixer and gently fold in the 2.5 cups chocolate chips and 0.5 cup toasted walnuts using a silicone spatula. Be careful not to overmix—you want the chocolate and nuts distributed evenly throughout the dough without breaking up the delicate structure you just created. I like to press the dough together gently to ensure the chocolate chips are surrounded by dough, which prevents them from melting too quickly in the oven.
This is also the perfect time to do a quick dough consistency check. The dough should hold together when pressed but still be soft enough to scoop easily. If it’s too crumbly, add 1-2 teaspoons of milk or water to bind it. If it’s too sticky, chill it for an extra 10 minutes before proceeding. The right texture ensures cookies that hold their shape while still being tender.
⏰ Step 4: Chill for Perfect Texture (Don’t Skip This!)
Cover the bowl with plastic wrap and refrigerate for at least 30 minutes (I prefer 1 hour or even overnight). Chilling is non-negotiable for these cookies—it solidifies the butter, which prevents excessive spreading in the oven. It also allows the flour to fully hydrate, creating that perfect chewy center. Real talk: I’ve made this recipe without chilling, and the results were flat, greasy cookies that spread into sad, thin discs.
While the dough chills, preheat your oven to 350°F and line two baking sheets with parchment paper. The oven should be fully preheated before the dough goes in—this ensures even baking and that beautiful golden color. If you’re making these in a humid environment, consider adding a baking sheet on the middle rack to help with even heat distribution.
🔥 Step 5: Bake to Golden Perfection with Timing Precision
Scoop the chilled dough into 2-tablespoon portions using a cookie scoop (this ensures uniform size and baking time). Place them 3 inches apart on the prepared baking sheets—crowding leads to uneven baking and cookies that steam instead of crisp up. Bake for 11-13 minutes until the edges are golden brown but the centers still look slightly underdone. They’ll continue cooking on the hot pan after you remove them from the oven.
Here’s the moment that matters: pull the cookies out when the edges are set but the centers still have a hint of softness. They should pull away from the parchment paper easily but still look slightly puffy. Let them cool on the baking sheet for 5 minutes before transferring to a wire rack. This brief resting period helps them set properly while maintaining that perfect texture. Sprinkle with 0.5 teaspoon flaky sea salt while still warm for that classic salty-sweet contrast.
Pro Tips For Making 15 Chocolate Chip Cookie
- MEASURE BUTTER BY WEIGHT: I learned this the hard way—packing butter into a measuring cup leaves air pockets, and suddenly your cookies turn out flat or greasy. Use a kitchen scale for 225g (1 cup) of cold, cubed butter. No guesswork, no sad cookies.
- CREAM BUTTER AND SUGARS LOW: Skip the food processor for this one. Use a wooden spoon and mix by hand—it takes longer, but you’ll get that perfect ribbon stage (when the dough holds a peak) without overworking the eggs. High-speed mixers add air, and your cookies spread like pancakes.
- CHILL DOUGH (REALLY): I was skeptical until I tried it: after mixing, refrigerate the dough for at least 2 hours, or overnight if you can. This prevents over-baking and gives you thick, chewy centers. Yes, even if you’re impatient like me—just don’t skip it.
- USE ROOM-TEMP EGG: Cold eggs from the fridge won’t blend smoothly into the butter-sugar mix, leaving lumps that ruin texture. Take eggs out 30 minutes before mixing. Trust me, the dough will be silky, and your cookies won’t taste like they’re fighting for structure.
Pro cooking tips for perfect results
Butter Temperature Matters
Room temperature butter is the foundation of perfect cookies. I always test by pressing a thumb into the butter—if it leaves a slight indentation but holds its shape, it’s ready. Cold butter creates tough cookies, while butter that’s too soft spreads excessively.
For best results, take the butter out of the fridge 1 hour before starting. If your kitchen runs warm, place the butter in the freezer for 10 minutes to firm it up slightly before creaming. 🧈
Sugar Ratio Secrets
The combination of white and brown sugar creates the ideal texture. White sugar gives structure, while brown sugar adds moisture and caramelization. Pack the brown sugar firmly into the measuring cup—this ensures you get the right amount of moisture.
For extra caramel depth, I sometimes replace 2 tablespoons of white sugar with turbinado sugar, which adds beautiful crunchy specks. Always use superfine sugar if you can—it dissolves more evenly and prevents graininess.
Dough Consistency Check
Your dough should be soft but not sticky when you press it. If it’s too crumbly, add 1 teaspoon milk or water at a time until it comes together. For sticky dough, chill for an extra 10-15 minutes before scooping.
I like to do the “finger test”—if the dough leaves a clean imprint when you press your finger, it’s ready. Overchilling can make cookies tough, so don’t exceed 2 hours total refrigeration time unless you’re making ahead.
Chilling Can’t Be Skipped
The 30-minute chill is non-negotiable for texture control. This step lets the flour hydrate fully and prevents excessive spreading. Pro tip: Roll the chilled dough into a log, wrap tightly in plastic, and refrigerate for up to 5 days or freeze for 3 months.
When ready to bake, let it sit at room temperature for 30 minutes before scooping. For extra flavor development, I often chill the dough overnight—it makes a noticeable difference in the final product.
Baking Sheet Spacing
Place cookies 3 inches apart on your baking sheets—this ensures even baking and prevents steam from making them soft. I use parchment paper for easy release, but if you’re baking on bare sheets, use a light dusting of flour. Rotate the pans halfway through baking for even browning.
For extra crisp edges, bake one sheet at a time on the middle rack. The oven thermometer is your friend—many ovens run hot, so if your cookies brown too quickly, lower the temp to 325°F.
Salt Timing Matters
Sprinkle the flaky sea salt immediately after removing cookies from the oven while they’re still warm. This enhances the buttery flavor and creates that perfect salty-sweet contrast. For extra crunch, I sometimes add crushed pretzels or toasted coconut flakes alongside the salt.
If you’re using kosher salt instead of flaky sea salt, sprinkle it evenly over the tops before baking for a different texture effect. 💛
Nutrition facts
Frequently asked questions
Why do your cookies have walnuts when classic recipes don’t?
The walnuts add a delightful nutty crunch that balances the softness of the cookie centers. You can omit them if you prefer traditional chocolate chip cookies, but I find they enhance the texture and flavor without overpowering. For a different twist, try chopped pecans or almonds instead.
Can I make these cookies gluten-free or vegan?
For gluten-free, replace the 3 cups all-purpose flour with a 1:1 gluten-free baking flour blend like King Arthur’s. For vegan cookies, use vegan butter, flax eggs (2 tbsp ground flaxseed + 6 tbsp water per egg), and dairy-free chocolate chips. The texture may vary slightly but will still be delicious.
How do I store leftover cookies?
Store cookies in an airtight container with parchment paper between layers to maintain crispness. They’ll stay fresh for 5 days at room temperature or 2 months in the freezer. For extra freshness, freeze individual cookies on a tray first, then transfer to a bag once solid.
What if my cookies spread too much?
Over-spreading usually means the butter was too soft or the dough wasn’t chilled long enough. Next time, chill the dough for 1 extra hour and use cold butter** (press a thumb into it—if it leaves a deep indentation, it’s too soft). Also, scoop dough balls slightly smaller (1.5 tablespoons instead of 2 tablespoons) for better control.
Can I double the recipe for a crowd?
Yes! This recipe is designed to scale easily. Double all ingredients and bake in batches on 3-4 baking sheets to avoid overcrowding. For large batches, I recommend using two stand mixers or mixing dough in two separate bowls to save time. Just be sure to rotate pans halfway through baking for even results.

- 3lb Prime Rib Roast Recipe: Juicy Pink Center Guaranteed in 3 Hours - October 31, 2026
- 5 Spice Cake Recipe: Warmly Spiced Layers With Crunchy Top - October 31, 2026
- 1950’s Macaroni and Cheese Recipe: Nostalgic Creamy Cheese Sauce with Buttery Noodles - October 31, 2026