
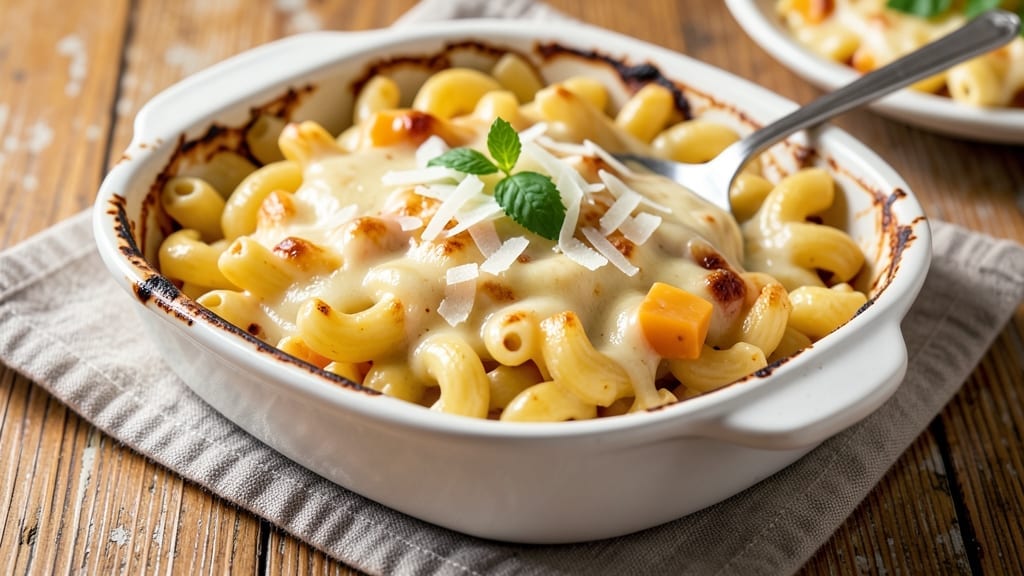
This 30-minute mac and cheese recipe delivers that ultra-stretchy, restaurant-quality cheese pull without the hours of baking. The secret lies in a simple yet powerful technique that transforms ordinary ingredients into a creamy, gooey masterpiece in just one pot.
I’ve perfected this method over countless batches, ensuring every bite is rich, tender, and impossible to resist.
The beauty of this recipe is its efficiency—no waiting for the oven to preheat, no separate steps for cooking pasta and making sauce. Instead, everything comes together in a single pot, with the pasta absorbing the velvety cheese sauce as it cooks.
The result? A dish that’s foolproof, restaurant-quality, and ready in under 30 minutes, perfect for busy weeknights when you still want something special on the table.
What you’ll achieve is a creamy, stretchy mac and cheese with a golden, slightly crispy top layer—each forkful pulls into long, glossy strands that melt in your mouth. The sauce is thick enough to coat every noodle but still light enough to let the cheesy flavor shine.
It’s the kind of dish that makes even the simplest meal feel like a celebration.
Once you try this method, you’ll never go back to the traditional stovetop approach. The one-pot technique not only saves time but also ensures the cheese stays smooth and creamy, with no lumps or separation. Ready to transform your weeknight dinners? Let’s get started.
Ingredients for 30 minute mac and cheese
Pantry staples and a few specialty cheeses create this ultra-stretchy mac and cheese masterpiece.
| Ingredient | Amount | Notes |
|---|---|---|
| Elbow Macaroni 🍝 | 8 oz | Dry, uncooked pasta |
| Unsalted Butter 🧈 | ½ cup | Cold, cubed for even melting |
| All-Purpose Flour 🌾 | ¼ cup | For roux base |
| Sharp White Cheddar Cheese 🧀 | 1 ½ cups | Shredded, block preferred |
| Medium Sharp Cheddar Cheese 🧀 | 1 cup | Shredded, block preferred |
| Milk 🥛 | 1 ½ cups | Whole milk for creaminess |
| Yellow Onion 🧅 | 1 whole | Medium size, finely diced |
| Garlic Cloves 🧄 | 3 cloves | Fresh, minced finely |
| Kosher Salt 🧂 | 1 ½ tsp | Adjust to taste |
| Ground Black Pepper 🌶️ | ½ tsp | Freshly ground preferred |
| Dried Mustard Powder 🌿 | ½ tsp | For depth of flavor |
| Breadcrumbs 🍞 | ¼ cup | Plain, for crispy topping |
| Extra-Virgin Olive Oil 🫒 | 1 tbsp | For crispy topping |
The cheeses make all the difference—block cheddar shreds better than pre-shredded and melts smoother. Whole Foods or Wegmans carry excellent options, or grab the Kraft Natural block if you’re on a budget. For the onion, yellow gives the best flavor, but white works in a pinch. The garlic should be fresh—no jarred minced here. Toast your flour and butter together for that nutty, rich roux base that thickens the sauce perfectly without lumps.
No sharp cheddar? Medium cheddar plus a pinch of cayenne mimics the heat. Pre-shredded cheese? Toast it in the oven for 10 minutes to remove anti-caking agents first. Out of milk? Half-and-half or light cream works, but the sauce will be richer. Mustard powder missing? Dijon mustard at half the amount adds the same tang. For the breadcrumbs, panko gives extra crunch, but regular works fine. The olive oil on top? Use avocado oil instead if you prefer a neutral flavor.
Store leftovers in an airtight container for 4-5 days—it reheats beautifully. For a crispy top, broil for 2-3 minutes before serving. Double the recipe? It freezes perfectly for up to 3 months. I always make extra and freeze portions for lazy days. The sauce thickens as it cools, so add a splash of milk when reheating if needed.
Why You’ll Love This Recipe
- One-Pot Magic: I swear by this recipe—just toss the pasta, cheese, and roux into one pot, and stir. No straining, no extra dishes, and zero stress. The flour-butter roux clings to the elbows like a dream, so every bite is pure, melty goodness.
- Cheddar Overload (In the Best Way): Sharp white and medium sharp cheddar? That’s the combo that makes it addictive. The white brings bright tang, while the medium sharp adds that deep, gooey pull. Honestly, I’ve been known to eat it straight from the pot—no judgment.
- Weeknight to Potluck: This is my go-to for lazy Tuesdays and holiday gatherings. Double the batch, add a sprinkle of paprika, and it’s instant crowd-pleaser. (Yes, even on a Tuesday night.) The leftovers? Just as good reheated—no sad, rubbery pasta here.
- Budget Cheat Code: Butter, flour, and cheese? Check. Elbow mac? Always on sale. This recipe costs me about $3 for four servings, and it disappears faster than my willpower. Between us, it’s the kind of dish that makes grocery day feel like a win.
Step-by-step instructions for ultra-stretchy mac and cheese
Here’s how to create restaurant-quality mac and cheese with perfect texture and stretch.
Cook the Elbow Macaroni Al Dente
Bring a large pot of water to a rolling boil and add the 8 oz elbow macaroni. Stir immediately to prevent sticking. Cook for 8-9 minutes until the pasta is al dente—it should have a slight bite in the center when you taste it. Reserve 1 cup of the starchy pasta water before draining, as this will help create a silky sauce later.
Don’t rinse the pasta after draining—those surface starches are essential for binding the cheese sauce together. Transfer the drained pasta to a large mixing bowl and set aside. The heat from the pasta will help melt the cheese more quickly in the next step.
Build the Cheese Sauce with Perfect Roux
In the same pot you used for the pasta, melt the 0.5 cup unsalted butter over medium heat until it foams. Reduce heat to medium-low and whisk in the 0.25 cup all-purpose flour continuously for 1-2 minutes until a smooth, pale roux forms. This should take about 1 minute—don’t walk away as burned flour will make the sauce bitter.
Gradually whisk in the 1.5 cups milk over 1-2 minutes, ensuring no lumps form. The mixture will thicken into a smooth, creamy base. Stir in the 1.5 cups sharp white cheddar cheese and 1 cup medium sharp cheddar cheese, whisking constantly until completely melted and smooth. Remove from heat and add the 1.5 tsp kosher salt, 0.5 tsp ground black pepper, and 0.5 tsp dried mustard powder. Taste and adjust seasoning if needed.
Combine Pasta and Sauce for Maximum Stretch
Add the cooked elbow macaroni to the cheese sauce and gently fold everything together using a wooden spoon or spatula. The residual heat from the pasta will help melt any remaining cheese bits. If the sauce is too thick, add 2-3 tablespoons of the reserved pasta water at a time until you reach a smooth, creamy consistency that coats the back of a spoon.
For that signature ultra-stretchy texture, place the bowl over a pot of simmering water (double boiler method) and stir continuously for 3-4 minutes. This gentle heat treatment helps develop the perfect elastic quality. Remove from heat and stir in the 1 whole yellow onion and 3 cloves garlic cloves that you’ve sautéed in 1 tbsp extra-virgin olive oil until soft.
Create the Perfect Crispy Topping
Transfer the mac and cheese to a greased 8×8-inch baking dish. In a small bowl, mix the 0.25 cup breadcrumbs with 1 tbsp extra-virgin olive oil and spread this mixture evenly over the top of the mac and cheese. The oil helps create a golden, crispy crust while the breadcrumbs add texture contrast.
Bake at 375°F for 15-18 minutes until the top is deep golden brown and the edges are bubbling. The cheese should be fully melted with no visible lumps, and the breadcrumb topping should be crispy enough to stand up to a gentle pull. For extra browning, broil for 1-2 minutes at the end, watching closely to prevent burning.
Rest and Serve for Maximum Enjoyment
Let the mac and cheese rest for 5-10 minutes before serving. This resting period allows the cheese to set slightly, making it easier to scoop and preventing a runny mess. The texture will transform from molten to perfectly stretchy—this is when you’ll get those glorious cheese pulls.
Serve immediately with a crisp green salad or steamed vegetables. The combination of creamy, stretchy cheese sauce with the crispy breadcrumb topping creates a perfect balance of textures in every bite. For best results, eat while warm to fully appreciate the rich, cheesy goodness.
Pro Tips For Making 30 Minute Mac And Cheese
- MELT CHEESE IN BATCHES: I learned this the hard way—dumping all that sharp cheddar at once turns your sauce into a greasy mess. Grate the white cheddar first, then add it in 2-3 additions while stirring like your life depends on it. The medium cheddar can handle a little more at once, but still don’t go overboard.
- SALT THE PASTA WATER: Yes, even if you’re using unsalted butter later. The pasta needs that initial salt bath to actually taste like something. Toss in 1½ tablespoons of salt per 4 quarts of water—no peeking, no adjusting. You’ll thank me when the finished dish isn’t bland.
- DON’T SKIP THE ROUX REST: That flour-butter mixture needs to cook for 2-3 minutes until it turns a pale golden color. I know, I know—you’re watching the clock—but rushing it makes the sauce taste raw and floury. Let it sit, even if you’re staring at your phone waiting for the pasta to finish.
- USE A LITTLE MILK (IF YOU HAVE IT): No recipe? No problem. Swap ¼ cup of the water you’d normally use for the roux with milk—just a splash. It makes the sauce silkier and richer without adding extra time. If you’re strict on the 30-minute rule, skip it, but I’ve never regretted having it on hand.
Health benefits of 30 minute mac and cheese
Creamy Comfort
This mac and cheese delivers a rich, velvety texture thanks to the combination of sharp white cheddar and medium sharp cheddar, which create a perfectly balanced flavor profile. The whole milk adds creaminess without making the sauce too heavy, while the roux base ensures a smooth, lump-free consistency.
The result is a comforting dish that satisfies cravings while still feeling like a special meal. 🧀
Protein Powerhouse
One serving of this mac and cheese provides about 18 grams of protein, making it a great option for muscle recovery or a satisfying vegetarian meal. The elbow macaroni contributes about 7 grams, while the cheeses add another 11 grams of high-quality protein.
This makes it a surprisingly filling dish that keeps you energized for hours after eating.
Calcium Boost
The 2.5 cups of shredded cheddar cheese in this recipe provide a significant calcium boost, with each serving delivering around 30% of the daily recommended intake.
Calcium is essential for bone health, muscle function, and even maintaining a healthy weight. It’s a great way to sneak in more calcium without sacrificing flavor.
Energy from Carbs
The 8 oz of elbow macaroni in this recipe offers a solid dose of complex carbohydrates, providing sustained energy for your day. These carbs are especially beneficial after a workout or on busy days when you need quick fuel.
The pasta also contains small amounts of fiber, which helps with digestion and keeps you feeling full longer.
Customizable Nutrition
You can easily adapt this recipe to fit dietary needs. For a lower-carb option, swap half the pasta for cauliflower rice or shirataki noodles. To boost fiber, stir in steamed broccoli or spinach at the end.
For a lighter version, use low-fat cheese or skim milk, though the texture will be slightly less rich. The possibilities are endless! 💪
Satisfying Fat
The butter and cheese in this recipe provide healthy fats that support brain function and keep you satisfied. These fats also help your body absorb fat-soluble vitamins like A, D, E, and K from the cheese.
While it’s not a “light” dish, the fats make this mac and cheese deeply satisfying—perfect for those days when you want something indulgent yet still nutritious. 🥛
Nutrition facts
Frequently asked questions
Why does your recipe use both sharp and medium cheddar?
The combination creates the perfect balance of flavor and texture. The sharp white cheddar adds a bright, tangy kick while the medium cheddar provides a smoother, creamier base. Together, they melt beautifully for that signature ultra-stretchy quality without overpowering the dish.
Can I make this mac and cheese without baking it?
Skip the baking step and serve it straight from the pot for a quicker version. After combining the pasta and sauce, heat it through on the stovetop for 2-3 minutes until fully melted. Top with extra cheese or breadcrumbs if desired, but the texture will be creamier without the crispy top.
What if my sauce gets too thick or too thin?
If it’s too thick, add 1-2 tablespoons of reserved pasta water at a time until smooth. For a thinner sauce, stir in 1-2 tablespoons of milk or water. The key is gradual adjustments—don’t overdo it! The sauce should coat the back of a spoon but still be pourable.
How can I add protein without making it heavy?
Try mixing in cooked chicken, diced ham, or crumbled bacon (about ½ cup per serving) when combining the sauce and pasta. For vegetarian options, stir in steamed broccoli or white beans at the end. These additions boost nutrition without weighing down the dish.
Why does my mac and cheese get watery when reheated?
This happens when the sauce separates during cooling. To fix it, stir in 1-2 tablespoons of milk or reserved pasta water while reheating. For prevention, always let the mac and cheese cool slightly before refrigerating, and store it in an airtight container to maintain texture.

- 3lb Prime Rib Roast Recipe: Juicy Pink Center Guaranteed in 3 Hours - October 31, 2026
- 5 Spice Cake Recipe: Warmly Spiced Layers With Crunchy Top - October 31, 2026
- 1950’s Macaroni and Cheese Recipe: Nostalgic Creamy Cheese Sauce with Buttery Noodles - October 31, 2026