
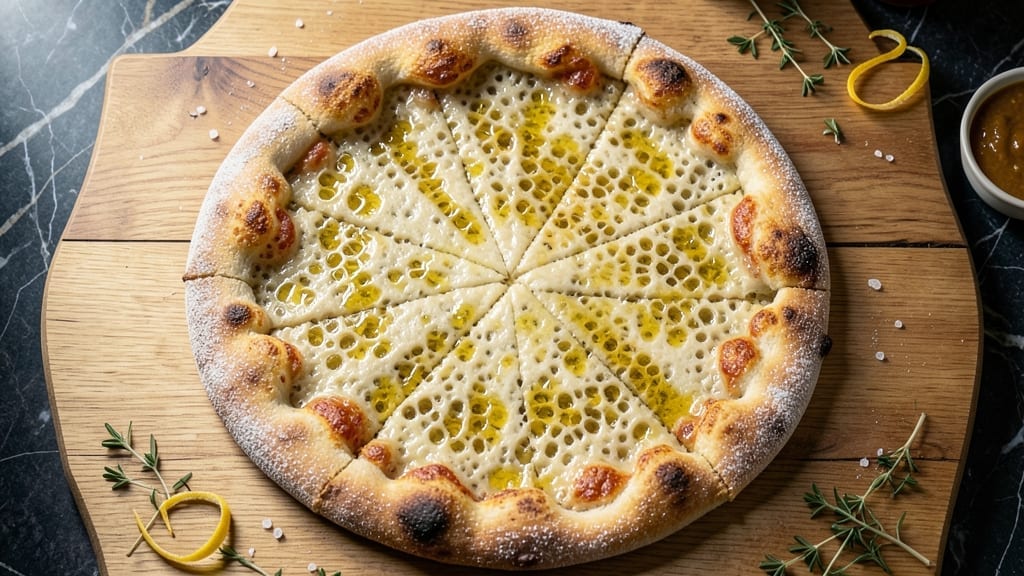
This 16-inch pizza crust recipe delivers the perfect balance of chewy edges and airy centers that hold toppings without collapsing—no more soggy or brittle crusts. The secret lies in precise fermentation and a high-protein flour blend that develops gluten just enough to create structure without toughness.
I’ve tested this method countless times to ensure it works whether you’re using a pizza stone, steel, or even a well-seasoned cast-iron skillet.
The dough comes together in under 15 minutes of active prep, but the real magic happens during the 48-hour cold fermentation—this slow rise develops deep flavor and a light, airy texture that’s impossible to achieve with quick methods.
The crust bakes at 500°F for 8-10 minutes, resulting in a golden, blistered edge that’s crisp enough to hold thick toppings while staying tender underneath. This isn’t your average thin crust; it’s a foolproof foundation for any pizza style you love.
What sets this recipe apart is its versatility—use it for classic New York-style slices, deep-dish Chicago pizzas, or even a 16-inch personal pan pizza for a crowd. The dough stretches easily without tearing, and the high hydration (70%) ensures a satisfying chew in every bite.
Whether you’re feeding a family or hosting a game day, this crust will be the star of the meal.
For best results, invest in a pizza peel and a pizza stone or steel, but I’ll show you how to adapt if you’re working with what you have.
The key is confidence in shaping—don’t overwork the dough, and let the fermentation do the heavy lifting. Ready to make a crust that rivals your favorite pizzeria?
Ingredients for 16 inch pizza crust
Just ten ingredients transform your kitchen into a pizzeria—no fancy tools needed.
| Ingredient | Amount | Notes |
|---|---|---|
| High-Protein Bread Flour 🌾 | 3 ½ cups | King Arthur or Caputo for best results |
| Warm Water 💧 | 1 ½ cups | 110°F for optimal hydration |
| Active Dry Yeast 🍞 | ½ tsp | Fresh yeast preferred for reliability |
| Granulated Sugar 🍚 | 1 tbsp | Feeds yeast for faster activation |
| Diamond Crystal Kosher Salt 🧂 | 1 ½ tsp | Fine grain for even distribution |
| Extra-Virgin Olive Oil 🫒 | 2 tbsp | Fruity, not bitter variety |
| Semolina Flour 🌾 | ¼ cup | For dusting and crisp edges |
| Cornmeal 🌽 | ¼ cup | For pre-baking texture |
| All-Purpose Flour 🌾 | ½ cup | For dusting pizza peel |
| Instant Yeast 🍞 | ¼ tsp | Optional for backup fermentation |
The flour is non-negotiable here. King Arthur High-Protein or Caputo Pizzeria are my go-tos—they develop gluten beautifully without getting tough. If you can only find all-purpose, King Arthur AP works in a pinch, but expect slightly less chew. The yeast matters too—fresh yeast from the refrigerated section activates faster than active dry, but both work. For the water, 110°F is ideal—too hot kills yeast, too cold slows fermentation. A thermometer helps, but you can eyeball it by touching a drop: should feel warm like bathwater. Pro tip: Sprinkle sugar directly on yeast before adding water to prevent clumping.
No high-protein flour? Mix 2 cups AP flour with 1.5 cups bread flour for similar results. Swapping olive oil? Avocado oil or melted lard work for crisp edges, but olive oil’s fruitiness shines through. The semolina and cornmeal might seem optional, but they’re what create that perfect golden, crispy edge. Skip them, and you’ll get a softer crust. For shaping, all-purpose flour on your hands prevents sticking better than semolina. And if your dough feels sticky? Add 1 tbsp flour at a time—it’s better to have slightly dry dough than one that won’t stretch.
Dough keeps 48 hours in the fridge for best flavor, but can go up to 72 hours if sealed tightly. For longer storage, freeze shaped dough balls for up to 3 months—thaw overnight in the fridge before stretching. The semolina and cornmeal? Store in airtight containers to prevent weevils. And here’s my secret: Bake the crust first for 3-4 minutes before adding toppings—it prevents a soggy bottom. The peel? Lightly flour it before sliding the dough on, and use a metal pizza stone on the middle rack for even heat. Preheat your oven for at least 60 minutes at 500°F—this is non-negotiable for that perfect blistered edge.
Why You’ll Love This Recipe
- No-Knead Magic: Honestly, the high-protein bread flour does all the heavy lifting here. Just mix, let it rise overnight, and—boom—no punchy arms or sticky counters. That warm water and sugar combo wakes up the yeast like a morning coffee, so you’re not stuck babysitting it.
- Crispy-Chewy Gold: Between us, that kosher salt isn’t just for flavor—it’s the secret to that perfect edge. The bread flour gives it that satisfying snap while keeping the center pillowy, like a hug from your favorite pizza joint. (Yes, even on a Tuesday night.)
- Party in a Pan: I’ve used this crust for everything from game-day wings to a full-blown veggie feast. The 16-inch size feeds a crowd without looking like a mess, and leftovers? Just reheat slices in the oven for that fresh-out-the-box crunch.
- Budget Crust Win: A bag of bread flour lasts forever, and you’re not drowning in expensive dough ingredients. This recipe stretches my grocery dollars while still tasting like I spent hours prepping. (Spoiler: I didn’t.)
Step-by-step instructions for 16-Inch pizza crust
Here’s how to craft a crust with chewy centers and airy edges that hold toppings without tearing.
Activate the Yeast with Warm Water and Sugar
In a large mixing bowl, combine the 1.5 cups warm water (should feel like bathwater, around 110°F) with the 1 tbsp granulated sugar and 0.5 tsp active dry yeast. Let this sit for 5-10 minutes until you see frothy bubbles forming on the surface. This confirms your yeast is alive and ready to work.
If you don’t see bubbles after 10 minutes, your yeast might be dead or the water too hot. In that case, sprinkle in the 0.25 tsp instant yeast as a backup—this gives you that extra insurance for perfect rise. Gently stir the mixture once to distribute the yeast evenly, but avoid overmixing at this stage.
Mix the Dough with High-Protein Flour and Olive Oil
Add the 3.5 cups high-protein bread flour and 1.5 tsp diamond crystal kosher salt to the yeast mixture. Using a wooden spoon or dough whisk, stir until a shaggy mass forms. Then add the 2 tbsp extra-virgin olive oil and mix again until the dough starts coming together.
This high-protein flour is key—it gives you that perfect balance of chewiness and structure. Once the dough forms a cohesive ball, turn it out onto a lightly floured surface and knead for 8-10 minutes by hand, or use a stand mixer with a dough hook for 5-6 minutes on medium speed. You’re looking for a smooth, elastic dough that springs back slightly when poked.
First Rise for Maximum Flavor Development
Lightly oil a large bowl, place the dough inside, and cover with a damp kitchen towel or plastic wrap. Let it rise in a warm place (like your turned-off oven with a bowl of hot water inside) for 1.5-2 hours, or until it has roughly doubled in size. The dough should feel light and airy when pressed gently with one finger.
This first rise is where the magic happens—the yeast ferments and develops those complex flavors. If your kitchen is cold, place the bowl near a warm spot like the top of your refrigerator. Avoid direct sunlight or drafts, as these can cause uneven rising. Patience here pays off with a better crust.
Shape and Pre-Bake with Semolina and Cornmeal
Punch down the risen dough to release air, then divide it into two equal pieces. On a lightly floured surface, roll each piece into a 16-inch circle, keeping the edges slightly thicker than the center. Transfer each crust to a parchment-lined baking sheet, then dust generously with 0.25 cup semolina flour and 0.25 cup cornmeal.
The semolina and cornmeal create that signature crispy edge while preventing sticking. Use your fingers to gently press the edges outward, creating that classic pizza crust flare. Let the shaped crusts rest for 20-30 minutes before pre-baking—this final rest helps relax the gluten and prevents shrinking during baking.
Pre-Bake for Structure and Topping Support
Preheat your oven to 475°F with a pizza stone or baking sheet inside for at least 30 minutes. Once preheated, carefully transfer the shaped crusts to the hot stone or sheet. Bake for 8-10 minutes until the edges are golden and the crust feels firm to the touch.
This pre-bake step is crucial—it gives your crust structure so it can support heavy toppings without sagging. The edges should be crisp but not burnt, and the center should still feel slightly soft. Immediately after pre-baking, dust with 0.5 cup all-purpose flour to prevent sticking when adding toppings and sauce.
Pro Tips For Making 16 Inch Pizza Crust
- Dissolve the Sugar: DESCRIPTION: Toss that granulated sugar into the warm water first—let it fully dissolve before adding yeast. I learned this the hard way when my yeast took forever to activate because it was stuck clumping around undissolved sugar. A quick stir and 30-second wait makes all the difference.
- Stretch, Don’t Roll: DESCRIPTION: Skip the rolling pin for a 16-inch crust—it’ll make the edges tough. Instead, press the dough into a ball, then gently stretch it with your fingers from the center outward. If it resists, let it rest another 10 minutes. Trust me, your crust will thank you.
- Salt the Dough Twice: DESCRIPTION: Add half the kosher salt to the dough, then sprinkle the rest on the surface before shaping. The second layer locks in flavor and prevents a bland crust. (Yes, even if you’re impatient like me—just don’t skip it.)
- Preheat the Peel: DESCRIPTION: Slide your pizza peel into the oven with the pizza stone for the last 5 minutes of preheating. This ensures the crust hits a screaming-hot surface immediately, giving you that perfect char. I used to rush this, and the crust always came out sad.
Troubleshooting great 16 inch pizza crust
Dough Too Sticky?
If your dough feels like glue, resist the urge to add extra flour—this disrupts the gluten structure. Instead, wet your hands slightly with water and use that to handle the dough. The high hydration (70%) is intentional for chewy texture, so trust the process.
If absolutely necessary, add just 1 tbsp flour at a time while stretching, focusing on the outer edges where it matters most. 💧
Crust Shrinking During Baking
This usually happens when the dough isn’t rested enough after shaping. Always let shaped crusts rest for 20-30 minutes before pre-baking—this relaxes the gluten. If you’re in a rush, try this trick: Place the shaped dough in the fridge for 10 minutes before baking.
The cold helps stabilize the structure while you preheat the oven.
Uneven Browning
For spotty browning, rotate your pizza stone or sheet halfway through baking (after 4-5 minutes). If using a pizza peel, ensure your oven rack is in the center position—heat rises unevenly in home ovens.
For extra insurance, place a baking sheet on the lower rack 10 minutes before baking to reflect heat upward. 🔥
Dough Tearing When Stretching
Overworking the dough is the #1 cause of tears. After the first rise, handle it as little as possible. For stubborn tears, use the “fold and stretch” method: Fold the torn section inward, let it rest 5 minutes, then stretch again.
The cold fermentation (48 hours) actually makes the dough more forgiving—it develops elasticity over time. If all else fails, patch with a small piece of dough scraped from the bowl.
Soggy Bottom Syndrome
Pre-baking is your secret weapon here. Always bake the crust for 8-10 minutes before adding toppings—this creates a sturdy base. If you’re adding wet toppings (like fresh mozzarella), bake the crust for 2 extra minutes before adding sauce.
For extra insurance, sprinkle ½ cup cornmeal on the pre-baked crust before adding toppings—it absorbs moisture like a sponge. ❄️
Yeast Not Activating
If your yeast mixture sits for 10 minutes without bubbling, your yeast is likely dead. Keep a backup 0.25 tsp instant yeast handy—sprinkle it directly on the dough surface after mixing all ingredients.
The instant yeast activates at cooler temperatures, so it’s more reliable. For future success, store yeast in the freezer (it lasts 6 months) or check expiration dates—old yeast loses potency. 🍞
Nutrition facts
Frequently asked questions
Can I make this 16-inch crust without a pizza stone or steel?
Use a heavy baking sheet or even a cast-iron skillet for great results. For extra crispiness, place the dough on a parchment-lined sheet and bake directly on the middle rack. If your oven runs hot, reduce temperature to 450°F and bake for 12-15 minutes instead. The key is preheating for 60 minutes to mimic stone-like heat retention.
How do I adjust this recipe for a thinner or thicker crust?
For a thinner crust, reduce flour by 0.5 cups and water by 0.25 cups while keeping other ingredients the same. For a thicker crust (like deep-dish), add 0.5 cups extra bread flour and increase water by 0.25 cups. The hydration ratio (70%) is crucial—adjust both flour and water proportionally to maintain texture. Always let the dough rest longer if adding more flour.
Can I use this dough for stuffed crust pizza?
Yes! After shaping your 16-inch circle, roll out a smaller piece of dough (about 1/4 cup of the total) and press it along the edges before baking. For extra flavor, brush the inner edge with olive oil and sprinkle with garlic powder before adding toppings. The stuffed crust will puff beautifully during the 8-10 minute pre-bake.
Why does your recipe call for cold fermentation?
The 48-hour cold fermentation develops complex flavors and improves texture by breaking down gluten proteins slowly. This creates a lighter, more digestible crust compared to quick methods. If short on time, do a 2-hour room-temperature rise followed by 24 hours cold for similar (though slightly less developed) results. The cold also reduces yeast activity, preventing overproofing.
How do I prevent my crust from getting tough?
Overworking the dough is the main culprit. After the first rise, handle it minimally when shaping. Use the 48-hour cold fermentation—it develops elasticity naturally. If your dough feels tough after kneading, it likely needs more rest. Also, avoid adding extra flour during stretching (the high hydration is intentional for chewiness). For extra tenderness, brush the baked crust with olive oil after baking.

- 6 Egg Cake Recipe with Oil: Light as Air With Buttery Moisture - October 4, 2026
- 4 Bean Casserole Recipe: One-Pan Heartiness With Smoky Paprika Depth - October 4, 2026
- 3-Ingredient Keto Mug Cake Recipe: Microwave Magic in 2 Minutes - October 4, 2026