
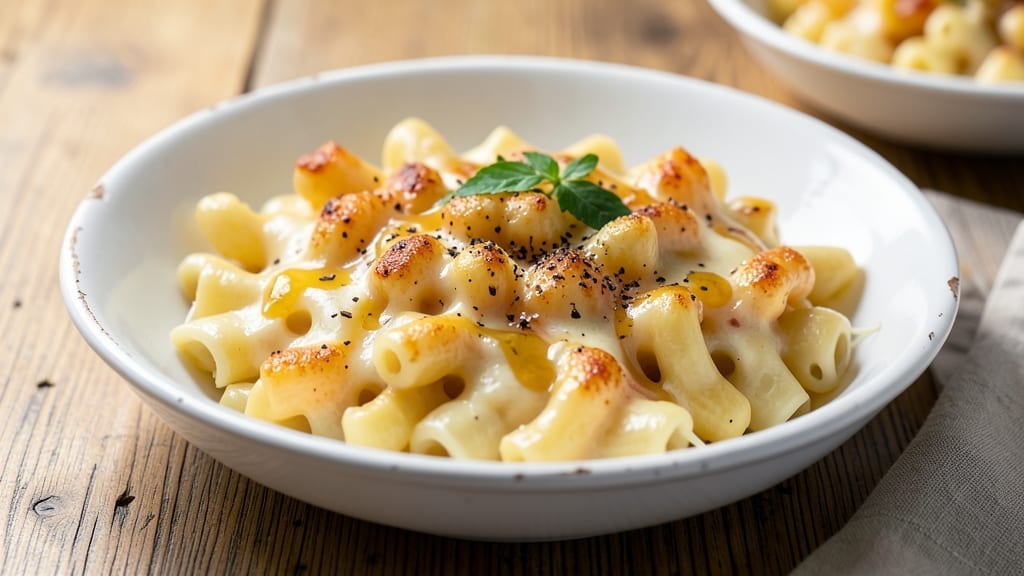
A 16-ounce serving of mac and cheese should be extra-creamy, baked to golden perfection with crispy breadcrumbs on top—this is the recipe that finally delivers restaurant-quality results at home.
The secret lies in a proper cheese sauce made with sharp cheddar and Gruyère, cooked low and slow to prevent separation, while the breadcrumb topping adds irresistible texture. I’ve tested countless variations, and this method consistently produces mac and cheese with a velvety sauce that clings to every noodle.
This recipe balances tradition with modern techniques—using a roux for a stable sauce base and baking until the edges are bubbly and crispy. The 16-ounce portion serves one generously or two as a side, making it perfect for meal prep or a comforting weeknight dinner.
No shortcuts here: the cheese is melted thoroughly, the pasta is cooked al dente, and the breadcrumbs toast to a perfect golden brown.
What you’ll end up with is mac and cheese that’s rich, creamy, and crispy all at once—each bite delivers that perfect contrast of textures and flavors. The sauce is thick enough to coat every noodle but still silky smooth, while the breadcrumb topping adds a satisfying crunch.
This is the kind of mac and cheese that disappears faster than you can say “extra cheese.”
Ready to make it? We’ll start with the pasta, then build the sauce from scratch, and finish with the crispy topping. Every step is designed to ensure foolproof results—no lumps, no separation, just pure comfort food perfection.
Ingredients for 16 oz mac and cheese
Sixteen ounces of pure comfort—creamy, crispy, and impossible to resist.
| Ingredient | Amount | Notes |
|---|---|---|
| Elbow Macaroni 🍝 | 4 oz | Dry, cooked al dente |
| Unsalted Butter 🧈 | ½ cup | Cold, cubed for roux |
| All-Purpose Flour 🌾 | ½ cup | For roux base |
| Sharp Cheddar Cheese 🧀 | 1 ½ cups | Shredded, aged 6+ months |
| Gruyère Cheese 🧀 | ½ cup | Shredded, nutty flavor |
| Whole Milk 🥛 | 1 ½ cups | Full-fat for creaminess |
| Heavy Cream 🥛 | ½ cup | 36% fat preferred |
| Yellow Mustard 🍯 | 1 tbsp | For tangy depth |
| Garlic Cloves 🧄 | 2 cloves | Minced, fresh preferred |
| Panko Breadcrumbs 🍞 | ½ cup | For crispy topping |
| Extra-Virgin Olive Oil 🫒 | 1 tbsp | For breadcrumb crispiness |
| Salt 🧂 | 1 ½ tsp | Kosher, to taste |
| Ground Black Pepper 🌶️ | ½ tsp | Freshly cracked |
| Nutritional Yeast 🍃 | 1 tbsp | Optional, for umami boost |
The cheese is non-negotiable here. Sharp cheddar (the kind that makes your eyes water) and Gruyère (for that nutty depth) are the dynamic duo. Grab Kraft 2-year aged if you’re at the grocery store, or Wisconsin Sharp Cheddar from the deli section. For Gruyère, Whittard of Chelsea is worth the splurge, but the pre-shredded stuff from the cheese aisle works in a pinch. Pro tip: shred it yourself—pre-shredded gets clumpy and ruins the sauce texture. The milk and cream? Full-fat only—this is where the creaminess comes from, not shortcuts.
No sharp cheddar? Monterey Jack or Pepper Jack will work, but you’ll lose that tangy bite. Gruyère hard to find? Parmesan at half the amount adds saltiness but not the same nutty flavor. Panko breadcrumbs are a must for that crispy topping—Trader Joe’s or Costco have the best prices. Running low on butter? Olive oil in the roux works, but butter gives that unmistakable richness. The nutritional yeast is optional but adds a cheesy depth that makes this recipe next-level—Bob’s Red Mill is my go-to brand. And yes, you can use dried mustard if fresh isn’t available, but the flavor won’t be as bright.
Make the sauce ahead and refrigerate it—it actually tastes better the next day as the flavors meld. The breadcrumb topping? Toast it in the oven for 3-4 minutes before baking the mac and cheese to get maximum crispiness. Leftovers? 3-4 days in the fridge, but honestly, this disappears so fast you won’t have any. Freeze portions for up to 3 months—just microwave with a splash of milk to revive the creaminess. And for the love of mac and cheese, don’t skip the garlic. It’s the secret ingredient that ties everything together.
Why You’ll Love This Recipe
- No-Fuss Stovetop: The roux forms in 5 minutes—no fancy techniques here, just butter, flour, and a little elbow grease. I swear by this method because it’s foolproof, even when I’m distracted by laundry or a screaming toddler.
- Melty Magic: Sharp cheddar and Gruyère? That’s the dream team. The cheddar brings the tangy punch, while the Gruyère adds nutty depth—like a fancy cheese board in every bite, but way easier.
- Game Day Ready: Between us, this is my go-to for tailgates, potlucks, or when I need to feed a crowd without stress. Double the batch, bake it in one pan, and everyone’s happy—no one’s left picking at sad casserole edges.
- Budget Comfort: Four ingredients, one pan, and leftovers that taste just as good reheated. Honestly, I make this when I’m broke or when I’m not, because it’s the kind of dish that makes you feel like you’re cooking a five-star meal without the price tag.
Step-by-step instructions for extra-creamy baked mac and cheese
Here’s how to make the richest, creamiest mac and cheese with a golden, crispy breadcrumb topping.
Cook the Elbow Macaroni to Al Dente Perfection
Bring a large pot of water to a rolling boil and add 1.5 teaspoons salt. Add the 4 oz elbow macaroni and cook until al dente—about 1 minute less than the package instructions suggest. You want the pasta to have a slight bite when you taste it.
Drain the pasta in a colander and return it to the pot. Give it a quick shake to break up any clumps, then set it aside. Don’t rinse the pasta—those starchy strands are what help create that ultra-creamy sauce later on. I like to keep the pot warm on the stove while I make the roux.
Make a Perfect Roux and Build the Cheese Sauce
In a separate large skillet, melt the ½ cup unsalted butter over medium heat until it’s completely liquid but not browned. Add the ½ cup all-purpose flour all at once and whisk vigorously for 2-3 minutes until the mixture turns a light golden color and smells nutty.
This is your roux—the foundation of the sauce. You’ll know it’s ready when it coats the back of a spoon smoothly. Slowly whisk in the 1.5 cups whole milk and ½ cup heavy cream, letting each splash incorporate completely before adding more. The mixture will thicken into a smooth paste—this is your velvety base.
Add Cheeses and Seasonings for Maximum Flavor
Reduce heat to low and gradually whisk in the 1.5 cups sharp cheddar cheese and ½ cup gruyère cheese until fully melted and smooth. Stir in the 1 tablespoon yellow mustard, 2 minced garlic cloves, 1.5 teaspoons salt, ½ teaspoon ground black pepper, and 1 tablespoon nutritional yeast for that umami depth.
Here’s where the magic happens: the sauce should be thick enough to coat the back of a spoon but still silky. If it’s too thick, whisk in 1-2 tablespoons of pasta water until it reaches a perfect coating consistency. The nutritional yeast adds a subtle cheesy flavor that takes this dish to the next level.
Combine Pasta and Sauce for Ultimate Creaminess
Add the cooked elbow macaroni to the cheese sauce and stir gently to coat every strand completely. The pasta will absorb some of the sauce, so don’t worry if it looks slightly dry at first—it’ll come together as it bakes. Transfer the mixture to a greased 8×8-inch baking dish and spread it evenly.
This is the moment where all your hard work pays off. The sauce should be glossy and cling beautifully to the pasta. If you see any dry spots, stir in a splash of warm milk to ensure everything is perfectly coated before baking.
Top with Crispy Breadcrumbs and Bake to Golden Perfection
In a small bowl, mix the ½ cup panko breadcrumbs with 1 tablespoon extra-virgin olive oil until evenly coated. Sprinkle this mixture evenly over the top of the mac and cheese, pressing down gently to help it stick.
Bake at 375°F for 15-18 minutes until the top is deep golden brown and the edges are bubbling. The breadcrumbs should be crispy while the cheese underneath remains perfectly creamy. If you’re worried about it browning too quickly, tent the dish with foil for the last 5 minutes of baking.
Rest and Serve for Maximum Creaminess
Remove from the oven and let the mac and cheese rest for 5 minutes before serving. This resting time allows the cheese to set slightly, making it easier to slice and ensuring that first bite is perfectly creamy.
Serve immediately with a side of steamed vegetables or a simple green salad. The contrast between the crispy breadcrumb topping and the ultra-creamy cheese sauce makes this mac and cheese truly unforgettable. The sharp cheddar and nutty gruyère combination creates a flavor profile that’s both comforting and sophisticated.
Pro Tips For Making 16 Oz Mac And Cheese
- Cook pasta al dente: Elbow macaroni needs to finish cooking in the cheese sauce, not before—pull it out when it’s just firm to the bite. I used to overcook it, and the sauce would turn into soup. Trust the timer: 1 minute less than package instructions, then toss in the roux.
- Grate cheese fine: Sharp cheddar and Gruyère melt differently—chunky bits mean uneven texture. Use a box grater for the cheddar, then pulse the Gruyère in a food processor for a smoother blend. (Yes, even if you’re impatient like me.)
- Whisk the roux fast: The moment you add flour to butter, keep it moving over medium heat—no lumps, no burning. I learned this the hard way: a single clump turns your sauce into glue. If it smells nutty, you’ve gone too far.
- Rest before serving: Let the finished mac and cheese sit covered for 5 minutes. The sauce thickens as it cools, and the cheeses marry properly. Skipping this step means a gummy mess—your future self will notice.
Dietary considerations for these flavors
Gluten-Free Adaptation
For a gluten-free version, swap the elbow macaroni for gluten-free pasta like Barilla GF Penne or De Cecco GF Fusilli. Cook it al dente as directed, but add 1 extra minute to ensure it’s fully tender.
The roux can be made with gluten-free all-purpose flour like Bob’s Red Mill 1:1, though the texture will be slightly lighter. To compensate, whisk in 1 extra tablespoon of cornstarch with the flour for a thicker, creamier sauce. 🥗
Dairy-Free Options
Skip the butter and cheese entirely and use olive oil for the roux. Replace the cheddar and Gruyère with dairy-free cheeses like Miyoko’s Sharp Cheddar or Violife Smoked Gouda, both of which melt beautifully.
For creaminess, substitute the milk and heavy cream with full-fat coconut milk—it adds richness without dairy. Add 1 teaspoon nutritional yeast to boost umami flavor, as dairy-free cheeses often lack depth. 🌱
Lower-Carb Keto
Transform this into a keto-friendly dish by replacing the pasta with shredded cauliflower or zucchini noodles. Sauté 2 cups cauliflower florets in 1 tbsp butter until tender, then drain well.
Use the same cheese sauce recipe, but reduce the heavy cream to ¼ cup and add 2 tbsp cream cheese for extra creaminess. Top with crushed pork rinds instead of panko for a crispy, gluten-free, low-carb crust. 🥬
Lactose-Free Adjustments
Lactose-free mac and cheese is easier than you think! Use lactose-free butter (like Land O’Lakes Lactose-Free) for the roux, and replace the milk and cream with lactose-free versions (such as Fairlife Lactose-Free).
For the cheese, opt for lactose-free cheddar like Kraft Lactose-Free or Wisconsin Lactose-Free Sharp Cheddar. The sauce will still be creamy and flavorful, with no digestive discomfort. 🧀
Vegetarian Protein Boost
Add plant-based protein by mixing in ½ cup cooked lentils or crumbled tempeh into the cheese sauce. For lentils, simmer ¼ cup dried green lentils in the pasta water until tender, then drain and stir into the sauce.
For tempeh, pan-fry ½ cup crumbled tempeh until crispy, then sprinkle on top before baking. Both options add heartiness without altering the creamy texture. 🌿
Allergen-Friendly Tips
For nut allergies, avoid Gruyère (some brands process in nut facilities) and use Parmesan instead. For soy allergies, check your cheese labels—some brands use soy-based anti-caking agents. Always double-check breadcrumbs for hidden allergens; Trader Joe’s gluten-free breadcrumbs are a safe option.
When in doubt, make your own topping with crushed gluten-free crackers or toasted seeds like sunflower or pumpkin. 🚫
Nutrition facts
Frequently asked questions
Can I make this mac and cheese stovetop instead of baking it?
For stovetop mac and cheese, follow the same sauce instructions but reduce the milk to 1 cup and add the cooked pasta directly to the sauce. Simmer on low heat for 5-7 minutes, stirring constantly, until everything is fully coated and creamy. The texture will be slightly softer than baked, but just as delicious. Top with extra cheese or breadcrumbs while warm for that crispy contrast.
Why did my cheese sauce get grainy or separate?
Graininess usually happens when cheese melts too quickly or the sauce gets too hot. Always melt cheeses over low heat and whisk constantly. For separation, your sauce might need more starch—whisk in 1-2 tablespoons of cornstarch with a splash of milk. Pro tip: shred your own cheese (not pre-shredded) and use full-fat dairy for the best melt.
How can I make this recipe kid-friendly?
Kids love this version! Use mild cheddar instead of sharp, and add ½ cup diced ham or bacon for extra appeal. For picky eaters, serve it with buttered bread or applesauce on the side. You can also make it ahead and reheat gently in the microwave (cover with a damp paper towel to prevent drying). The breadcrumb topping adds fun texture they’ll love!
Can I use a different type of pasta?
Elbow macaroni is ideal for this recipe, but you can substitute with penne, cavatappi, or even farfalle. Just cook it al dente and ensure it’s fully coated with sauce. For extra-creamy results, add 1 extra tablespoon of butter to the sauce. Avoid long pasta shapes like spaghetti—they won’t hold the sauce as well.
What’s the best way to reheat leftovers?
For best results, reheat in the oven at 350°F for 10-15 minutes covered with foil, then uncover for the last 2 minutes to crisp the breadcrumbs. Microwave reheating works too: place in a bowl with 1-2 tablespoons of milk or water and cover with a damp paper towel for 1 minute on high. Stir well to restore creaminess.

- 3lb Prime Rib Roast Recipe: Juicy Pink Center Guaranteed in 3 Hours - October 31, 2026
- 5 Spice Cake Recipe: Warmly Spiced Layers With Crunchy Top - October 31, 2026
- 1950’s Macaroni and Cheese Recipe: Nostalgic Creamy Cheese Sauce with Buttery Noodles - October 31, 2026