
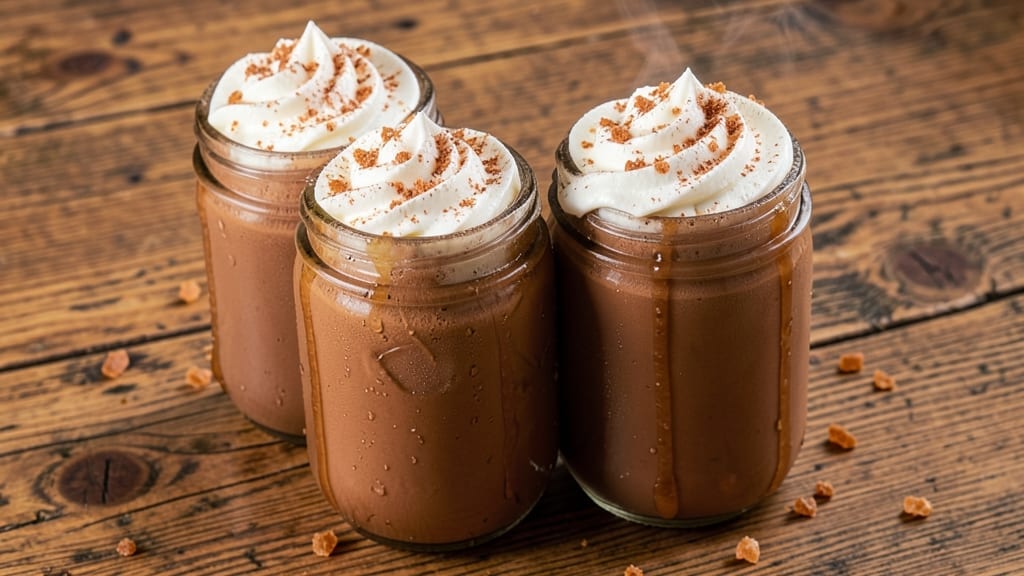
This 16-ounce mason jar hot chocolate transforms a simple beverage into a cozy, Instagram-worthy treat that’s as delicious as it is stylish.
The key lies in layering rich cocoa powder, warm spices, and velvety milk in a way that creates visual appeal and deep, satisfying flavor—every sip feels like a hug on a chilly day.
What makes this recipe special is how effortlessly it combines pantry staples with a professional touch, delivering restaurant-quality results without the fuss.
The process is surprisingly simple: whisk together cocoa, sugar, and spices in the jar, then pour in heated milk and stir until smooth. The mason jar’s sturdy glass keeps everything warm while adding rustic charm to your table.
Optional toppings like whipped cream, crushed candy canes, or a sprinkle of cinnamon elevate it further, making it customizable for any occasion—whether you’re treating yourself after a long day or hosting a winter gathering.
By the time you’re done, you’ll have a rich, aromatic hot chocolate with a perfectly balanced blend of sweetness and spice, topped with creamy, melt-in-your-mouth textures. The mason jar’s proportions make it ideal for single servings, so no one has to share (though they’ll probably want to).
It’s the kind of drink that feels indulgent yet effortless—exactly what you need when you crave comfort without compromise.
Serve immediately for the best experience, or prepare ahead and reheat gently to maintain that velvety consistency. Pair with a good book, soft music, or a cozy blanket for the ultimate in hygge-inspired relaxation. Here’s how to make it—simple, luxurious, and guaranteed to become a winter staple.
Ingredients for 16 oz mason jar hot chocolate
Pantry staples meet cozy indulgence—just nine ingredients for four luxurious servings.
| Ingredient | Amount | Notes |
|---|---|---|
| Unsweetened Cocoa Powder 🍫 | ½ cup | High-quality Dutch-processed preferred |
| Granulated Sugar 🍚 | ¼ cup | Or light brown sugar |
| Whole Milk 🥛 | 1 ½ cups | Whole for creaminess (or 2% if preferred) |
| Heavy Whipping Cream 🧈 | ½ cup | Full-fat for best texture |
| Ground Cinnamon 🌿 | 1 tsp | Freshly ground for best flavor |
| Ground Nutmeg 🌿 | ¼ tsp | Freshly grated preferred |
| Salt 🧂 | ¼ tsp | Fine sea salt preferred |
| Vanilla Extract 🌸 | 1 tsp | Pure vanilla extract |
| Mini Marshmallows 🍫 | ¼ cup | For optional topping |
| Whipped Cream 🧈 | ¼ cup | Store-bought or homemade |
| Crushed Candy Canes 🎄 | 2 tbsp | For festive garnish |
| 16-Ounce Mason Jars 🍶 | 4 whole | Clean, dry jars |
| Whole Milk Powder 🥛 | 1 tbsp | Optional for extra richness |
The cocoa powder is where the magic happens. Hershey’s Special Dark or Ghirardelli are my go-tos—they dissolve smoothly without graininess. If you’re using natural cocoa (not Dutch-processed), add a pinch more sugar to balance the acidity. For the milk, whole milk gives that velvety texture, but 2% works too if you prefer. The heavy cream is non-negotiable for that restaurant-quality foam—don’t skip it. As for spices, Penzeys sells pre-ground nutmeg that’s always fresh, but if you’ve got a nutmeg grater, freshly grated makes all the difference. Pro tip: measure your spices right after opening a new jar—they lose potency fast.
No heavy cream? Full-fat coconut milk works in a pinch (though it’ll taste different). Out of vanilla? Vanilla bean paste or even a scraped vanilla bean pod adds depth. The sugar can be swapped for maple syrup or honey (reduce other liquids slightly to compensate). For the toppings, mini marshmallows are a must for that classic look, but crushed peppermint bark or chocolate shavings work too. If you’re making this ahead, store the dry ingredients in the jars separately—just add the milk and cream when ready to serve. The candy canes? Trader Joe’s sells them pre-crushed in a jar for convenience.
Prep ahead to save time: mix the dry ingredients in the jars and store them in an airtight container for up to 1 week. When ready to serve, just heat the milk and cream, stir, and top. The hot chocolate keeps its best texture for 20-30 minutes after heating, so make fresh batches if serving multiple rounds. For extra richness, add the milk powder when heating the liquids—it dissolves completely and adds a subtle caramel note. These jars are perfect for gifting too—just tie a ribbon around the lid and add a cute tag. Store leftovers in the fridge for up to 3 days, but honestly, it’s best enjoyed fresh.
Why You’ll Love This Recipe
- I’ll be real: this costs pennies per serving, but tastes like a fancy café drink. A little sugar, a splash of cream, and that deep cocoa flavor stretch my grocery budget without sacrificing wow factor. Leftovers? None. They vanish too fast.
- No-Fuss Layering: I swear by the magic of just shaking the jar—no blender, no strainer—until the cocoa powder dissolves into velvety smoothness. That first sip? The contrast of the creamy milk and whipped cream swirling with the rich cocoa is pure indulgence without the fuss.
- Cinnamon-Kissed Richness: Between us, the secret’s in that dusting of cinnamon—it cuts through the sweetness just enough to make this taste adult. The heavy cream on top turns it from cozy to dangerously satisfying, like a hug in mug form.
- Grab-and-Go Magic: Honestly, these jars are my weekend lifesaver. Prep them ahead, and they’re ready for campfire nights, sick-day cuddles, or even a last-minute date-night treat. Just pop in the microwave—no measuring, no spills.
Step-by-step instructions for single-serve spiced luxury hot chocolate
Layering rich flavors in your jars creates a decadent treat that’s perfect for cozy nights.
Combine Dry Ingredients in Each Jar
Place the 4 whole 16-ounce mason jars on a flat surface. Into each jar, add 0.5 cup unsweetened cocoa powder, 0.25 cup granulated sugar, 1 tsp ground cinnamon, 0.25 tsp ground nutmeg, and 0.25 tsp salt. Give each jar a gentle shake to distribute the dry ingredients evenly along the sides.
This step is crucial for creating that velvety texture later. The spices will infuse into the liquid as it heats, so make sure they’re well mixed. I like to use a rubber spatula to press the cocoa powder against the jar sides—this prevents clumping when we add the liquids next.
Add Liquid Ingredients Layer by Layer
To each jar, carefully pour in 1.5 cups whole milk and 0.5 cup heavy whipping cream. Add 1 tsp vanilla extract and 1 tbsp whole milk powder (if using). Seal each jar tightly and shake vigorously for 30 seconds until the dry ingredients are fully dissolved and no streaks remain.
Here’s where the magic happens: the milk powder creates an extra-rich base, while the vanilla extract adds depth. Shake until the mixture looks completely smooth—this prevents gritty texture when you drink it. If you notice any lumps, give it another shake or use a fork to stir them out.
Prepare the Topping Components
In a small bowl, gently fold together 0.25 cup whipped cream, 0.25 cup mini marshmallows, and 2 tbsp crushed candy canes. Set aside. This topping should be light and airy—don’t overmix or the whipped cream will deflate.
The crushed candy canes add a festive sparkle, while the marshmallows provide that classic hot chocolate texture contrast. I like to keep the candy canes slightly chunky so they melt slowly and create fun surprises with each sip. Store this topping mixture in the refrigerator until ready to use.
Assemble and Microwave Each Jar
Remove the lids from the jars and place them upside-down on a microwave-safe plate. Microwave each jar individually on high power for 1 minute and 30 seconds, then stir with a spoon. Microwave again for 30 seconds until the mixture is hot and smooth, stirring between intervals to prevent overheating.
Watch carefully at the 1-minute mark—if you see any bubbles forming, stir immediately to prevent boiling over. The hot chocolate should be thick and luxurious, with a glossy sheen. If it’s too thick after microwaving, add 1-2 tablespoons of hot water to reach your preferred consistency.
Top and Serve Immediately
Spoon the prepared whipped cream topping evenly over each hot chocolate. Use a skewer to gently press some marshmallows and candy cane pieces into the surface for visual appeal. Serve immediately while the hot chocolate is steaming hot and the toppings are fresh.
This is where the experience comes together—hot, spiced chocolate with cool, creamy topping. The contrast in temperatures makes each sip extra satisfying. For an extra touch, garnish with a few extra candy cane pieces or a sprinkle of cinnamon. Enjoy while it’s warm, as the marshmallows will start to melt and lose their shape after about 10 minutes.
Pro Tips For Making 16 Oz Mason Jar Hot Chocolate
- STIR WHILE HEATING: I learned this the hard way—skip the stirring, and you’ll end up with a clumpy, lumpy mess. Whisk the cocoa powder into the milk before heating, then stir constantly on medium-low. The jar’s thick sides make it easy to miss spots, so don’t rush this part.
- SIFT THE COCOA: Dumping cocoa powder straight into the jar guarantees clumps, no matter how much you whisk. Use a fine-mesh sieve to dust it evenly over the sugar first—this cuts down on lumps and makes mixing a breeze. (Yes, even if you’re impatient like me.)
- DON’T BOIL THE CREAM: Heavy whipping cream burns faster than you’d think, and once it’s scorched, there’s no fixing it. Heat the milk and cream together until it’s just below a simmer—about 180°F—then remove from heat. The residual warmth will finish the job without risking curdling.
- ADD CINNAMON LAST: Ground cinnamon loses its warmth when exposed to heat for too long. Sprinkle it over the top after the mixture is off the heat, then stir gently. This keeps the flavor bright and avoids that bitter, overcooked taste. (Your future self will notice the difference.)
Serving suggestions for this 16 oz mason jar hot chocolate
Cozy Presentation Ideas
Wrap a red and white striped cloth napkin around each jar for a festive touch—it keeps hands warm while adding holiday charm. I love using Trader Joe’s cloth napkins for this because they’re affordable and come in fun patterns.
For extra warmth, place the jars on a wooden tray lined with a faux fur rug or flannel blanket—this makes the setup feel like a spa experience. 🔥
Garnish Like a Pro
Use a skewer or cake pop stick to press mini marshmallows and crushed candy canes into the whipped cream topping. This creates visual texture and makes each sip feel special. For a dusting of color, sprinkle cocoa powder or powdered sugar over the top using a fine-mesh sieve.
A cinnamon stick garnish on the rim adds a rustic touch that looks stunning in photos. ✨
Pair with Comfort Food
Serve your hot chocolate with warm chocolate chip cookies or buttery shortbread for the ultimate pairing. I love homemade snickerdoodles with their cinnamon-sugar coating—they complement the spiced cocoa perfectly.
For a savory contrast, offer sharp cheddar cheese cubes or dark chocolate-covered pretzels. This balances the sweetness and adds a fun crunch. 🍪
Make It a Party Setup
Turn your hot chocolate into a DIY bar by setting out small bowls of toppings like chopped nuts, dried cranberries, caramel drizzle, and extra whipped cream.
Let guests customize their own jars—it’s especially fun for kids (or adults!) who love mixing flavors. Use mini mason jars as individual toppings containers for a cute, cohesive look. 🎉
Seasonal Adaptations
For winter, add peppermint chocolate chips or orange zest to the dry mix for a festive twist. In spring, swap candy canes for fresh berries or lemon zest—the bright flavors feel refreshing.
For summer, serve over crushed ice with a mint sprig for a boozy twist (add 1 oz vodka per jar). Each season gets its own delicious variation! 🌸
Gift-Worthy Presentation
Tie the jar lids with twine and attach a mini wooden spoon for stirring. Add a handwritten tag with the recipe or a sweet note like “Sip & Smile.”
Store the dry ingredients in the jar ahead of time, then include a small bag of milk powder and instructions for assembly. This makes a thoughtful hostess gift or teacher appreciation treat—perfect for holidays or birthdays. 🎁
Nutrition facts
Frequently asked questions
Can I make this hot chocolate ahead of time?
Store the dry ingredients (cocoa, sugar, spices) in the jars for up to 1 week in an airtight container. When ready to serve, just add the heated milk and cream, stir, and top. For best texture, reheat gently in the microwave for 30-45 seconds until steaming. The toppings should always be added fresh for that perfect contrast.
What if I don’t have heavy cream?
No problem! Use full-fat coconut milk for a dairy-free option, though the texture will be slightly different. For a lighter version, substitute with half-and-half—just reduce the milk by 2 tablespoons to maintain richness. The key is keeping the fat content high for that velvety mouthfeel. If using coconut milk, add 1/4 tsp vanilla bean paste for extra depth.
How do I prevent the hot chocolate from getting too thick?
If your hot chocolate is too thick after microwaving, stir in 1-2 tablespoons of hot water until you reach your preferred consistency. For prevention, shake the jars more vigorously before microwaving to ensure all dry ingredients dissolve completely. Also, avoid overmixing the whipped cream topping—gentle folds keep it light and airy. The ideal texture should coat the back of a spoon but still be drinkable.
Can I make this recipe without a microwave?
Yes! Heat the milk and cream in a small saucepan over medium-low heat until steaming (don’t boil). Pour the hot liquid into the jars with dry ingredients, seal, and shake well. For extra warmth, place the sealed jars in a bowl of warm water for 5 minutes to gently heat through. This method gives you more control over the temperature and prevents overheating.
What’s the secret to making it taste extra luxurious?
Use Dutch-processed cocoa powder (like Ghirardelli) for smoother flavor, and don’t skip the milk powder—it adds a subtle caramel note that elevates everything. For an extra touch, infuse the milk with a cinnamon stick while heating, or add a pinch of espresso powder for depth. The contrast of warm spices with cool toppings is what makes this feel truly indulgent.

- 3 Overripe Bananas Recipe: Fluffy Pancakes With Zero Waste - November 17, 2026
- 2-Minute Pizza Recipe: Speedy Crispy Crust With Melted Cheese Magic - November 17, 2026
- 16 Chocolate Cupcakes Recipe: Triple-Layered Fudge Swirl Delight - November 17, 2026