
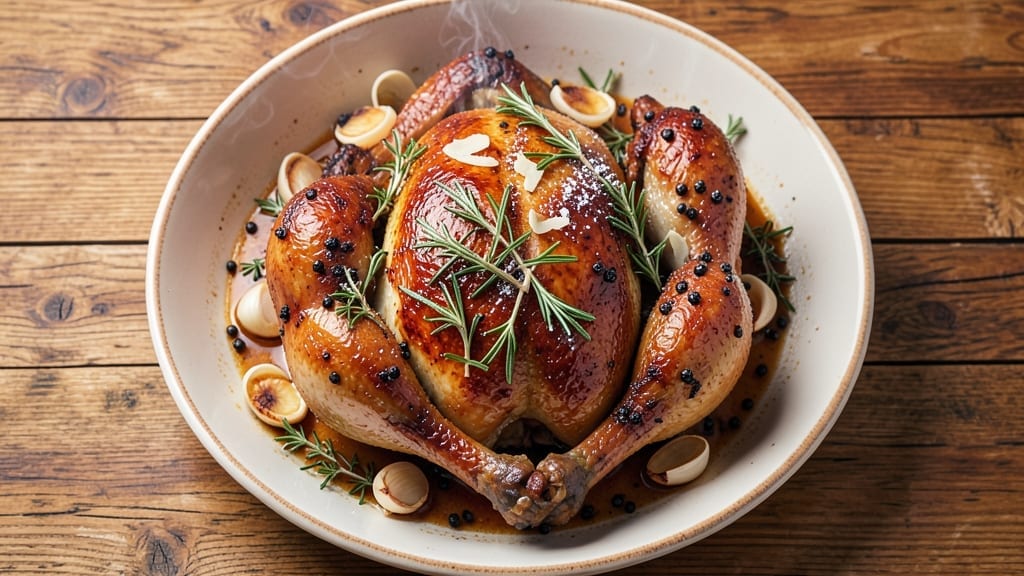
An 18-pound roasted turkey deserves perfection—crisp golden skin, juicy dark meat, and a flavor so rich it steals the show at every holiday table. This recipe transforms a simple bird into a centerpiece with a foolproof method that ensures no dry meat or pale skin, even with a large turkey.
The secret lies in precise seasoning, strategic basting, and understanding how to handle a bird this size without overcooking.
What sets this turkey apart is the balance of technique and simplicity: a dry brine (not wet) locks in moisture while developing deep flavor, and a high-heat start creates that coveted crispy skin before shifting to a lower temperature for even cooking.
You’ll also learn the exact resting time to keep the meat tender—no more slicing into a dry, sad centerpiece. This isn’t just another turkey recipe; it’s the one that turns Thanksgiving into a showstopper.
The result? A turkey so juicy and flavorful that every slice feels like a celebration. The crispy skin shatters with each bite, while the dark meat stays moist and rich, proving that a well-cooked turkey doesn’t require hours of fussing.
Whether you’re feeding a crowd or treating yourself to a special meal, this method delivers restaurant-quality results at home—no shortcuts, just precision.
Pair it with homemade gravy, roasted vegetables, or your favorite stuffing for a complete feast. The instructions walk you through every step, from prepping the bird to carving like a pro. Let’s get started—your turkey is about to become the star of the meal.
Ingredients for 18 lb roasted turkey
Your 18-pounder needs these 14 ingredients for restaurant-quality crispy skin and juicy dark meat.
| Ingredient | Amount | Notes |
|---|---|---|
| Fresh Whole Turkey 🦃 | 18 lb | Unstuffed, giblets removed |
| Kosher Salt 🧂 | 1 ½ cups | Diamond Crystal preferred |
| Black Peppercorns 🌶️ | ½ cup | Freshly cracked, coarse grind |
| Fresh Thyme Sprigs 🌿 | 12 whole | Stems attached, organic preferred |
| Fresh Rosemary Sprigs 🌿 | 8 whole | Woodsy variety, stems intact |
| Garlic Cloves 🧄 | 12 cloves | Smashed, skin-on for flavor |
| Unsalted Butter 🧈 | 1 cup | Cold, cubed for basting |
| Extra-Virgin Olive Oil 🫒 | ½ cup | For skin crisping |
| Fresh Sage Leaves 🍃 | 2 tbsp | Chopped, aromatic variety |
| Fresh Parsley Sprigs 🌿 | 8 whole | Garnish, stems removed |
| Apple Cider Vinegar 🍎 | ¼ cup | For dry brine |
| Dried Sage 🍃 | 2 tbsp | Crushed, for dry rub |
| Dried Marjoram 🌿 | 1 tbsp | Sweet variety, optional |
| Cornstarch 🌾 | 2 tbsp | For skin crisping |
The turkey is the star—fresh from a trusted butcher (like Whole Foods or your local grocer’s meat counter) is key. Look for a bird with good marbling and vibrant color, not pale or slimy. The herbs? Organic fresh herbs make all the difference—Trader Joe’s or your local farmers market are great sources. The kosher salt is non-negotiable: Diamond Crystal dissolves better than Morton. Pro tip: buy your turkey 2-3 days before cooking so it can dry-brine properly in the fridge.
No fresh thyme? Dried at half the amount works in a pinch, but fresh is worth hunting down. Short on butter? Olive oil or duck fat will crisp the skin just fine. The vinegar in the dry brine might seem odd, but it tenderizes the meat—apple cider vinegar is best, but white vinegar in a bind. For the herbs, don’t overcrowd the cavity: just 4-5 sprigs of each is plenty. The cornstarch? Skip it if you’re in a hurry, but it’s what gives that perfect crunch.
Herbs and garlic can stay fresh for 5-7 days wrapped in damp paper towels. The dry brine mix (salt, pepper, dried herbs) keeps indefinitely in an airtight container. Butter and olive oil? Freeze in ice cube trays for easy portioning. The turkey itself? Cook day-of for best results—it’s not something you want to reheat. Leftovers? 3-4 days max in the fridge, or freeze portions for up to 3 months.
Why You’ll Love This Recipe
- Just Salt & Herbs: I swear, the secret’s in the simplicity—crusty kosher salt and crushed peppercorns, plus rosemary and thyme tucked under the skin. That’s it. No brining, no basting, just flavor.
- Golden Every Time: The key? Roasting it uncovered at 325°F until the skin turns perfectly crispy—like a buttery, aromatic blanket. Between us, that’s the part everyone raves about.
- Leftovers for Days: An 18-pounder means turkey sandwiches, tacos, and soup for a week. Honestly, I make this just for the leftovers—it’s my freezer’s best friend.
- Big Day, Small Effort: Whether it’s Thanksgiving or a random Sunday dinner, this turkey handles the crowd. One pan, zero fuss, and it still feels like a showstopper. (Yes, even on a Tuesday night.)
Step-by-step instructions for 18-Pound roasted turkey
Here’s how to transform your turkey into golden, crisp-skinned perfection with tender, juicy meat.
Prepare the Dry Brine for Maximum Flavor
Start by combining the 1.5 cups kosher salt and 0.25 cup apple cider vinegar in a large mixing bowl. This dry brine mixture is what creates that legendary crispy skin and keeps the meat impossibly juicy. Place the turkey breast-side up on a wire rack set over a baking sheet to allow air circulation on all sides.
Gently rub the salt-vinegar mixture all over the turkey, including inside the cavity. Pay special attention to the skin—press the salt into the surface to help break down proteins and render fat. Let the turkey sit uncovered in the refrigerator for 12-24 hours. This long dry brine time is non-negotiable for that restaurant-quality result. Don’t skip it, even if it seems like too much time.
Create the Herb Butter and Seasoning Rub
In a small bowl, combine the 1 cup cold unsalted butter, 2 tbsp dried sage, 1 tbsp dried marjoram, 12 smashed garlic cloves, 2 tbsp chopped fresh sage leaves, and 12 whole fresh thyme sprigs. Mix until the herbs are evenly distributed throughout the butter. This herb butter will baste the turkey and infuse it with incredible flavor.
In a separate bowl, mix the 0.5 cup freshly cracked black peppercorns with the 8 whole fresh rosemary sprigs. Crush the peppercorns slightly with your fingers to release their oils. This pepper-rosemary blend will create a beautiful crust on the turkey’s skin. After the dry brine, pat the turkey completely dry with paper towels—this step is crucial for crispy skin—and then rub this pepper-rosemary mixture all over the turkey, pressing it into the skin.
Set Up for Roasting with Perfect Airflow
Preheat your oven to 325°F. Place the turkey on a rack in a roasting pan, breast-side up. This elevated position allows hot air to circulate underneath, ensuring even cooking and crispy skin all around. Pour 0.5 cup extra-virgin olive oil into the bottom of the roasting pan—this will create steam during roasting, keeping the turkey moist.
Here’s where the magic happens: Stuff the cavity with the 8 whole fresh parsley sprigs and any remaining herb butter. The parsley adds a fresh finish, while the butter bastes the turkey from the inside out. Place the roasting pan on the middle rack of your oven. The middle position ensures even heat distribution throughout the cooking process.
Roast Low and Slow for Perfect Doneness
Roast the turkey uncovered for 2 hours before you even think about checking the temperature. This slow, gentle cooking ensures the meat stays juicy and tender. After 2 hours, reduce the oven temperature to 300°F—this is the secret to keeping the turkey from drying out while it finishes cooking.
Here’s how you’ll know when it’s done: The turkey’s internal temperature should reach 165°F in the thickest part of the thigh (not touching bone). This typically takes 3-4 more hours total cooking time, so plan accordingly. The skin should be deep golden brown, and the juices should run clear when you pierce the thigh with a meat thermometer. If the skin starts browning too quickly, tent it loosely with foil to prevent burning.
Achieve Crispy Skin and Rest Properly
Once the turkey reaches 165°F, remove it from the oven and let it rest for 30 minutes before carving. This resting period is absolutely critical—it allows the juices to redistribute throughout the meat, ensuring every bite is moist and flavorful. While it rests, here’s how to get that perfect crispy skin: In a small bowl, mix the 2 tbsp cornstarch with 2 tablespoons water to make a slurry.
Brush this cornstarch mixture all over the turkey’s skin, focusing on the breast and any areas that didn’t get crispy during roasting. Return the turkey to a 425°F oven for 15-20 minutes to crisp up the skin. The cornstarch creates a beautiful, golden-brown crust that’s irresistibly crispy. Let the turkey rest again for 15 minutes before carving, then serve with the pan drippings reduced into a flavorful gravy.
Pro Tips For Making 18 Lb Roasted Turkey
- USE A MEAT THERMOMETER: I learned this the hard way—guessing doneness with an 18-pounder leads to dry meat or undercooked danger zones. Stick the probe into the thickest part of the thigh (avoid touching bone) and pull it at 165°F internal temp—no peeking early, or you’ll lose heat and moisture.
- SALT THE CAVITY FIRST: Skip the dry rub on the skin—it burns before it crisps. Instead, pack the cavity with 1 tablespoon kosher salt (plus thyme and rosemary sprigs) before trussing. This seasons the meat from the inside out while keeping the skin crispy, not soggy.
- DON’T RUSH THE CRISP: High heat for the first hour gets the skin golden fast, but finish at 325°F for the last 45 minutes—this guarantees even cooking without charring. I used to blast it the whole time, and the outside would turn leather before the inside hit safe temps.
- STUFF THE NECK CAVITY: That tiny pocket isn’t just for looks—it traps heat and renders fat for juicier meat. Tuck a halved onion and a sprig of rosemary inside before tying it off. My grandmother swore by this, and she was right: the turkey stays moist longer, and the flavor seeps in.
Essential equipment for this recipe
Oven Essentials
Your oven is the heart of this turkey, so invest in a high-quality meat thermometer—I swear by the ThermoWorks Smoke for accuracy. A wire rack in your roasting pan is non-negotiable for airflow and crispy skin.
If your oven runs hot, a digital oven thermometer (like OxiFresh) ensures you’re cooking at the right temperature. 🌡️
For even heat distribution, use a roasting pan with a 4-5 quart capacity—I love All-Clad’s stainless steel version. If your pan lacks handles, add oven-safe silicone handles (like OXO’s) for safety. Preheat for at least 30 minutes to ensure consistent cooking temperatures.
Basting Tools
A basting brush with a long handle (like OXO’s silicone brush) makes basting easier without burning your hands. For basting liquid, I use a small saucepan on the stovetop to melt the herb butter while the turkey cooks.
A baster spoon (like Norpro’s) helps pick up pan juices for extra flavor. 🍴
Pro tip: Keep your basting liquid warm in a double boiler or slow cooker on warm setting to maintain consistency. Never use metal utensils that could scratch the turkey’s skin—stick to silicone or heatproof plastic.
Resting Setup
A large cutting board (like John Boos’ maple) is perfect for resting your turkey. For easy transport, use a cooling rack inside a large roasting pan to catch drippings. I also keep a kitchen timer (like OXO’s digital) nearby to track the 30-minute rest before carving. 🕒
For the final crisp, you’ll need a small bowl for mixing the cornstarch slurry and a pastry brush (like West Bend’s) to apply it evenly. A tongs set (like OXO’s) helps flip the turkey safely during the crisping phase.
Budget-Friendly Swaps
No fancy tools? A meat thermometer with a pop-up indicator (like Taylor Precision) works just fine for beginners. Use foil pans instead of roasting pans—just poke holes for airflow. A spoon or spatula can bast, though it’s messier. 💰
For crispy skin, skip the cornstarch and use olive oil + flour (1 tbsp each) brushed on before the final crisp. A large plate or baking sheet works for resting—just tent with foil to keep warm. The key is patience, not perfection!
Nutrition facts
Frequently asked questions
How long should I let an 18 lb turkey rest before carving?
Always let your turkey rest for 30 minutes after reaching 165°F internally. This crucial step allows juices to redistribute, preventing dry meat when you slice. For the final crisp, add another 15 minutes rest after the cornstarch crisping phase.
Can I stuff my 18 lb turkey, or should I leave it unstuffed?
For best results, leave it unstuffed—stuffing adds 15-20 minutes to cooking time and can dry out the meat. If you prefer stuffing, cook it separately in a baking dish. Stuffed turkeys require 425°F for the first hour to ensure the center reaches 165°F.
Why does the recipe call for a dry brine instead of a wet brine?
The dry brine (salt + vinegar) creates a better skin seal while keeping the meat juicier than wet brining. It also prevents the turkey from absorbing too much liquid, which can dilute flavors. The 12-24 hour dry brine time is key for that perfect crispy texture and deep flavor.
What’s the best way to reheat leftover turkey slices?
Reheat slices in a 350°F oven for 10-15 minutes with a splash of broth to keep them moist. Avoid microwaving—it dries out the meat. For gravy, simmer pan drippings on the stove until thickened. Leftovers keep 3-4 days refrigerated or 3 months frozen.
How do I adjust cooking time if my oven runs hot or cold?
Use an oven thermometer to check accuracy. If your oven runs hot, reduce temperature by 25°F (e.g., 300°F instead of 325°F). For cold ovens, increase by 25°F. Always use a meat thermometer—never rely on estimated times for an 18 lb bird.

- 3lb Prime Rib Roast Recipe: Juicy Pink Center Guaranteed in 3 Hours - October 31, 2026
- 5 Spice Cake Recipe: Warmly Spiced Layers With Crunchy Top - October 31, 2026
- 1950’s Macaroni and Cheese Recipe: Nostalgic Creamy Cheese Sauce with Buttery Noodles - October 31, 2026