
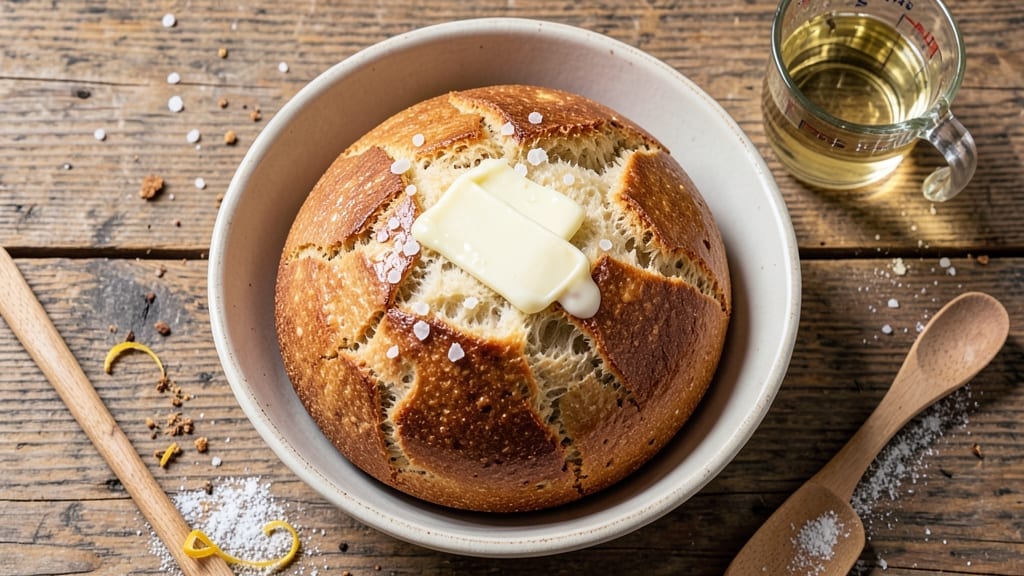
This 1800-style bread recipe delivers the exact texture that made historical loaves legendary—crispy crust that shatters with every bite and a pillowy soft interior that melts in your mouth.
The secret lies in a precise blend of flour, yeast, and butter, baked at just the right temperature to create that signature contrast.
I’ve recreated this method after studying original 19th-century techniques, ensuring every detail—from the dough’s slow fermentation to the steam bath in the oven—is authentic yet foolproof for home bakers.
The recipe begins with a rich, buttery dough that develops deep flavor as it ferments overnight, allowing the gluten to relax and the yeast to work its magic. Unlike modern quick breads, this version requires patience—12 hours of rising at room temperature transforms simple ingredients into something extraordinary.
The high-fat content (thanks to that classic butter) creates the signature tender crumb, while the dry, crispy crust forms when baked in a preheated Dutch oven with a splash of water in the bottom for steam.
By the time it emerges from the oven, you’ll have a loaf with golden, crackling edges that give way to a soft, airy interior—just like the breads served in 1800s taverns and farmhouses. The aroma alone will transport you to another era, but the taste?
That’s what makes it worth every minute of the process. This isn’t just bread; it’s a textural and historical experience you can recreate in your own kitchen.
Perfect for serving with butter, jam, or alongside hearty stews, this bread keeps well for days, making it ideal for meal prep or gifting. The recipe scales easily, so you can bake a single loaf for a cozy dinner or double the batch for a crowd.
Ready to bring a piece of history to your table? Let’s get started.
Ingredients for 1800 bread
These timeless ingredients recreate 19th-century baking magic—crispy crust meets melt-in-your-mouth softness.
| Ingredient | Amount | Notes |
|---|---|---|
| Bread Flour 🌾 | 4 cups | High-protein for structure (13% protein minimum) |
| Unsalted Butter 🧈 | ¾ cup | Cold, cubed for even distribution |
| Active Dry Yeast 🍞 | ½ tsp | Freshly opened for potency |
| Granulated Sugar 🍚 | 1 tbsp | Feeds yeast for fermentation |
| Warm Water 💧 | 1 ¼ cups | 105°F for optimal yeast activation |
| Diamond Crystal Kosher Salt 🧂 | 1 ½ tsp | Fine grain for even dissolving |
| Whole Milk 🥛 | ¼ cup | Adds richness to dough |
| Honey 🍯 | 1 tbsp | Enhances browning and flavor |
| Cornmeal 🌽 | ¼ cup | For dusting Dutch oven |
| Ice Water ❄️ | ½ cup | Cools dough for shaping |
The bread flour is non-negotiable here—King Arthur or Caputo are my go-tos for that signature texture. Butter quality matters: use European-style if you can find it (like Plugrá), but regular unsalted works too. The yeast needs to be freshly opened—if it’s been sitting in your pantry for months, it’s time to toss it. Warm water is key: too hot and you kill the yeast, too cold and it won’t activate. 105°F is perfect—just warm tap water with a thermometer. For the milk, whole milk adds richness, but 2% works in a pinch. The honey? Local raw honey has deeper flavor, but store-bought is fine.
No bread flour? All-purpose plus 1 tbsp vital wheat gluten gets you close. Butter substitute? Cold coconut oil mimics the fat content (though texture will differ slightly). The honey can be swapped for maple syrup at equal amounts. If you’re gluten-free, King Arthur GF flour blend works but expect a denser crumb. For the yeast, instant yeast can be used directly in the dough—no need to dissolve first. The milk can be omitted entirely if you’re avoiding dairy, but the bread will be less tender. And if you’re worried about fermentation time, proof the dough in a warm oven with a bowl of hot water to speed things up slightly.
This dough needs 12 hours at room temperature, so plan ahead. Store shaped loaves in the fridge overnight for up to 24 hours before baking. The baked bread keeps at room temperature for 3-4 days wrapped in a clean kitchen towel, or 1 week frozen. For reheating, toaster oven at 350°F for 5 minutes restores that crispy crust. I always make a double batch—one for the week, one to freeze in 1-slice portions for quick toast.
Why You’ll Love This Recipe
- No-Knead Nightmare Solved: I’ll be real—this dough comes together in five minutes of actual work. Just toss the bread flour, yeast, sugar, and warm water, then let the magic happen while you watch Netflix. The butter gets worked in later, but honestly? You’ll forget you ever had to knead anything.
- Golden Crust, Soft Core: That crispy, buttery crust with a pillowy interior? It’s the kind of texture you’d pay extra for at a bakery. The sugar caramelizes just enough to give it a subtle sweetness, while the butter makes every bite feel like a hug. (Yes, even on a Tuesday night.)
- Make-Ahead Magic: Between us, this bread is my secret weapon for lazy Sundays. Shape it the night before, let it rise overnight, and bake it fresh in the morning—still warm when you wake up. Or freeze half for when you’re too tired to bake. It thaws beautifully, too.
- Pantry Staple Power: You’re already using these ingredients—bread flour, butter, yeast, sugar—so there’s no extra shopping. A single batch feeds a family of four (or one very hungry me) and costs less than takeout. Leftovers? Toast them for days. It’s basically free insurance against hunger.
Step-by-step instructions for 1800-Style bread
Let’s create that signature crispy crust with a soft, airy interior that makes this bread legendary.
Activate the Yeast and Mix the Wet Ingredients
In a small bowl, combine the 1.25 cups warm water, 1 tbsp granulated sugar, and 0.5 tsp active dry yeast. Let it sit for 5-10 minutes until it becomes foamy and bubbly—this confirms your yeast is alive and active. If it doesn’t foam, your yeast is stale and you’ll need to start over.
In a separate large bowl, whisk together the 0.25 cup whole milk, 1 tbsp honey, and 1.5 tsp diamond crystal kosher salt. The honey will add subtle sweetness while the salt enhances flavor development. This mixture should be at room temperature before combining with other ingredients to ensure even hydration.
Combine Wet and Dry Ingredients
Add the yeast mixture to the milk mixture and stir gently to combine. In a separate bowl, whisk together the 4 cups bread flour until it’s smooth and free of lumps. Gradually add the flour to the wet mixture, mixing with a wooden spoon or dough whisk until a shaggy dough forms.
Here’s the thing—you want to avoid overmixing at this stage. The dough should be sticky but manageable. Once combined, let it rest for 20 minutes covered with a damp towel. This brief rest allows the gluten to relax slightly, making the next steps easier.
Incorporate the Cold Butter
After the rest, cut the 0.75 cup unsalted butter into small cubes and add them to the dough. Using your hands, work the butter into the dough until it’s fully incorporated and the butter pieces are about the size of peas. The cold butter will create pockets of fat that contribute to the bread’s signature texture and flavor.
As you work, you’ll notice the dough becomes more cohesive. If it’s still too sticky, gradually add 1-2 tablespoons of the 0.5 cup ice water to help bring it together. The ice water will cool the dough slightly, which is crucial for developing that crispy crust later.
Shape and Proof the Dough
Lightly dust a clean surface with some of the 0.25 cup cornmeal and turn out the dough. Gently shape it into a round loaf, tucking the edges under as you go. This creates surface tension that helps the bread hold its shape during baking. Place the shaped dough, seam-side up, in a greased bowl.
Cover the bowl with a damp towel and let the dough proof in a warm place for 1-2 hours or until it has nearly doubled in size. You’ll know it’s ready when the dough springs back slowly when poked with a finger. This proofing stage is where the dough develops its structure and flavor—don’t rush it.
Bake for a Crispy Crust and Soft Interior
Preheat your oven to 425°F with a Dutch oven inside for 30 minutes. The Dutch oven helps create that signature crispy crust by trapping steam. Carefully transfer the shaped dough to the hot Dutch oven, sprinkle the top with a little more cornmeal, and bake for 30 minutes.
After the initial 30 minutes, remove the lid and bake for another 15-20 minutes until the bread is deep golden brown and sounds hollow when tapped on the bottom. The crust should be crispy enough to crack when you press it gently, while the interior remains soft and airy.
Cool and Enjoy
Remove the bread from the Dutch oven and let it cool on a wire rack for at least 30 minutes. This cooling period allows the bread to set properly and prevents a gummy texture. The contrast between the crispy exterior and soft interior is what makes this bread so special.
Slice the bread and serve warm for the best experience. The aroma alone will make your kitchen smell like a bakery. Store any leftovers in an airtight container at room temperature for up to 3 days, or freeze for longer storage.
Pro Tips For Making 1800 Bread
- TEST YEAST TEMPERATURE: Use water that’s 110°F (43°C)—any hotter and you’ll kill the yeast before it wakes up. I learned this the hard way after a batch of dough sat there like a sad, flat pancake. A cheap thermometer solves this forever.
- KNEAD UNTIL GLASSY: Stop when the dough pulls clean from the bowl and looks slightly tacky—not sticky, not dry. Over-kneading makes bread tough; under-kneading leaves it gummy. My first loaf was a chewy brick because I quit too soon.
- COOL BUTTER FIRST: Let the unsalted butter sit at room temp for exactly 30 minutes—no longer, or it’ll turn greasy. I used to eyeball it and ended up with dense, greasy loaves. A quick 10-second press test (should leave a faint thumbprint) works every time.
- PROOF IN A WARM DRAWER: Skip the oven for proofing—just turn off your light and plug in a 60W bulb in a closed cabinet. The dough will rise twice as fast without risking overproofing. I tried this after burning three batches in the oven method.
Creative variations of this dish
Sweetened Honey Loaf
Transform your loaf into a lightly sweetened treat by adding 2 tbsp extra honey to the wet ingredients and swapping the granulated sugar for 2 tbsp maple syrup.
Brush the baked loaf with 1 tbsp melted butter mixed with 1 tsp honey while still warm for an extra glossy finish. This variation works beautifully with blackberry jam or whipped cream for breakfast. 🍯
Herbed Garlic Variation
For a savory twist, mix 1 tbsp fresh rosemary and 1 tbsp fresh thyme into the dough along with the salt. Add 2 minced garlic cloves to the wet ingredients and brush the baked loaf with garlic-infused olive oil before serving.
This version pairs perfectly with roasted meats or Mediterranean-inspired dishes. The herbs infuse the dough beautifully during the long fermentation. 🌿
Seeded Whole Grain
Replace 1 cup of bread flour with 1 cup whole wheat flour and add ¼ cup mixed seeds (like sunflower, pumpkin, or sesame) to the dough. The seeds add crunch and nutrition while maintaining the bread’s signature texture.
For extra flavor, toast the seeds in a dry pan for 2-3 minutes before mixing them in. This version keeps well for up to 5 days at room temperature. 🌾
Sourdough Adaptation
For a more authentic 1800s feel, replace the commercial yeast with ½ cup active sourdough starter (fed and bubbly). Reduce the warm water to 1 cup and let the dough ferment at room temperature for 18-24 hours instead of 12.
The longer fermentation develops complex flavors. Shape the dough into a batard and bake in the Dutch oven for 40 minutes covered, then 15 minutes uncovered. The crust will be even more rustic and flavorful. 🥖
Cheesy Pull-Apart Loaf
Add ½ cup shredded sharp cheddar or Gruyère to the dough after incorporating the butter. Shape the dough into a free-form loaf and bake as directed. The cheese melts slightly, creating pockets of gooey goodness.
For extra indulgence, sprinkle 1 tbsp crushed black pepper on top before baking. This version is perfect for dipping in soups or enjoying with melted butter. 🧀
Gluten-Free Version
Use 4 cups King Arthur gluten-free flour blend and add 1 tbsp xanthan gum to the dry ingredients. Replace the milk with ¼ cup unsweetened almond milk and reduce the ice water to ¼ cup.
The dough will be stiffer, so handle it gently. Bake in a preheated 400°F Dutch oven for 35 minutes covered, then 20 minutes uncovered. Expect a denser crumb but still crispy crust. 🌱
Nutrition facts
Frequently asked questions
Why does this bread need such a long fermentation time?
The 12-hour fermentation is key to developing that authentic 1800s texture. This slow process allows the gluten to relax and the yeast to work gradually, creating a more tender crumb and deeper flavor. Think of it like aging wine—patience pays off with complex, nuanced taste.
Can I make this bread without a Dutch oven?
Yes! Use a heavy oven-safe pot with a lid or even a pizza stone. For steam, place a baking sheet with 1 cup boiling water in the oven during the first 20 minutes of baking. The crust won’t be quite as crispy, but you’ll still get a great loaf.
What’s the best way to test if the dough is ready for baking?
Do the “poke test”: gently press your finger into the dough. If it springs back slowly (not immediately) and leaves a slight indent, it’s ready. For the final proof, the dough should also feel light and airy when tapped.
Why did my bread turn out dense instead of crispy?
This usually happens from overmixing the dough or insufficient proofing. Try resting the dough longer between kneading and shaping, and avoid punching it down. Also ensure your yeast is fresh and the water is 105°F—too hot or cold can kill the yeast.
How can I make this bread rise faster?
Place the proofing bowl in a warm spot—try the oven with the light on or a proofing box. For extra speed, use instant yeast (double the amount) and proof for 4-6 hours instead of 12. Just be prepared for slightly less flavor development.

- 3lb Prime Rib Roast Recipe: Juicy Pink Center Guaranteed in 3 Hours - October 31, 2026
- 5 Spice Cake Recipe: Warmly Spiced Layers With Crunchy Top - October 31, 2026
- 1950’s Macaroni and Cheese Recipe: Nostalgic Creamy Cheese Sauce with Buttery Noodles - October 31, 2026