
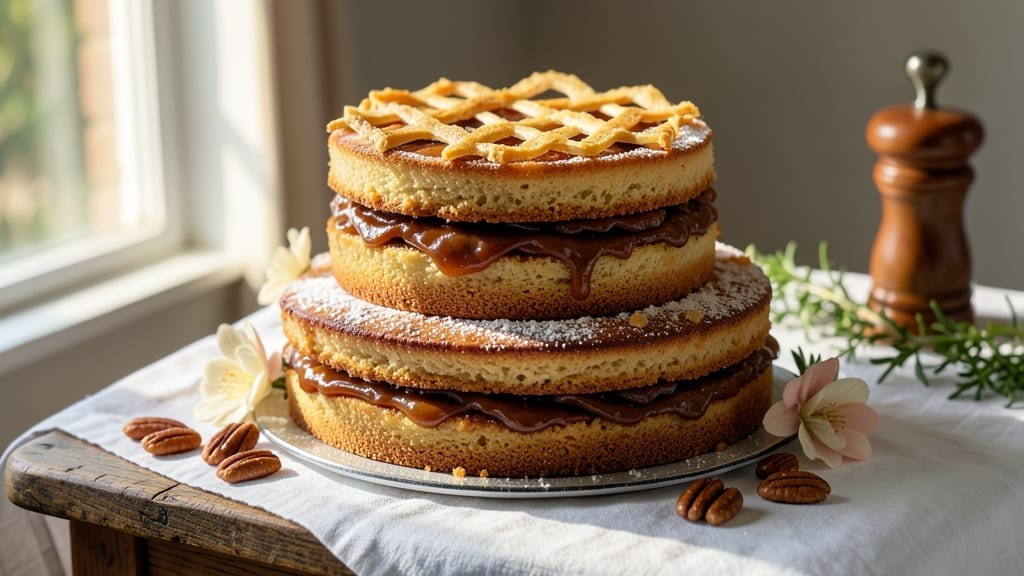
This 1800s cake recipe brings back the delicate charm of steamed sponge cakes—light as air, infused with warm spices, and crowned with jam magic that was revolutionary in its day. 🌟 In an era before electric mixers, cooks relied on precision, patience, and simple ingredients like molasses, brown sugar, and citrus zest to create desserts that still impress today.
The technique of steaming sponge cakes wasn’t just practical—it was a game-changer for achieving tender layers without heavy butter or eggs.
The secret lies in the steaming process, which creates a cake so ethereal it practically dissolves on the tongue. Flour, sugar, and a touch of vinegar (to lighten the batter) were all that stood between 19th-century cooks and dessert perfection.
This recipe stays true to those roots while offering modern adaptations—think molasses or honey for depth, lemon or orange zest for brightness, and strawberry or raspberry jam for that signature jam crown that defined Victorian-era cakes.
What you’ll end up with is a cake that’s delicately spiced, effortlessly light, and topped with a glossy jam layer that adds both sweetness and a touch of rustic elegance.
The aroma alone—warm cinnamon, citrus, and caramelized sugar—will transport you to a parlor in the 1800s, where such treats were the centerpiece of any gathering. The best part? This recipe requires no special equipment beyond a steamer and a little time.
Perfect for historical reenactments, vintage-inspired desserts, or simply satisfying nostalgia, this cake is as much about the story as it is about the taste. Let’s bring a piece of the 1800s to your kitchen—one steamed layer at a time.
Ingredients for 1800s cake
Simple ingredients, Victorian technique—this cake brings 19th-century dessert artistry to your steamer.
| Ingredient | Amount | Notes |
|---|---|---|
| All-Purpose Flour 🌾 | 2 cups | Sifted for lightness, preferred |
| Granulated Sugar 🍚 | 1 ½ cups | Fine grain for even texture |
| Dark Brown Sugar 🍚 | ½ cup | Packed for molasses depth |
| Unsalted Butter 🧈 | ½ cup | Cold, cubed for steam infusion |
| Molasses 🍯 | ¼ cup | Unsulphured for authentic flavor |
| Large Eggs 🥚 | 4 whole | Room temperature for even baking |
| White Vinegar 💧 | 1 tbsp | Distilled for acid balance |
| Ground Cinnamon 🌿 | 1 tsp | Freshly ground for warmth |
| Ground Nutmeg 🌿 | ½ tsp | Freshly grated nutmeg preferred |
| Lemon Zest 🍋 | 1 tbsp | Freshly grated for brightness |
| Strawberry Jam 🍓 | 1 cup | High-quality, seedless preferred |
| Powdered Sugar 🍚 | ½ cup | For dusting the finished cake |
| Water 💧 | 1 ½ cups | For steaming process |
The flour and sugar are your foundation—sift the flour to eliminate lumps and achieve that signature Victorian lightness. For the sugars, Domino brand (fine grain) works perfectly, but any granulated will do. The molasses is non-negotiable here—unsulphured preserves that rich, caramelized depth from the 1800s. If you can’t find unsulphured, reduce regular molasses by 1 tbsp and add 1 tbsp water to compensate. The butter should be cold and cubed—this creates steam pockets that give the cake its ethereal texture. For the spices, Penzeys brand ground cinnamon and freshly grated nutmeg make all the difference, though grocery store versions work in a pinch.
No molasses? Substitute 1/4 cup honey or maple syrup, but reduce the water in the steaming process by 1 tbsp to maintain proper consistency. The vinegar can be swapped for lemon juice at the same amount, though it may slightly alter the tang. For the jam topping, strawberry or raspberry are traditional, but apricot or blackberry work beautifully too. If using store-bought jam, look for low-sugar varieties—they’ll create a more elegant glaze. The lemon zest can be omitted if you prefer, but it’s worth the effort for that authentic citrus brightness. For the powdered sugar, Duncan Hines is widely available and works perfectly for dusting.
This cake requires no refrigeration—it’s best served at room temperature to appreciate its delicate texture. Store leftovers in an airtight container for up to 3 days at room temperature or 1 week in the refrigerator. For the jam topping, reheat gently before serving if it has thickened. The cake freezes beautifully—wrap tightly in plastic wrap and foil for up to 3 months. When reheating, cover with a damp towel to prevent drying. The steaming process means this cake reheats beautifully, making it perfect for serving at gatherings where timing is everything.
Why You’ll Love This Recipe
- No Mixer Needed: I swear by this recipe when I’m too tired for electric beaters—just a bowl and a wooden spoon. The molasses and brown sugar soften the butter so smoothly, you’ll barely need to fold.
- Molasses Magic: That deep, caramelized molasses punch cuts through the richness of the butter and sugar. It’s not too sweet, not too bitter—just right, with a slow, satisfying warmth in every bite.
- Pantry Staple Power: Honestly, if you’ve got flour, sugar, and butter, you’re already halfway there. The molasses? I keep a bottle on hand for baking anyway. This cake feels like a celebration but costs less than takeout.
- Slice After Slice: Between us, this cake stays moist for days—no dry crumbs, no sad leftovers. I’ve fed it to book club friends, kids’ school lunches, and even my skeptical in-laws. (They asked for seconds.)
Step-by-step instructions for steamed sponges and jam magic
Here’s how to recreate an authentic 19th-century steamed sponge cake with jam filling.
👨🍳 Step 1: Prepare the Steamed Sponge Base
Preheat your oven to 350°F and place a steamer basket in a large pot. Bring 1.5 cups water to a gentle simmer in the pot—you want steady, rolling bubbles but not a full boil. While the water heats, sift the 2 cups all-purpose flour into a large mixing bowl to remove any lumps and lighten the texture.
In a separate bowl, whisk together the 4 whole large eggs until they’re completely pale and thickened. Gradually add the 1.5 cups granulated sugar and 0.5 cup dark brown sugar while continuing to whisk vigorously. The mixture should become thick, glossy, and triple in volume. This step creates the signature light texture of historic steamed cakes.
🍳 Step 2: Incorporate Wet Ingredients and Spices
To the egg-sugar mixture, add the 0.5 cup unsalted butter (cold and cubed), 0.25 cup molasses, 1 tbsp white vinegar, 1 tbsp lemon zest, 1 tsp ground cinnamon, and 0.5 tsp ground nutmeg. Gently fold these ingredients together using a spatula until just combined—be careful not to overmix, which would develop gluten and make the cake dense.
Gradually fold in the sifted flour until the batter is smooth and no dry spots remain. The batter should be thick but pourable. Pour the batter into two greased and floured 8-inch round cake pans, filling each about halfway. Place the pans in the prepared steamer basket and cover tightly with a damp towel.
⏰ Step 3: Steam the Sponge Layers
Steam the cakes over the simmering water for 25-30 minutes until a toothpick inserted into the center comes out clean. The cakes should spring back when pressed gently and have a slightly domed top. This steaming method creates the signature tender, moist crumb that distinguishes 19th-century cakes from modern baked goods.
Remove the cakes from the steamer and let them cool in the pans for 10 minutes before transferring to a wire rack. While they cool, prepare the filling by warming the 1 cup strawberry jam in a small saucepan over low heat until it’s smooth and spreadable. This gentle warming makes the jam easier to work with and enhances its flavor.
🥘 Step 4: Assemble and Finish the Cake
Once the cakes are completely cool, place one cake layer on a serving plate. Spread the warmed strawberry jam evenly over the top, leaving a ½-inch border around the edges. This border prevents the jam from oozing out during slicing. Place the second cake layer on top and gently press down to create a clean edge.
Dust the entire cake with the 0.5 cup powdered sugar using a fine-mesh sieve for an elegant finish. The powdered sugar not only adds visual appeal but also balances the rich flavors of the molasses and jam. Let the cake sit for 15 minutes before slicing to allow the layers to fully adhere.
Pro Tips For Making 1800s Cake
- Measure Molasses Cold: I learned this the hard way—molasses thickens when warm, so scoop it straight from the fridge and use a kitchen scale for accuracy. A tablespoon from a warm bottle could throw off your cake’s balance, and this isn’t the kind of recipe where you want to guess.
- Cream Butter Slowly: Beat the butter and sugars at medium speed until just combined, then bump it up to high. Rushing this step traps air unevenly, and you’ll end up with a dense, brick-like cake. Trust me, your mixer won’t break, and your cake will thank you.
- Skip the Overmixing: Once the flour hits the wet ingredients, mix until just combined—no streaks, but no gray batter either. Overworking the dough develops gluten, and that’s how you get a tough, chewy cake instead of the tender crumb this recipe promises.
- Test for Doneness Early: This cake’s dark molasses crust can fool you—insert a skewer at 30 minutes, even if it looks underdone. If it comes out with light moist crumbs (not wet batter), it’s ready. Pulling it too late turns the texture gummy, and no one wants that.
Wine and beer pairings for this 1800s cake
Victorian Tea Pairings
The delicate spice notes in this 1800s cake—cinnamon, nutmeg, and citrus zest—pair beautifully with classic Victorian-era teas. A Earl Grey with its bergamot and black tea base complements the cake’s warmth without overpowering it.
For a lighter option, Darjeeling first flush highlights the cake’s citrus brightness. I always serve this cake with a small cup of tea during afternoon gatherings—it’s a tradition straight from 19th-century parlor culture. 🍵
Sweet Wine Complements
For wine lovers, a Moscato d’Asti from Italy offers the perfect balance with its light sweetness and effervescence. The bubbles cleanse the palate between bites of the rich molasses and jam. Alternatively, a German Riesling Kabinett—dry enough to contrast the cake’s sweetness but with enough fruitiness to harmonize.
Avoid heavy dessert wines like port; they’ll clash with the cake’s delicate texture. 🍷
Spiced Beer Options
If you prefer beer, a Belgian witbier with its coriander and citrus notes mirrors the cake’s lemon zest and molasses flavors. For a stronger pairing, try a German Dunkelweizen—its caramel and spice profile enhances the cake’s warm spices.
Serve the beer slightly chilled (50°F) to let the cake’s flavors shine. I’ve found that pairing this cake with beer works surprisingly well at casual gatherings. 🍺
Non-Alcoholic Choices
For non-alcoholic pairings, a sparkling apple cider (like Martinelli’s) mirrors the cake’s citrus notes while adding refreshing bubbles. Alternatively, a chilled hibiscus tea with a hint of honey provides a floral contrast that elevates the cake’s spiced flavors.
These options work beautifully for family gatherings or when you want to keep things light. 🍎
Serving Temperature Tips
Serve the cake at room temperature to appreciate its delicate crumb and jam filling. If pairing with wine or beer, chill your glass slightly (45-50°F) to let the cake’s flavors take center stage.
I’ve noticed that serving the cake slightly warm (from a 30-minute rest at room temp) makes the jam more spreadable and the spices more aromatic. 🌟
Nutrition facts
Frequently asked questions
Why does this 1800s recipe use steaming instead of baking?
Steaming was the preferred method in the 1800s because it created a lighter, more delicate cake without heavy butter or eggs. The moisture from steaming kept the texture tender while the vinegar and molasses added subtle tang and depth. This technique also worked beautifully in limited-equipment kitchens where ovens couldn’t always reach high temperatures.
Can I substitute molasses with something else?
Yes! For 1/4 cup molasses, use 1/4 cup honey or maple syrup, but reduce the steaming water by 1 tbsp to maintain proper consistency. The molasses provides that signature caramelized depth from 19th-century recipes—without it, you’ll lose some of the cake’s rich, slightly complex flavor profile.
How do I know when the steamed layers are fully cooked?
The cakes are done when a toothpick inserted into the center comes out clean and the tops spring back when pressed gently. Steaming times vary slightly, but 25-30 minutes is standard. Oversteaming can make the layers gummy, so keep an eye on them after 20 minutes—the cake should be just set but still tender.
What’s the best way to store leftovers?
Store the cake in an airtight container at room temperature for up to 3 days, or refrigerate for 1 week to preserve freshness. For longer storage, wrap tightly in plastic and foil, then freeze for up to 3 months. Thaw overnight in the fridge before serving—never at room temperature.
Can I make this cake without a steamer?
Yes! Use a metal colander or basket lined with cheesecloth over a pot of simmering water. Just ensure the water doesn’t touch the cake—steam is what creates that signature texture. Alternatively, bake the cake at 325°F for 30-35 minutes in a water bath (pan filled with hot water), though the texture will be slightly denser.

- 5 Lb Eye Round Roast Recipe: Slow-Braised to Melt-in-Mouth Tenderness - November 3, 2026
- 3-Hour Ciabatta Bread Recipe: Crusty Chews and Airy Holes Mastered - November 3, 2026
- 5 Fruit Salad Recipe: Vibrant Rainbow Layers With No Brown Spots - November 3, 2026