
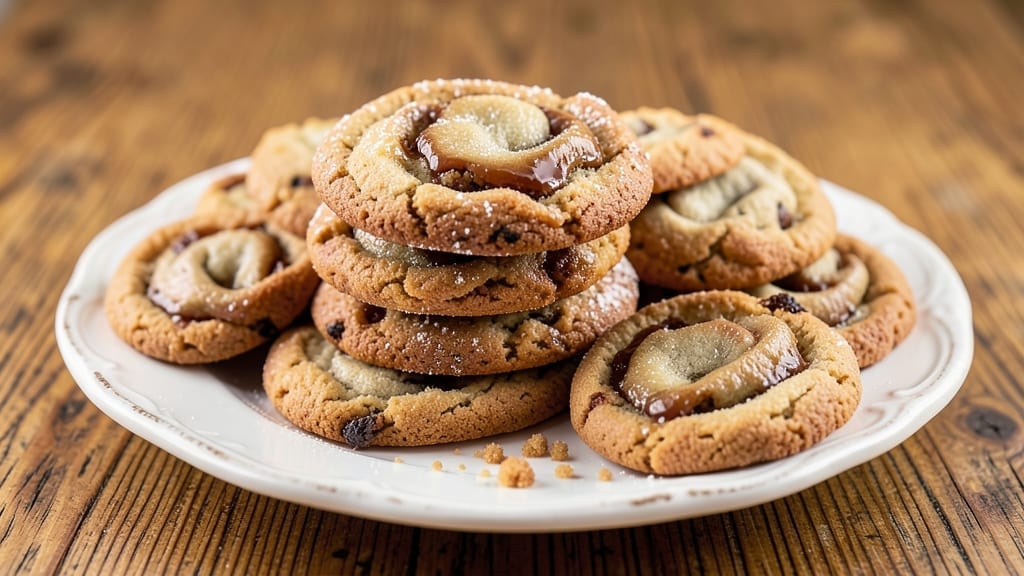
This 1939 Toll House cookie recipe brings back the original buttery walnut swirls that made history at the Toll House Inn. 💛 The classic combination of walnuts, chocolate, and brown sugar creates chewy centers with crisp edges—just as Ruth Wakefield intended when she first shared this recipe with Nestlé.
The secret lies in the perfect balance of butter and sugar, ensuring every bite delivers that signature texture.
The recipe’s historical significance comes from its roots at the Toll House Inn in Massachusetts, where Ruth Wakefield famously ran out of baker’s chocolate and chopped up a Nestlé bar instead. This adaptation became so popular that Nestlé began producing chocolate chips specifically for baking.
The walnut version remains a beloved classic, offering a nutty depth that sets it apart from chocolate chip cookies.
What makes these cookies truly special is their foolproof method—no fancy techniques required, just a few simple ingredients mixed together and baked at 350°F for 10-12 minutes. The walnuts add a satisfying crunch, while the brown sugar caramelizes slightly, creating a rich, buttery flavor that lingers.
Each batch yields perfectly golden cookies with soft centers that stay chewy even after cooling.
Once you try this recipe, you’ll understand why it’s stood the test of time. Whether you’re baking for a family gathering or simply craving a taste of nostalgia, these 1939 Toll House cookies deliver the same warmth and comfort they’ve provided for generations. Let’s get baking!
Ingredients for 1939 toll house cookie
The original Toll House ingredients—walnuts, chocolate, and buttery richness—come together for classic chewy cookies.
| Ingredient | Amount | Notes |
|---|---|---|
| Unsalted Butter 🧈 | 1 cup | Cold, cubed for even mixing |
| Packed Brown Sugar 🍯 | 1 cup | Light or dark, packed firmly |
| Granulated Sugar 🍚 | ½ cup | White sugar, standard grade |
| Large Eggs 🥚 | 2 whole | Room temperature for blending |
| Pure Vanilla Extract 🌿 | 2 tsp | Bottled, not imitation |
| All-Purpose Flour 🌾 | 2 ½ cups | Sifted, spooned and leveled |
| Baking Soda 🧂 | 1 tsp | Freshly opened for potency |
| Salt 🧂 | ½ tsp | Fine sea salt preferred |
| Walnuts 🥜 | 1 ½ cups | Chopped, toasted lightly |
| Semi-Sweet Chocolate Chips 🍫 | 1 ½ cups | Nestlé original preferred |
| Granulated Sugar (for swirl) 🍚 | ¼ cup | Extra for walnut swirl |
The butter and sugars are the foundation here. European-style unsalted butter (like Plugrá or Land O’Lakes) gives the best flavor, but any good brand works. Brown sugar should be packed firmly—use a spoon to press it down in the measuring cup. The walnuts? Toast them first in a dry pan for 5-7 minutes until fragrant. This enhances their flavor dramatically. For chocolate, Nestlé semi-sweet chips are the original choice, but any quality brand will work. The extra sugar for the swirl ensures it stays crisp during baking.
No vanilla extract? Seeds from one vanilla bean work beautifully, though they’re pricier. Short on walnuts? Pecans or hazelnuts add a nice variation. The baking soda must be fresh—old baking soda loses its lift. If you’re gluten-sensitive, swap the all-purpose flour for a 1:1 gluten-free blend, but expect slightly denser cookies. For extra chewiness, chill the dough for 24 hours before baking. The flour should be sifted to avoid dense cookies, and measure it by spooning it into the cup then leveling off—don’t scoop directly from the bag.
Store dough in an airtight container in the fridge for up to 48 hours—it actually improves in flavor. Baked cookies keep at room temperature for 5-7 days in a sealed container, though they’ll lose their crispness after 2 days. For longer storage, freeze baked cookies in a single layer on a tray before transferring to a bag. They’ll keep for 3 months this way. The walnut swirls are best eaten within 3 days of baking for maximum crunch. If you’re making these ahead for a gathering, bake them the day before and store in an airtight tin.
Why You’ll Love This Recipe
- Pantry Staples Only: I swear by this recipe because it uses what’s already in my kitchen—no weird ingredients, just butter, sugars, and vanilla. That brown sugar caramelizes into pure chewiness, and the eggs bind everything together without fuss.
- Chewy-Crisp Magic: The secret’s in the butter-to-sugar ratio—rich but not greasy, with that perfect crisp edge and gooey center. Honestly, the first bite makes me close my eyes. (Yes, even on a Tuesday night.)
- Party in a Jar: These freeze like a dream, so I bake a batch for holidays, pack them in lunchboxes, or stash them for when company drops by. The vanilla’s bright enough to feel festive, but simple enough for everyday.
- Budget-Friendly Luxury: A single batch costs me pennies but tastes like a bakery treat. Between us, I’ve made these for 15 years, and they’re still my go-to when I want something special without breaking the bank.
Step-by-step instructions for 1939 Toll House cookie recipe
Here’s how to craft the original Toll House cookies with their signature walnut swirls and chewy centers.
👨🍳 Step 1: Cream Butter and Sugars to Light and Fluffy
In a stand mixer fitted with the paddle attachment, combine the 1 cup unsalted butter (cold and cubed) with the 1 cup packed brown sugar and 0.5 cup granulated sugar. Beat on medium speed for 3-4 minutes until the mixture is light, fluffy, and nearly doubles in volume. You’ll notice the color lighten as air incorporates into the butter.
This creaming process is crucial—it creates the air pockets that give these cookies their signature chewy texture. If your butter isn’t cold enough, the mixture will separate. If it’s too cold, it won’t emulsify properly. You’re aiming for a ribbon stage when you lift the paddle—when the mixture holds a brief trail before dissolving.
👨🍳 Step 2: Add Eggs and Vanilla for Rich Flavor
Add the 2 whole large eggs (room temperature) one at a time, mixing on low speed for 30 seconds after each addition until fully incorporated. Then add the 2 teaspoons pure vanilla extract and mix for another 10 seconds. The mixture should look slightly thicker and more cohesive.
I always use room temperature eggs—they blend more smoothly and create a more uniform dough. The vanilla extract should be bottled, not imitation, for that authentic Toll House flavor. At this stage, the dough will look slightly curdled, but don’t worry—it will come together perfectly when you add the dry ingredients.
🥘 Step 3: Combine Dry Ingredients and Prepare Walnut Swirl
In a separate bowl, whisk together the 2.5 cups all-purpose flour, 1 teaspoon baking soda, and 0.5 teaspoon salt. Gradually add this mixture to the wet ingredients, mixing on low speed for 30-45 seconds until just combined. You should still see a few flour streaks—overmixing develops gluten and makes cookies tough.
In a small bowl, combine the 1.5 cups chopped walnuts with the 0.25 cup granulated sugar (for swirl). This creates the classic walnut-sugar swirl that distinguishes these cookies. Fold in the 1.5 cups semi-sweet chocolate chips by hand using a silicone spatula, making sure they’re evenly distributed throughout the dough.
⏰ Step 4: Chill the Dough for Perfect Texture
Cover the mixing bowl with plastic wrap and refrigerate for at least 1 hour (or up to 24 hours). Chilling is non-negotiable here—it allows the flour to fully hydrate, prevents excessive spreading, and ensures those beautiful walnut swirls hold their shape when baked.
Cold dough also means the cookies will hold their shape better in the oven, resulting in thicker cookies with crispy edges and chewy centers. This step makes a MASSIVE difference in the final texture. If you’re short on time, at least 30 minutes in the fridge will help, but 1 hour is ideal.
🔥 Step 5: Bake to Golden Perfection
Preheat your oven to 375°F and line two baking sheets with parchment paper. Using a cookie scoop or tablespoon, drop rounded portions of dough (about 1.5 tablespoons each) onto the prepared sheets, spacing them 2 inches apart. For the walnut swirls, gently press a walnut mixture piece into the center of each dough ball and swirl lightly with a fork.
Bake for 10-12 minutes until the edges are golden brown but the centers still look slightly underdone. They’ll continue cooking on the hot pan after you remove them from the oven. Let them cool on the baking sheet for 5 minutes before transferring to a wire rack. The walnut swirls should be visible and slightly crispy around the edges.
Pro Tips For Making 1939 Toll House Cookie
- CREAM THE BUTTER SLOWLY: I learned this the hard way—dumping cold butter into sugar and expecting magic. Instead, soften the butter to room temperature (it should dent when pressed) and mix it into the sugars gradually with a wooden spoon or mixer. This avoids greasy cookies and ensures the brown sugar dissolves properly, giving that classic chewy texture.
- CHILL THE DOUGH LONGER: Sounds counterintuitive, but resist the urge to bake immediately. After mixing, flatten the dough into a disk and refrigerate it for at least 24 hours (or overnight). This lets the flour hydrate evenly, prevents flat cookies, and deepens the chocolate flavor—trust me, your future self will notice the difference.
- MEASURE BROWN SUGAR RIGHT: Packed brown sugar isn’t just “scooped and leveled.” Press it firmly into the measuring cup until it overflows, then level it off with a knife. Underpacking means less moisture, and these cookies rely on that caramelized sweetness to stay tender. (Yes, even if you’re impatient like me.)
- BAKE IN MIDDLE RACK: The oven’s hot spots are real, and Toll House cookies hate them. Place your sheet on the middle rack and rotate the pan halfway through baking (around 8–10 minutes). This guarantees even browning without burnt edges or pale centers—no more guessing games.
Serving suggestions for this 1939 toll house cookie
Classic Milk Pairing
These cookies pair beautifully with a cold glass of whole milk—the creamy richness complements the buttery walnut flavor perfectly. I always serve them with 2% or whole milk from a local dairy like Organic Valley or Horizon for that authentic, comforting experience.
The milk’s natural sweetness balances the caramelized edges of the cookies. 🥛
Creamy Vanilla Ice Cream
For a decadent dessert experience, serve these warm cookies with vanilla bean ice cream. My go-to brands are Ben & Jerry’s or Häagen-Dazs—their rich, creamy texture contrasts wonderfully with the crispy walnut swirls.
Let the cookies cool slightly before serving to prevent melting. A drizzle of warm caramel sauce adds an extra layer of indulgence.
After-Dinner Coffee
Pair these cookies with a dark roast coffee like Peet’s Major Dickason’s Blend or Starbucks Sumatra. The bold, slightly bitter notes of the coffee cut through the sweetness of the cookies, creating a perfect balance.
I like to serve them with a small espresso shot for an extra caffeine boost. The warmth of the coffee enhances the buttery, nutty flavors of the cookies.
Warm Spiced Tea
For a cozy, comforting pairing, serve these cookies with chamomile or spiced chai tea. The earthy notes of the tea complement the walnut and chocolate flavors beautifully. I recommend Tazo Chai Tea or a homemade blend with cinnamon, cardamom, and cloves.
The warmth of the tea enhances the chewy texture of the cookies, making them even more satisfying.
Garnish for Extra Flair
Elevate your presentation with a sprinkle of flaky sea salt or a dusting of powdered sugar right before serving. A few toasted walnut halves on top adds a rustic touch and extra crunch.
For a festive touch, drizzle with melted white chocolate or a berry compote to add a pop of color and freshness. These simple garnishes make your cookies look as good as they taste. ✨
Nutrition facts
Frequently asked questions
Why do these 1939 Toll House cookies have walnut swirls instead of chocolate chips?
The original recipe Ruth Wakefield created at the Toll House Inn used walnuts—chocolate chips came later when Nestlé developed them specifically for baking! These walnut swirls create a beautiful visual contrast and add a satisfying crunch that sets them apart from modern chocolate chip versions.
Can I make these cookies without a stand mixer?
Use two large bowls and a sturdy wooden spoon or hand mixer. Cream the butter and sugars by hand for 5-7 minutes until light and fluffy—just keep at it until you see color changes and the mixture thickens. The key is patience and elbow grease!
How do I fix cookies that spread too much during baking?
Chill your dough for the full 1-24 hours before baking—this prevents excessive spreading. Also, use 375°F (not higher) and scoop dough portions slightly smaller (1.5 tablespoons). If they still spread, your butter might be too soft—try chilling it for 30 minutes before creaming.
What’s the best way to store these cookies?
Keep them in an airtight container at room temperature for 5-7 days. For longer storage, freeze baked cookies (not dough) in a single layer for 3 months. Thaw at room temperature—no microwave needed! The walnut swirls stay crispy when properly stored.
Can I substitute walnuts for pecans or hazelnuts?
Yes! Pecans work beautifully for a sweeter flavor, while hazelnuts add a slightly earthier taste. Toast them first (5-7 minutes) for maximum flavor. Just keep the total nut quantity at 1.5 cups and adjust the sugar for the swirl to 0.25 cup to maintain the classic texture.

- 3lb Prime Rib Roast Recipe: Juicy Pink Center Guaranteed in 3 Hours - October 31, 2026
- 5 Spice Cake Recipe: Warmly Spiced Layers With Crunchy Top - October 31, 2026
- 1950’s Macaroni and Cheese Recipe: Nostalgic Creamy Cheese Sauce with Buttery Noodles - October 31, 2026