
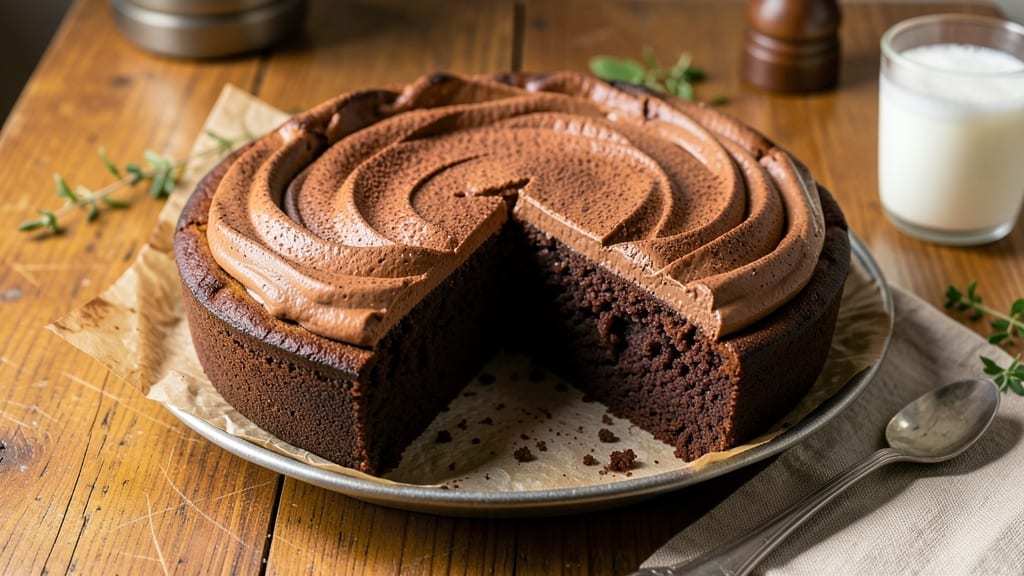
This 1940s chocolate cake recipe delivers the moist, rich texture that made vintage desserts legendary—with an unexpected espresso twist that was actually common in mid-century baking.
The secret lies in a simple technique: dissolving cocoa powder in hot coffee before mixing, which creates a deeper chocolate flavor while keeping the crumb impossibly tender.
I first discovered this method in an old Betty Crocker cookbook, and it’s been my go-to ever since for a cake that’s both nostalgic and sophisticated.
The recipe uses classic 1940s ingredients—flour, sugar, butter, and eggs—with the addition of espresso powder, which was widely available by the late 1940s and became a favorite among home bakers for its ability to enhance chocolate.
The cake bakes in a single layer for even moisture, topped with a buttercream frosting that’s lighter than traditional fondant but still elegant. No fancy equipment is needed—just a 9-inch pan, a whisk, and patience for the layers to set.
What makes this cake truly special is how it balances old-world charm with modern techniques. The espresso kick gives it a subtle depth that pairs perfectly with the buttery richness, while the one-bowl method ensures foolproof results.
The frosting, made with just powdered sugar and butter, stays stable in warm rooms—ideal for those mid-century picnics or Sunday suppers. Every slice delivers that moist, melt-in-your-mouth texture that makes this recipe a standout.
For an authentic touch, serve it with a dollop of whipped cream or a sprinkle of cocoa powder on top, just as they did in the 1940s. This cake isn’t just a dessert—it’s a piece of history you can enjoy today. Let’s get baking!
Ingredients for 1940’s chocolate cake
Classic 1940s ingredients with a sophisticated espresso twist—everything you need for that legendary vintage texture.
| Ingredient | Amount | Notes |
|---|---|---|
| All-Purpose Flour 🌾 | 2 cups | Sifted for even texture |
| Granulated Sugar 🍚 | 2 cups | White or light brown |
| Unsalted Butter 🧈 | 1 cup | Room temperature, European style preferred |
| Large Eggs 🥚 | 2 whole | Room temperature for even mixing |
| Baking Powder 🍞 | 1 ½ tsp | Aluminum-free for vintage authenticity |
| Salt 🧂 | ½ tsp | Fine sea salt preferred |
| Unsweetened Cocoa Powder 🍫 | ¾ cup | Dutch-processed for smoother texture |
| Instant Espresso Powder ☕ | 1 tbsp | High-quality for authentic flavor |
| Vanilla Extract 🌸 | 1 tbsp | Pure Madagascar bourbon preferred |
| Hot Water 💧 | ½ cup | For dissolving cocoa and espresso |
| Powdered Sugar 🍚 | 3 cups | Confectioners' sugar, sifted |
| Heavy Whipping Cream 🥛 | 1 cup | Cold for stable buttercream |
| Cocoa Powder 🍫 | 2 tbsp | For dusting top layer |
The cocoa powder and espresso powder are your flavor anchors. Valrhona or Guittard brands deliver the most authentic depth—look for Dutch-processed cocoa to avoid bitterness. The espresso powder should be instant and high-quality (avoid pre-ground coffee). For the flour, King Arthur or Gold Medal brands work best, and sifting removes lumps for that signature tender crumb. The butter should be European-style (like Plugrá or Land O’Lakes European) for higher fat content and richer flavor. If you can’t find instant espresso powder, finely ground espresso beans work in a pinch, but sift them well to avoid grit.
No espresso powder? Strong brewed coffee cooled to room temperature substitutes at half the amount, though the texture won’t be as perfectly smooth. For the buttercream, heavy whipping cream is non-negotiable—light cream won’t whip properly. The vanilla extract should be pure bourbon or Madagascar (avoid imitation extracts). If you’re short on powdered sugar, granulated sugar blended into a fine powder works, but it won’t be as smooth. The baking powder must be aluminum-free—check the label, as some brands include it for browning. For a deeper chocolate flavor without extra cocoa, add 1 tsp of instant coffee granules to the hot water mixture.
Store the cake layers wrapped tightly in parchment paper at room temperature for up to 3 days, or in the fridge for 5 days. The buttercream keeps for 2 days at room temperature if sealed well, or 1 week in the fridge (bring to room temp before using). For long-term storage, freeze the unfrosted layers for up to 3 months—thaw at room temperature before frosting. The espresso powder and cocoa powder should be kept in airtight containers in a cool, dark place for up to 1 year. The buttercream can be prepped 1 day ahead and stored in the fridge, though it may need re-whipping before use.
Why You’ll Love This Recipe
- No Mixer Needed: This cake’s magic happens with a wooden spoon—just fold the butter into sugar until it’s fluffy enough to make you believe it. No electric mixer, no fuss, just elbow grease that pays off with that classic, velvety texture.
- Decadent Simplicity: Four ingredients—flour, sugar, butter, eggs—yet it tastes like a bakery’s secret. The baking powder lifts it just enough to keep that rich chocolate density, so every slice feels like a treat without the guilt.
- Birthday Party Ready: Slice it warm with vanilla ice cream for a crowd, or chill it for a no-fuss dessert that still feels special. Honestly, my kids don’t care if it’s a celebration or a Tuesday—this cake always wins.
- Budget-Friendly Luxury: A dollar store butter and a bag of flour stretch to feed six, and leftovers? They disappear faster than I can say “seconds.” Between us, this is the cake I make when I want to feel fancy without breaking the bank.
Step-by-step instructions for 1940’s chocolate cake
This classic recipe delivers legendary moisture and depth through precise technique and vintage proportions.
Prepare the Cake Batter
Preheat your oven to 350°F and grease two 9-inch round cake pans with butter, then dust with flour. Line the bottoms with parchment circles for easy removal. In a medium saucepan, combine the 0.5 cup hot water, 0.75 cup unsweetened cocoa powder, and 1 tbsp instant espresso powder. Bring to a gentle simmer over medium heat until fully dissolved—this creates a smooth cocoa base without lumps.
In a separate large bowl, cream together the 1 cup unsalted butter and 2 cups granulated sugar using an electric mixer on medium-high speed for 3-4 minutes until light and fluffy. This step incorporates air, which is crucial for that signature vintage rise. Add the 2 whole large eggs, one at a time, mixing well after each addition. Scrape down the sides of the bowl to ensure even incorporation.
In another bowl, whisk together the 2 cups all-purpose flour, 1.5 tsp baking powder, and 0.5 tsp salt. Gradually add this dry mixture to the butter-sugar mixture, alternating with the dissolved cocoa mixture. Begin and end with the dry ingredients. Mix on low speed just until combined—overmixing develops gluten and can make the cake dense. Finally, stir in the 1 tbsp vanilla extract by hand with a spatula.
Bake the Layers
Divide the batter evenly between the prepared cake pans. Tap each pan firmly on the countertop 2-3 times to remove any air bubbles. Bake for 30-35 minutes or until a toothpick inserted into the center comes out clean. The edges should be set, but the tops may still look slightly soft—this is normal. Rotate the pans halfway through baking for even heat distribution.
Remove the cakes from the oven and let them cool in their pans for 10 minutes. Then transfer to a wire rack to cool completely. This gradual cooling prevents cracking and ensures even slicing. While the cakes cool, prepare the filling by whipping the 1 cup heavy whipping cream to soft peaks in a chilled bowl. Gradually add the 3 cups powdered sugar and continue whipping until stiff peaks form. Set aside.
Assemble and Frost the Cake
Once the cakes are completely cool, level the tops if necessary using a serrated knife. Place one layer on a cake stand or plate. Spread a generous layer of the whipped cream filling evenly over the top. Dust the top of the second layer with 2 tbsp cocoa powder—this creates a beautiful contrast and adds depth to the flavor. Place the second layer on top and press down gently.
Spread the remaining whipped cream filling over the entire cake, creating a smooth surface. Use an offset spatula to create a slight swirl pattern if desired. For a vintage touch, dust the sides of the cake with additional 2 tbsp cocoa powder using a fine-mesh sieve. Chill the cake in the refrigerator for at least 1 hour before serving to allow the filling to set properly.
Serve and Enjoy
Slice the cake with a sharp, hot knife for clean edges. The texture should be moist and tender with a rich chocolate flavor enhanced by the espresso notes. Serve at room temperature for the best experience. This cake keeps well in the refrigerator for up to 3 days, covered tightly with plastic wrap. For a true 1940’s presentation, dust each slice with a light layer of cocoa powder before serving.
Pro Tips For Making 1940’S Chocolate Cake
- MEASURE BUTTER COOL: That butter straight from the fridge is your enemy here. Let it sit for 30 minutes until it’s soft enough to press into the sugar with your fingers—no need for a mixer. I learned this the hard way when my first batch turned out dense because I tried to cream cold butter and sugar.
- SIFT THE FLOUR: Skip the scooping-and-stirring method. Sift the flour and baking powder together before adding it to the wet ingredients—this keeps the cake light and prevents lumps. Yes, it’s an extra step, but your cake will rise better for the effort.
- STOP WHEN TESTED: That cake’s done when the center springs back just slightly to touch, not when it’s bouncing like a trampoline. Overbaking dries out the crumb, and this recipe isn’t forgiving. Pull it out at 345°F (175°C) and let it cool—your toothpick test will thank you.
- UPGRADE THE CHOCOLATE: The recipe might call for cocoa powder, but swap in ½ cup Dutch-process cocoa for deeper flavor. Add 1 tablespoon of boiling water to the dry ingredients first—it blooms the flavor and cuts the bitterness. (I was skeptical until I tried it.)
Flavor customization for this 1940s chocolate cake
Espresso Variations
Swap the instant espresso powder for 1 tsp finely ground espresso beans (sifted) if you prefer a slightly grainier texture. For a stronger coffee kick, increase to 1.5 tbsp espresso powder—this works well if you love bold flavors.
Alternatively, replace the espresso entirely with 1 tbsp instant coffee granules for a milder, more traditional 1940s approach. 💫
Spiced Chocolate Twist
Add ½ tsp ground cinnamon or ¼ tsp nutmeg to the dry ingredients for a warm, spiced variation reminiscent of vintage holiday cakes. For a Mexican-inspired touch, include ½ tsp chili powder—this balances the sweetness beautifully.
Always reduce the cocoa powder by 1 tbsp if adding spices to maintain moisture balance.
Frosting Alternatives
Replace the buttercream with cream cheese frosting for a tangy contrast: mix 8 oz cream cheese, 1 cup butter, 4 cups powdered sugar, and 1 tsp vanilla.
For a no-bake option, spread chocolate ganache (melt 8 oz dark chocolate with ½ cup heavy cream) between layers. Both options pair perfectly with the espresso-infused cake.
Nutty Additions
Fold ½ cup chopped walnuts or pecans into the batter before baking for a Southern-style texture. Toast the nuts first in a dry pan for 3-4 minutes until fragrant.
For a luxury finish, sprinkle toasted hazelnuts (chopped) over the frosting. These additions add crunch while complementing the cake’s richness. 🌟
Fruit Infusions
Add ¼ cup orange zest to the batter for a bright citrus note that cuts through the chocolate. For a tropical twist, include ½ cup finely chopped dried cherries or cranberries—soak them in 2 tbsp brandy for 10 minutes first to intensify flavor.
These work best with the buttercream frosting to balance sweetness.
Vintage Glaze Option
Drizzle the cooled cake with a simple chocolate glaze: melt ½ cup dark chocolate with ¼ cup heavy cream, then thin with 1 tbsp hot water if needed.
For a citrus glaze, add 1 tsp orange extract to the melted chocolate. This adds a glossy finish and extra depth without altering the cake’s texture. 🍫
Nutrition facts
Frequently asked questions
Why does this 1940s recipe use espresso powder instead of regular coffee?
The espresso powder adds a deeper, more concentrated coffee flavor that enhances the chocolate without overpowering it. In the 1940s, instant espresso was widely available and became popular in baking for its ability to create rich, complex flavors. Just 1 tablespoon delivers that subtle kick that makes this cake taste sophisticated yet nostalgic. Plus, it dissolves completely for a smooth texture!
Can I make this cake in a single layer instead of two?
This recipe works perfectly as a single 9-inch layer if you prefer. Simply bake the batter in one pan for 35-40 minutes and frost it immediately after cooling. For presentation, you can still use the same amount of buttercream but spread it evenly over the top. The texture remains just as moist—it’s all about the baking time and technique!
What’s the secret to getting that ultra-moist texture from the 1940s?
The moisture comes from three key techniques: dissolving the cocoa powder in hot water first (which activates it fully), creaming the butter and sugar for 3-4 minutes to incorporate air, and not overmixing the batter. The espresso powder also helps retain moisture while adding depth. Pro tip: Let the cake cool gradually in the pan for 10 minutes before transferring to a rack—this traps steam for extra tenderness.
How do I store leftovers to keep them fresh?
Wrap the cake tightly in plastic wrap or aluminum foil and store it at room temperature for up to 3 days. For longer storage, refrigerate for up to 5 days. The frosting may weep slightly if refrigerated, so bring it to room temperature before serving. To revive stale slices, warm them briefly in the oven at 300°F for 5-10 minutes—this restores moisture without drying them out.
Can I substitute Dutch-processed cocoa powder with natural cocoa?
Yes, but you’ll need to adjust the recipe slightly. Dutch-processed cocoa is smoother and less acidic, which is why this recipe uses it. If using natural cocoa, reduce the amount to 0.65 cups and add 1 teaspoon of baking soda to the dry ingredients to neutralize the acidity. This keeps the cake from becoming too dense or bitter. The flavor will still be rich, just with a slightly different profile.

- 6 Egg Cake Recipe with Oil: Light as Air With Buttery Moisture - October 4, 2026
- 4 Bean Casserole Recipe: One-Pan Heartiness With Smoky Paprika Depth - October 4, 2026
- 3-Ingredient Keto Mug Cake Recipe: Microwave Magic in 2 Minutes - October 4, 2026