
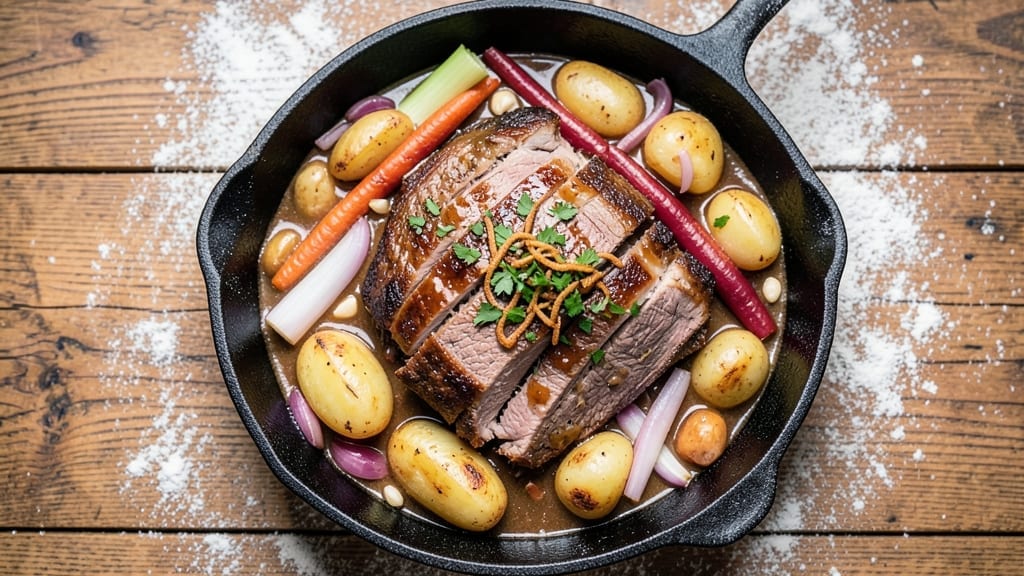
This 1950s beef stew recipe brings back the hearty, comforting flavors of mid-century home cooking—where slow-simmered beef and root vegetables create a dish so tender it nearly melts in your mouth.
The secret lies in tough cuts of beef that transform into fork-tender perfection, all thanks to a long, gentle simmer with pantry staples like onions, carrots, and potatoes.
I’ve recreated this recipe using ingredients available in the 1950s, but with a few modern shortcuts to make it accessible for today’s kitchens.
What makes this stew special is its balance of deep, savory flavors and comforting textures. The beef, traditionally chuck or round, becomes so tender it falls apart with the slightest touch, while the root vegetables caramelize into sweet, velvety bites.
The slow cooking process allows the flavors to meld together, creating a rich, aromatic broth that’s the soul of the dish. This isn’t just a stew—it’s a taste of nostalgia, a reminder of home-cooked meals that fed families for generations.
By the time you’re done, you’ll have a pot of restaurant-quality beef stew that’s hearty enough for a family dinner but simple enough for a weeknight meal.
The aroma alone will have everyone gathering around the table, and the first bite will transport you back to a time when meals were made with care and patience. The best part? Leftovers taste even better the next day, making this the ultimate comfort food for any season.
Serve this stew with crusty bread to soak up every last drop of that flavorful broth, or pair it with buttered noodles for a classic mid-century touch. The recipe scales easily, so you can make a big batch to feed a crowd or freeze portions for later.
Let’s bring the warmth of 1950s home cooking back to your kitchen today.
Ingredients for 1950 beef stew
Pantry staples and a few key ingredients transform tough beef into melt-in-your-mouth perfection.
| Ingredient | Amount | Notes |
|---|---|---|
| Chuck Roast 🥩 | 3 lb | Tough cut for tender results |
| Yellow Onions 🧅 | 2 whole | Chopped into bite-sized pieces |
| Carrots 🥕 | 1 ½ lb | Whole, peeled, cut into chunks |
| Russet Potatoes 🥔 | 2 lb | Peeled, cut into 1-inch cubes |
| Celery Stalks 🧄 | 4 whole | Chopped, including leaves |
| Garlic Cloves 🧄 | 6 cloves | Minced for depth of flavor |
| Tomato Paste 🍅 | ½ cup | For rich, concentrated flavor |
| Beef Broth 💧 | 4 cups | Homemade or quality store-bought |
| Red Wine 🍷 | 1 cup | Bold dry red like Cabernet |
| All-Purpose Flour 🌾 | 1 tbsp | For thickening the stew |
| Salt 🧂 | 1 ½ tsp | Kosher or sea salt preferred |
| Ground Black Pepper 🌶️ | 1 tsp | Freshly ground for best flavor |
| Bay Leaves 🍃 | 2 whole | For aromatic depth |
| Thyme Sprigs 🌿 | 2 whole | Fresh, not dried |
| Parsley 🌿 | ¼ cup | Chopped, for garnish |
The beef is everything here—chuck roast is the gold standard for this recipe, with its perfect balance of fat and connective tissue. You’ll find it in the meat section of any grocery store, often labeled as ‘beef stew meat’ or ‘chuck roast.’ For the best results, look for a piece with good marbling—those little white flecks of fat are what make the meat tender. Costco usually carries a large roast that’s perfect for this, but the regular supermarket version works fine too. If you’re buying a whole roast, ask the butcher to cut it into 1.5-inch chunks for you. Fresh thyme and bay leaves? Trader Joe’s has great bundles of both, but any grocery store should carry them.
No red wine? Beef broth with a splash of balsamic vinegar works just as well—it’ll give you that same deep, savory punch. Fresh thyme is ideal, but if you only have dried, use one-third the amount (so 2 teaspoons instead of 2 sprigs). The tomato paste can be from a tube or a can—just make sure it’s San Marzano if possible, as it’s sweeter and richer. For the carrots and potatoes, baby versions are fine, but regular-sized ones caramelize better. The celery leaves add extra flavor, so don’t toss them! If you’re short on time, frozen chopped veggies work in a pinch, but fresh gives the best texture.
This stew tastes even better the next day—plan ahead and make a double batch. It keeps for 4-5 days in the fridge, and you can freeze portions for up to 3 months. I like to portion it into individual containers so I can grab a ready-made lunch. For serving, crusty bread is a must—it soaks up all that rich broth. If you’re making this ahead, the flavors actually improve as they meld together over time. Just reheat gently on the stove with a splash of broth to keep it moist.
Why You’ll Love This Recipe
- Minimal Chopping Required: That chuck roast? It’s basically one big hunk of forgiving meat—no fancy slicing needed. I just dice the onions, carrots, and celery into rough chunks (no julienne skills required), toss them in the pot, and let the slow simmer do the work. Honestly, the stew tastes better when the veggies aren’t perfect.
- Deep, Rich Satisfaction: The secret’s in the long cook—chuck roast turns tender enough to melt, while the potatoes soak up all that savory broth. Between us, that first bite of caramelized onion and beef? It’s the kind of flavor that makes you pause mid-spoonful and think, “Why don’t I do this more often?”
- Leftovers That Don’t Suck: This stew actually improves overnight. I make a double batch on Sundays, and by Wednesday, it’s even better—more melded, more flavorful. Freeze half for when you’re too tired to cook, and thaw it straight into a fresh pot. (Yes, even on a Tuesday night.)
- Budget-Friendly Crowd-Pleaser: A single chuck roast feeds six for under $20, and the veggies stretch it further. My college roommates called it “the poor man’s fancy dinner,” but they’d fight over seconds anyway. It’s the kind of recipe that makes you feel like you’re serving something special without breaking the bank.
Step-by-step instructions for 1950s beef stew
Here’s how to create a classic, deeply flavorful beef stew that transforms tough chuck roast into melt-in-your-mouth tenderness.
Sear the Chuck Roast for Deep Flavor
Pat the 3 lb chuck roast dry with paper towels—this helps the meat brown properly. Heat a large Dutch oven over medium-high heat and add 1 tablespoon of vegetable oil. Once hot, place the chuck roast in the pot and sear for 4-5 minutes on each side until it develops a rich, golden-brown crust. This step is crucial because it locks in juices and creates the foundation for that classic beef stew flavor.
Remove the roast from the pot and set it aside. You’ll notice the meat will release easily when properly seared. Now it’s time to build the flavor base that will infuse into the meat during the long simmer.
Build the Flavor Base with Vegetables and Aromatics
In the same Dutch oven, add 2 chopped whole yellow onions, 1.5 lb carrots cut into chunks, 2 lb russet potatoes cut into 1-inch cubes, and 4 chopped celery stalks (including leaves). Cook for 5-6 minutes, stirring occasionally, until the vegetables begin to soften and the onions turn translucent. This process releases their natural sugars which will caramelize and deepen the stew’s flavor.
Add 6 minced garlic cloves and stir for 30 seconds until fragrant. Then sprinkle in 1 tablespoon of all-purpose flour, stirring constantly for 1 minute to cook off the raw flour taste. This creates a light roux that will help thicken the stew later. The vegetables should now be tender but not mushy.
Develop the Rich Stew Sauce
Pour in 1 cup of red wine and scrape up any browned bits from the bottom of the pot—these contain concentrated flavor. Let the wine simmer for 3-4 minutes until reduced by half. Then add 0.5 cup tomato paste, 4 cups beef broth, 1.5 teaspoons salt, and 1 teaspoon ground black pepper. Stir well and bring to a gentle boil.
Return the chuck roast to the pot, along with 2 whole bay leaves and 2 whole thyme sprigs. The liquid should come about halfway up the sides of the roast. Here’s the thing—this is where patience pays off. The stew needs to simmer gently for 2-2.5 hours to break down the tough meat fibers and infuse all the flavors.
Simmer to Perfect Tender Meat
Cover the Dutch oven and reduce heat to low. Let the stew simmer gently for 2 hours, checking occasionally to ensure the liquid doesn’t reduce too much. You’ll know it’s ready when the chuck roast is fork-tender and easily pulls apart with minimal resistance. The potatoes should be tender but still hold their shape.
If the stew becomes too thick before the meat is tender, add hot water or broth 1 cup at a time until the liquid reaches the desired consistency. The goal is tender meat in a flavorful sauce that coats the back of a spoon. This is where that initial sear and proper seasoning pay off with rich, savory results.
Finish and Serve with Fresh Herbs
Once the meat is tender, remove the chuck roast and let it rest for 10 minutes before slicing against the grain. Return the sliced meat to the stew and discard the bay leaves and thyme sprigs. Taste and adjust seasoning if needed—this is your chance to perfect the balance of flavors.
Ladle the beef stew into bowls and garnish with 0.25 cup chopped parsley. The final dish should have tender beef that practically melts in your mouth, surrounded by flavorful vegetables in a rich, velvety sauce. Serve with crusty bread to soak up every last drop of that delicious 1950s-style beef stew.
Pro Tips For Making 1950 Beef Stew
- Brown the Chuck First: I learned this the hard way—skipping the deep brown means flavorless stew. Sear the chuck roast in batches over medium-high heat until it’s dark and crusty on all sides. The Maillard reaction here is non-negotiable; it’s what turns your stew from “meat and veggies” to “1950s comfort food.”
- Dice Onions Like Dice: Big onion chunks turn to mush. Cut the yellow onions into ¼-inch pieces—small enough to disappear but not so fine they dissolve. My grandmother swore by this, and she was right: uniform size means even cooking and no weird textures lurking in your bite.
- Par-Cook the Potatoes: Russets fall apart if dumped raw into the pot. Boil them for 5 minutes first, then add them to the stew. They’ll hold shape, absorb flavors, and finish cooking without turning to glue. (Yes, even if you’re impatient like me.)
- Deglaze with Beer or Wine: After browning the meat, don’t just add broth—deglaze with ½ cup of beer or dry white wine. Scrape up those browned bits; they’re packed with flavor. Skip this, and you’re missing the richest part of the stew. (Your future self will notice.)
Best sauces and condiments for this recipe
Classic Red Wine Reduction
The rich, deep flavor of red wine is the backbone of this 1950s beef stew. After searing the beef, deglaze the Dutch oven with 1 cup dry red wine (Cabernet Sauvignon or Merlot work best) to lift all those delicious browned bits from the bottom.
Let it reduce by half—this concentrates the flavors and creates a velvety base. If you don’t have wine, a mix of beef broth and 1 tablespoon balsamic vinegar works perfectly. 🍷
Tomato Paste Boost
Don’t skip the ½ cup tomato paste—it adds a deep, umami richness that was a staple in 1950s home cooking. Stir it in after the wine reduces and before adding the broth.
For extra depth, I like to toast the tomato paste with the onions and garlic for 1-2 minutes to caramelize the sugars. This step transforms the stew from good to exceptional.
Herb-Infused Broth
Fresh thyme and bay leaves are non-negotiable for authentic flavor. Add 2 sprigs of fresh thyme and 2 bay leaves when returning the beef to the pot—they’ll infuse the broth with aromatic warmth.
If you only have dried herbs, use ½ teaspoon dried thyme and 1 bay leaf, but fresh is always better. Remove the herbs before serving to avoid a bitter bite. 🌿
Flour Thickener Trick
A light roux made with 1 tablespoon all-purpose flour helps thicken the stew naturally without making it gluey. Cook the flour with the onions and garlic for 1 minute to remove the raw taste before adding liquids.
This creates a silky texture that coats the meat and vegetables beautifully. For a gluten-free option, swap the flour for 1 tablespoon cornstarch mixed with a splash of cold water.
Umami-Packed Broth
Use 4 cups high-quality beef broth—homemade is ideal, but store-bought brands like Kitchen Basics or Swanson work well. For extra depth, add 1 teaspoon Worcestershire sauce (a 1950s pantry staple) when combining the broth with the wine reduction.
The umami punch elevates the entire dish, making it taste even more restaurant-worthy. 💫
Finishing Touches
Brighten the stew with ¼ cup chopped parsley just before serving—it adds freshness and a pop of color. For a smoky note, sprinkle in ½ teaspoon smoked paprika at the end.
If you want to take it to the next level, stir in 1 tablespoon Dijon mustard while the stew simmers—it adds a tangy complexity that balances the richness. Trust me, this makes all the difference!
Nutrition facts
Frequently asked questions
Can I use a different cut of beef instead of chuck roast?
Yes, but chuck roast is ideal for its perfect fat-to-meat ratio. Round roast works well too, though it’s leaner and may need an extra 30 minutes of simmering. Avoid tender cuts like sirloin—they’ll turn mushy. For a budget option, try stew beef (often pre-cut from chuck), which cooks similarly.
How do I make this stew without red wine?
No problem! Replace the wine with 1 cup beef broth plus 1 tablespoon balsamic vinegar for depth. For extra richness, add 1 teaspoon soy sauce (a 1950s pantry staple) when combining liquids. The flavor will be slightly different but still delicious—just more savory than fruity.
Why does my stew taste bland after simmering?
Bland stew usually means insufficient seasoning or improper technique. First, ensure you’re using salted broth—low-sodium versions need extra salt. Second, always scrape up browned bits when deglazing (they’re packed with flavor). Finally, taste as you go and adjust with black pepper, Worcestershire sauce, or a pinch of sugar to balance flavors.
Can I prep this stew ahead of time?
This stew tastes even better the next day. Assemble everything except the parsley, then refrigerate for up to 2 days or freeze for 3 months. Reheat gently on the stove with a splash of broth to maintain moisture. The flavors actually deepen as they meld together over time!
What’s the best way to reheat leftovers?
Never microwave—it makes the meat tough! Instead, reheat on the stove over medium-low heat for 10-15 minutes, stirring occasionally and adding a splash of broth if needed. For extra tenderness, cover the pot and let it steam gently. The slow method preserves that melt-in-your-mouth texture.

- 3lb Prime Rib Roast Recipe: Juicy Pink Center Guaranteed in 3 Hours - October 31, 2026
- 5 Spice Cake Recipe: Warmly Spiced Layers With Crunchy Top - October 31, 2026
- 1950’s Macaroni and Cheese Recipe: Nostalgic Creamy Cheese Sauce with Buttery Noodles - October 31, 2026