
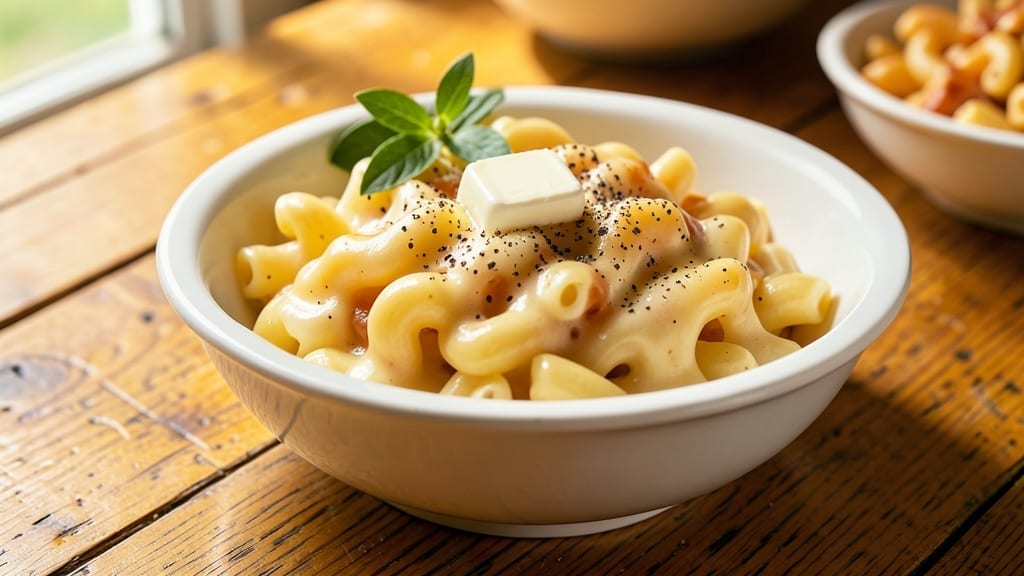
This 1950s mac and cheese recipe brings back the golden era of comfort food—creamy, cheesy, and baked to perfection with that iconic crispy breadcrumb topping. 💛 The secret lies in using sharp cheddar, a touch of mustard powder for depth, and slow-cooked elbow macaroni that soaks up every bit of that velvety cheese sauce.
I’ve recreated this nostalgic classic exactly as it was made in home kitchens decades ago, when mac and cheese wasn’t just a side but the star of the meal.
The technique is simple but essential: cook the pasta al dente, then mix it with a rich cheese sauce made from butter, flour, and milk—no shortcuts here. The sauce gets thickened just right, then folded into the noodles before being topped with buttery breadcrumbs for that signature crunch.
This isn’t your modern quick-fix version; it’s the real deal, with layers of flavor that transport you back to a time when dinner was slow-cooked and savored.
What you’ll end up with is a creamy, triple-cheese masterpiece—golden on top, tender inside, and so rich it’ll have everyone asking for seconds. The aroma alone will fill your kitchen with warmth, just like it did in 1950s homes.
This dish is perfect for family dinners, potlucks, or even a cozy weeknight treat when you crave that classic comfort.
Serve it with a simple green salad or steamed veggies to balance the richness, or enjoy it as-is—because sometimes, mac and cheese deserves to be the main event. Let’s bring back the magic of the 1950s, one cheesy bite at a time.
Ingredients for 1950s mac and cheese
Six ingredients make this nostalgic 1950s mac and cheese—creamy, cheesy, and golden-topped perfection.
| Ingredient | Amount | Notes |
|---|---|---|
| Elbow Macaroni 🍝 | 1 ½ lb | Cooked al dente, drained well |
| Sharp Cheddar Cheese 🧀 | 2 cups | Shredded, block preferred |
| American Cheese 🧀 | 1 cup | Shredded, mild variety |
| Unsalted Butter 🧈 | ¾ cup | Cold, cubed for sauce |
| All-Purpose Flour 🌾 | ½ cup | For roux, sifted |
| Whole Milk 🥛 | 2 cups | Whole milk for richness |
| Mustard Powder 🌶️ | 1 tsp | For classic depth |
| Salt 🧂 | 1 ½ tsp | Kosher or sea salt |
| Black Pepper 🌶️ | ½ tsp | Freshly ground |
| Plain Breadcrumbs 🍞 | ½ cup | Dry, for topping |
| Melted Butter 🧈 | ¼ cup | For breadcrumb mix |
The cheeses are non-negotiable here. Sharp cheddar gives that tangy kick, while American cheese delivers that classic stretchy texture. I grab Kraft Singles for the American—it’s what our grandmas used, and it melts like a dream. For the cheddar, Kraft 2% Milk Cheddar from the yellow box is my go-to; it’s consistent and affordable. If you’re feeling fancy, swap in Parmigiano-Reggiano for the American, but stick with the cheddar for that authentic 50s flavor. The butter matters too—Land O’Lakes unsalted is my standby, but any good-quality brand works.
No mustard powder? Dijon mustard at half the amount works in a pinch, though it’ll be tangier. Running low on breadcrumbs? Panko crushed in a food processor gives you that same crispy texture. The milk can be 2% or whole—whole gives extra richness, but 2% is fine if that’s what you’ve got. For the pasta, elbow macaroni is classic, but cavatappi or shells work too if that’s what you’ve got. Just make sure it’s cooked al dente—mac and cheese should have a bite, not be mushy. And if you’re worried about the American cheese being too processed, add a splash of milk to the shredded cheddar to help it melt more smoothly.
This reheats beautifully—just cover with foil and bake at 350°F for 15 minutes. Keeps in the fridge for 4-5 days, though it’s best enjoyed fresh. For make-ahead magic, assemble the casserole, cover tightly, and refrigerate overnight. The flavors meld even more, and it’s ready to bake straight from the fridge. Leftovers? Freeze for up to 3 months—just thaw overnight in the fridge before reheating.
Why You’ll Love This Recipe
- No-Fuss Pantry Staples: I swear by this recipe because it only asks for what’s already in my cupboard. Elbow macaroni, sharp cheddar, and American cheese? That’s it for the heavy hitters. Honestly, I’ve made it three times this month without even checking the fridge first.
- Melty Magic Combo: The secret’s in the cheese blend—sharp cheddar for that tangy bite, American for that stretchy, gooey goodness. I’ll be real: the first time I tried it, I nearly burned my tongue spooning it straight from the pot. Worth every second.
- Weeknight Wonder: This is my go-to when I’ve got a house full of hungry people and zero energy. Toss in some steamed broccoli or canned green beans, and suddenly you’ve got dinner. (Yes, even on a Tuesday night when takeout feels like a chore.)
- Budget-Friendly Leftovers: A single batch stretches for three meals—my kids fight over it, and I still save money. The best part? It reheats like a dream, no soggy pasta in sight. That crispy, buttery edge? Still there, even after three days. My secret weapon for lazy mornings.
Step-by-step instructions for 1950s mac and cheese
This classic recipe delivers that nostalgic, ultra-creamy mac and cheese with a perfect breadcrumb topping.
🍳 Step 1: Cook the Elbow Macaroni to Al Dente Perfection
Bring a large pot of water to a rolling boil and add the 1.5 lb elbow macaroni. Cook until 1 minute before the package directions specify for al dente (about 10-11 minutes). You want the pasta to have a slight bite—it’ll finish cooking in the oven.
Drain the pasta in a colander and rinse briefly with cold water to stop the cooking process. Shake the colander gently to remove excess water, then transfer the drained macaroni to a large mixing bowl. This step is crucial—too much water left in the pasta will make your sauce watery. Toss the pasta with 1 tablespoon of the melted butter to prevent sticking while you make the sauce.
👨🍳 Step 2: Make the Classic Roux and Triple-Cheese Sauce
In a heavy-bottomed saucepan, melt 0.5 cup unsalted butter over medium heat. Once the butter has completely melted and starts to foam, reduce the heat to medium-low and whisk in 0.5 cup all-purpose flour. This creates a roux—the foundation of your creamy sauce.
Cook the roux for 2-3 minutes, whisking constantly, until it turns a light golden brown color. Here’s the thing—don’t walk away. If it darkens too much, it’ll taste bitter. Next, gradually whisk in 2 cups whole milk over 2 minutes, ensuring no lumps form. Stir in 1 tsp mustard powder, 1.5 tsp salt, and 0.5 tsp black pepper. Remove from heat and add 2 cups sharp cheddar cheese and 1 cup American cheese, stirring until completely melted and smooth.
🥘 Step 3: Combine Pasta and Sauce for Ultimate Creaminess
Pour the hot cheese sauce over the drained macaroni in the mixing bowl. Using a wooden spoon or rubber spatula, gently fold everything together until the pasta is completely coated in the velvety sauce. The mixture should look thick and glossy—like a rich, cheesy hug for your noodles.
Transfer the pasta mixture to a 9×13-inch baking dish, spreading it out evenly. Here’s a pro tip: press down gently on the macaroni with the back of a spoon to help it settle and create a smooth surface for the topping. This prevents the breadcrumbs from sinking into the cheese later.
🔥 Step 4: Top with Crispy Breadcrumbs for Perfect Texture
Preheat your oven to 375°F. In a small bowl, mix together 0.5 cup plain breadcrumbs and 0.25 cup melted butter until evenly combined. The mixture should look moist but not soupy—just enough to help the breadcrumbs stick to the macaroni.
Sprinkle the buttered breadcrumb mixture evenly over the top of the macaroni, pressing down gently with your fingers to ensure good contact. Place the baking dish on the center rack of your oven and bake for 20-25 minutes, until the top is golden brown and the edges are bubbling.
⏰ Step 5: Rest and Serve for Maximum Creamy Bliss
Remove the mac and cheese from the oven and let it rest for 5-10 minutes before serving. This resting time is crucial—it allows the sauce to set slightly and prevents a runny mess when you cut into it. The breadcrumb topping should be crispy on top with a soft, chewy texture underneath.
Cut into squares and serve immediately. Each bite should deliver that perfect combination of buttery noodles, rich triple-cheese sauce, and crispy breadcrumb topping. For extra 1950s flair, serve with a simple side salad or steamed vegetables—just like grandma used to make!
Pro Tips For Making 1950s Mac And Cheese
- Cook Pasta Al Dente: DESCRIPTION: I learned this the hard way—overcooked elbow macaroni turns mushy in the cheese sauce. Pull it out just before it’s fully tender (test one piece), then finish cooking in the sauce. The extra starch makes the sauce cling better, and the slight bite keeps the texture perfect.
- Grate Cheese Fresh: DESCRIPTION: Pre-shredded cheddar has anti-caking agents that make the sauce grainy. Use a box grater for sharp cheddar and a cheese plane for American cheese—it’s faster than you’d think, and the texture stays smooth. (Yes, even if you’re impatient like me.)
- Melt Cheese Slow: DESCRIPTION: After mixing the roux, lower the heat to medium-low. I used to rush this, and the cheese would separate or turn greasy. Let it simmer gently, stirring constantly, until it’s fully melted but not bubbling hard—about 5 minutes. Patience here means no clumps.
- Add Butter Last: DESCRIPTION: Toss in the unsalted butter at the very end, off the heat. It coats the pasta and cheese, giving that classic 1950s richness without making the sauce too heavy. Skip this, and you’ll miss the velvety finish that makes this dish sing.
Pro cooking tips for this dish
Perfect Roux Mastery
Your roux is the backbone of this 1950s mac and cheese, so pay close attention to the color and timing. Cook the butter and flour over medium-low heat for exactly 2-3 minutes until it reaches a light golden brown—this is your blonde roux.
If it darkens to a deeper brown, you’ve gone too far, and the sauce will taste bitter. Keep whisking constantly to prevent burning. I use a heavy-bottomed saucepan because it distributes heat evenly, which is crucial for that perfect roux. 🌡️
Cheese Melting Secrets
The key to that ultra-creamy texture is melting the cheeses off the heat. Once your sauce is smooth, remove it from the stove before adding the 2 cups sharp cheddar and 1 cup American cheese. Stir vigorously until fully melted—this prevents the cheese from clumping.
If your sauce looks too thick, add 1-2 tablespoons of milk to loosen it up. I’ve found that Kraft Singles melts more smoothly than pre-shredded cheddar, which often contains anti-caking agents that can make the sauce grainy.
Al Dente Pasta Rule
Cook your elbow macaroni just one minute less than the package suggests. The pasta will finish cooking in the oven, and this ensures it has that perfect al dente bite.
After draining, rinse it briefly with cold water to stop the cooking process, then shake the colander vigorously to remove excess water. Any leftover moisture will dilute your sauce and make the final dish watery.
Toss the pasta with 1 tablespoon of melted butter right away to keep it from sticking while you work on the sauce. 🍝
Breadcrumb Topping Tricks
For that iconic crispy topping, mix your 0.5 cup breadcrumbs with 0.25 cup melted butter until the crumbs are evenly moistened but not soggy. Spread them over the mac and cheese in an even layer, then press down gently with your fingers to ensure they stick.
This prevents them from floating off during baking. I like to use plain breadcrumbs rather than panko—they’re finer and create a more uniform, crispy crust. Bake until the top is golden brown and the edges are bubbling, about 20-25 minutes at 375°F.
Resting for Success
Never skip the 5-10 minute rest after baking. This allows the sauce to set slightly, preventing a runny mess when you cut into it. The breadcrumb topping will also firm up, giving you that perfect contrast of crispy on top and creamy underneath.
I like to serve it straight from the baking dish for that classic 1950s feel, but if you’re plating it, use a spatula to lift it out gently to avoid breaking the topping. 💫
Make-Ahead Magic
This mac and cheese reheats beautifully, but the best way to make it ahead is to assemble the casserole, cover it tightly, and refrigerate it overnight. The flavors meld even more, and it’s ready to bake straight from the fridge—just add 5-10 extra minutes to the baking time.
For freezing, assemble the dish, cover it with foil, and freeze for up to 3 months. Thaw it overnight in the fridge before baking, and you’ll have a fresh, cheesy masterpiece with minimal effort.
Nutrition facts
Frequently asked questions
Why does this recipe use both sharp cheddar and American cheese?
The sharp cheddar gives that classic tangy flavor, while American cheese provides that signature stretchy, creamy texture. This combo was standard in 1950s recipes—American cheese melts like a dream and adds that nostalgic, slightly sweet note that makes the dish extra comforting. It’s what gave mac and cheese its iconic gooey perfection back then!
Can I make this mac and cheese without baking it?
Skip the breadcrumb topping and serve it as a stovetop version. After combining the pasta and sauce, heat through gently in a skillet for 2-3 minutes until bubbly. The texture will be creamier without the crispy top, but still delicious. Just be sure to drain the pasta very well first to avoid a watery sauce.
What’s the best way to store leftovers?
Cover tightly with foil and refrigerate for up to 4-5 days. For reheating, bake at 350°F for 15 minutes or microwave in 30-second intervals until heated through. For freezing, assemble the dish, wrap tightly in foil, and freeze for up to 3 months. Thaw overnight in the fridge before reheating for best results.
Can I substitute the elbow macaroni with another pasta shape?
Yes! While elbow macaroni is classic, you can use cavatappi or shells for better sauce trapping. Just make sure to cook them al dente and drain very well. Avoid long pasta like spaghetti—it won’t hold the sauce as nicely. The key is pasta that can nestle into the cheesy sauce without falling apart.
Why does my mac and cheese turn out watery?
Most likely, your pasta wasn’t drained well enough or you added too much milk to the sauce. Always shake the colander vigorously after draining and rinse with cold water to stop cooking. For the sauce, measure your milk precisely—too much will dilute the cheese. If needed, simmer the sauce uncovered for 2-3 minutes to thicken it before adding the pasta.

- 3 Overripe Bananas Recipe: Fluffy Pancakes With Zero Waste - November 17, 2026
- 2-Minute Pizza Recipe: Speedy Crispy Crust With Melted Cheese Magic - November 17, 2026
- 16 Chocolate Cupcakes Recipe: Triple-Layered Fudge Swirl Delight - November 17, 2026