
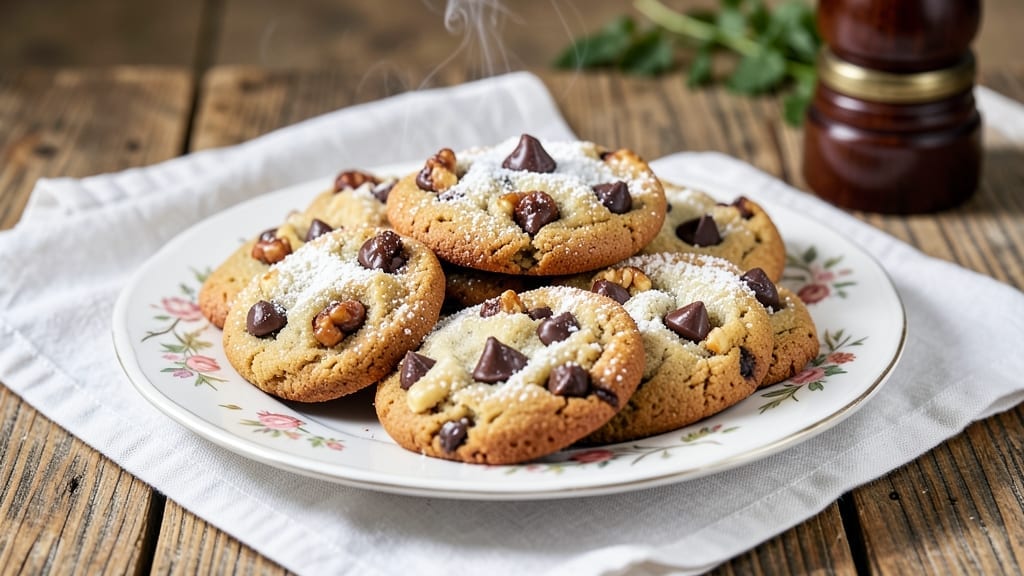
This 1960 Toll House cookie recipe brings back the golden era of home baking with its signature crisp edges and molten chocolate centers.
The original Nestlé Toll House recipe from 1939—created to showcase their semi-sweet chocolate morsels—has stood the test of time, offering a perfect balance of buttery richness and caramelized sugar.
What makes these cookies special is their foolproof technique: creaming butter and sugar properly, mixing in chocolate chips at the last moment for gooey pockets, and baking until golden but still soft in the middle.
The secret to achieving that classic 1960s texture lies in the chilling step—letting the dough rest in the fridge for at least 30 minutes allows the flour to hydrate fully, preventing excessive spreading while ensuring a tender crumb.
This recipe uses just five simple ingredients (plus chocolate chips) to deliver restaurant-quality results, with no fancy techniques required. The aroma alone—warm vanilla, brown sugar, and melting chocolate—will transport you back to childhood afternoons spent baking with family.
By the time these cookies emerge from the oven, you’ll have perfectly crisp-edged, chewy-centered treats with pools of melted chocolate in every bite. The buttery flavor lingers just right, while the caramelized sugar adds a subtle depth that makes them impossible to resist.
Whether you’re baking for a holiday gathering or simply craving a taste of nostalgia, this recipe delivers the same magic that’s made Toll House cookies a classic for over 80 years.
For best results, use Nestlé semi-sweet chocolate morsels (or high-quality chocolate chips) and don’t overbake—they should look golden but still soft in the center. Store in an airtight container for up to a week, though they rarely last that long.
Pair with a glass of cold milk for the full experience. Let’s bake these timeless cookies!
Ingredients for 1960 toll house cookie
Five classic ingredients plus chocolate morsels—this 1960 Toll House recipe delivers timeless nostalgia in every bite.
| Ingredient | Amount | Notes |
|---|---|---|
| Unsalted Butter 🧈 | 1 cup | Cold, cubed for creaming |
| Packed Brown Sugar 🍯 | 1 cup | Light or dark preferred |
| Large Eggs 🥚 | 2 whole | Room temperature for blending |
| Pure Vanilla Extract 🌿 | 2 tsp | Imitation-free for authentic flavor |
| All-Purpose Flour 🌾 | 2 cups | Sifted for light texture |
| Nestlé Semi-Sweet Chocolate Morsels 🍫 | 2 cups | Original 1960s recipe version |
| Diamond Crystal Kosher Salt 🧂 | ½ tsp | Fine grain for delicate seasoning |
The butter is non-negotiable here—unsalted, high-fat, and cold. Look for European-style butter with at least 82% fat content for that signature richness. Plugrá or Kerrygold are my go-tos, but any quality brand works. The brown sugar should be packed firmly—don’t scoop it loosely. Domino or C&H are reliable grocery store options. For chocolate, stick with Nestlé semi-sweet morsels if you can find them; they melt differently than modern chips, creating those classic gooey pockets. The vanilla extract should be pure—McCormick or Nielsen-Massey are solid choices, but avoid imitation varieties.
No brown sugar? White sugar plus 1 tbsp molasses mimics the flavor, though texture will differ slightly. Short on chocolate morsels? High-quality chocolate chips work in a pinch, but they melt more uniformly. The flour matters too—King Arthur or Gold Medal brands yield the best texture. For a gluten-free version, swap in a 1:1 baking blend, though texture will be slightly denser. The eggs should be large for proper structure; if you’re unsure, use the weight—2 oz each—rather than count. And for the love of baking, measure flour properly—spoon it into the cup and level off, don’t scoop directly from the bag.
This dough is best made a day ahead—chill for 24 hours for maximum flavor development. Store wrapped in the fridge for up to 5 days, though I’ve never had any left that long. For baking, preheat your oven to 375°F and use a light-colored baking sheet—dark pans burn the edges too quickly. Cookies keep their texture for 5 days in an airtight container at room temperature, though they’re best enjoyed fresh. Freeze portions for up to 3 months—wrap individually in parchment for easy reheating. The secret to perfect cookies? Underbake slightly—they’ll firm up as they cool, but stay soft in the center.
Why You’ll Love This Recipe
- No-Fuss Mixing: I swear by the “cream everything together” method—no need to measure flour last or worry about overmixing. Just toss the butter, brown sugar, and eggs in a bowl, let the mixer do its thing, and fold in the dry stuff. Five minutes tops, and zero stress.
- Chocolate-Chip Magic: That perfect balance of chewy centers and crisp edges? The secret’s in the brown sugar caramelizing just enough to cling to the chocolate chips. (Yes, I double-check the bag first—no fun when you’re short on chips.)
- Holiday or Hangry Fix: These cookies freeze like a dream, so I bake a batch in December and pull them out whenever I need a quick treat. They’re also the only thing my picky teenager will eat straight from the jar—no judgment here.
- Pantry Staple Power: Butter, sugar, eggs, flour—these are the ingredients I already have. No specialty items, no last-minute grocery runs. And if I make a big batch? Half the jar disappears in 48 hours, but the rest lasts weeks in the freezer. Win-win.
Step-by-step instructions for 1960 Toll House cookies
Master the classic technique that delivers perfectly balanced texture—crisp edges and molten centers—every time.
Cream Butter and Brown Sugar to Peak Volume
In a stand mixer fitted with the paddle attachment, beat the 1 cup unsalted butter (cold and cubed) with the 1 cup packed brown sugar on medium speed for 3-4 minutes. You’re aiming for a light, fluffy texture that nearly doubles in volume and becomes pale in color. This thorough creaming incorporates air, which creates those iconic crackly tops and prevents dense cookies.
I press down on the mixture with a rubber spatula occasionally to ensure the butter is fully emulsified. Stop when the mixture looks like whipped cream—it should leave a trail when the paddle lifts. This is your signal that the fat and sugar have properly combined for optimal texture. Don’t rush this step; under-creaming leads to flat, cakey cookies instead of the classic Toll House profile.
Incorporate Eggs and Vanilla for Structure
Add the 2 whole large eggs one at a time, mixing on low speed for 30 seconds after each addition until fully incorporated. Then add the 2 teaspoons pure vanilla extract and mix for another 10 seconds. The mixture will look slightly curdled initially, but this will resolve once you add the dry ingredients.
I always use room-temperature eggs for this recipe—they blend more smoothly and create a lighter texture. The vanilla extract should be pure, not imitation, as the authentic flavor is crucial to the classic Toll House profile. This step builds the foundation for the cookie’s structure while keeping it tender rather than tough.
Combine Dry Ingredients for Light Texture
In a separate bowl, whisk together the 2 cups all-purpose flour and 0.5 teaspoon diamond crystal kosher salt. Sift the flour if it’s lumpy to ensure a light, airy texture. Gradually add the dry mixture to the wet ingredients, mixing on low speed for 30-45 seconds until just combined.
Here’s where precision matters: you should still see a few flour streaks when you lift the paddle. Over-mixing develops gluten and makes cookies tough. Remove the bowl from the mixer and fold in the 2 cups Nestlé semi-sweet chocolate morsels by hand using a silicone spatula. Make sure the chocolate is evenly distributed throughout the dough.
Chill the Dough for Perfect Shape
Cover the bowl with plastic wrap and refrigerate for at least 30 minutes (I prefer 1 hour or even overnight). This chilling step is non-negotiable—it solidifies the butter, which prevents excessive spreading in the oven. Cold dough also allows the flour to fully hydrate, creating better texture and ensuring those classic rounded cookies with crisp edges.
Real talk: Skipping this step leads to flat, greasy cookies. The dough will firm up nicely in the refrigerator, making it easier to portion and shape. I like to press the dough into a disk before chilling for cleaner slices later.
Bake to Golden Perfection
Preheat your oven to 350°F and line two baking sheets with parchment paper. Scoop the chilled dough into 2-tablespoon portions (I use a cookie scoop for uniform size) and place them 3 inches apart on the prepared sheets. The dough will be cold and firm—this is normal.
Bake for 11-13 minutes until the edges are golden brown but the centers still look slightly underdone. They’ll continue cooking on the hot pan after removal. Let them cool on the baking sheet for 5 minutes before transferring to a wire rack. The centers should be soft and gooey, with crisp edges that give way to that classic Toll House texture.
Pro Tips For Making 1960 Toll House Cookie
- CREAM THE BUTTER SLOWLY: Dump the brown sugar and butter into the bowl first, then mix on low speed until fully combined. I used to crank it up fast, and ended up with a greasy mess—this way, the butter actually emulsifies properly with the sugar.
- USE ROOM-TEMPERATURE EGGS: Cold eggs from the fridge can make your dough tough and uneven. Let them sit out for 30 minutes before cracking them in—your cookies will spread more predictably and hold together better.
- WEIGH THE FLOUR: Scooping flour from the bag packs in too much air, leading to dry, dense cookies. Use a kitchen scale for 120 grams of all-purpose flour—it’s the only way to guarantee consistent texture every time.
- BAKE ONE PAN AT A TIME: Overcrowding the tray means uneven baking—edges cook faster while centers stay doughy. Space them 2 inches apart and bake in batches if needed; your cookies will crisp up properly instead of turning out flat and gummy.
Creative variations of 1960 toll house cookie
Nutty Chocolate Twist
Swap out half the chocolate morsels for chopped walnuts or pecans (about 1 cup total) to add crunch and depth. Toast the nuts in a dry pan over medium heat for 3-4 minutes until fragrant, then cool before folding into the dough.
I like using Davis Street Nuts for their rich flavor. This variation keeps the classic Toll House texture while adding a satisfying nutty contrast that pairs beautifully with the chocolate. 🌰
White Chocolate Vanilla
For a lighter take, replace the semi-sweet chocolate with 2 cups white chocolate chips and add 1 teaspoon almond extract to the vanilla. The result is a sweeter, creamier cookie with a delicate vanilla aroma. I recommend Guittard white chocolate chips for their smooth melt.
These cookies are perfect for spring or summer gatherings when you want something lighter but still nostalgic. The white chocolate melts more evenly, creating pockets of creamy goodness rather than gooey pockets. ✨
Spiced Chai Version
Infuse the dough with warm spices by adding 1 teaspoon ground cinnamon, ½ teaspoon ground cardamom, and ¼ teaspoon ground cloves to the dry ingredients. Use dark brown sugar for deeper caramel notes, and fold in ½ cup chopped dried cranberries for a festive twist.
This spiced variation tastes like a hug in cookie form and pairs perfectly with chai tea. The spices complement the chocolate beautifully, creating a cozy, aromatic experience. 🌶️
Gluten-Free Adaptation
For a gluten-free version, replace the all-purpose flour with 2 cups gluten-free 1:1 baking flour (I recommend King Arthur Measure for Measure). Add ½ teaspoon xanthan gum to improve texture. The dough will be slightly stickier, so use a silicone spatula when folding in the chocolate.
These cookies maintain the classic Toll House flavor but with a tender, slightly denser crumb. They’re perfect for guests with gluten sensitivities and still deliver that nostalgic taste. 💛
Double Chocolate Decadence
For a richer, more intense chocolate flavor, add ½ cup cocoa powder to the dry ingredients and use 2½ cups chocolate morsels or chips. This creates a fudgier cookie with deeper chocolate notes. I like using a mix of semi-sweet and dark chocolate for complexity.
The extra cocoa enhances the chocolate flavor without overpowering the buttery base. These cookies are a crowd-pleaser for chocolate lovers and feel extra indulgent. 🍫
Nutrition facts
Frequently asked questions
Why do these 1960 Toll House cookies need to chill?
The 30-minute chill is crucial for two reasons: it prevents excessive spreading (thanks to firm butter) and lets the flour hydrate properly. Without chilling, cookies flatten out and lose that classic rounded shape. Pro tip: Press the dough into a disk before refrigerating for cleaner slices later!
Can I substitute white sugar for brown sugar?
Yes, but expect a slightly different texture. Replace the 1 cup brown sugar with 1 cup white sugar plus 1 tablespoon molasses to mimic the moisture and caramel notes. The cookies will be crispier rather than chewy. For best results, stick with brown sugar for that authentic 1960s flavor.
What if my cookies spread too much?
Over-spreading usually means the butter was too soft or the dough wasn’t chilled long enough. Next time, use cold butter and chill the dough for at least 1 hour. Also, scoop portions slightly smaller (1.5 tablespoons) and bake on a light-colored baking sheet to prevent burning. Dark pans overheat the edges!
How do I store these cookies for maximum freshness?
Keep them in an airtight container at room temperature for up to 5 days. For longer storage, freeze portions wrapped in parchment for 3 months. Reheat in a 350°F oven for 3-5 minutes to restore that gooey center. The aroma alone will make your kitchen smell like nostalgia!
Why are Nestlé chocolate morsels recommended?
These morsels melt differently than modern chips, creating those classic gooey pockets with crisp edges. They contain less sugar and more fat, which enhances the cookie’s texture. If unavailable, use high-quality chocolate chips—but expect slightly less meltiness. The original 1960 recipe was designed around these specific morsels!

- 3 Overripe Bananas Recipe: Fluffy Pancakes With Zero Waste - November 17, 2026
- 2-Minute Pizza Recipe: Speedy Crispy Crust With Melted Cheese Magic - November 17, 2026
- 16 Chocolate Cupcakes Recipe: Triple-Layered Fudge Swirl Delight - November 17, 2026