
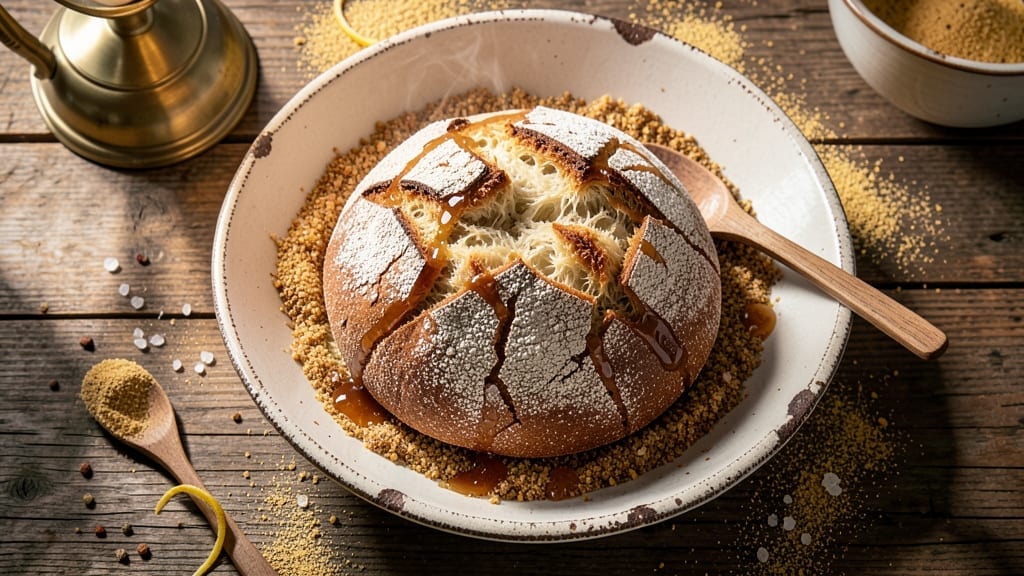
This 19th-century bread recipe brings the golden crust and rustic charm of Victorian-era bakeries to your kitchen. The secret lies in a traditional sourdough starter, cultivated through natural fermentation—a method that created bread with unmatched depth and texture.
I’ve adapted this historic technique with modern safety adjustments, ensuring you achieve that same artisanal quality without compromising freshness.
The process begins with a sourdough starter, nurtured over days to develop the tangy complexity that defines heirloom bread. Unlike modern quick-rise methods, this slow fermentation builds flavor and structure, resulting in a loaf with a crisp, crackling crust and a tender, airy crumb.
The recipe uses simple ingredients—flour, water, and salt—just as bakers did in the 1800s, but with precise timing to ensure reliability.
What you’ll end up with is a loaf that smells like nostalgia—warm, slightly sweet, with a crust so crisp it shatters at the touch. The interior remains soft and slightly chewy, perfect for slathering with butter or dipping in olive oil.
This bread isn’t just a recipe; it’s a connection to a time when baking was both an art and a necessity.
Whether you’re baking for a family gathering or simply craving the comfort of a hearth-baked loaf, this method delivers results that feel timeless. The starter can be preserved for future batches, making it a rewarding project for both beginners and seasoned bakers alike.
Let’s get started on this journey back to the past.
Ingredients for 19th century bread
Victorian bakers relied on these precise ingredients to craft heirloom bread with legendary crust and crumb.
| Ingredient | Amount | Notes |
|---|---|---|
| Unbleached All-Purpose Flour 🌾 | 5 cups | Organic preferred for optimal texture |
| Sourdough Starter 🍞 | 1 cup | Active, bubbly starter (100% hydration) |
| Warm Water 💧 | 3 ½ cups | 100°F-105°F for ideal fermentation |
| Kosher Salt 🧂 | 2 tsp | Diamond Crystal preferred for consistency |
| Honey or Maple Syrup 🍯 | 1 tbsp | For initial starter feeding (optional) |
| Cornmeal or Rye Flour 🌾 | ¼ cup | For dusting baking surface |
| Extra-Virgin Olive Oil 🫒 | 2 tbsp | For dough bowl and crust |
| Whole Milk (optional) 🥛 | 1 tbsp | For enriched dough (optional) |
| Instant Yeast (optional) 🍞 | ¼ tsp | For backup fermentation boost |
| Coarse Sea Salt 🧂 | 1 tsp | For final crust sprinkle |
| Ice Water ❄️ | ½ cup | For dough shaping (optional) |
| Wooden Bread Peel 🪵 | 1 whole | For traditional baking transfer |
The sourdough starter is non-negotiable for authentic flavor—cultivate yours for 5-7 days using unbleached flour and warm water at 75°F. King Arthur or Bob’s Red Mill flours yield superior texture due to their protein structure. For the starter, feed it 1:1:1 ratio (starter:flour:water) daily until bubbly and doubled in 4-6 hours. The honey in the initial feed isn’t traditional but helps kickstart fermentation for modern kitchens. Store your active starter in a glass jar in the fridge between uses—it’ll last 1-2 weeks if fed weekly.
No active starter? Instant yeast at 0.25 tsp can jumpstart fermentation, though it lacks the depth. Substitute whole wheat flour for 10% of the all-purpose for a nuttier profile, but expect a denser crumb. The olive oil should be fruity and peppery—California Gold or Colavita brands excel. For the optional milk enrichment, whole milk adds richness, but oat milk works in a pinch. Prefer a darker crust? Swap rye flour for the cornmeal dusting—it caramelizes beautifully during baking. Every ingredient here serves a purpose: the Diamond Crystal salt dissolves cleanly, while coarse sea salt on top creates that signature Victorian crackle.
Pre-ferment the dough overnight in a cool (68°F) environment for optimal flavor development. The wooden peel isn’t mandatory but adds authenticity—any heatproof surface works. Store leftover dough in the fridge for up to 24 hours wrapped tightly in plastic. The baked loaf keeps well at room temperature for 2-3 days wrapped in a towel-lined basket, or freeze sliced for 3 months. For reheating, wrap slices in foil and warm at 350°F for 5 minutes—they’ll taste freshly baked every time. The starter itself can be preserved indefinitely with weekly feedings, making this a truly heirloom-worthy process.
Why You’ll Love This Recipe
- No-Fuss Dough: I swear by this recipe because it’s just three things—flour, starter, water—and a pinch of salt. No kneading, no waiting for fancy hydration tricks—just mix, rest, and bake. Honestly, my sourdough days are over until I make this again.
- Golden Crust Magic: That touch of honey or maple syrup? It’s the secret to a crust so crisp and caramelized it’ll make you forget store-bought ever existed. The inside stays soft, almost custardy, like a hug from your great-grandmother’s kitchen.
- Weeknight Wonder: Toss a loaf in the oven while you prep dinner—it’s done before the pasta boils. Slice it thick for breakfast toast, tear it for sandwiches, or freeze half for lazy mornings. Between us, I’ve fed a crowd with this and still had leftovers for days.
- Pocketbook Hero: Flour and salt are cheap, and a little starter goes a long way. I’ve made this on a budget, and it’s never felt like I skimped. Plus, it keeps beautifully—no sad, dried-out bread here. Just pure, reliable goodness.
Step-by-step instructions for artisan sourdough bread
Master this 19th-century technique for a bread with crackling crust and open crumb—authentic yet approachable.
Feed and Prepare the Sourdough Starter
First, verify your sourdough starter is active with visible bubbles and a slightly tangy aroma. In a clean bowl, combine the 1 cup Sourdough Starter with 1 cup of the 3.5 cups Warm Water and 1 tbsp Honey or Maple Syrup. Stir gently to dissolve the syrup completely, then add 1 cup of the 5 cups Unbleached All-Purpose Flour, mixing just until combined. Cover loosely with a damp towel and let ferment at room temperature for 4-6 hours until it doubles in volume and exhibits active bubbling.
This feeding step is critical—it ensures your starter has enough vitality to properly leaven the bread. If using the 0.25 tsp Instant Yeast (optional), add it now along with the flour to provide a fermentation boost, especially if your starter feels sluggish. The starter should be lively and domed before proceeding; if not, allow additional time for fermentation.
Mix the Dough with Proper Hydration
In a large mixing bowl, combine the remaining 2.5 cups Warm Water (from the original 3.5 cups) with the 2 tsp Kosher Salt and 2 tbsp Extra-Virgin Olive Oil. Add the 5 cups Unbleached All-Purpose Flour and mix with a wooden spoon until a shaggy dough forms. This initial mix should be sticky but manageable—if it’s too dry, add 1 tbsp Whole Milk (optional) to improve extensibility.
Next, incorporate the fed sourdough starter and mix vigorously for 5-7 minutes by hand, or use a stand mixer with a dough hook on low speed for 3-4 minutes. The dough should become smooth, elastic, and slightly tacky. If it feels too stiff, add 1 tbsp Ice Water gradually until it reaches the ideal consistency—when you press your finger into the dough, it should spring back slowly rather than immediately.
Develop Gluten Through Bulk Fermentation
Transfer the dough to a lightly oiled bowl, cover with a damp towel, and let it rest at room temperature for 1 hour. After this initial rest, perform a series of stretch-and-folds every 30 minutes for 2 hours total. To do this, wet your hands, grab one side of the dough, stretch it upward, and fold it over itself. Rotate the bowl and repeat this process on all four sides. This technique strengthens the gluten structure, creating that signature open crumb.
During bulk fermentation, the dough should increase by 50-75% in volume. It should look puffy with visible bubbles and feel slightly domed when viewed from the side. If the dough rises too quickly (within 1-2 hours), place it in the refrigerator to slow fermentation—this prevents overproofing. The ideal dough temperature during fermentation should be between 75-78°F for optimal yeast activity.
Shape and Final Proof the Dough
Turn the dough onto a surface lightly dusted with 0.25 cup Cornmeal or Rye Flour and gently shape it into a round loaf. To do this, use the “stretch-and-fold” technique again, but this time shape the dough into a tight ball by pulling the edges toward the center. Place the shaped dough seam-side down in a banneton or bowl lined with a floured towel, cover, and let it proof at room temperature for 1-2 hours or in the refrigerator overnight for a slower, more flavorful development.
For a traditional approach, use the Wooden Bread Peel to transfer the dough to your baking surface. If proofing in the refrigerator, remove the dough 1 hour before baking to allow it to come to room temperature. The dough should spring back slowly when gently pressed—this indicates it’s ready for baking. If it springs back too quickly, allow additional proofing time.
Bake for a Crisp Crust and Open Crumb
Preheat your oven to 450°F with a Dutch oven inside for 45 minutes. This step is essential for creating that coveted crisp crust. Carefully transfer the dough (using the Wooden Bread Peel) into the hot Dutch oven, sprinkle the top with 1 tsp Coarse Sea Salt, and bake covered for 20 minutes. Remove the lid and bake uncovered for an additional 15-20 minutes until the bread is deep golden brown and sounds hollow when tapped on the bottom.
The internal temperature should reach 190-200°F at the center. If the crust browns too quickly, tent the bread with foil to prevent over-browning. Once baked, transfer the bread to a wire rack and let it cool completely before slicing. This resting period allows the crumb to set and ensures clean slices. The result should be a bread with a crackling crust, an open crumb, and a subtle tang from the sourdough starter—just as bakers of the 19th century would have made.
Pro Tips For Making 19th Century Bread
- Use Lukewarm Water: I learned this the hard way—cold water kills your starter, and hot water cooks it alive. Aim for 75–80°F (like bathwater) to keep the yeast happy without shocking it. If you’re unsure, dip your finger in: it should feel warm but not hot.
- Salt the Dough Early: Add the kosher salt with the starter, not at the end. It dissolves better and distributes evenly, so every bite gets that subtle balance. I used to sprinkle it later, and the flavor felt uneven—like someone forgot to season half the loaf.
- Skip the Over-Kneading: This isn’t a baguette—it’s a rustic, old-school loaf. Knead just until the dough comes together (about 5–7 minutes by hand). Overwork it, and you’ll end up with a tough, chewy mess. The sourdough needs time to relax, not punishment.
- Proof in a Drafty Spot: Your oven’s pilot light or a slightly open window does the trick better than a warm kitchen. The uneven heat mimics a 19th-century hearth and gives that signature open crumb. I tried a proofing box once—too perfect, too tight. Nature’s drafts win.
Essential equipment for 19th century bread
Dutch Oven Essentials
A cast iron Dutch oven is the cornerstone of 19th-century bread baking—it mimics the heat retention of a hearth oven perfectly. I recommend a 5-6 quart Lodge Dutch oven with a tight-fitting lid for even heat distribution.
The heavy material traps steam during the initial bake, creating that signature crisp crust while keeping the interior moist. Preheat it in the oven for 45 minutes before adding your dough to ensure proper temperature transfer. 🔥
Wooden Peel for Traditional Transfer
The wooden bread peel isn’t just for show—it’s a functional tool that Victorian bakers relied on to slide hot loaves into the oven without tearing the dough. Look for a hickory or oak peel with a smooth, slightly curved edge (like the Kitchen Crafts Bread Peel).
Practice transferring dough onto it before baking to build confidence—it takes a light touch to avoid sticking. Store it near your baking station for easy access during the process.
Banneton or Proofing Basket
A banneton (round proofing basket) gives your dough its signature shape while allowing air circulation during final proofing. I use a canvas-covered banneton lined with a floured towel—this prevents sticking and creates clean seams when you transfer the dough.
For a budget-friendly option, a round bowl lined with a floured kitchen towel works just as well. Dust it generously with rye flour before shaping your dough to prevent adhesion.
Digital Thermometer for Precision
Accurate temperature control is key to replicating 19th-century baking techniques. A laser or infrared thermometer (like the Thermoworks One) lets you check your oven’s actual temperature—many home ovens run 25-50°F hotter than the set temperature.
For dough proofing, use it to monitor your kitchen’s ambient temperature—ideal proofing occurs between 75-78°F. This small investment prevents common pitfalls like overproofing or underbaked crusts. ⚡
Flour Sifter for Light Dough
A fine-mesh flour sifter (like the OXO Good Grips) ensures even distribution of flour when dusting your work surface and banneton. This prevents dense spots in your dough and creates a lighter, more open crumb.Sift the flour directly over the dough during mixing to incorporate air—this mimics the aeration Victorian bakers achieved through manual kneading. Keep one handy near your mixing bowl for quick access during the process.
Damp Towel Kit for Fermentation
Maintaining proper humidity during fermentation is crucial for developing gluten structure. I keep a set of three damp kitchen towels in a resealable plastic bag—this creates a self-contained humid environment for my dough. Change the towels every 2-3 hours to prevent mold growth.
For bulk fermentation, drape the towel loosely over the bowl to allow airflow while retaining moisture. This simple setup replicates the humid conditions of a traditional bread oven. 💫
Nutrition facts
Frequently asked questions
Why does 19th-century bread require a sourdough starter?
Sourdough starters were essential in the 1800s because they provided natural leavening without commercial yeast. The fermentation process created a lighter, more flavorful loaf while preserving the dough longer—critical before refrigeration. This method also improved digestibility by breaking down gluten, making bread more accessible for daily meals. The tangy flavor became a hallmark of heirloom breads.
Can I make this bread without a Dutch oven?
Yes, but your crust won’t be as crisp. Use a baking stone or steel preheated for 1 hour at 450°F, then bake with a metal bowl inverted over the loaf to trap steam. For best results, place the bowl on the stone and bake as directed. Without steam, expect a softer crust but still delicious interior. A pizza stone works in a pinch too!
How long should I let my starter ferment before baking?
Your starter should be bubbly and doubled in size within 4-6 hours after feeding. For optimal flavor, let it ferment 8-12 hours at room temperature before using—this builds more complexity. If your kitchen is warm (above 78°F), ferment it longer or move it to the fridge overnight. The longer it ferments, the more tangy your bread will taste.
What if my dough doesn’t rise properly?
Common causes include cold temperatures, weak starter, or overproofing. First, check your starter’s activity—it should smell slightly fruity and have bubbles. If sluggish, feed it 1:1:1 (starter:flour:water) and wait 4-6 hours more. Keep your dough in a warm spot (75-78°F) and avoid drafts. For backup, add 0.25 tsp instant yeast during mixing to boost rise.
How do I store leftover bread to keep it fresh?
Wrap cooled slices in parchment paper, then place them in a bread box or sealed container at room temperature for 2-3 days. For longer storage, freeze slices wrapped individually—they’ll stay fresh for 3 months. To revive, warm frozen slices in a 350°F oven for 5 minutes** wrapped in foil. Victorian bakers often froze dough too!

- 3lb Prime Rib Roast Recipe: Juicy Pink Center Guaranteed in 3 Hours - October 31, 2026
- 5 Spice Cake Recipe: Warmly Spiced Layers With Crunchy Top - October 31, 2026
- 1950’s Macaroni and Cheese Recipe: Nostalgic Creamy Cheese Sauce with Buttery Noodles - October 31, 2026