
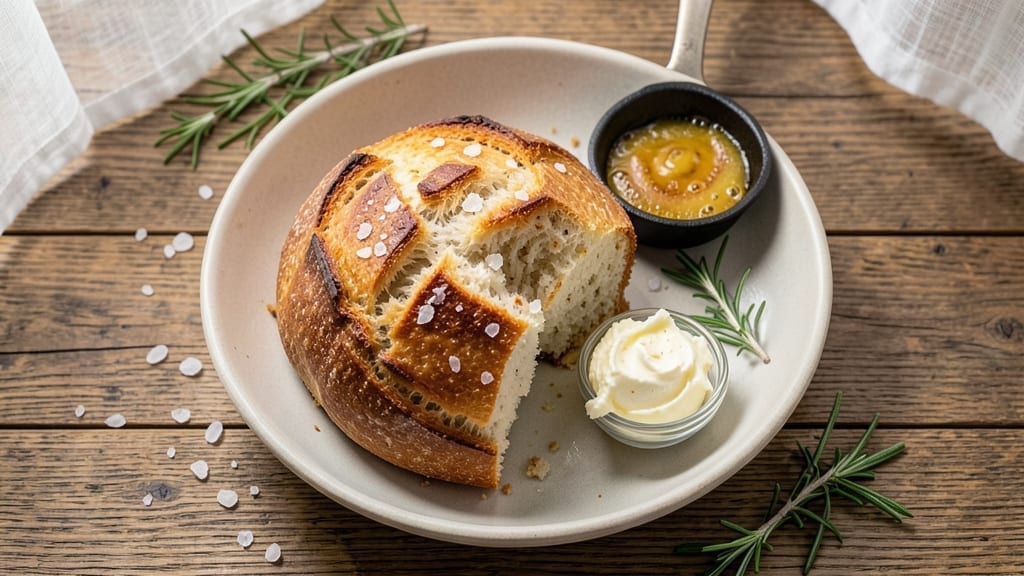
Mastering a 500g flour bread recipe with an artisan crust and no-knead ease is simpler than you think—this method delivers professional results with minimal effort. The secret lies in a slow fermentation that develops deep flavor and a crispy, golden-brown exterior without requiring hours of kneading.
I’ve perfected this approach after years of baking, and it consistently produces a loaf with an open crumb structure and rich, toasty notes.
This recipe transforms basic pantry ingredients into a loaf that rivals artisanal bakery bread, using just 500g all-purpose flour as the foundation. The dough rests overnight, allowing gluten to relax naturally, which eliminates the need for vigorous kneading while creating a tender yet sturdy crumb.
High heat baking creates that coveted crackly crust, while steam in the oven ensures an even rise and perfect oven spring.
By the time you pull this loaf from the oven, you’ll have a crusty exterior with a crisp snap and a soft, airy interior—ideal for toast, sandwiches, or simply enjoying with butter.
The aroma alone will have everyone asking for seconds. This method is perfect for beginners and seasoned bakers alike, producing consistent results every time.
Whether you’re serving it fresh from the oven or storing it for later, this bread keeps beautifully for days. Pair it with soups, charcuterie boards, or enjoy it plain—its versatility makes it a staple for any kitchen. Let’s get started on creating your perfect loaf.
Ingredients for 500g flour bread
Simple pantry staples transform into a restaurant-worthy loaf with this no-knead magic.
| Ingredient | Amount | Notes |
|---|---|---|
| All-Purpose Flour 🌾 | 500 g | High-protein for better gluten development |
| Active Dry Yeast 🍞 | 0.7 g | Or 2.25 tsp (1 packet) |
| Granulated Sugar 🍚 | ½ tbsp | Feeds yeast for better rise |
| Unsalted Butter 🧈 | 2 tbsp | Cold, cubed for flavor |
| Large Eggs 🥚 | 1 whole | Room temperature for even mixing |
| Warm Water 💧 | 300 ml | 105-110°F (40-43°C) |
| Diamond Crystal Kosher Salt 🧂 | 1 ½ tsp | Adjust to taste |
| Cornmeal 🌽 | ½ cup | For dusting parchment |
| Ice Cubes ❄️ | ½ cup | For oven steam |
The flour is everything here—King Arthur or Caputo Tipo 00 if you’re splurging, but Gold Medal all-purpose works perfectly for home bakers. Yeast is non-negotiable: Saf-Instant or Red Star are my go-tos—they’re foolproof and last longer. Store your flour in the freezer to prevent rancidity (yes, really). The butter needs to be cold when you mix it—pull it from the fridge right before measuring. Warm water is crucial for activating the yeast properly—test it with your finger. If it feels like bathwater, it’s perfect. Too hot and you’ll kill the yeast; too cold and it won’t wake up.
No yeast? Sourdough starter at 2 tbsp works beautifully—just reduce the flour by 2 tbsp. Out of butter? Olive oil at the same amount keeps the bread tender, though it’ll lack that rich flavor. Diamond Crystal salt is less salty than table salt, so if you only have table salt, use half the amount. The cornmeal is optional but creates that perfect crumb texture—skip it if you’re in a pinch. For the ice cubes, regular ice works too, but they’ll melt faster. Pro tip: Freeze your water in ice cube trays for easy portioning later.
This dough is a dream to store—wrapped in a clean kitchen towel, it’ll keep in the fridge for up to 3 days before baking. For longer storage, shape the loaf and freeze it on a tray before wrapping. Thaw overnight in the fridge before baking. The finished loaf? Room temperature in a bread box for 2 days, or freeze slices for quick toast. Toasting revives stale bread—always do this before serving. The crust gets better with time, so save the leftovers for sandwiches—they’ll be even more flavorful.
Why You’ll Love This Recipe
- No-Fuss Dough: I swear, this bread comes together in one bowl—no stand mixer, no fancy tools, just a spoon and 15 minutes of my time. The yeast blooms fast with warm water and sugar, and the butter and egg bind it so smoothly I barely have to knead.
- Golden Crust Secret: That crispy, caramelized crust? It’s all in the egg wash and a 5-minute bake at 200°C (400°F) before dropping to 180°C (350°F). The butter keeps it tender inside while the sugar gives it just enough sweetness to make it irresistible.
- Weeknight Hero: I make this on Mondays when I’m exhausted, and it’s still warm by dinner. Slice it for toast, freeze half for later, or use it to mop up soup—it’s the one bread that does it all without fuss.
- Budget Baking Win: Five ingredients, no specialty flours, and it stretches to feed four for under $2. Leftovers? Toast them for breakfast or pack them in lunches. Honestly, it’s the kind of bread that makes grocery day feel like a victory.
Step-by-step instructions for artisan crust with no-knead ease
Here’s how to transform 500g flour into a rustic, golden loaf with minimal effort.
Activate the Yeast with Warm Water and Sugar
In a small bowl, combine the 300 ml warm water (between 105-110°F) with the 0.5 tbsp granulated sugar. Sprinkle the 0.7 g active dry yeast on top and let it sit for 5-10 minutes until it becomes frothy and bubbly. This activation step ensures your yeast is alive and ready to work.
I always test the water temperature first with my finger—it should feel warm but not hot to the touch. If the yeast doesn’t bubble within 10 minutes, it’s likely dead, and you’ll need to start fresh. The sugar feeds the yeast, helping it multiply rapidly for a better rise.
Mix the Dough with Butter and Egg
In a large mixing bowl, combine the 500 g all-purpose flour and 1.5 tsp diamond crystal kosher salt. Make a well in the center and pour in the activated yeast mixture. Add the 1 whole large egg and 2 tbsp cold cubed unsalted butter to the well.
Using a wooden spoon or dough whisk, gently mix the ingredients until they begin to come together. The dough will be shaggy at first, but don’t worry—this is normal. The high-protein flour helps develop gluten without excessive kneading. Once combined, let the dough rest for 10 minutes to allow the flour to fully hydrate.
Shape and Rest the Dough
After the 10-minute rest, wet your hands slightly and gently shape the dough into a round loaf. Place it seam-side up in a lightly greased bowl, cover with a damp kitchen towel, and let it rise at room temperature for 1-2 hours or until nearly doubled in size.
I like to give the dough a gentle shake every 30 minutes to help it rise evenly. The dough should feel slightly springy when pressed gently—this indicates proper gluten development. If it rises too quickly, it might collapse later, so keep an eye on it during this stage.
Preheat and Prepare for Baking
Preheat your oven to 425°F with a Dutch oven inside for 30 minutes. This step is crucial for creating that signature artisan crust. While the oven heats, dust a piece of parchment paper with 0.5 cup cornmeal and place the risen dough on top.
Here’s the thing—adding ice cubes to the hot Dutch oven creates steam, which helps develop that crispy crust and open crumb. Just before baking, add the 0.5 cup ice cubes to the Dutch oven. The sudden temperature change will create the perfect baking environment.
Bake to Golden Perfection
Carefully transfer the dough (still on the cornmeal-dusted parchment) into the preheated Dutch oven. Cover with the lid and bake for 30 minutes. Remove the lid and bake for another 15-20 minutes until the bread is deep golden brown and sounds hollow when tapped on the bottom.
The internal temperature should reach 190-200°F at the center. Let the bread cool on a wire rack for at least 30 minutes before slicing—this prevents a gummy crumb. The crust should be crisp and shatterable, with a soft, airy interior that’s perfect for sandwiches or toast.
Pro Tips For Making 500g Flour Bread
- MIX BUTTER COLD: Take that unsalted butter straight from the fridge—yes, even if it’s summer—and cut it into cubes. I used to soften it “just enough” and ended up with a dense, gummy loaf. Cold butter creates pockets of steam during baking, which is what gives your bread that light, airy crumb.
- TEST YEAST TEMPERATURE: Warm your milk or water to 110°F (43°C) before activating the yeast—no thermometer? Dip your finger in; it should feel like a warm bath, not a sauna. I learned this the hard way when my yeast died on me twice in a row, leaving me with a sad, flat dough.
- KNEAD JUST ENOUGH: Stop when the dough springs back slowly after poking it—about 8-10 minutes by hand. Over-kneading develops gluten too much, and your bread turns out tough. I was obsessed with “perfect kneading” until I realized my bread was chewier than a hockey puck.
- PROOF IN A WARM DRAWER: Place your dough in a lightly oiled bowl, cover it with a damp towel, and stick it in a turned-off oven with the light on. The light generates just enough heat to proof it evenly—no thermometer needed. I tried the “just leave it on the counter” method and came home to a collapsed loaf every time.
Make-ahead tips for this 500g flour bread
Overnight Prep
This dough is designed for convenience—mix everything in the evening and let it ferment overnight in the fridge. After combining your ingredients and shaping the dough, place it in a lightly greased bowl, cover tightly with plastic wrap, and refrigerate for 8-12 hours.
The cold slows fermentation, developing deeper flavor while keeping the dough manageable. I like to set my timer for 10 hours—this gives enough time for the yeast to work without overproofing.
The next morning, take the dough out and let it sit at room temperature for 1-2 hours until it springs back slowly when pressed. This cold fermentation trick is a game-changer for flavor development and texture—your bread will taste like it’s been baking for days. 💫
Freezer-Friendly Dough
Need to pause your baking? Shape the dough into a loaf, wrap it tightly in plastic wrap, then place it in a freezer bag. This dough keeps in the freezer for up to 3 months without losing quality.
When ready to bake, thaw it in the fridge overnight, then proceed with the baking instructions as usual. The texture remains just as light and airy as fresh dough.
For even better results, shape the dough into individual rolls or boules and freeze them on a tray before transferring to a bag. This way, you can bake just what you need without thawing the entire batch. Perfect for meal prep on busy days! ❄️
Baked Loaf Storage
Your freshly baked loaf will stay fresh at room temperature for 2-3 days when stored in a bread box or wrapped in a clean kitchen towel. For longer storage, slice the bread and freeze the slices in a single layer on a tray before transferring to a freezer bag.
Toast directly from frozen for crispy, fresh-tasting slices every time.
I always keep a loaf in the freezer as a backup—just thaw overnight in the fridge before serving. The crust stays crisp, and the interior remains soft. This method works perfectly for sandwiches or toast, saving you time during the week. 💡
Reviving Stale Bread
Even if your bread sits out too long, don’t toss it! Wrap the loaf in aluminum foil and reheat it in a 350°F oven for 10-15 minutes. The steam will revive the crust and soften the interior.
For an instant fix, sprinkle slices with water and toast them until crispy—this trick works wonders for sandwich bread.
For extra flavor, brush slices with melted butter and sprinkle with flaky salt before serving. The combination of warmth and salt transforms stale bread into something delicious. This is my go-to trick for using up leftovers without waste. 🔥
Nutrition facts
Frequently asked questions
Why does this recipe use only 500g flour for a whole loaf?
This amount creates a dense yet airy crumb perfect for sandwiches and toast—ideal for small households or when you want a compact loaf. The no-knead method with 500g high-protein flour develops enough gluten for structure without overworking the dough. You’ll get a 1-pound loaf with a satisfying crust-to-interior ratio.
Can I substitute all-purpose flour with bread flour?
Yes, but reduce it to 450g and add 50g vital wheat gluten to maintain the same texture. Bread flour has more protein, which can make the dough tough if used at full 500g. For best results, stick with all-purpose flour or use King Arthur Bread Flour (which has slightly less protein than standard bread flour).
What if my dough doesn’t rise properly?
Check your yeast first—it may be expired. Also verify water temperature (105-110°F) and sugar amount (0.5 tbsp). If using a cold fridge for overnight fermentation, let the dough sit at room temp for 2 extra hours before baking. For extra rise, try adding 0.25 tsp baking soda to the flour before mixing.
How do I get a darker, crispier crust?
Brush the baked loaf with melted butter immediately after removing from the Dutch oven, then return to 400°F oven for 5-7 minutes. For extra color, sprinkle with cornmeal before baking. The ice cube trick creates steam, but adding 1 tbsp honey to the dough before shaping also enhances browning.
Can I make this bread in a regular loaf pan instead of a Dutch oven?
Yes, but the crust won’t be as crispy. Grease the pan well and bake at 375°F for 40-45 minutes with a pan of water on the lower rack for steam. For best results, shape the dough into a round boule and bake on a baking sheet with cornmeal instead—this gives you that artisan look without special equipment.

- 3lb Prime Rib Roast Recipe: Juicy Pink Center Guaranteed in 3 Hours - October 31, 2026
- 5 Spice Cake Recipe: Warmly Spiced Layers With Crunchy Top - October 31, 2026
- 1950’s Macaroni and Cheese Recipe: Nostalgic Creamy Cheese Sauce with Buttery Noodles - October 31, 2026