
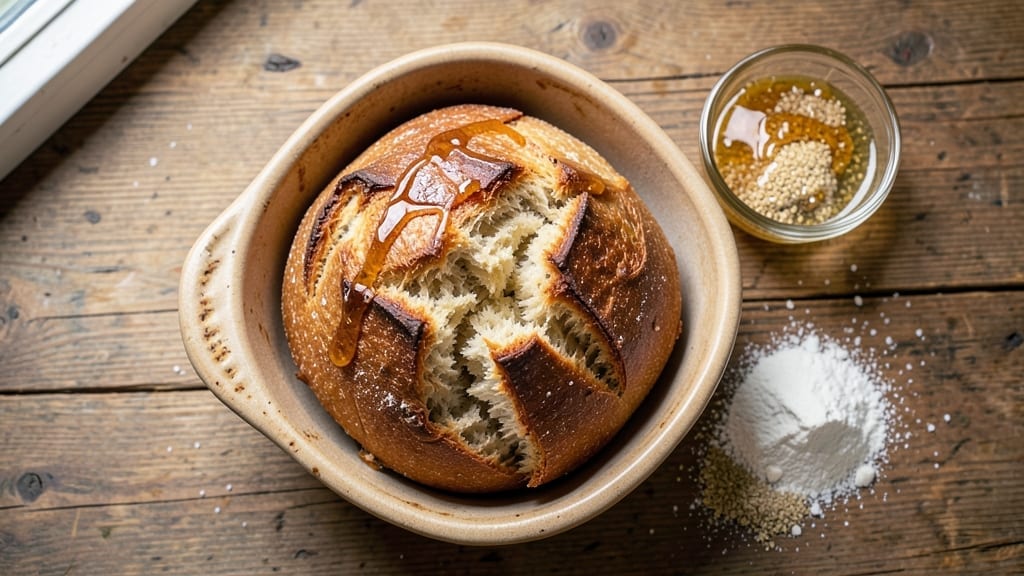
A 1lb bread loaf recipe that delivers artisanal-quality sandwich bread with a crisp golden crust and tender, airy crumb—this is the homemade loaf I’ve perfected after years of trial and error.
The secret lies in precise ingredient ratios, proper kneading, and controlled proofing, which transform simple pantry staples into bread that rivals your favorite bakery. Every slice will have that perfect balance of structure and softness, with a crust that’s just crisp enough to hold up to sandwiches without being tough.
This recipe uses a straightforward 5-ingredient base (flour, water, yeast, sugar, and salt) with optional additions like honey or milk for extra richness, but the real magic happens in the technique.
We’ll cover everything from activating yeast properly to scoring the loaf before baking—small details that make a world of difference in texture and appearance. The dough develops its own strength during the 2-hour bulk fermentation, creating that signature open crumb structure that’s impossible to achieve with quick breads.
By the time you pull that loaf from your oven, you’ll have achieved restaurant-quality sandwich bread with a crisp crust that’s perfect for toast and a crumb so tender it practically melts in your mouth.
The aroma alone will have everyone gathering in the kitchen, and each slice will hold up beautifully to your favorite fillings—no more soggy sandwiches here. This loaf keeps well for 4-5 days at room temperature or can be frozen for up to 3 months, making it ideal for meal prep.
Whether you’re making this for daily lunches or special occasions, the same principles apply—just scale the recipe as needed. The beauty of homemade bread is that you control every variable, from hydration levels to baking times, allowing you to customize the texture to your exact preference.
Let’s get started on creating bread that will become your new kitchen staple.
Ingredients for 1lb bread loaf
Five core ingredients plus optional upgrades transform your kitchen into a bakery.
| Ingredient | Amount | Notes |
|---|---|---|
| All-Purpose Flour 🌾 | 4 cups | High-protein preferred for structure |
| Active Dry Yeast 🍞 | ¼ tsp | Fresh yeast at 1 tsp if available |
| Granulated Sugar 🍚 | 1 tbsp | White or brown sugar works |
| Salt 🧂 | 1 ½ tsp | Diamond Crystal preferred |
| Water 💧 | 1 ¼ cups | Lukewarm (110°F) for yeast activation |
| Honey 🍯 | 1 tbsp | Optional for extra richness |
| Unsalted Butter 🧈 | 1 tbsp | Cold for crust development |
| Milk 🥛 | 1 tbsp | Optional for softer crumb |
| Egg Wash 🥚 | 1 whole | 1 egg beaten with 1 tsp water |
Flour is non-negotiable here—King Arthur or Gold Medal are my go-tos for that perfect crumb. The yeast needs to be fresh and active, so test it in warm water with a pinch of sugar (it should foam in 5 minutes). For the honey and milk, local raw honey adds subtle floral notes while whole milk creates a richer crumb. Store your flour in the freezer if you’re not using it weekly to preserve freshness. The butter should be cold when you mix it in—cut it into tiny cubes for even distribution in the dough.
No yeast? Instant yeast works at the same amount, but don’t substitute baking powder. Running short on honey? Maple syrup at 1:1 ratio gives similar moisture without altering flavor. The milk can be swapped for water if needed, though the crumb will be slightly less tender. For a vegan version, use plant-based milk and vegan butter, but expect a marginally denser texture. The egg wash is optional but gives that golden sheen—egg substitute works too if avoiding eggs.
Mix your dough and let it rest in the fridge overnight for even better flavor development. The shaped loaf keeps beautifully for 4-5 days wrapped in a clean kitchen towel, or freeze portions for up to 3 months. For reheating, wrap in foil and warm at 300°F for 10 minutes. The crust stays crisp for about 2 hours after baking, so slice when still warm. This loaf doubles as a perfect French toast base—trust me on that.
Why You’ll Love This Recipe
- Five-Minute Mix: I swear, this loaf comes together faster than I can boil water. Just toss the flour, yeast, sugar, and salt in a bowl, add warm water, and stir until it’s smoother than my morning coffee. No kneading, no waiting—just straightforward, no-fuss dough that actually works.
- Golden Crust Magic: That crispy, caramelized crust? It’s all in the sugar and a little patience. The outside shatters like a perfect cracker while the inside stays soft enough to soak up soup or melt with butter. Honestly, it’s the kind of bread that makes you pause mid-slice just to admire it.
- Leftover Hero: This loaf lasts forever—toast it for breakfast, fry slices for French toast, or toss it into a pot of chili for texture. I’ll be real: I’ve had loaves sit in my freezer for weeks, and they still taste like day one. It’s my pantry’s unsung MVP.
- Budget Breakthrough: Four ingredients, zero waste. That’s right—just flour, yeast, sugar, and salt. No specialty flours, no pricey add-ins, just solid, reliable bread that costs pennies per serving. My wallet and my stomach both thank me.
Step-by-step instructions for homemade sandwich bread
Here’s the method that delivers a perfectly balanced crust and tender crumb every single time.
Activate the Yeast with Lukewarm Water
In a small bowl, combine the 1.25 cups lukewarm water (about 110°F) with the 1 tbsp granulated sugar and 0.25 tsp active dry yeast. Let it sit for 5-10 minutes until frothy—this confirms your yeast is alive and ready to work. If it doesn’t bubble, your yeast may be dead, and you’ll need to start over.
The reason for the sugar is simple: yeast feeds on it, creating that initial burst of activity. This step is non-negotiable for proper rise. I always check the water temperature with a thermometer—too hot kills yeast, too cold slows it down. If you don’t have one, test with your wrist: it should feel warm but not hot to the touch.
Mix the Dough and Develop Gluten
In a large bowl, whisk together the 4 cups all-purpose flour and 1.5 tsp salt. Make a well in the center and pour in the yeast mixture. Add the 1 tbsp honey, 1 tbsp cold unsalted butter, and 1 tbsp milk (if using). Use a wooden spoon to combine everything until a shaggy dough forms.
Turn the dough out onto a lightly floured surface and knead for 8-10 minutes until smooth and elastic. Here’s the thing—you’re not just mixing ingredients, you’re developing gluten strands that give bread its structure. I press down gently on the dough during the first minute to help strengthen it. When you’re done, the dough should be slightly tacky but not sticky, and it should spring back when poked.
First Rise and Shape the Loaf
Lightly oil a large bowl, place the dough inside, and cover with a damp towel. Let it rise in a warm place for 1-1.5 hours until doubled in size. The dough should feel puffy and light when pressed gently with one finger—it should leave a slight indentation but spring back slowly.
Punch down the dough to release air, then divide it into two equal pieces. Shape each into a smooth, round ball. Here’s where attention to detail matters: place each ball seam-side down in a greased 9×5-inch loaf pan. Cover again and let rise for another 30-45 minutes until just above the pan edges. The dough should feel firm but still springy to the touch.
Bake to Golden Perfection
Preheat your oven to 375°F. Brush the tops of the loaves with the egg wash (1 egg beaten with 1 tsp water). Bake for 25-30 minutes until the crust is deep golden brown and the internal temperature reaches 190°F. Tap the bottom of the loaf—it should sound hollow.
I always bake until the crust is beautifully browned because that’s where so much flavor develops. If your oven runs hot, start checking at the 20-minute mark. The bread will continue cooking slightly after removal, so pull it out when it’s just shy of fully browned. Let it cool on a wire rack for at least 30 minutes before slicing—this prevents a gummy crumb.
Pro Tips For Making 1lb Bread Loaf
- Bloom the Yeast First: Skip mixing dry yeast straight into flour—it’ll wake up slower and unevenly. Instead, dissolve it in warm (not hot) water with a pinch of sugar, then let it sit for 5-10 minutes until frothy. I learned this the hard way when my loaf took three hours to rise because the yeast was sluggish.
- Measure Flour by Weight: Scooping flour from the bag packs in air, which means your loaf will be dense and dry. Use a kitchen scale for 1lb recipes—aim for 425g all-purpose flour (plus/minus 5g). My first loaves were brick-heavy until I switched to weighing.
- Don’t Overwork the Dough: Once you’ve kneaded the dough enough to pull it away cleanly from the bowl, stop. Overmixing develops too much gluten, making the bread tough. For a 1lb loaf, 5-7 minutes by hand (or 3-4 on low speed in a mixer) is plenty—no need to tire yourself out.
- Steam the Loaf: Place a metal bowl of boiling water in your oven before baking, then close the door. The steam creates a crisp crust and prevents the top from drying out. I was skeptical—”why add more water?”—but now I swear by it for that bakery-style finish.
Wine and beer pairings for this recipe
Crisp White Wine
For this classic sandwich bread, I always reach for a dry Riesling or Sauvignon Blanc—their bright acidity cuts through the buttery richness of the crust while complementing the honey notes in the dough.
A 2019 Alsace Pinot Gris from France is my go-to, with its crisp apple and citrus flavors that refresh your palate between bites. Serve slightly chilled to enhance the wine’s natural acidity and let it shine alongside the bread’s tender crumb. 🍷
Malty Amber Ale
If you prefer beer pairings, an amber ale with caramel and biscuit notes creates a perfect match. I love New Belgium Fat Tire—its balanced malt sweetness and subtle hop bitterness mirror the bread’s crust and crumb without overpowering it.
For a stronger option, try a Belgian Dubbel like Westmalle Trappist, which adds a rich, slightly spiced contrast to the bread’s honeyed flavor. Serve at 50°F to preserve its crispness.
Light Red Wine
A Pinot Noir with delicate red fruit flavors works surprisingly well, especially if your bread has a slightly darker crust. Look for a Oregon Willamette Valley Pinot Noir—its bright cherry and earthy undertones pair beautifully without clashing.
Avoid heavy reds like Cabernet Sauvignon, as their tannins can overpower the bread’s delicate texture. A 2020 Russian River Valley Pinot Noir is my top recommendation for this pairing.
Seasonal Cider Option
For a seasonal twist, try a dry hard cider like Strongbow Original. Its crisp apple notes and subtle spice echo the bread’s honey and butter flavors while adding a refreshing contrast.
A chilled cider (around 45°F) works best, especially during fall and winter when the bread’s richness pairs perfectly with cider’s bright acidity. This is a great non-alcoholic option for gatherings.
Coffee Pairing
Believe it or not, a medium-roast coffee with caramel and nutty undertones enhances the bread’s flavors. A lightly sweetened latte or flat white** made with Intelligentsia Black Cat beans brings out the bread’s honey and butter notes beautifully.
The coffee’s acidity balances the bread’s richness, making each bite even more satisfying. ☕
Nutrition facts
Frequently asked questions
Why does my dough feel too sticky after kneading?
The dough should be slightly tacky but not gluey. If it’s too sticky, you likely need 1-2 tablespoons more flour during kneading. Try adding flour gradually while kneading—overworking sticky dough can develop too much gluten, making the bread dense. For extra control, chill the dough for 15 minutes before shaping if it’s too warm.
Can I make this recipe without a loaf pan?
Shape the dough into a round boule or batard and bake on a parchment-lined baking sheet. For a boule, place the dough seam-side up and bake at 375°F for 25-30 minutes. For a batard, use a baking stone and bake at 400°F for 20-25 minutes. The crust will be thicker and more rustic than pan bread.
How do I fix a dough that didn’t rise properly?
If your dough didn’t rise enough, it may be due to inactive yeast or cold temperatures. First, check if your yeast is fresh by testing it in warm water with sugar—it should bubble within 5-10 minutes. If the yeast is fine, try placing your dough in a warmer spot (like near the oven with the light on) for the next rise. For a second attempt, increase the yeast to 0.5 tsp and reduce sugar to 0.5 tbsp.
Can I add seeds or nuts to this recipe?
Yes, but add them during the final 10 minutes of kneading to avoid overworking the dough. Use 1/4 cup total of seeds (sunflower, sesame) or chopped nuts (walnuts, pecans). For best results, toast the seeds/nuts first to enhance flavor. If adding wet ingredients like raisins, reduce water by 1 tbsp to maintain proper dough consistency.
How long should I let the bread cool before slicing?
Always wait at least 30 minutes before slicing—this prevents a gummy crumb. For even better texture, let it cool completely (up to 2 hours). The crust will firm up as it cools, making it easier to slice cleanly. If you’re impatient, slice carefully and toast the bread to restore crispiness.

- 3lb Prime Rib Roast Recipe: Juicy Pink Center Guaranteed in 3 Hours - October 31, 2026
- 5 Spice Cake Recipe: Warmly Spiced Layers With Crunchy Top - October 31, 2026
- 1950’s Macaroni and Cheese Recipe: Nostalgic Creamy Cheese Sauce with Buttery Noodles - October 31, 2026