
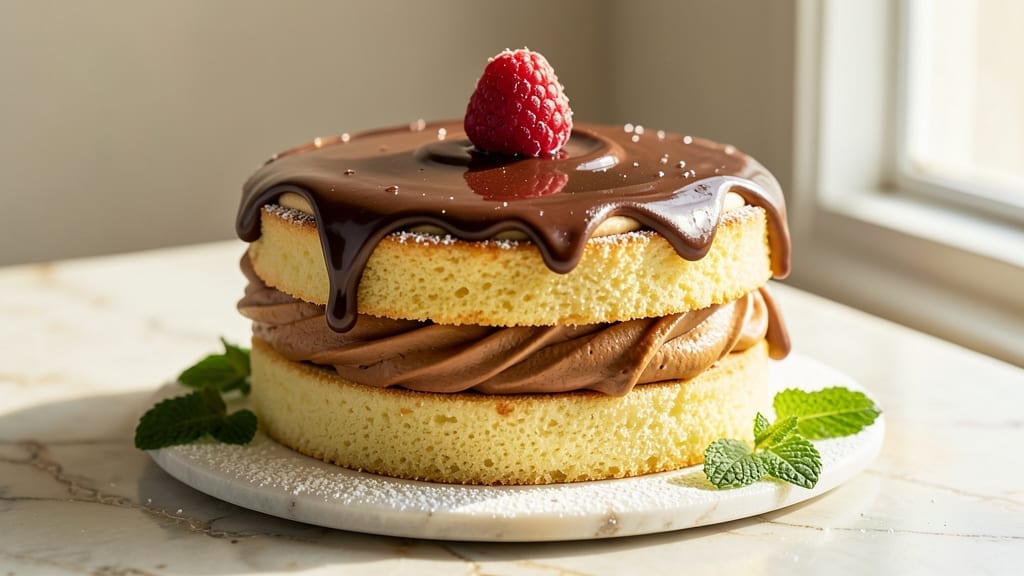
Perfecting two 6-inch cakes for elegant gatherings means no more guessing about proportions or uneven layers—this recipe delivers foolproof results every time. 💛 The secret lies in scaling a single batter precisely, ensuring each cake rises evenly and supports stacking without collapsing.
Whether you’re celebrating a birthday, anniversary, or just treating yourself, these cakes offer the ideal balance of moisture and structure for flawless frosting and presentation.
This recipe uses simple, high-quality ingredients—all-purpose flour, granulated sugar, and eggs—to create tender crumb that holds its shape while remaining light. Baking at 350°F for 25-30 minutes ensures a golden, even finish, and the included cooling technique prevents cracking.
The batter is designed to split evenly, so you can bake both cakes simultaneously without compromising texture or flavor.
Once baked, these cakes become the perfect canvas for your favorite frosting or filling—whether it’s rich chocolate ganache, velvety buttercream, or fresh fruit compote. The stackable layers create a stunning centerpiece that’s as impressive as it is delicious, with clean edges and a professional finish.
No special equipment is needed beyond a standard 6-inch round pan and a sturdy offset spatula for frosting.
Perfect for special occasions or spontaneous celebrations, these cakes are designed to impress without the stress. The recipe includes tips for leveling, stacking, and decorating, so you can focus on enjoying the moment rather than worrying about the details.
Ready to bake cakes that look and taste like they came from a bakery? Let’s get started.
Ingredients for 2 6 inch cake
Simple, high-quality ingredients for two perfect 6-inch cakes that stack like a dream.
| Ingredient | Amount | Notes |
|---|---|---|
| All-Purpose Flour 🌾 | 2 ½ cups | Sifted for light texture |
| Granulated Sugar 🍚 | 1 ¾ cups | Superfine preferred for smoothness |
| Unsalted Butter 🧈 | 1 cup | Cold, cubed for creaming |
| Large Eggs 🥚 | 3 whole | Room temperature for even baking |
| Vanilla Extract 🌸 | 1 tbsp | Pure Madagascar preferred |
| Whole Milk 🥛 | ¾ cup | Room temperature for smooth batter |
| Baking Powder 🍞 | 2 tsp | Freshly measured for lift |
| Salt 🧂 | ½ tsp | Fine sea salt preferred |
| Vegetable Oil 🫒 | ¼ cup | Light, neutral flavor |
| Cake Flour 🌾 | ½ cup | Optional for extra tenderness |
| Cornstarch 🌽 | 1 tbsp | For crisp edges |
| Powdered Sugar 🍚 | 2 tbsp | For dusting layers |
The flour is non-negotiable here—King Arthur or Gold Medal are my go-tos for consistent results. Cake flour makes these layers extra tender, but all-purpose works fine if you’re in a pinch (just skip the cornstarch). Butter matters too: use European-style if you can find it—it’s higher in fat content, which gives those cakes that melt-in-your-mouth quality. The eggs should be at room temperature (I pull them out 30 minutes before mixing), and vanilla extract? Pure Madagascar has that deep, complex flavor that makes all the difference. For the milk, whole works best for richness, but 2% is fine if that’s what you’ve got.
No vanilla extract? Vanilla bean paste works perfectly—just use half the amount. Running short on butter? Coconut oil at the same quantity keeps things moist, though the flavor will be slightly different. The cornstarch is optional but worth it for those crisp edges—if you skip it, just add an extra tablespoon of flour. For the sugar, superfine dissolves faster, but regular granulated works if you pulse it in a food processor first. Bob’s Red Mill makes a great all-purpose flour that’s perfect for this recipe if you want to splurge on one ingredient.
These cakes keep beautifully—wrap tightly in plastic wrap for 3 days at room temperature or freeze for 3 months. I like to portion the batter into two separate bowls before baking so I can handle them easily. The pans should be room temperature too—cold pans can cause uneven baking. Once cooled, store layers between parchment paper to prevent sticking. The buttercream or filling can be added right before serving, or store the cakes separately with parchment between layers for up to 2 days.
Why You’ll Love This Recipe
- No Mixer Needed: I swear by this recipe because it’s foolproof with just a bowl and a whisk—no stand mixer or fancy tools. The butter and sugar get creamed by hand (seriously, it’s easier than it sounds), and the eggs blend right in. My hands are always greasy, but the result? A cake so tender it melts in your mouth.
- Butter-Sugar Magic: That classic combo of creamed butter and sugar? It’s the secret weapon here. The texture is light but rich—no dryness, no heaviness—just pure, buttery happiness in every bite. Honestly, I’ve tried boxed mixes, but this? This is the real deal.
- Double the Fun: Two 6-inch cakes mean you can split them for birthdays, showers, or just because. Bake one for today, freeze the other for next month’s potluck. (Yes, I’ve done it.) They’re small enough to feel special but big enough to feed a crowd—or save for lazy mornings.
- Pantry Staples Only: No weird ingredients, no last-minute grocery runs. Flour, sugar, butter, eggs, and vanilla? That’s it. I’ve made this with store-brand butter and still got rave reviews. Budget-friendly, fuss-free, and always reliable—my kind of recipe.
Step-by-step instructions for stackable 6-Inch cake layers
Here’s how to bake perfectly even layers with crisp edges and tender crumb.
🍳 Step 1: Cream Butter and Sugars to Light and Fluffy
In a stand mixer fitted with the paddle attachment, beat the 1 cup unsalted butter (cold, cubed) and 1.75 cups granulated sugar on medium speed for 3-4 minutes. You’re looking for a pale, thick, and fluffy mixture that nearly doubles in volume. This creaming process incorporates air, which creates that signature tender crumb and helps the cake rise properly.
I like to scrape down the sides of the bowl every 30 seconds with a silicone spatula to ensure even mixing. The butter should be fully incorporated but still hold its shape when you press it between your fingers. If it feels too soft, chill the bowl in the refrigerator for 10 minutes before proceeding—this prevents overmixing and keeps the cake structure intact.
👨🍳 Step 2: Add Eggs and Wet Ingredients Gradually
Add the 3 whole large eggs one at a time, mixing on low speed for 30 seconds after each addition. This slow incorporation prevents the eggs from scrambling. After the eggs are fully incorporated, add the 1 tbsp vanilla extract and mix for another 10 seconds until just combined.
Next, alternate adding the 0.75 cup whole milk and the 2.5 cups all-purpose flour (sifted) mixed with 2 tsp baking powder, 0.5 tsp salt, 0.5 cup cake flour, and 1 tbsp cornstarch. Start and end with the flour mixture to ensure the batter doesn’t turn out too wet. Mix on low speed just until combined—you should still see a few streaks of flour. Overmixing develops gluten, which can make the cake tough.
🍳 Step 3: Incorporate Oil for Moisture and Mix in Powdered Sugar
With the mixer running on low speed, slowly pour in the 0.25 cup vegetable oil while scraping down the sides of the bowl. This ensures the oil distributes evenly throughout the batter, adding moisture without making the cake greasy. Once fully incorporated, add the 2 tbsp powdered sugar and mix for another 10 seconds until smooth.
The batter should be thick but pourable, like heavy pudding. If it’s too thick, add 1-2 tablespoons of the whole milk to loosen it slightly. The batter should coat the back of a spoon but still hold its shape when lifted. Let the batter rest at room temperature for 15-20 minutes—this allows the flour to fully hydrate and the air bubbles to relax, resulting in a smoother texture.
🔥 Step 4: Bake in Prepared Pans for Even Layers
Preheat your oven to 350°F and grease two 6-inch round cake pans with vegetable oil or line them with parchment paper. Divide the batter evenly between the two pans—you should have about 1 cup of batter per pan. Tap the pans gently on the counter to remove any air bubbles and ensure the batter settles evenly.
Bake for 25-30 minutes, or until a toothpick inserted into the center comes out clean. The edges should be golden brown, and the top should spring back when pressed lightly with your finger. Rotate the pans halfway through baking for even heat distribution. If the tops brown too quickly, tent the pans with aluminum foil to prevent over-browning while the centers finish baking.
⏰ Step 5: Cool and Prepare for Stacking
Remove the cakes from the oven and let them cool in the pans for 10 minutes. Then, transfer them to a wire rack to cool completely. Once cooled, run a thin knife or offset spatula around the edges to loosen them from the pans. Place a piece of parchment paper on top of each cake and flip them over to remove them easily.
For stacking, level the tops if needed using a serrated knife. Dust the first layer with 1 tbsp powdered sugar and place it on your serving plate. Repeat with the second layer, ensuring they’re perfectly aligned. This method guarantees clean, stackable layers that look as impressive as they taste.
Pro Tips For Making 2 6 Inch Cake
- MIX BUTTER AND SUGAR UNTIL PALE: I learned this the hard way—skipping the pale color means your cake will taste flat and dense. Beat the butter and sugar until it’s light and almost white (about 3-5 minutes with an electric mixer), not just fluffy. That extra time dissolves more sugar into the butter, making the crumb lighter.
- WEIGH YOUR FLOUR (NO SCOOPING): I used to scoop flour straight from the bag, and my cakes always turned out dry. For this recipe, use a kitchen scale—spoon the flour into the measuring cup, then level it off. You’ll end up with about 10% less than the scooped version, and your cakes will stay moist.
- ROOM-TEMP EGG AND BUTTER: Cold eggs and butter are the silent cake killers. Take both out of the fridge 30 minutes before mixing—room temperature ingredients blend smoother and create a more stable batter. (Yes, even if you’re impatient like me.)
- BAKE UNTIL COOLER THAN YOU THINK: I used to pull cakes out when the center looked set, but they’d keep cooking on the wire rack. For 6-inch cakes, aim for an internal temp of 190-195°F (a toothpick should come out with a few moist crumbs, not wet batter). Let them cool 10 minutes in the pan before transferring.
Wine and beer pairings for these flavors
Sweet Wine Pairings
For these delicate vanilla-infused cakes, I reach for dry Riesling—its crisp acidity and subtle honeyed notes complement the cake’s tender crumb without overpowering it. A 2019 Dr. Loosen Blue Slate Riesling from Germany is my go-to; its citrus and mineral finish cleanse the palate between bites. 🍷
If you prefer reds, a Pinot Noir with bright berry flavors works beautifully. Look for a 2018 Meiomi Pinot Noir from California—its light body and red fruit notes harmonize with the cake’s vanilla and butter richness.
Avoid heavy, tannic wines like Cabernet Sauvignon, which can clash with the cake’s delicate texture.
Creamy Dessert Wines
For a truly indulgent pairing, serve with Moscato d’Asti—its effervescence and floral aroma elevate the cake’s vanilla and powdered sugar finish. A 2022 Saracco Moscato d’Asti offers just the right sweetness to balance the cake’s buttery layers. 🍇
If you’re serving a chocolate buttercream version, a late-harvest Gewürztraminer adds a tropical fruit contrast that’s simply divine. The 2017 Chateau Ste. Michelle Gewürztraminer from Washington State is a crowd-pleaser with its lychee and rose notes.
Beer Pairings
A Belgian witbier like Hoegaarden brings a refreshing citrusy brightness that cuts through the cake’s richness. The 3.8% ABV ensures it won’t overpower the delicate flavors. 🍺
For a richer option, try a honey-brown ale such as Allagash Honey Brown. Its caramel and spice notes mirror the cake’s vanilla and butter, creating a cozy, satisfying pairing. Avoid heavy stouts or IPAs—they’ll compete with the cake’s subtle sweetness.
Non-Alcoholic Options
For a sparkling non-alcoholic choice, San Pellegrino Aranciata with its blood orange and citrus flavors provides a zesty contrast. Serve it chilled to enhance the cake’s freshness. 🍊
A vanilla chai latte made with Starbucks Chai Tea Concentrate and steamed milk offers a creamy, aromatic pairing that echoes the cake’s vanilla essence. The warmth of the chai complements the cake’s buttery layers beautifully.
Nutrition facts
Frequently asked questions
Can I bake just one 6-inch cake instead of two?
Simply double the batter recipe and bake it all in one pan. Use a 6-inch round pan lined with parchment paper for easy removal. The baking time remains the same (25-30 minutes at 350°F), but you may need to tent with foil after 15 minutes to prevent over-browning. This works perfectly for single-serving desserts or testing flavors.
Why do my cakes crack on top?
Cracking usually happens when cakes cool too quickly or the oven gets too hot. To prevent this, let cakes cool in the pan for 10 minutes before transferring to a wire rack, and avoid opening the oven door during baking. If you notice the top browning too fast, tent with aluminum foil. Also, ensure your oven thermometer is accurate—350°F is critical for even baking.
How do I level the cakes for perfect stacking?
Use a serrated knife or cake leveler to trim the domed tops. Place the cake on a cutting board, then gently saw back and forth with a light touch—don’t press down hard. For extra precision, use a laser level guide or a piece of string dipped in flour as a straightedge. Always level cakes after they’ve cooled completely to avoid crumbling.
Can I substitute cake flour with all-purpose?
Yes, but with a small adjustment! Replace the 0.5 cup cake flour with 0.5 cup all-purpose flour and add 1 tbsp cornstarch to the dry ingredients. This maintains the cake’s tenderness. Without cornstarch, the texture may be slightly denser, but it’ll still taste delicious. For best results, sift all dry ingredients together thoroughly.
How long can I store baked cakes before stacking?
Store baked cakes in an airtight container at room temperature for up to 3 days or freeze for 3 months. For stacking, bring frozen cakes to room temperature first (thaw in the fridge overnight). Dust layers with powdered sugar just before assembling to prevent sticking. Never stack cakes that are still warm—they’ll compress and lose their structure.

- 3lb Prime Rib Roast Recipe: Juicy Pink Center Guaranteed in 3 Hours - October 31, 2026
- 5 Spice Cake Recipe: Warmly Spiced Layers With Crunchy Top - October 31, 2026
- 1950’s Macaroni and Cheese Recipe: Nostalgic Creamy Cheese Sauce with Buttery Noodles - October 31, 2026