
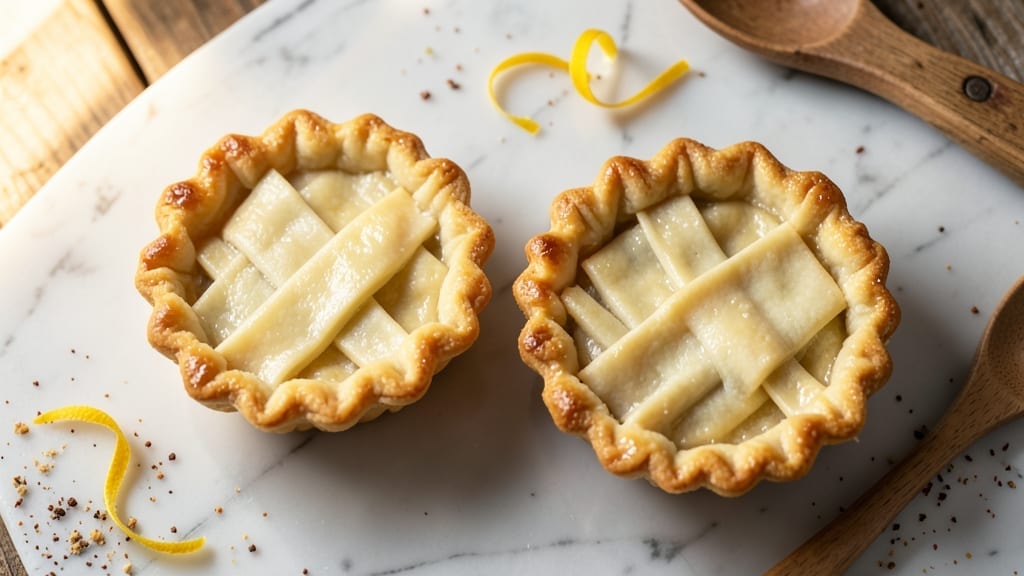
Creating two 9-inch pie crusts that deliver flaky, golden layers without the stress is the foundation every dessert needs. This recipe transforms simple ingredients into a crisp, buttery crust that holds fillings perfectly—whether you’re baking a classic apple pie, a rich pecan tart, or a savory quiche.
The secret lies in proper chilling, gentle handling, and a precise baking technique that guarantees consistent results every time.
What sets this recipe apart is its foolproof method for achieving that signature flakiness, even for beginners. With just 20 minutes of active prep and 20 minutes of baking, you’ll have two perfect crusts ready for any filling.
The dough rests in the refrigerator, allowing the gluten to relax and the butter to solidify, which is critical for those delicate, lacy layers. No rolling pin? No problem—this technique works with a wine bottle or even your hands.
The result is a crisp yet tender crust with a golden, slightly caramelized edge that’s impossible to resist. Whether you’re blind-baking for a custard filling or using it immediately for a fruit pie, these crusts will impress without the guesswork.
The key is patience—letting the dough rest and baking at the right temperature ensures a professional-quality finish every time.
Pair these crusts with your favorite fillings, from spiced apples to creamy pumpkin, and serve with confidence. The beauty of this recipe is its versatility—use one for a top crust, the other for a bottom, or even double up for a deep-dish masterpiece.
Here’s how to make them perfectly every time.
Ingredients for 2 9 inch pie crust
Nine essential ingredients crafting two perfect 9-inch pie crusts with professional flakiness.
| Ingredient | Amount | Notes |
|---|---|---|
| All-Purpose Flour 🌾 | 3 ½ cups | Unbleached, spooned and leveled |
| Unsalted Butter 🧈 | 1 ½ cups | Cold, cubed, high-fat content |
| Ice Water 💧 | ½ cup | Chilled for proper dough texture |
| Diamond Crystal Kosher Salt 🧂 | ½ tsp | Fine grain for even distribution |
| Granulated Sugar 🍚 | 1 tbsp | Enhances golden browning |
| Large Egg Yolks 🥚 | 1 whole | For binding and richness |
| White Vinegar 🍶 | 1 tsp | Balances acidity in dough |
| Cornstarch 🌽 | 1 tbsp | Prevents sticking during baking |
| Coarse Sugar 🍚 | 1 tbsp | For sprinkling before baking |
The butter is non-negotiable—European-style or high-fat American brands like Land O’Lakes work best. Look for cubes that are cold but not rock-hard; they should yield slightly when pressed. Whole Foods and Wegmans carry excellent options, but any grocery store’s butter section will suffice. The flour should be sifted before measuring to eliminate air pockets, ensuring even distribution in the dough. For the salt, Diamond Crystal is preferred over Morton—its coarser texture dissolves more evenly. Keep everything chilled until use; gloves work well for handling cold butter without warming it.
No ice water? Freeze a small ice cube tray for 10 minutes to chill regular water. Substitute vinegar with lemon juice at half the amount, though it may slightly alter flavor. For a lower-fat crust, replace 2 tbsp butter with apricot jam—it adds moisture without compromising flakiness. The egg yolk can be omitted for a vegan version, though the crust will be slightly less tender. If your dough feels too dry, add 1 tsp more ice water; if too sticky, chill for an additional 10 minutes. The cornstarch is optional but prevents soggy bottoms when blind-baking.
Wrap dough tightly in plastic wrap and refrigerate for at least 2 hours—overnight is ideal. For longer storage, freeze shaped crusts between parchment paper for up to 3 months. Thaw in the fridge overnight before baking. The cornstarch sprinkle before baking creates a crisp barrier that prevents sticking. If pre-baking, use pie weights or dried beans to maintain shape. Store baked crusts in an airtight container at room temperature for 3 days or freeze for 2 months—reheat at 350°F for 5 minutes to restore crispness.
Why You’ll Love This Recipe
- No-Fuss Foundation: I swear by this crust—just flour, butter, ice water, and a pinch of salt. No food processor, no stress, just cold butter cut into flour until it looks like coarse sand. Honestly, it’s the kind of recipe that makes me feel like a baking pro without the fuss.
- Buttery Crunch Magic: That crispy, golden edge with a tender center? It’s all in the butter-to-flour ratio and chilling time. The sugar in the dough gives it a subtle sweetness that pairs perfectly with anything—savory or sweet—without overpowering.
- Double the Crust: Two 9-inch crusts mean I’m always covered—whether it’s a classic apple pie, a cheesy galette, or even a savory quiche. Between us, I’ve used these crusts for everything from dessert to breakfast, and they never let me down.
- Budget-Friendly Staples: Flour, butter, and salt? These are pantry basics that won’t break the bank. I make this dough in bulk, freeze one crust, and use the other fresh—no wasted ingredients, just pure efficiency. Plus, it’s the kind of recipe that stretches my grocery budget without sacrificing quality.
Step-by-step instructions for 2 perfect 9-Inch pie crusts
Mastering flaky pie crusts requires precision—here’s how to achieve professional results every time.
Cut and Mix the Dry Ingredients
In a large bowl, combine the 3.5 cups All-Purpose Flour, 0.5 tsp Diamond Crystal Kosher Salt, 1 tbsp Cornstarch, and 1 tbsp Granulated Sugar. Whisk gently to distribute the ingredients evenly. The cornstarch prevents gumminess, while the sugar enhances browning. I use a whisk to avoid developing gluten, which would make the crust tough.
Create a well in the center of the dry mixture large enough to accommodate the 1.5 cups Unsalted Butter cubes. The butter should fit snugly without spilling over the edges. This well ensures even distribution when you cut in the fat—a critical step for flaky layers.
Cut in the Cold Butter
Add the 1.5 cups Unsalted Butter cubes to the well, keeping them cold and intact. Using a pastry cutter or two forks, work the butter into the flour mixture until it resembles coarse crumbs with pea-sized butter pieces. Overworking here destroys the flakiness, so stop as soon as the mixture looks like wet sand.
I press down firmly with my pastry cutter, lifting occasionally to check for even distribution. The butter should remain cold throughout—if it starts to melt, chill the mixture for 10 minutes before proceeding. Cold butter creates steam pockets during baking, which separate into those signature flaky layers.
Add Wet Ingredients and Form the Dough
In a separate small bowl, whisk together the 0.5 cup Ice Water, 1 tsp White Vinegar, and 1 whole Large Egg Yolks. The vinegar balances the dough’s acidity, while the egg yolk adds binding without making the crust tough. Pour this liquid mixture gradually over the dry ingredients, mixing just until the dough comes together.
Use a rubber spatula to gently fold the dough until it forms a shaggy mass. Avoid overmixing—this develops gluten and makes the crust dense. If the dough feels too dry, add 1 teaspoon of ice water at a time until it holds together when pressed. The dough should be cold and slightly sticky but not wet.
Divide, Shape, and Chill the Dough
Turn the dough out onto a lightly floured surface and divide it into two equal portions. I use a kitchen scale for accuracy, targeting 17.5 ounces each for perfect 9-inch crusts. Roll each portion into a 12-inch circle, about ⅛-inch thick, rotating the dough as you work to maintain even thickness.
Transfer each rolled crust to a parchment-lined plate, cover with plastic wrap, and refrigerate for at least 1 hour (up to 24 hours). Chilling relaxes the gluten and firms up the fat, preventing shrinking during baking. This step is non-negotiable for professional results—skipping it leads to tough, uneven crusts.
Pre-Bake for Perfect Support
Preheat your oven to 375°F. Remove one chilled crust from the refrigerator and place it in a 9-inch pie dish. Sprinkle the edges with 1 tbsp Coarse Sugar for a golden finish. Using a fork, prick the bottom all over with small holes to prevent air pockets. Line with parchment paper, fill with pie weights or dried beans, and bake for 15 minutes.
Remove the weights and bake for an additional 5-7 minutes until the edges are light golden brown and the crust is set. The parchment prevents soggy bottoms while the weights ensure even baking. Repeat with the second crust. Let both cool completely before filling—this prevents a soggy pie crust.
Pro Tips For Making 2 9 Inch Pie Crust
- Chill the Butter First: Take your unsalted butter straight from the fridge—cold, firm cubes work best. I learned this the hard way when my crust turned greasy and soggy because I used butter that was too soft. Cut it into ½-inch pieces and keep them in the freezer for 10 minutes if your kitchen’s warm.
- Use Ice Water Sparingly: The recipe calls for ice water, but don’t drown the dough. Measure it carefully—just enough to hold the dough together when pressed. Too much water makes the crust tough, and too little makes it crumbly. Start with 6-8 tablespoons and adjust as you go.
- Skip the Overworking: Mix the dough until it just comes together—no more. Overhandling develops gluten, which turns your flaky crust into something closer to a cracker. Press the dough gently, then refrigerate it for at least 1 hour. Patience here guarantees layers.
- Roll Between Chilled Sheets: Roll the dough between two sheets of parchment or plastic wrap instead of bare countertops. This prevents sticking and makes rolling easier, especially if your kitchen’s warm. Keep the dough cold by chilling it for 10-15 minutes between rolls if needed.
Best sauces and condiments for this dish
Classic Fruit Fillings
Pair your crust with a spiced apple filling—simmer 6 cups peeled, sliced apples with ½ cup brown sugar, 1 tbsp lemon juice, and 1 tsp cinnamon for 10 minutes. This sweet-tart combo complements the crust’s buttery richness.
For a summer twist, try peach galette with 3 cups sliced peaches, 2 tbsp honey, and 1 tsp vanilla extract. The juicy fruit contrasts beautifully with the crisp crust. 🍏
Creamy Custard Pairings
For a pumpkin pie, blend 1.5 cups pumpkin purée, 1 cup heavy cream, 3 eggs, ¾ cup brown sugar, and 1 tsp pumpkin pie spice. Bake at 425°F for 15 minutes, then reduce to 350°F for 40-50 minutes.
The custard’s silky texture pairs perfectly with the crust’s flaky layers. For a chocolate cream pie, mix 1 cup chocolate pudding with 1 cup whipped cream—the contrast is decadent. 🥧
Savory Options
Transform your crust into a quiche by filling it with a mix of 6 eggs, 1 cup heavy cream, 1 cup shredded Gruyère, and ½ cup cooked bacon or sautéed onions. Bake at 375°F for 30-35 minutes until set.
For a spinach and feta tart, layer 3 cups sautéed spinach, 1 cup crumbled feta, and a sprinkle of toasted pine nuts. The tangy cheese balances the crust’s buttery flavor. 🧀
Sweet Toppings
Before baking, brush the crust with 1 tbsp melted butter and sprinkle with 1 tbsp coarse sugar for extra caramelization. For a lattice top, cut the second crust into strips and weave them over a fruit filling—this adds visual appeal and texture.
Try a vanilla bean custard drizzle after baking for a restaurant-worthy finish. A dusting of powdered sugar or crushed pistachios adds an elegant touch. ✨
Condiment Enhancements
Serve your pie with a scoop of vanilla bean ice cream or whipped cream to contrast the crust’s crispness. A drizzle of honey or caramel sauce elevates fruit pies, while a sprinkle of flaky sea salt balances sweetness in custard pies.
For savory tarts, a balsamic glaze or chipotle crema adds depth. These condiments turn a simple pie into a showstopper. 🍯
Nutrition facts
Frequently asked questions
Can I make these crusts without a rolling pin?
Use a clean wine bottle, mason jar, or even your hands. Roll the dough between two sheets of parchment paper to prevent sticking. For extra thickness control, place a ruler or measuring cup on top while rolling. The key is to keep the dough even—about ⅛-inch thick—for consistent baking.
Why does my crust turn out tough instead of flaky?
Overworking the dough or skipping the chill time are the most common culprits. Always keep the butter cold and cut it into the flour until it resembles coarse crumbs, not a paste. Let the dough rest in the fridge for at least 1 hour—this relaxes the gluten and prevents shrinking. Also, avoid adding too much water.
How do I prevent a soggy bottom in fruit pies?
Pre-bake your crust for 15 minutes at 375°F with pie weights or dried beans before adding filling. For extra insurance, sprinkle 1 tbsp cornstarch on the bottom of the unbaked crust. If your filling is juicy (like berries), pre-cook it slightly to reduce moisture—this keeps the crust crisp.
Can I make these crusts ahead of time?
Yes! Shape the dough and refrigerate it for up to 24 hours before using. For longer storage, freeze the shaped crusts between parchment paper for up to 3 months. Thaw in the fridge overnight—never at room temperature. This method actually improves the flavor and texture.
What’s the best way to store leftover crust?
Keep baked crusts in an airtight container at room temperature for 3 days or freeze for 2 months. To restore crispness, reheat at 350°F for 5 minutes before adding fillings. For unbaked dough, wrap tightly in plastic and refrigerate for up to 3 days—or freeze for 3 months.

- 6 Egg Cake Recipe with Oil: Light as Air With Buttery Moisture - October 4, 2026
- 4 Bean Casserole Recipe: One-Pan Heartiness With Smoky Paprika Depth - October 4, 2026
- 3-Ingredient Keto Mug Cake Recipe: Microwave Magic in 2 Minutes - October 4, 2026