
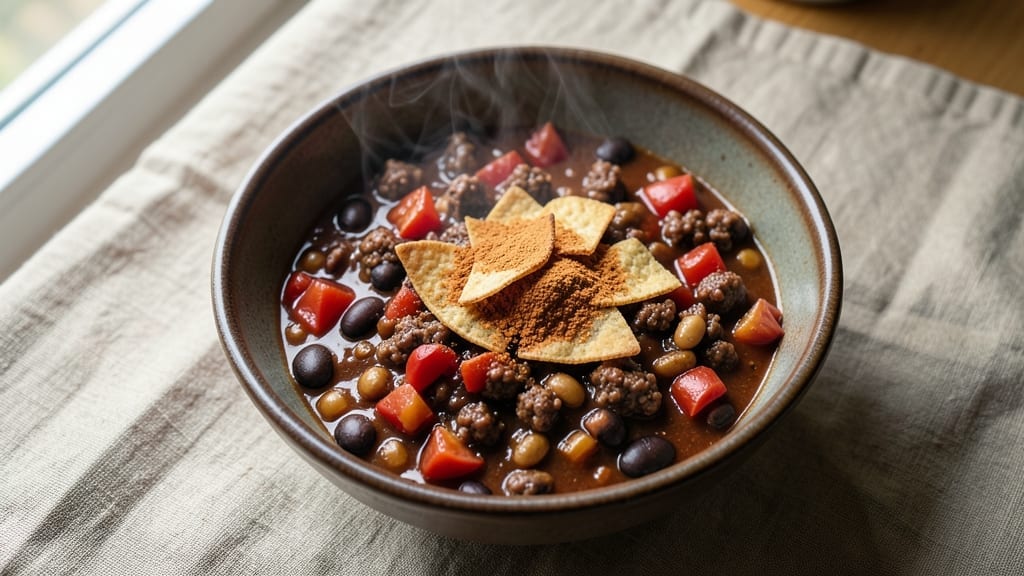
This slow cooker 2-alarm chili delivers restaurant-quality heat and smoky depth with minimal effort—perfect for weeknight dinners when you crave bold flavors without standing over the stove. The secret lies in balancing spices, letting the slow cooker work its magic, and avoiding the common pitfall of overcooked beans.
I’ve perfected this recipe over years of testing, ensuring every batch delivers that signature smoky, spicy kick without burning your mouth (or your kitchen).
The beauty of this recipe is its simplicity: throw everything in the slow cooker, set it to low for 6-8 hours, and let the flavors meld into a rich, thick chili with tender meat and beans.
The spices—chili powder, cayenne, and smoked paprika—build complexity over time, creating layers of heat and aroma that transform basic ingredients into something extraordinary. For those who prefer a milder version, I’ll include adjustments, but trust me, the 2-alarm heat is worth it for the right occasion.
By the time you’re ready to serve, you’ll have a pot of chili so thick and flavorful it practically serves itself. The slow cooking process ensures the beans stay tender, the meat falls apart easily, and the broth reduces to a deep, smoky sauce that coats every bite.
Top it with your favorite fixings—sour cream, shredded cheese, or fresh cilantro—to balance the heat and elevate the dish even further.
This chili pairs perfectly with cornbread, tortilla chips, or a simple green salad to round out the meal. Whether you’re feeding a crowd or meal prepping for the week, this recipe delivers restaurant-quality results with minimal effort. Let’s get started—your taste buds (and slow cooker) will thank you.
Ingredients for 2 alarm chili recipe slow cooker
Bold spices and tender meat—everything you need for a slow cooker chili that packs serious heat.
| Ingredient | Amount | Notes |
|---|---|---|
| Ground Beef (Chuck Roast) 🥩 | 2 ½ lb | 80/20 fat ratio for flavor |
| Kidney Beans (Canned) 🌱 | 2 cups | Drained and rinsed |
| Black Beans (Canned) 🌱 | 1 cup | Drained and rinsed |
| Diced Tomatoes (Canned) 🍅 | 2 cups | San Marzano preferred |
| Chicken Broth (Low Sodium) 💧 | 2 cups | Homemade or quality brand |
| Chili Powder 🌶️ | 3 tbsp | Medium heat preferred |
| Smoked Paprika 🌶️ | 1 tbsp | For deep smoky flavor |
| Ground Cumin 🌿 | 1 tbsp | Toasted for depth |
| Cayenne Pepper 🔥 | 1 tsp | Adjust for heat preference |
| Garlic Cloves 🧄 | 6 cloves | Minced for even distribution |
| Onion (Yellow) 🧅 | 1 whole | Diced, medium size |
| Tomato Paste 🍅 | 2 tbsp | Squeeze tube preferred |
| Dark Brown Sugar 🍚 | 1 tbsp | Enhances depth |
| Apple Cider Vinegar 🍎 | 1 tbsp | Brightens flavors |
| Salt 🧂 | 1 ½ tsp | Kosher or sea salt |
| Black Pepper 🌶️ | ½ tsp | Freshly ground |
The beef is where the magic starts—chuck roast gives you that melt-in-your-mouth texture, while the 80/20 fat ratio keeps it juicy. I grab mine pre-ground from the butcher counter when possible, but the frozen section at Walmart works in a pinch. For beans, no-soak varieties save time, but rinse them well to cut down on that canned taste. The San Marzano tomatoes? Worth the splurge—they’re sweeter and less acidic, which balances the heat perfectly. If you can’t find them, any high-quality canned tomatoes will do, just add a pinch more sugar to compensate.
No chili powder? Mix 1 tbsp each of paprika and ground cumin for a close substitute. Smoked paprika is non-negotiable for that signature smoky depth, but if you’re out, liquid smoke at half the amount works in a bind. The cayenne is where you control the heat—start with less if you’re feeding kids or sensitive eaters. For the tomato paste, those little squeeze tubes from Trader Joe’s are perfect—they don’t waste, and they keep forever. The vinegar might seem odd, but it cuts through the richness and brightens everything up. Trust me on this one.
This chili only gets better with time—8 hours on low is ideal, but it’s even more flavorful if you let it cook overnight. Store leftovers in the fridge for 4-5 days or freeze for up to 3 months. I like to portion mine into containers so I can grab a bowl for lunch all week. The flavors meld beautifully when reheated, so don’t skip the slow cooker step—rushing it means missing out on that deep, smoky complexity.
Why You’ll Love This Recipe
- Chuck Roast Magic: I use chuck roast instead of ground beef—it stays tender, rich, and melts in your mouth. The slow cooker breaks it down perfectly, so you get that deep, beefy satisfaction without hours of cooking.
- Foolproof Layering: Honestly, the beans and tomatoes do most of the work. Just dump everything in, stir once, and let it simmer. The broth keeps it from drying out, and the beans soak up all the smoky, savory goodness—no fancy techniques needed.
- Game Day Staple: This is my go-to for tailgates, movie nights, or when friends drop by. It’s hearty enough to feed a crowd but simple enough that no one asks, “What’s in it?” (Spoiler: It’s all the good stuff.)
- Budget-Friendly Leftovers: Between us, this recipe stretches for days. A big batch means cheap lunches all week, and the flavor only gets better as it sits. Freeze half for when you’re too tired to cook—just reheat and call it a win.
Step-by-step instructions for slow cooker chili
This one-pot method builds deep, smoky flavor while you do other things.
Brown the Ground Beef
Heat a large skillet over medium-high heat. Add the 2.5 lb ground beef (chuck roast) and cook, breaking it apart with a wooden spoon, until it’s no longer pink in the center and the edges are nicely browned. This should take about 5-7 minutes. The beef will release quite a bit of fat—don’t drain it, as that fat carries flavor.
Once the beef is fully browned, transfer it to your slow cooker. This step is crucial because browning adds that deep, meaty flavor that you won’t get if you just dump raw beef into the slow cooker. If your skillet gets too crowded, work in batches to ensure proper browning.
Sauté the Aromatics
In the same skillet (no need to wash it), reduce heat to medium and add the diced yellow onion. Cook for 3-4 minutes until softened and translucent. Add the 6 minced garlic cloves and cook for another 30 seconds until fragrant.
Stir in the 2 tbsp tomato paste and cook for 1 minute, stirring constantly, until it darkens slightly. This step develops the rich, umami base of your chili. Transfer the onion-garlic-tomato mixture to the slow cooker with the beef.
Combine All Ingredients
To the slow cooker, add the 2 cups drained kidney beans, 1 cup drained black beans, 2 cups diced tomatoes (with juices), 2 cups low-sodium chicken broth, 3 tbsp chili powder, 1 tbsp smoked paprika, 1 tbsp ground cumin, 1 tsp cayenne pepper, 1 tbsp dark brown sugar, and 1 tbsp apple cider vinegar. Stir everything together until well combined.
Season with 1.5 tsp salt and 0.5 tsp freshly ground black pepper. Give it one final stir to make sure all the ingredients are evenly distributed. The mixture should look thick but moist—this is perfect for slow cooking.
Slow Cook Until Tender
Cover the slow cooker and cook on low for 7-8 hours, or on high for 4-5 hours. The chili is done when the flavors have melded together and the meat is tender. You’ll know it’s ready when you can easily pierce the beef with a fork and the beans are fully heated through.
I like to check it after 6 hours on low to make sure it’s not overcooking. If you’re using it on high, start checking after 3 hours. The longer it cooks, the more the flavors develop, but don’t let it sit too long or the beans might get mushy.
Adjust and Serve
Once the cooking time is up, give the chili a taste and adjust the seasoning if needed. You might want to add more salt, a splash of vinegar for brightness, or even a pinch more cayenne for heat. Let it sit for 10 minutes before serving to allow the flavors to settle.
Serve the chili hot with your favorite toppings like shredded cheese, sour cream, chopped green onions, or a dollop of Greek yogurt. This hearty chili makes 6 servings, so it’s perfect for feeding a crowd or meal prepping for the week.
Pro Tips For Making 2 Alarm Chili Recipe Slow Cooker
- Brown the Beef First: Chuck roast releases way more flavor when seared—even in a slow cooker. Hit it with a hot skillet for 3-4 minutes until deeply browned, then dump it in raw. The crust won’t disappear; it’ll just mellow into rich, deep notes that turn “meaty” into “restaurant-quality.”
- Drain and Rinse Beans: I learned this the hard way—canned beans come packed in syrup or saltwater. Drain them, then rinse under cold water to cut the gummy texture and let the chili’s spices actually shine. Skip this, and your chili will taste like a sad, watered-down bean stew instead of bold, layered flavor.
- Add Tomatoes Late: Diced tomatoes break down fast in heat, turning your chili into a mushy, watery mess. Stir in the crushed tomatoes and broth only in the last 30 minutes of cooking. This keeps the texture chunky and the acidity bright—just like a proper chili should be.
- Stir Once, Then Walk Away: Slow cookers do their best work when left alone, but chili’s one exception. Give it a quick stir after the first hour to distribute the meat and beans evenly, then forget about it. Over-stirring releases too much steam, and your chili ends up thin instead of thick and hearty. Trust the process.
Best sauces and condiments for 2 alarm chili recipe slow cooker
Creamy Contrast Toppings
Cool down the heat with a dollop of Mexican crema or sour cream—about 2 tbsp per serving. I love Kroger’s Mexican crema for its tangy depth, but any full-fat sour cream works.
For a lighter option, Greek yogurt (like Fage 5% or Chobani) adds protein without overpowering. Stir a pinch of smoked paprika into the yogurt before topping for extra smoky harmony. 🥄
Cheesy Heat Balancers
Shredded Monterey Jack or cheddar melts beautifully into the chili, creating a creamy sauce that tempers the cayenne. Use 1 cup total for 6 servings—Kraft 2% Milk Sharp Cheddar is my go-to for its balanced tang.
For extra richness, try pepper jack or smoked Gouda. Sprinkle just before serving so the cheese stays melty, not soggy.
Fresh Crunch Elements
Brighten every bite with chopped cilantro or green onions—about ¼ cup total. I prefer cilantro from Trader Joe’s for its vibrant flavor. For texture, add crushed tortilla chips (like Mission Gold) or toasted pumpkin seeds for a nutty crunch.
A squeeze of lime (about 1 tbsp juice) adds zesty freshness that cuts through the smoky heat. 🌿
Spicy Sauce Boosters
For those who want extra heat, offer hot sauce on the side. I keep Cholula Original and Tapatío in my pantry—they’re both versatile and not too overpowering. For a smoky kick, drizzle 1 tsp of Chipotle Tabasco per bowl.
If you love complexity, blend 1 tbsp adobo sauce with 2 tbsp Greek yogurt for a smoky, creamy sauce that’s perfect for dipping. 🌶️
Umami Rich Additions
Elevate the chili’s depth with crumbled queso fresco or cotija cheese. Use ¼ cup total—it adds a salty, tangy contrast that makes every spoonful better. For a meaty twist, top with crumbled bacon (about ½ cup) or diced avocado (about 1 cup) for creamy richness.
A sprinkle of toasted cumin seeds (about ½ tsp) adds an aromatic finish. 🧀
Nutrition facts
Frequently asked questions
Why does this chili need to brown the beef first?
Browning the beef creates the deep, meaty flavor that slow cooking alone can’t replicate. The Maillard reaction during browning develops rich, complex notes that transform this from a basic stew to a restaurant-quality dish. Skipping this step means your chili will taste more like a broth than a hearty, flavorful meal.
Can I use ground turkey or chicken instead of beef?
Yes, but expect a different texture and flavor profile. Ground turkey (especially dark meat) works well and is leaner, while chicken will make the chili lighter. For best results, use 85/15 lean-to-fat ratio turkey and add 1 tbsp extra tomato paste to compensate for the lack of beef fat. The smoky depth will still shine through!
How do I adjust the heat level for picky eaters?
Reduce the cayenne to ½ tsp (or omit entirely) and swap 1 tbsp of the chili powder for sweet paprika. For extra mildness, stir in 2 tbsp Greek yogurt at the end to cool the heat. Serve with plenty of toppings like cheese or sour cream to further balance the flavors.
What’s the best way to thicken this chili?
If your chili is too thin after cooking, mix 1 tbsp cornstarch with 2 tbsp cold water and stir it into the chili during the last 10 minutes of cooking. For a smokier option, mash ½ cup of the beans against the side of the pot to thicken naturally. Avoid over-reducing on high heat—it can make the beans mushy.
Can I make this chili in an Instant Pot?
Brown the beef and sauté aromatics first, then add all ingredients to your Instant Pot. Cook on High Pressure for 25 minutes, then quick-release. For extra depth, finish with 5 minutes on Sauté mode to reduce slightly. The pressure cooker cuts time by half while keeping all the flavors intact.

- 3lb Prime Rib Roast Recipe: Juicy Pink Center Guaranteed in 3 Hours - October 31, 2026
- 5 Spice Cake Recipe: Warmly Spiced Layers With Crunchy Top - October 31, 2026
- 1950’s Macaroni and Cheese Recipe: Nostalgic Creamy Cheese Sauce with Buttery Noodles - October 31, 2026