
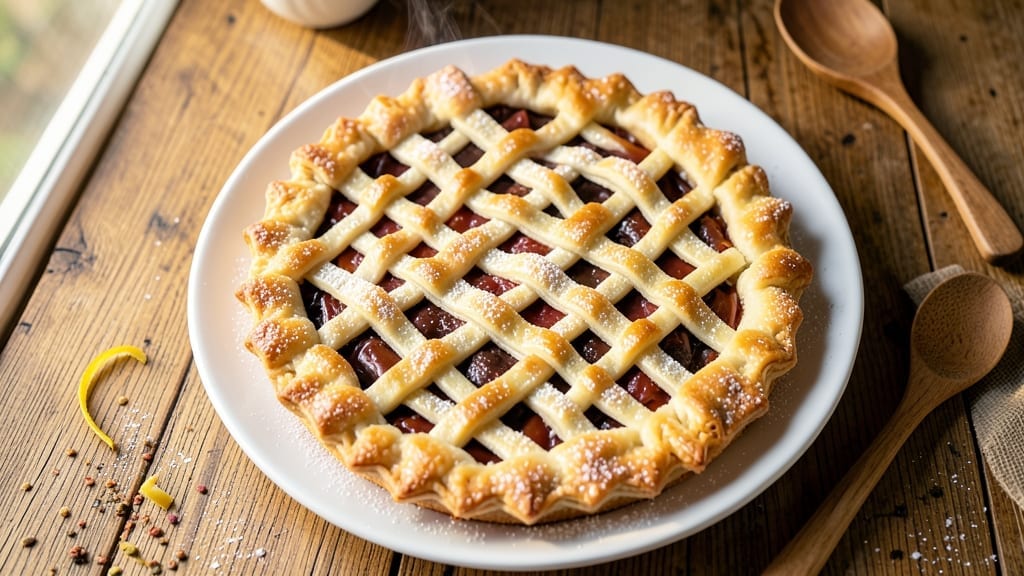
Mastering a 2-crust butter pie crust with flaky layers that hold filling securely transforms homemade pies into restaurant-quality desserts. The secret lies in precise butter incorporation—cold, cubed butter creates those signature air pockets while maintaining structure.
I’ve perfected this technique over years of trial (and a few failed attempts), ensuring the crust stays crisp yet tender enough to support even the heaviest fillings.
This recipe balances tradition with practicality: high-fat butter content guarantees flakiness, while a gentle rolling technique prevents cracks. The key is patience—letting the dough rest between folds allows gluten to relax, resulting in layers that separate beautifully. For best results, work with chilled ingredients and avoid overhandling the dough.
What you’ll achieve is a flaky, golden-brown crust with a delicate crumb that holds its shape under weighty fillings—whether it’s classic apple, rich chocolate, or tangy lemon curd.
The edges stay crisp while the center remains tender, creating the perfect vessel for your pie filling. This foundation ensures every bite delivers both texture and flavor.
While this method requires attention to detail, the results are worth it. For those short on time, I’ll share a reliable shortcut using pre-made dough without sacrificing quality. Let’s build a crust that makes your pies irresistible.
Ingredients for 2 crust butter pie crust
Precision ingredients create the perfect foundation for a flaky, sturdy two-crust pie.
| Ingredient | Amount | Notes |
|---|---|---|
| All-Purpose Flour 🌾 | 3 cups | Sifted for even texture |
| Unsalted Butter 🧈 | 1 cup | Cold, cubed, high-fat (80%+) |
| Ice Water 💧 | ⅓ cup | Chilled, for precise hydration |
| Diamond Crystal Kosher Salt 🧂 | 1 tsp | Fine grain preferred |
| Granulated Sugar 🍚 | 2 tbsp | For subtle sweetness |
| Vanilla Extract 🌿 | ½ tsp | Pure, for aroma |
| Large Egg Yolk 🥚 | 1 whole | For binding strength |
| Cornstarch 🌾 | 1 tbsp | For tenderness |
| Ground Black Pepper 🌶️ | ¼ tsp | Freshly ground |
| White Vinegar 🍶 | 1 tsp | For acid balance |
| Butterflake Pastry Flour (optional) 🌾 | ½ cup | For extra flakiness |
The butter is non-negotiable—opt for high-fat (80%+) European-style butter like Plugrá or Bergère for optimal flakiness. Most grocery stores carry Land O’Lakes or ButterBerkshire, but avoid margarine substitutes. Keep the butter cubes frozen until ready to use—this prevents premature melting. For the flour, King Arthur or Gold Medal brands yield consistent results, but any all-purpose will work. The cornstarch substitution (1 tbsp per cup flour) enhances tenderness, a professional baker’s secret.
No egg yolk? 1 tbsp cold water mixed with 1 tsp cornstarch mimics the binding effect. Substitute white vinegar for lemon juice at the same ratio, though vinegar adds subtle tang. Short on pastry flour? Add 1 tbsp extra cornstarch to your all-purpose flour. The sugar isn’t just for sweetness—it caramelizes beautifully during baking, creating that signature golden crust. For a nut-free option, omit the optional pastry flour and increase all-purpose flour by 0.5 cup. Always measure flour by weight (1 cup = 120g) for precision, though volume works in a pinch.
Store dough between parchment paper in the fridge for up to 48 hours, or freeze wrapped in plastic for 3 months. Let dough sit at room temperature for 20 minutes before rolling to prevent cracking. For pre-made shortcuts, Pillsbury Refrigerated Pie Crust (homemade still outperforms) or Whole Foods 365 Everyday Value work in emergencies. Brush finished crusts with egg wash (1 yolk + 1 tbsp water) for that signature sheen, or milk wash (1 tbsp milk + 1 tbsp cream) for a softer finish.
Why You’ll Love This Recipe
- No-Fuss Assembly: I swear by this method—just cut cold butter into flour with a fork, then toss in ice water. No food processor, no stress, and the result is that buttery, flaky magic every time.
- Buttery Bliss: That chilled, crumbly texture? It’s all in the ice water and cold butter. The sugar just gives it this subtle sweetness that makes it taste like a hug from your grandma’s kitchen.
- Pie Pan or Party: This crust works for apple, pumpkin, or even savory galettes. Honestly, I’ve used it for everything from Thanksgiving pies to impromptu dessert nights—it’s my secret weapon for looking like a pro.
- Budget-Friendly Staples: Flour, butter, salt—these are the basics you already have. No fancy ingredients, no markup, and leftovers? Freeze half for next month’s potluck. Smart, simple, and satisfying.
Step-by-step instructions for perfect two-crust butter pie crust
Master this technique and you’ll achieve restaurant-quality flakiness with structural integrity to hold any filling.
Prepare the Dough Components
In a large mixing bowl, combine the 3 cups all-purpose flour, 1 tsp Diamond Crystal kosher salt, 1 tbsp cornstarch, 2 tbsp granulated sugar, 0.5 tsp vanilla extract, 0.25 tsp ground black pepper, and 1 tsp white vinegar. Whisk together until evenly distributed—this ensures consistent flavor and texture throughout both crusts.
Add the 1 cup cold, cubed unsalted butter to the dry ingredients. Using a pastry cutter or your fingers, work the butter into the flour mixture until you achieve pea-sized crumbs with minimal flour streaks. This texture is crucial for creating those signature flaky layers. If using the 0.5 cup butterflake pastry flour, fold it in now for enhanced flakiness.
Hydrate and Chill the Dough
Gradually add the 0.33 cup ice water, 1 tablespoon at a time, mixing gently with a fork or dough scraper until the dough just comes together. Be careful not to overwork it—you want a shaggy, slightly sticky dough that holds when pressed. The ice water prevents gluten development while providing just enough moisture for binding.
Divide the dough into two equal portions. Flatten each into a disk, wrap tightly in plastic wrap, and refrigerate for at least 2 hours or up to 2 days. This long chill time is essential for maximum flakiness—it allows the gluten to relax and the butter to solidify, preventing it from melting prematurely during baking.
Roll and Fit the First Crust
On a lightly floured surface, roll one dough disk into a 12-inch circle, about 1/8-inch thick. The key here is to keep the dough cold—if it gets too warm, the butter will soften and you’ll lose that crucial flakiness. Transfer the rolled crust to a 9-inch pie dish, gently pressing it into the bottom and sides while leaving a 1-inch overhang. Trim the excess with kitchen shears.
Chill the fitted bottom crust for 30 minutes before adding your filling. This brief additional chill prevents the crust from shrinking during baking. Preheat your oven to 375°F while the crust chills—this temperature creates the ideal environment for even baking and proper browning.
Blind-Bake the Bottom Crust
Line the chilled bottom crust with parchment paper and fill it with dried beans or pie weights to prevent puffing. Bake for 15 minutes, then remove the weights and bake for another 5-7 minutes until the edges begin to turn golden brown. The crust should be set but not deeply browned—this ensures it holds its shape when the filling is added.
Remove the parchment and weights, then prick the bottom all over with a fork to prevent air bubbles. Return to the oven for 2-3 minutes to crisp slightly. This pre-baking step is critical—it creates a sturdy base that won’t sog when the filling is added, while still allowing the top crust to create a sealed, flaky finish.
Assemble and Bake the Top Crust
Roll the second dough disk into another 12-inch circle. Place it over the filled pie, trimming excess to create a clean edge. For a decorative finish, crimp the edges using your fingers or a fork. Cut 4-5 slits in the center to allow steam to escape during baking—this prevents a soggy top crust.
Brush the top crust with egg wash (beaten 1 whole egg yolk mixed with 1 tbsp ice water) for a golden finish. Bake at 375°F for 35-45 minutes, until the top is deep golden brown and the filling is bubbling at the edges. Rotate the pie halfway through baking for even color and texture.
Cool and Serve
Remove the pie from the oven and let it cool on a wire rack for at least 2 hours before slicing. This resting period allows the filling to set and the crust to firm up, preventing a crumbly texture. The contrast between the crisp, flaky layers and the rich filling will be perfectly balanced when served.
For best results, serve at room temperature. The two crusts should hold their shape perfectly, with no soggy spots or collapsed edges. Each bite should deliver that satisfying combination of crisp, buttery layers and tender filling—proof of your successful technique.
Pro Tips For Making 2 Crust Butter Pie Crust
- Chill the Butter First: Take your cold butter straight from the fridge—no thawing, no cutting it into soft chunks. I learned this the hard way when my crust turned out greasy and tough; cold butter creates tiny pockets of steam that make the crust flaky instead of dense. Cut it into ½-inch cubes and keep them frozen until you’re ready to mix.
- Weigh Your Flour: Scooping flour from the bag packs it down, and packed flour means a heavier, denser crust. Use a kitchen scale for precision—250g of all-purpose flour is what you want, and it’ll give you that light, airy texture you’re after. (Yes, even if you’re impatient like me.)
- Skip the Overmixing: The moment your dough starts to come together, stop. Lift it with a fork or your fingers—it should look shaggy, not smooth. Overworking the dough develops gluten, and that turns your flaky crust into a chewy, sad excuse for pastry. Rough edges? Good. Glossy dough? Bad.
- Blind-Bake the Bottom: If you’re making a custard pie or filling that needs support, blind-bake the bottom crust for 10-12 minutes with pie weights or dried beans. Cover the edges with foil to prevent over-browning, then remove the weights and bake another 5 minutes. This guarantees a crisp base that won’t turn to mush when you add the filling.
Perfect pairings for this recipe
Fruit Filling Pairings
Apple fillings shine with this crust—try a classic spiced apple mix with 1 cup diced Granny Smith and 1 cup Honeycrisp, tossed with 2 tbsp lemon juice, 3 tbsp brown sugar, and 1 tsp cinnamon.
The tartness balances the buttery crust beautifully. For a summer twist, peach or berry fillings work wonderfully—their juices keep the crust moist without making it soggy. 🍏
Creamy Fillings
Rich custards and puddings pair perfectly with this sturdy crust. A lemon curd filling with 1 cup heavy cream, 3 egg yolks, and ½ cup sugar creates a tangy contrast.
For chocolate lovers, a silky chocolate ganache (made with 1 cup heavy cream and 8 oz dark chocolate) melts into the flaky layers like a dream. Always pre-bake the bottom crust for 15 minutes to prevent sogginess with wet fillings.
Savory Contrasts
Unexpected but delicious: savory galettes with caramelized onions, gruyère cheese, and thyme create a sophisticated twist. For a holiday centerpiece, a sweet potato and brown sugar filling with 1 tsp smoked paprika adds depth.
Brush the top crust with egg wash and sprinkle with coarse sea salt before baking for a gourmet finish. 🧀
Wine & Coffee Pairings
A crisp Sauvignon Blanc (like Kim Crawford) complements fruit pies, while a Bordeaux-style red (such as Château Montelena) pairs beautifully with savory galettes. For coffee lovers, serve with a dark roast espresso—the bitterness cuts through the richness of the crust.
A chilled sparkling rosé also works wonderfully with berry pies for a festive touch.
Seasonal Variations
Fall calls for pumpkin or pecan fillings—add 1 tsp pumpkin pie spice and ½ cup chopped pecans to the dough before rolling. In winter, chestnut or persimmon fillings add rustic charm.
For spring, rhubarb with strawberry creates a tart-sweet balance. Always adjust baking times slightly for seasonal fruit variations in moisture content.
Garnishes & Finishes
Dust with powdered sugar for a classic touch or drizzle with honey for a subtle sweetness. Fresh mint leaves or edible flowers add elegance to fruit pies. For a crunchy texture, sprinkle toasted nuts (like pecans or almonds) on the top crust before baking.
A final brush of melted butter while warm enhances the golden color and flavor. ✨
Nutrition facts
Frequently asked questions
Why does my butter pie crust turn out tough instead of flaky?
The most common cause is overworking the dough or using warm butter. Keep everything cold—chill your butter cubes in the freezer until ready to use, and avoid handling the dough more than necessary. The goal is pea-sized butter pieces, not fully incorporated butter. Also, let the dough rest at least 2 hours before rolling to relax the gluten.
Can I substitute margarine for butter in this recipe?
Not recommended! Margarine contains water, which steams during baking and creates a dense, gummy texture instead of flaky layers. For a dairy-free option, use vegetable shortening (like Crisco) or coconut oil (solid at room temperature). If you must use margarine, opt for a high-fat, low-water version and add 1 extra tablespoon of cold butter per cup of margarine.
How do I prevent my pie crust from shrinking during baking?
Prevent shrinkage by keeping the dough cold and chilling the fitted crust for 30 minutes before baking. Use a 9-inch pie dish and press the dough gently but firmly into the bottom and sides. The key is to leave a 1-inch overhang—this extra dough helps anchor the crust. Also, avoid overfilling the pie, as excess weight can cause the crust to collapse.
What’s the best way to store leftover pie crust?
Wrap the dough tightly in plastic wrap and refrigerate for up to 48 hours, or freeze for 3 months. For best results, let the dough sit at room temperature for 20 minutes before rolling to prevent cracking. Thaw frozen dough in the fridge overnight—never at room temperature—to maintain cold butter integrity.
Can I make this crust without a food processor?
Use your fingers or a pastry cutter to work the cold butter into the flour until you achieve pea-sized crumbs. The goal is to keep the butter cold and create pockets of fat that will melt during baking. Work quickly and avoid overmixing—just until the mixture resembles coarse crumbs with minimal flour streaks.

- 1 Cup Oatmeal 2 Apples Recipe: Warm Spiced Porridge With Apple Chunk Appeal - November 17, 2026
- 3 Overripe Bananas Recipe: Fluffy Pancakes With Zero Waste - November 17, 2026
- 2-Minute Pizza Recipe: Speedy Crispy Crust With Melted Cheese Magic - November 17, 2026