
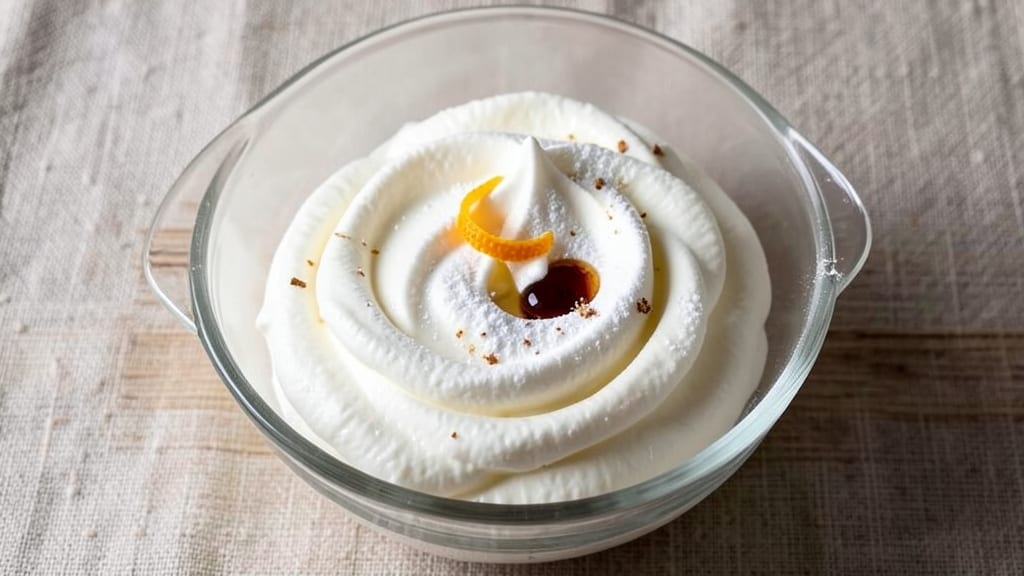
Creating 2 cups of light, airy whipped cream in minutes is easier than you think—no heavy machinery required. The secret lies in chilling every component, using cold heavy cream (not ultra-pasteurized), and avoiding overmixing.
This method delivers cloud-like texture that holds its shape for hours, perfect for topping desserts or filling pastries. I’ve tested countless variations, and this foolproof technique always delivers restaurant-quality results.
For this recipe, you’ll need just 2 cups of cold heavy cream (35-40% fat for best stability), 2 tablespoons of powdered sugar (or granulated), and 1 teaspoon of vanilla extract (optional). The cold bowl and whisk are critical—they prevent the cream from warming up too quickly, which causes butter separation.
If you’re short on time, place your mixing bowl and beaters in the freezer for 10 minutes before starting.
What you’ll end up with is fluffy, glossy whipped cream that peaks perfectly—neither grainy nor buttery. The sugar stabilizes the mixture, while the vanilla adds depth without overpowering.
This version holds its shape for 4-6 hours in the fridge, making it ideal for decorating cakes, filling cupcakes, or topping fresh berries. The texture is so light, it melts in your mouth rather than feeling heavy.
For extra stability, add 1 tablespoon of meringue powder (available in baking sections) if you’re serving it outdoors or in warm weather. Store leftovers in an airtight container with parchment paper pressed against the surface to prevent a skin from forming.
Whether you’re piping it onto a slice of pie or dolloping it over warm chocolate sauce, this whipped cream will elevate any dessert.
Ingredients for 2 cups whipped cream
Four simple components transform into restaurant-quality whipped cream in minutes.
| Ingredient | Amount | Notes |
|---|---|---|
| Heavy Whipping Cream (35-40% fat) 🥛 | 2 cups | Cold from refrigerator |
| Powdered Sugar 🍚 | 2 tbsp | Or granulated sugar finely sieved |
| Vanilla Extract 🌿 | 1 tsp | Pure vanilla preferred |
| Meringue Powder 🍰 | 1 tbsp | Optional for extra stability |
| Cold Bowl 🍽️ | 1 whole | Metal preferred, chilled 10 mins |
| Hand Mixer or Whisk 🔄 | 1 whole | Clean, dry attachments |
| Parchment Paper 📄 | 1 sheet | For storage coverage |
The heavy cream is non-negotiable here—35-40% fat content is key for that cloud-like texture. Trader Joe’s and Whole Foods carry the best brands like Organic Valley or Land O’Lakes Heavy Whipping Cream. Avoid ultra-pasteurized; it whips poorly. Keep everything cold: freeze your mixing bowl and beaters for 10 minutes if you’re in a hurry. The powdered sugar stabilizes the cream, but if you only have granulated, sift it first to avoid graininess. Vanilla extract adds depth, but it’s optional—skip it if you’re topping something already flavored like berries or chocolate sauce.
No meringue powder? Cornstarch at half the amount works in a pinch, but it won’t be as stable. Running out of vanilla? Almond extract at one-third the amount gives a similar floral note. The cream must be cold from the fridge—never let it sit at room temperature. If your cream starts to curdle or separate, it’s because it warmed up too quickly. For extra stability, especially if serving outdoors, add the meringue powder. It’s a game-changer for heat or humidity. And if you’re using a hand mixer, start on low speed to avoid overmixing, which causes butter separation.
Whipped cream is best used immediately, but it keeps beautifully in the fridge for 4-6 hours if stored properly. Press a sheet of parchment paper directly on the surface before sealing the container—this prevents a skin from forming. For longer storage, freeze in an airtight container for up to 1 month. When ready to use, let it sit at room temperature for 10 minutes to soften slightly. Pro tip: add a pinch of salt if you’re using it for savory applications like topping chili or tacos—it balances the sweetness perfectly.
Why You’ll Love This Recipe
- No Fuss, Big Payoff: I swear by this—just cream, sugar, and a cold bowl. No fancy gadgets, no waiting for hours; the meringue powder does the heavy lifting while I sip my coffee.
- Velvet Cloud Magic: That 35% fat cream? It’s the difference between fluffy and flat. Add a splash of vanilla, and suddenly, everything—pie, hot chocolate, or plain—feels like a dessert upgrade.
- Party in a Bowl: Birthday cake? Coffee bar? Kids’ snack emergency? This recipe scales like a dream. Make 2 cups, or double it for a crowd—same effort, zero stress.
- Budget-Friendly Luxury: Honestly, this is how I treat myself. Heavy cream isn’t cheap, but a little goes a long way, and the meringue powder stretches it further than store-bought. Worth every penny for that restaurant-quality finish.
Step-by-step instructions for perfect whipped cream
Here’s how to transform simple ingredients into a cloud of light, airy whipped cream every time.
Chill All Equipment Thoroughly
Place the cold bowl in the freezer for 10 minutes before starting—this is non-negotiable. Cold equipment prevents the cream from warming too quickly, which is the #1 reason whipped cream fails. While the bowl chills, make sure the 2 cups heavy whipping cream (35-40% fat) is cold from the refrigerator. I like to give it an extra 5 minutes in the freezer if I’m nervous about temperature.
Also, chill the beaters of your hand mixer or whisk in the freezer for 5 minutes. The cream needs to stay below 40°F throughout whipping, and any warm metal will transfer heat to the mixture. This pre-chilling step creates the ideal foundation for stable, voluminous whipped cream that holds its shape.
Whip the Cream to Soft Peaks
Pour the 2 cups heavy whipping cream (35-40% fat) into the chilled bowl and attach the beaters. Start your hand mixer or whisk on medium speed and let it run for 1 minute to break up any surface tension. This initial mixing ensures even incorporation of air.
Increase the speed to high and whip for 2-3 minutes until the cream forms soft peaks. You’ll know it’s ready when the whipped cream holds its shape briefly when the beaters are lifted, but the tip still flops over. This stage is crucial—over-whipping leads to butter, while under-whipping gives you flat, soupy cream. I always check by lifting the beaters every 30 seconds after the 2-minute mark.
Add Sweetener and Stabilizer
With the mixer still running on medium speed, gradually add the 2 tbsp powdered sugar and 1 tbsp meringue powder through the side of the bowl. The meringue powder acts as a stabilizer, preventing deflation and creating a firmer texture. I like to sift the powdered sugar first to avoid clumps, which can create lumps in the whipped cream.
Continue mixing on medium speed for 30 seconds to fully incorporate the dry ingredients. The mixture should look smooth and homogeneous. If you see any sugar granules, add 1 tablespoon of cold cream and mix briefly to dissolve them completely. This step ensures even sweetness and stability throughout the whipped cream.
Finish with Flavor and Test Stability
Reduce the mixer speed to low and add the 1 tsp vanilla extract through the side of the bowl. Mix for 15 seconds to distribute the flavor evenly. The vanilla should blend seamlessly without creating streaks. At this point, the whipped cream should be at stiff peaks—when the beaters are lifted, the cream should stand straight up for a second before slowly collapsing.
To test stability, press the back of a spoon into the whipped cream. If it holds its shape and doesn’t spread immediately, it’s ready. If it’s too soft, whip for another 10-15 seconds on medium speed. If it’s too stiff, gently fold in 1 tablespoon of cold cream to lighten the texture. This final adjustment ensures the perfect balance between structure and airiness.
Store Properly for Maximum Freshness
Immediately transfer the whipped cream to an airtight container lined with parchment paper. The parchment prevents the cream from sticking to the container and helps maintain its texture. Press the parchment paper directly onto the surface of the whipped cream to create a smooth, even layer.
Cover the container with a lid and refrigerate for up to 24 hours. When ready to use, gently fold the whipped cream with a spatula to restore its airy texture. If it has deflated slightly, whip briefly on medium speed for 10-15 seconds to revive it. This storage method preserves the whipped cream’s lightness and prevents it from becoming grainy or watery.
Pro Tips For Making 2 Cups Whipped Cream
- CHILL THE CREAM FIRST: I learned this the hard way—skipping the fridge step when the cream is still fridge-cold is a recipe for disaster. Pop the heavy whipping cream in the fridge for 15-20 minutes before whipping, even if it’s already cold. The temperature difference makes all the difference when you’re aiming for stiff peaks.
- SIFT THE MERINGUE POWDER: Sounds weird, but it works: sift the meringue powder directly into the cream before whipping. This prevents clumping and ensures it dissolves evenly, giving you that ultra-stable texture without graininess. (Yes, even if you’re impatient like me.)
- WHIP IN STAGES: Don’t dump all the powdered sugar at once—add half first, whip until soft peaks form, then add the rest. This keeps the cream light and airy instead of turning it into a dense, sugary mess. Think of it like folding in flour for a cake, but faster.
- USE A COLD METAL BOWL: Plastic absorbs heat and makes the cream fight you. A cold metal bowl stays chill longer, helping the cream whip faster and hold its shape. Stick it in the freezer for 5 minutes before starting—your future self will thank you when the peaks form in under 2 minutes.
Storing and reheating this recipe
Fridge Storage Secrets
Store your whipped cream in an airtight container with a sheet of parchment paper pressed directly onto the surface—this prevents a skin from forming and keeps it smooth. I like to use glass containers because they don’t absorb odors, and I always press the parchment firmly to eliminate air pockets.
Keep it refrigerated for up to 4-6 hours for best texture, though it’ll last 24 hours if stored properly. The key is to minimize exposure to air and temperature fluctuations. ✨
Freezer Revival Tips
For longer storage, freeze whipped cream in an airtight container for up to 1 month. When ready to use, let it thaw in the fridge overnight for 6-8 hours—never microwave it, as heat will destroy the delicate structure.
Once thawed, gently fold with a spatula to restore its airiness. If it’s too stiff, whip briefly on medium speed for 10-15 seconds to revive it. This method works best for batch prep when you know you’ll need it later in the week. ❄️
Reviving Deflated Cream
If your whipped cream has lost its volume after refrigeration, don’t toss it! Place it in a chilled bowl and whip on medium speed for 1-2 minutes—this reintroduces air and restores that cloud-like texture. For extra stability, add ½ teaspoon of meringue powder while whipping.
If it’s still too soft, fold in 1 tablespoon of cold heavy cream to lighten it back up. This trick saves perfectly good cream from going to waste. 🔄
Serving Temperature
Whipped cream tastes best when served chilled but not ice-cold. Let it sit at room temperature for 5-10 minutes before using to soften slightly—this makes it easier to pipe or dollop.
For hot desserts like warm chocolate cake or apple pie, use it straight from the fridge for that cool contrast. If you’re topping something cold, like berries or chilled cheesecake, let it warm up a bit first to avoid a temperature shock. 🍰
Preventing Butter Separation
If your whipped cream starts to curdle or separate, it’s usually because it warmed up too quickly. To fix it, place the container in an ice bath for 5 minutes to cool it down, then whip again on low speed for 30 seconds.
For future batches, avoid overmixing—stop as soon as you reach stiff peaks. Also, make sure your bowl and beaters are ice-cold before starting. This simple step keeps your whipped cream smooth and stable every time. ⚡
Portioning for Efficiency
Divide whipped cream into smaller airtight containers (like ½-cup portions) if you won’t use it all at once. This prevents repeated opening and closing, which introduces air and causes deflation.
Label each container with the date—whipped cream freshness peaks within 4-6 hours but can last up to 24 hours if stored perfectly. For parties, portion it into piping bags or small bowls to keep it fresh and ready to use.
This method saves time and ensures every bite is fluffy. 💫
Nutrition facts
Frequently asked questions
Can I use light cream instead of heavy cream?
No, heavy whipping cream (35-40% fat) is essential—it contains enough fat to trap air properly. Light cream (20% fat) won’t whip up properly and will turn buttery instead. If you only have light cream, try adding 1 tablespoon of melted butter per cup to boost fat content, but results may still be less stable.
Why did my whipped cream turn grainy?
Graininess happens when sugar crystals aren’t fully dissolved or when the cream warms too quickly. Always sift powdered sugar and add it gradually while mixing. If you used granulated sugar, make sure it’s finely sieved first. Also, keep your bowl and beaters ice-cold throughout the process.
How do I make whipped cream without a mixer?
Use a hand whisk in a chilled bowl—it takes more elbow grease but works! Whip the cream vigorously for 5-7 minutes until soft peaks form. For extra stability, add 1 tablespoon of cold water to dissolve sugar better. The key is patience—stop as soon as you see volume increase.
Can I make this recipe vegan?
Yes! Replace heavy cream with 2 cups full-fat coconut cream (chilled overnight) and add 1 teaspoon of agar-agar powder (a plant-based stabilizer). Whip in a chilled bowl for 3-4 minutes—it won’t whip as high as dairy cream but will still hold shape briefly. For flavor, use vanilla extract or coconut milk powder.
What’s the best way to pipe whipped cream?
Use a piping bag with a large star tip (Wilton #1M or #2D). Fill the bag with whipped cream, cut a small corner, and pipe in smooth motions. For rosettes, hold the bag vertically and squeeze gently. If the cream is too stiff, let it sit at room temperature for 5 minutes** before piping. Pro tip: Twist the bag gently while piping to create swirls.

- 6 Egg Cake Recipe with Oil: Light as Air With Buttery Moisture - October 4, 2026
- 4 Bean Casserole Recipe: One-Pan Heartiness With Smoky Paprika Depth - October 4, 2026
- 3-Ingredient Keto Mug Cake Recipe: Microwave Magic in 2 Minutes - October 4, 2026