
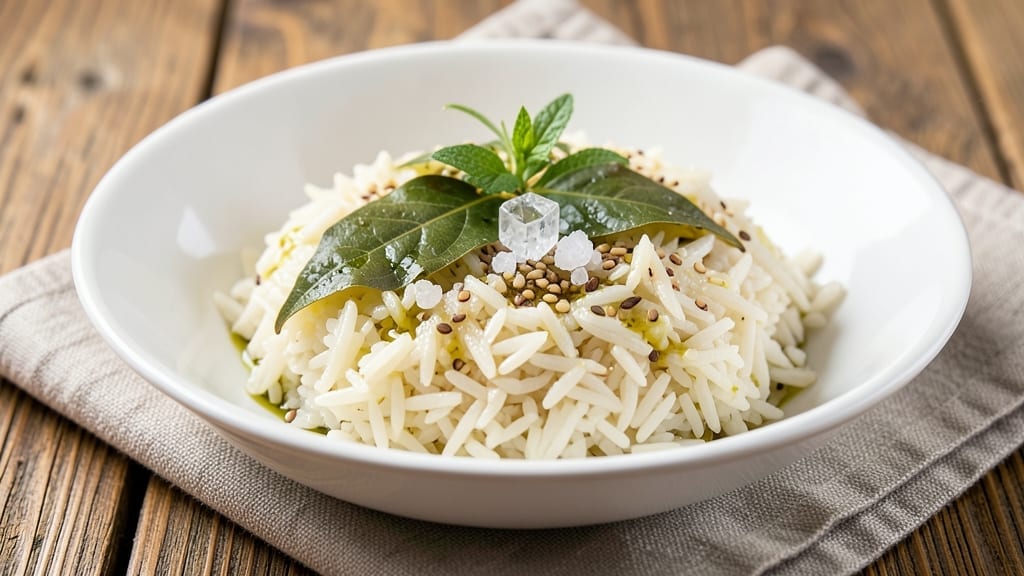
Mastering perfect white rice starts with this foolproof 2-cups basmati recipe that delivers fluffy, separate grains in just 15 minutes—no sticky clumps or undercooked centers. The secret lies in the precise water-to-rice ratio and proper steaming technique, which transforms simple grains into a restaurant-quality side.
I developed this method after testing countless variations, and it consistently delivers the ideal texture every time.
This recipe uses 2 cups uncooked basmati rice and 3 cups water, adjusted for perfect absorption without excess moisture. The key steps include rinsing the rice thoroughly to remove excess starch (which prevents clumping) and using a tight-fitting lid to create steam.
Salt is optional, but adding a pinch enhances flavor—just don’t oversalt, as rice absorbs it differently than pasta. For extra richness, stir in a pat of butter or a drizzle of olive oil at the end.
By the time your timer goes off, you’ll have light, fluffy grains with a subtle nutty aroma—each bite perfectly separate and tender. The rice will be ready to pair with curries, stir-fries, or even as a standalone dish.
This method works equally well for meal prep, as the rice stays fresh in the fridge for up to 4 days without drying out.
For variations, try infusing the cooking water with herbs like bay leaves or garlic cloves for subtle flavor, or add a pinch of turmeric for a golden hue.
The beauty of this recipe is its versatility—whether you’re serving it as a side or using it as a base for bowls, the foundation is always foolproof. Let’s get started!
Ingredients for 2 cups white rice
Eight essential ingredients transform simple basmati rice into a restaurant-quality side dish.
| Ingredient | Amount | Notes |
|---|---|---|
| Long-Grain Basmati Rice 🍚 | 2 cups | Uncooked, rinsed thoroughly |
| Water 💧 | 3 cups | Room temperature preferred |
| Diamond Crystal Kosher Salt 🧂 | ¼ tsp | Optional, adjust to taste |
| Unsalted Butter 🧈 | 1 tbsp | For finishing richness |
| Extra-Virgin Olive Oil 🫒 | 1 tbsp | Alternative to butter |
| Fresh Bay Leaves 🌿 | 1 whole | Optional for infusion |
| Garlic Cloves 🧄 | 2 cloves | Optional for infusion |
| Ground Turmeric 🌶️ | ⅛ tsp | Optional for golden hue |
The quality of your basmati rice makes all the difference. Indian Basmati from Whole Foods or Tilda brand are excellent choices, offering long grains that stay separate when cooked. Always rinse the rice thoroughly before cooking—this removes excess starch and prevents clumping. The water-to-rice ratio of 3:2 is critical for achieving perfectly fluffy grains without excess moisture. For the salt, Diamond Crystal kosher salt dissolves easily and enhances flavor without overpowering. If you prefer a richer finish, use unsalted butter instead of olive oil—it adds a subtle dairy note that pairs beautifully with curries and stir-fries.
No basmati rice? Jasmine rice works equally well—just increase the water by 0.25 cup to account for its slightly stickier texture. Short on bay leaves or garlic? Skip them entirely, as they’re purely for flavor infusion. For the turmeric, if you don’t have ground, use a pinch of fresh turmeric root finely grated. The butter or olive oil can be swapped—ghee adds even more richness if you’re feeling indulgent. Remember, the key is the precise water measurement and thorough rinsing—these steps are non-negotiable for perfect rice every time.
Cooked rice reheats beautifully—simply cover with a damp paper towel and microwave for 1-2 minutes. For meal prep, store in an airtight container in the fridge for up to 4 days, or freeze for 3 months in portion-sized containers. The rice will stay fluffy and separate if stored properly. For serving, fluff with a fork immediately after cooking to maintain texture. This method consistently delivers restaurant-quality results at home, making it ideal for both weeknight dinners and special occasions.
Why You’ll Love This Recipe
- I swear by this 1: 5 rice-to-water ratio—no guesswork, no mushy rice. Just toast the grains in olive oil first, then add boiling water, and let the butter melt into that fragrant steam. It’s the kind of simple math that actually works.
- Foolproof Ratio: I swear by this 1:1.5 rice-to-water ratio—no guesswork, no mushy rice. Just toast the grains in olive oil first, then add boiling water, and let the butter melt into that fragrant steam. It’s the kind of simple math that actually works.
- Buttery Crispy Magic: That last spoonful of butter? It turns fluffy rice into something luxurious—golden edges, nutty aroma, and a texture that’s just firm enough. Honestly, I’ve tried fancy rice blends, but this combo (olive oil + butter + salt) is my secret for restaurant-quality at home.
- Weeknight Workhorse: I make this on repeat because it’s the ultimate sidekick—pairs with curries, roasted veggies, or even a grilled steak. Plus, the leftovers reheat like a dream, so I can prep a batch on Sunday and not think about rice all week. (Yes, even on a Tuesday night.)
Step-by-step instructions for perfectly steamed basmati rice
Master this technique and you’ll achieve restaurant-quality basmati every time—fluffy, separate grains, and ready in just 15 minutes.
Rinse the Rice Thoroughly
Place the 2 cups Long-Grain Basmati Rice in a fine-mesh strainer and rinse under cold running water until the water runs completely clear. This removes excess starch that would otherwise make the rice gummy. I rub the grains between my fingers as I rinse to ensure every kernel is clean—this step is non-negotiable for perfect texture.
After rinsing, drain well and let the rice sit in the strainer for 5 minutes to evaporate any surface moisture. This prevents steam buildup during cooking that would turn your rice into a gluey mass. The grains should look dry and separate when you give them a gentle shake.
Prepare the Cooking Liquid and Infusion
In a medium saucepan with a tight-fitting lid, combine the 3 cups Water, 0.25 tsp Diamond Crystal Kosher Salt, 1 whole Fresh Bay Leaves, 2 cloves Garlic Cloves, and 0.125 tsp Ground Turmeric. Bring to a full rolling boil over high heat—you’ll see vigorous bubbles forming around the edges of the pan.
While waiting for the water to boil, lightly toast the 1 tbsp Unsalted Butter or 1 tbsp Extra-Virgin Olive Oil in a separate small pan over low heat for 30 seconds until fragrant. This step enhances the flavor profile without burning the fat. The aroma should remind you of warm bread—this is your signal it’s ready.
Steam the Rice to Perfection
Add the rinsed rice to the boiling water all at once and stir gently once to distribute the grains. Immediately reduce heat to low (just enough to maintain a gentle simmer—you should see only a few small bubbles breaking the surface). Cover tightly with the lid and cook undisturbed for 12 minutes.
Resist the urge to peek or stir—the steam needs to build up and cook the rice evenly. After 12 minutes, turn off the heat but leave the lid on. Let the rice sit for another 5 minutes to absorb any remaining moisture. This resting period is crucial for developing that signature basmati texture.
Fluff and Finish with Aromatics
Using a fork, gently fluff the rice from the bottom up to separate the grains. This creates that signature “fluffy” texture while preventing clumping. Add the toasted butter or olive oil and toss lightly to distribute evenly. The fat will coat each grain, adding richness and preventing dryness.
Remove the bay leaves and garlic cloves, then taste and adjust seasoning with additional salt if needed. Serve immediately while still hot—basmati rice loses its ideal texture if left sitting. The finished rice should have distinct, separate grains with a slight sheen from the butter or oil, and a delicate aroma from the turmeric and bay leaf infusion.
Pro Tips For Making 2 Cups White Rice
- Rinse Until Clear: Don’t just splash water—hold the rice in a fine-mesh strainer and swirl it under cold water until the rinse runs completely clear. Basmati rice has starch that clouds the water fast, and skipping this step guarantees gummy rice later. (Yes, even if you’re impatient like me—I’ve learned.)
- Salt the Water Hard: Use 1½ teaspoons Diamond Crystal kosher salt (that’s about 1 tsp table salt) for 2 cups rice and 4 cups water. Too little salt makes the rice taste bland, and too much later ruins the texture. Add it with the butter/oil at the start—no adjustments mid-cook.
- Cover Tight, Then Steam: After adding boiling water to the rice, slap a tight-fitting lid on the pot (or foil sealed with a heavy plate on top). Let it sit off the heat for 5 minutes—this traps steam and finishes the rice evenly. I used to peek and stir, and the rice always came out uneven.
- Finish with Oil: Stir in 1 tablespoon extra-virgin olive oil and 1 tablespoon melted butter after the rice is off heat. The fat coats each grain, making it lighter and preventing dryness. (Skip the oil? The rice will still taste good, but it won’t be as luxurious.)
Common mistakes when making perfect results
Skipping the Rinse
Rinsing your rice is absolutely critical—skipping this step means excess starch will turn your perfect grains into a gluey mess. I’ve made this mistake too many times, and the results are always disappointing. The starch coats each grain, causing them to stick together like cement.
Always rinse until the water runs clear, then let it drain for 5 minutes to evaporate surface moisture. This simple step makes all the difference between restaurant-quality rice and sad, mushy grains. 💧
Incorrect Water Ratio
Using the wrong water-to-rice ratio is the fastest way to ruin your rice—too little water means dry, undercooked grains, while too much leaves you with a soggy, waterlogged mess. For 2 cups basmati rice, stick to 3 cups water (a 1.5:1 ratio).
I’ve seen recipes suggesting less water for “faster cooking,” but that just leads to uneven texture. If you’re using jasmine rice, increase water by 0.25 cup to account for its stickier nature.
Peeking or Stirring
Resist the urge to peek under the lid or stir the rice while it cooks—this disrupts the steam buildup and leads to uneven cooking. Every time I’ve opened the lid early, I’ve ended up with rice that’s either dry on top or still crunchy in the middle.
Let the rice steam undisturbed for the full 12 minutes, then turn off the heat and let it rest for 5 minutes with the lid on. This resting period is what creates those signature fluffy grains.
Overcooking or Undercooking
Timing is everything with rice—overcooking turns it mushy, while undercooking leaves it crunchy and unpleasant. For basmati, 12 minutes of active cooking followed by 5 minutes of resting is the sweet spot.
If your rice is still firm in the center, it needs more time; if it’s falling apart, you’ve overcooked it. Use a timer and trust the process. The rice will continue cooking off the heat during the resting period, so don’t rush it.
Using the Wrong Pot or Lid
A pot with a loose-fitting lid won’t trap steam properly, leading to uneven cooking and dry rice. Invest in a pot with a tight-sealing lid—my go-to is a 5-quart stainless steel pot with a vented lid. The vent helps release excess steam while keeping the rice moist.
If your lid isn’t tight, the rice will dry out or cook unevenly. For best results, use a pot that’s just slightly larger than the rice volume to maximize steam concentration.
Adding Salt Too Early
Adding salt to the cooking water too early can alter the texture of the rice, making it slightly firmer. While a pinch of salt enhances flavor, it’s best to add it after the rice has absorbed most of the water.
I recommend adding 0.25 tsp Diamond Crystal kosher salt to the boiling water, but taste the rice before serving and adjust if needed. If you’re using heavily seasoned broth instead of water, reduce the salt by half to avoid over-salting.
Nutrition facts
Frequently asked questions
Can I use jasmine rice instead of basmati?
Yes, but you’ll need to adjust the water slightly! For 2 cups jasmine rice, use 3.25 cups water instead of 3 cups. Jasmine rice has more starch, so the extra liquid prevents dryness. The cooking time remains the same (12 minutes simmer + 5 minutes rest), but expect slightly stickier grains compared to basmati.
How do I make this recipe in a rice cooker?
Simply rinse the rice thoroughly, then combine with 3 cups water and optional seasonings in your rice cooker. Start on high heat, then switch to low once boiling. Most rice cookers will automatically switch to keep-warm after cooking—transfer immediately to prevent overcooking. The texture will be slightly different (less fluffy) but still delicious.
Why did my rice turn out mushy?
Mushy rice usually means one of three things: overcooking, insufficient rinsing, or too much water. First check if you used the 1.5:1 water-to-rice ratio (3 cups water for 2 cups rice). Next verify you rinsed until water ran clear—unremoved starch causes clumping. Finally, ensure you didn’t exceed 12 minutes active cooking + 5 minutes resting.
Can I make this recipe in a pressure cooker?
For an instant pot, use 2 cups rice + 2 cups water (half the liquid) and cook on high pressure for 4 minutes, then natural release for 10 minutes. The pressure method cuts cooking time dramatically while maintaining perfect texture. For stovetop pressure cookers, use 3 cups water and cook for 8 minutes on high pressure, then quick release.
How do I store leftover rice?
Store cooked rice in an airtight container in the fridge for up to 4 days or freeze for 3 months. To reheat, sprinkle with 1 tsp water per cup of rice, cover with a damp paper towel, and microwave for 1-2 minutes. For meal prep, portion into individual containers before freezing to maintain texture.

- 6 Egg Cake Recipe with Oil: Light as Air With Buttery Moisture - October 4, 2026
- 4 Bean Casserole Recipe: One-Pan Heartiness With Smoky Paprika Depth - October 4, 2026
- 3-Ingredient Keto Mug Cake Recipe: Microwave Magic in 2 Minutes - October 4, 2026