
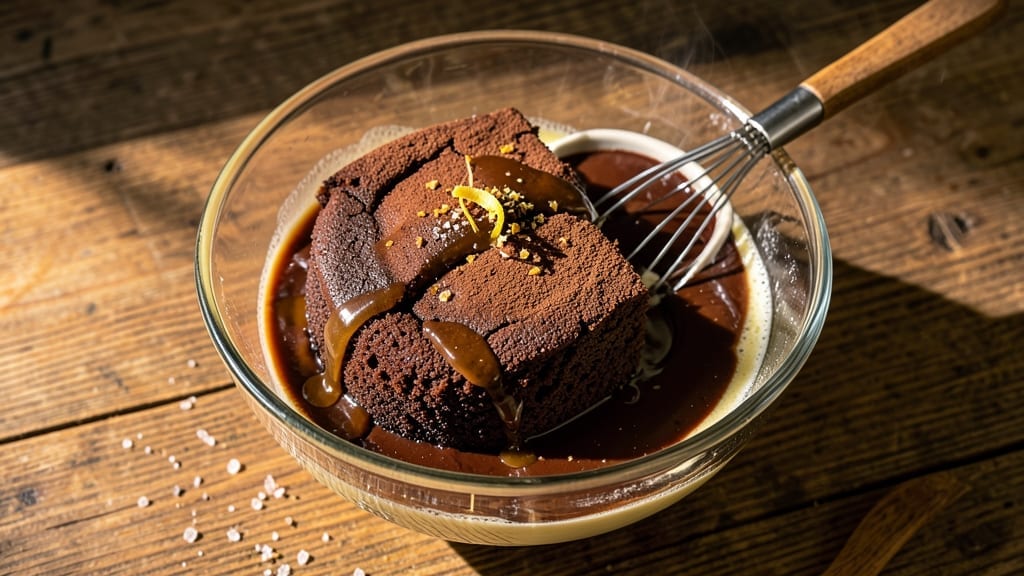
This 2-egg chocolate cake recipe delivers the perfect balance of ultra-moist crumb and fudgy layers without requiring a single extra egg or heavy butter. The secret lies in a precise ratio of all-purpose flour to cocoa powder combined with a touch of instant espresso powder—trust me, it makes all the difference. I’ve baked this cake dozens of times, and it never fails to impress with its rich chocolate flavor and tender texture that holds up beautifully for slicing.
The recipe relies on simple pantry staples: just two eggs, a cup of sugar, and basic baking ingredients, yet it achieves professional-level results.
What sets this apart is the moisture technique—using buttermilk instead of regular milk creates a lighter, more tender crumb, while melted butter ensures a velvety texture without making the cake too dense.
The cake bakes up with a slightly domed top and a crackly crust that gives way to a fudgy interior.
By the time it emerges from the oven, you’ll have a cake that’s perfectly moist in the center, with a subtle crunch on the edges and a rich chocolate aroma that fills your kitchen.
The layers are dense enough to hold their shape when sliced but tender enough to melt in your mouth. This is the kind of chocolate cake that satisfies even the most discerning chocolate lovers without requiring advanced baking skills.
Whether you’re serving it at a birthday celebration or simply treating yourself to a slice, this recipe delivers restaurant-quality results with minimal effort.
The beauty of this cake is its versatility—it works equally well as a single layer cake, layered with cream cheese frosting, or as a simple sheet cake with a dusting of powdered sugar. Let’s get baking!
Ingredients for 2 egg chocolate cake
Just 12 ingredients for a cake that tastes like it came from a bakery.
| Ingredient | Amount | Notes |
|---|---|---|
| All-Purpose Flour 🌾 | 1 ½ cups | Sifted for light texture |
| Unsweetened Cocoa Powder 🍫 | ½ cup | Natural or Dutch-processed |
| Granulated Sugar 🍚 | 1 ¼ cups | White or light brown |
| Large Eggs 🥚 | 2 whole | Room temperature preferred |
| Buttermilk 🥛 | 1 cup | Homemade or store-bought |
| Melted Unsalted Butter 🧈 | ½ cup | Cooled slightly before mixing |
| Instant Espresso Powder ☕ | 1 tbsp | Enhances chocolate depth |
| Baking Powder 🧂 | 1 ½ tsp | Aluminum-free preferred |
| Salt 🧂 | ½ tsp | Fine sea salt |
| Vanilla Extract 🌸 | 1 tsp | Pure alcohol-free if preferred |
| Vegetable Oil 🫒 | ¼ cup | Light neutral flavor |
| Hot Water 💧 | ¼ cup | For blooming cocoa |
The cocoa powder is non-negotiable here—Hershey’s Special Dark or Dutch-processed brands give the richest flavor. Grab the bulk bin at Whole Foods if you can, but the regular grocery store stuff works fine. The espresso powder? Starbucks or Nescafé work great—just don’t skip it. That’s what deepens the chocolate flavor without extra eggs. For the buttermilk, if you don’t have any, mix 1 tablespoon lemon juice or vinegar with 1 cup milk and let it sit for 5 minutes. Trust me, it’s worth the extra minute.
No buttermilk? Plain yogurt thinned with milk works in a pinch. Running low on vanilla? Almond extract at half the amount gives a nice twist. The vegetable oil can be swapped for melted butter if you prefer, but it keeps the cake tender without adding richness. For the sugar, brown sugar adds moisture but changes the texture slightly—white keeps it classic. And if you’re curious, the hot water is just to bloom the cocoa powder before mixing. No fancy equipment needed, just a bowl and whisk.
This batter keeps for 24 hours in the fridge if you want to prep ahead. Once baked, it’s best eaten within 3 days—the moisture starts to fade after that. I like to wrap it tightly in plastic wrap and store it at room temperature if I’m not serving it right away. Freezing? It’s not ideal for this recipe—the texture gets a little dry when thawed. But if you must, slice it before freezing and reheat briefly in the oven.
Why You’ll Love This Recipe
- Two Ingredients Only: Mixing just flour, cocoa, sugar, eggs, and buttermilk—no fancy substitutions, no extra bowls. Honestly, I’ve made this while scrolling through my phone, and it still comes out moist and rich every time.
- Rich Without Guilt: That buttermilk keeps it tender, while the cocoa delivers deep, bittersweet chocolate flavor. No one will guess it’s made with just two eggs—trust me, it’s the kind of cake that disappears faster than my willpower on a bad day.
- Weeknight Magic: Bake it for breakfast, dessert, or a last-minute gift. Slice a single serving for a quick treat or double the batter for a crowd—it’s my go-to when I need something impressive with zero stress.
- Budget-Friendly Luxury: Uses pantry staples you already own, and leftovers? They’re even better the second day. I’ll be real: this is the cake I reach for when I want to feel fancy without breaking the bank.
Step-by-step instructions for 2 egg chocolate cake
Here’s how to bake that ultra-moist, fudgy chocolate cake using just two eggs.
Bloom the Cocoa for Maximum Flavor
Start by whisking together the 0.5 cup unsweetened cocoa powder and 0.25 cup hot water in a small bowl. This step, called blooming, intensifies the chocolate flavor and prevents streaks in the finished cake. Let it sit for 5 minutes while you prepare the rest of the ingredients. You’ll notice the mixture will thicken slightly and develop a deeper, richer aroma—this is your signal that the cocoa is fully activated.
While waiting, preheat your oven to 350°F and grease two 6-inch round cake pans or one 9-inch round pan with nonstick spray or melted butter. Line the bottoms with parchment paper for easy removal. I like to use round pans because they give a more elegant presentation, but square pans work too if that’s what you have on hand.
Mix Wet Ingredients for Light, Airy Texture
In a separate large bowl, combine the 1.25 cups granulated sugar, 2 whole large eggs, 1 cup buttermilk, 0.5 cup melted unsalted butter, 1 tbsp instant espresso powder, 1 tsp vanilla extract, and 0.25 cup vegetable oil. Whisk vigorously for 2-3 minutes until the mixture is smooth and slightly thickened. You’ll see it lighten in color and become almost ribbony—this incorporates air that helps create that tender crumb.
Here’s the thing—don’t skip the espresso powder. It might seem odd, but it deepens the chocolate flavor without making the cake taste like coffee. The buttermilk adds moisture and tenderness, while the oil ensures that fudgy texture we’re after. If your butter is too hot, let it cool slightly before mixing to prevent the eggs from scrambling.
Combine Dry Ingredients Gently
Sift together the 1.5 cups all-purpose flour, 1.5 tsp baking powder, and 0.5 tsp salt in a medium bowl. This sifting step prevents lumps and ensures an even distribution of leavening. Gently fold the dry ingredients into the wet mixture using a spatula, mixing just until combined. You should still see some flour streaks—overmixing develops gluten and makes the cake tough. Stop as soon as the batter looks uniform.
Now, slowly pour in the bloomed cocoa mixture while gently folding it in. The batter will be thick but pourable. If it seems too thick, you can add 1-2 tablespoons of milk to loosen it slightly. The color should be a deep, rich chocolate brown. Give it one final stir to make sure everything is evenly incorporated. This is your last chance to check for any dry spots or uneven mixing.
Bake Until Perfectly Set
Divide the batter evenly between your prepared pans. For round pans, fill them about 2/3 full. Tap the pans gently on the counter a few times to release any air bubbles that might have formed. Bake in the preheated oven for 25-30 minutes for 6-inch pans or 30-35 minutes for a 9-inch pan. The cakes are done when a toothpick inserted in the center comes out clean with maybe just a few moist crumbs clinging to it.
Don’t overbake—this is where many cakes go wrong. The moment that toothpick test passes, remove the cakes from the oven immediately. Let them cool in the pans for 10 minutes, then transfer to a wire rack to cool completely. The cooling process is crucial—it allows the cakes to set properly and prevents them from becoming gummy. If you cut into them too soon, they’ll be too moist and fall apart.
Layer and Frost for Ultimate Decadence
Once completely cool, level the tops of the cakes if needed using a serrated knife. For a classic layered cake, place one cake layer on a plate and spread a thin layer of your favorite chocolate frosting. Place the second layer on top, then spread frosting over the entire cake. I like to use a simple buttercream or ganache for this recipe—both complement the rich chocolate flavor beautifully.
Chill the cake in the refrigerator for 30 minutes before serving to help the frosting set. This waiting time ensures clean slices and prevents a messy plate. When you’re ready to serve, cut into generous slices and watch as the moist crumb and fudgy layers melt in your mouth. The secret to this cake’s success lies in the careful balance of ingredients and the gentle mixing technique—no shortcuts here if you want that perfect texture.
Pro Tips For Making 2 Egg Chocolate Cake
- Whisk Eggs Until Ribbon Stage: The eggs in this cake aren’t just there to bind—they’re what makes it tender. Beat them until the mixture holds a slow ribbon when the whisk is lifted (about 30 seconds longer than you think). I learned this the hard way when my first two-egg cake turned out dense—turns out, under-whipped eggs don’t emulsify properly with the cocoa and buttermilk.
- Sift the Cocoa Twice: Unsweetened cocoa powder clumps like a grumpy cat if you don’t treat it right. Sift it before measuring into the dry ingredients, then sift it again right into the bowl. This ensures even distribution, so every bite has that deep chocolate flavor instead of pockets of bitter dust. (Yes, it’s extra work, but your cake will taste like it.)
- Don’t Overmix the Batter: Once you fold in the buttermilk, stop mixing after one turn with a spatula. Overmixing develops gluten in the flour, and that’s how you end up with a cake that’s more cakey than moist. The batter will look lumpy—that’s fine. Lumps disappear in the oven, but overworked gluten doesn’t.
- Bake Until Slightly Underdone: This cake needs to carryover cook—pull it out when the edges are set but the center still jiggles just a tiny bit (about 30 seconds before the recipe’s suggested time). If you bake it all the way to “done,” it’ll dry out faster than a forgotten sponge. Tent it with foil the last 5 minutes if your oven runs hot.
Make-ahead tips for this 2 egg chocolate cake
Batter Prep Ahead
Mix the batter up to 24 hours in advance and store it in an airtight container in the refrigerator. The flavors meld beautifully overnight, and the buttermilk continues to tenderize the flour.
When ready to bake, let the batter sit at room temperature for 30 minutes before pouring into pans—this ensures even baking. I always make a double batch and freeze half the batter in a ziplock freezer bag for future cravings. 💫
Baked Cake Storage
Once fully cooled, wrap the baked cake tightly in plastic wrap or aluminum foil. Store at room temperature for up to 3 days—the moisture stays perfect this way. For longer storage, slice the cake and freeze individual portions between layers of parchment paper.
Reheat frozen slices in the microwave for 10-15 seconds to restore that fudgy texture. 🍫
Frosting Prep
Make your frosting the day before and store it in the fridge. For buttercream, beat the chilled ingredients until fluffy, then cover with a damp towel to prevent drying. Ganache can be tempered ahead by melting chocolate with heavy cream, then cooling to a spreadable consistency.
I like to assemble the cake layers the morning of serving so the frosting stays smooth and vibrant. 🎂
Freezing Fully Assembled
For special occasions, assemble the entire cake and freeze it on a wire rack before wrapping tightly in plastic. Thaw in the fridge overnight, then bring to room temperature before serving.
The frosting may soften slightly, so chill for 15 minutes before slicing. This method works best with buttercream—ganache might become too runny when thawed. 🥶
Portion Control
Prevent waste by slicing the cake into 12 equal portions before storing. Wrap each slice individually in plastic wrap and store in a single layer in an airtight container. This makes it easy to grab just one slice when cravings strike.
For a single-serving treat, freeze individual slices between parchment paper and store in a ziplock bag for up to 2 months. 🍴
Nutrition facts
Frequently asked questions
Why does this recipe use only 2 eggs?
The secret lies in the moisture technique! Using buttermilk and vegetable oil creates a tender, fudgy texture that replaces what eggs normally provide. The espresso powder also deepens the chocolate flavor without needing extra richness. This keeps the cake light yet dense—perfect for that melt-in-your-mouth experience.
Can I substitute buttermilk if I don’t have any?
Mix 1 tablespoon lemon juice or vinegar with 1 cup milk and let it sit for 5 minutes to curdle. This homemade version works just as well. For extra richness, you could also use 1 cup plain yogurt thinned with 2 tablespoons milk—just know it’ll add a slight tang.
How do I know when the cake is fully baked?
Insert a toothpick into the center—it should come out with just a few moist crumbs, not wet batter. For 6-inch pans, bake 25-30 minutes and for 9-inch pans, 30-35 minutes. Overbaking makes the cake dry, so pull it out as soon as the toothpick test passes.
What’s the best frosting for this cake?
Buttercream or ganache work beautifully! For a classic look, use a smooth chocolate buttercream. For extra decadence, try a dark chocolate ganache. Just let the cake cool completely first—warm cake will melt the frosting. Chill the assembled cake for 30 minutes before slicing for clean cuts.
Why did my cake turn out dense instead of moist?
Overmixing the batter develops gluten, making it tough. Mix dry ingredients just until combined, and fold gently. Also check your oven—if it runs hot, reduce temperature by 25°F. Using cake flour (replace 0.25 cup all-purpose flour with cake flour) can also lighten the texture.

- 3lb Prime Rib Roast Recipe: Juicy Pink Center Guaranteed in 3 Hours - October 31, 2026
- 5 Spice Cake Recipe: Warmly Spiced Layers With Crunchy Top - October 31, 2026
- 1950’s Macaroni and Cheese Recipe: Nostalgic Creamy Cheese Sauce with Buttery Noodles - October 31, 2026