
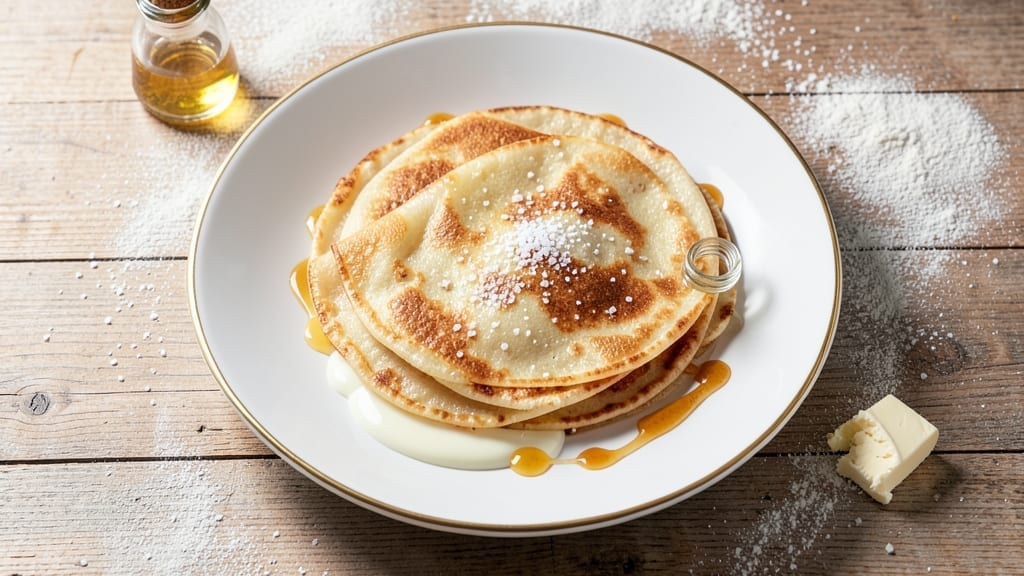
This 2-egg crepe recipe delivers the perfect balance of silky texture and rich yolk flavor—no complicated techniques required. The secret lies in a smooth batter that combines just flour, eggs, milk, and a touch of vanilla, creating thin layers that cook to golden perfection in minutes.
I’ve tested this recipe countless times, and it never fails to impress, whether you’re making sweet breakfast crepes or savory dinner wraps.
The key to success is achieving the right batter consistency—thin enough to spread effortlessly but thick enough to hold its shape when flipped. A nonstick skillet heated to medium-low ensures even cooking, while a quick wipe with a damp paper towel between crepes prevents sticking.
The result? Delicate, translucent crepes with just the right amount of set for rolling or folding.
What you’ll end up with are silky thin layers that practically melt in your mouth, each one perfectly balanced between tender and slightly firm. The subtle vanilla note enhances the richness of the eggs without overpowering the natural flavor.
These crepes are versatile enough for any meal—fill them with Nutella and berries for breakfast or ham and Gruyère for a light dinner.
Once mastered, this recipe becomes a foolproof foundation for endless variations. The batter keeps well in the fridge for up to 24 hours, and the crepes reheat beautifully. Whether you’re feeding a crowd or treating yourself to a special breakfast, this method delivers restaurant-quality results every time.
Ingredients for 2 egg crepe
Four simple ingredients make these crepes melt-in-your-mouth perfect every time.
| Ingredient | Amount | Notes |
|---|---|---|
| All-Purpose Flour 🌾 | ¾ cup | Sifted for smooth batter |
| Large Eggs 🥚 | 2 whole | Room temperature preferred |
| Whole Milk 🥛 | ¾ cup | Full-fat for creaminess |
| Pure Vanilla Extract 🌸 | ½ tsp | High-quality for flavor |
| Unsalted Butter 🧈 | 1 tbsp | For skillet coating |
| Granulated Sugar 🍚 | 1 tbsp | Optional for sweet crepes |
| Salt 🧂 | ¼ tsp | Fine sea salt preferred |
| Vegetable Oil 🫒 | 1 tbsp | For skillet preheating |
The eggs are non-negotiable here—room temperature makes all the difference. Grab the freshest eggs you can find—they whip up smoother and hold their shape better. I always buy organic eggs from the grocery store’s refrigerated section—they’re worth the extra few cents. The flour? King Arthur or Gold Medal brands are my go-tos for that silky texture. If you’re making sweet crepes, toss in that sugar; for savory, skip it. The vanilla? Pure extract, not imitation—trust me, you’ll taste the difference.
No vanilla extract? Vanilla bean paste works too, or even a pinch of vanilla sugar. Running low on milk? Almond milk or oat milk keeps things dairy-free, though full-fat milk gives the best texture. The butter matters for cooking—unsalted is best so you control the seasoning. If you’re worried about sticking, a light coating of oil in the pan is your friend. And if you’re short on eggs? Add a splash of milk to keep the batter thin, but don’t skip the eggs entirely—they’re what make these crepes magical.
Batter keeps for 24 hours in the fridge, covered. Give it a quick whisk before using. For leftovers, stack crepes with parchment between each to prevent sticking. They reheat beautifully—just 10 seconds in the microwave or a quick pan toast. Freeze extras by wrapping them in plastic wrap; they’ll last for up to 3 months. Pro tip: Label your containers—trust me, you’ll forget which ones are sweet and which are savory.
Why You’ll Love This Recipe
- Five-Ingredient Magic: I swear by this—just flour, eggs, milk, vanilla, and butter. That’s it. No measuring cups to stress over, no weird ratios to memorize. The batter comes together in seconds, and honestly? It’s the kind of recipe that makes me feel like a pro without trying.
- Vanilla-Butter Bliss: The vanilla and butter in this batter? Chef’s kiss. That first golden crepe, crisp at the edges but soft in the middle, with just a whisper of sweetness—it’s the kind of thing that makes you pause mid-bite. I’ll be real: I’ve made it plain before breakfast, and my kids still ask for seconds.
- Breakfast or Dessert: Here’s what sold me—this works anytime. Fold in Nutella for a quick dessert, or keep it simple with jam and cream. Need a fast lunch? Stuff it with scrambled eggs and cheese. Between us, I’ve even used leftover crepes as a crispy wrap for tacos. (Yes, even on a Tuesday night.)
- Zero-Waste Win: Two eggs, a splash of milk, a pat of butter—this recipe doesn’t overpromise. What’s left? A tiny bit of batter, maybe one extra crepe. No sad, half-empty containers staring at me. And if I mess up a batch? Freeze them. Thaw, reheat, and boom—breakfast is solved. My wallet and my fridge thank me.
Step-by-step instructions for silky thin crepes
Here’s how to make crepes so delicate they practically melt in your mouth.
Whisk the Batter Until Silky Smooth
In a medium bowl, combine the 0.75 cup all-purpose flour, 1 tablespoon granulated sugar, and 0.25 teaspoon salt. Whisk these dry ingredients together until fully blended—this prevents lumps later. I like to press down with a fork to break up any remaining clumps.
Next, add the 2 whole large eggs and 0.75 cup whole milk to the bowl. Pour in the 0.5 teaspoon pure vanilla extract and give it a quick stir to distribute. Now comes the magic: whisk vigorously for about 2 minutes until the batter becomes smooth and glossy. You’re looking for a consistency like heavy cream—thin enough to flow easily but thick enough to coat the pan.
Here’s the thing—don’t overmix. The batter should have a few tiny bubbles but still look uniform. If you see streaks of flour, give it another 30 seconds of whisking. The perfect batter should slide off the whisk in a slow ribbon, leaving a clean streak behind.
Rest the Batter for Maximum Flakiness
Cover the bowl with plastic wrap and let the batter rest at room temperature for 30 minutes. This resting period allows the flour to fully hydrate and the gluten to relax, which gives you those signature thin, tender layers. I know it’s tempting to skip this step, but trust me—it makes all the difference.
While the batter rests, grab a clean 8-inch skillet and place it over medium heat. Add the 1 tablespoon vegetable oil and swirl it around to coat the entire surface. The oil should heat up just until it shimmers—if it’s smoking, let it cool for a minute. You want that oil hot enough to create a nonstick surface but not so hot it burns the batter.
Once the oil is ready, add 1 tablespoon unsalted butter to the skillet. Tilt the pan slightly and use a paper towel to spread the butter evenly around the bottom. This butter adds richness and helps create that perfect golden color. Keep the skillet warm while you prepare to pour the batter.
Cook the Crepes to Golden Perfection
After the 30-minute rest, give the batter one last stir to redistribute any settled ingredients. Pour about ¼ cup of batter into the center of the skillet and immediately tilt the pan in all directions to spread it evenly into a thin, even layer. You’re aiming for a crepe about ⅛-inch thick—it should cover the entire bottom of the pan.
Let the crepe cook undisturbed for about 1-2 minutes until the edges start to lift and the bottom looks lightly golden. Here’s where it gets tricky: when the top surface looks set and you can see the underside is golden brown, it’s time to flip. I like to use a thin spatula and lift the crepe gently from one side, then flip it over with a quick motion.
Cook the other side for another 30-45 seconds until it’s lightly golden. The crepe should be tender but not rubbery—if it’s sticking, your pan isn’t hot enough. Transfer the cooked crepe to a clean dish towel and cover it loosely with another towel to keep it warm. Repeat with the remaining batter, adding a little more oil and butter to the pan as needed.
Master the Stacking Technique
Here’s a pro tip: don’t stack your crepes directly on top of each other right away. Instead, place each crepe on a clean kitchen towel and cover it with another towel. This prevents them from sticking together and keeps them pliable for filling later. You should end up with about 8-10 crepes from this batter.
For the perfect fillings, I recommend keeping it simple with sweet options like Nutella, fresh berries, and a dusting of powdered sugar, or savory options with cream cheese, smoked salmon, and fresh dill. The key is to fill the crepes immediately after stacking—they’re at their most tender right after cooking.
To serve, cut each crepe into wedges and arrange them on a plate. The goal is to showcase those delicate layers and the beautiful golden color. Each bite should be light, airy, and perfectly balanced with that rich egg flavor from the batter. Enjoy them immediately while they’re still warm and pliable!
Pro Tips For Making 2 Egg Crepe
- Whisk Until Smooth: No lumps allowed—beat those eggs and milk for a solid 30 seconds after mixing in the flour. I learned this the hard way when my first batch turned out like a lumpy pancake. A fine batter = silky crepes.
- Use Cold Butter: Cut that unsalted butter into tiny cubes and let them sit in the fridge until you’re ready to cook. Cold butter melts slower, giving you time to spread the batter evenly without it turning into a greasy mess.
- Let Batter Rest: Give your batter 10 minutes of hanging out before cooking. The flour absorbs the liquid better, and the eggs relax—trust me, your crepes will be lighter and less likely to tear when flipping.
- Medium-High Heat Only: Too hot? Your crepes burn before they cook. Too low? They steam into soggy pancakes. Medium-high heat (about a 7 out of 10) is the sweet spot—adjust based on your pan’s quirks.
Health benefits of these flavors
Lean Protein Boost
Each crepe contains about 4 grams of protein per serving from the eggs, making this a surprisingly protein-packed breakfast option. With just 2 eggs per recipe, you’re getting high-quality protein without the heaviness of traditional pancakes.
I’ve found these crepes keep me full for hours, especially when filled with savory ingredients like ham or cheese. 💪
Low-Calorie Flexibility
At roughly 80 calories per crepe (without fillings), these are perfect for calorie-conscious eaters. The thin nature of the crepes means you can enjoy multiple layers without overdoing it. I often make a batch for breakfast but save half for dinner—wrapped around veggies or lean meats—without guilt.
The key is portion control with fillings like fresh fruit or light yogurt.
Gluten-Free Adaptation
While this recipe uses all-purpose flour, you can easily adapt it for gluten-free diets by substituting ½ cup gluten-free all-purpose flour blend (like Bob’s Red Mill) and ¼ cup cornstarch.
The batter will be slightly thicker, so you may need to add 1-2 tablespoons extra milk to achieve that perfect thin consistency. I’ve tested this version and found it works beautifully with gluten-free fillings too.
Heart-Healthy Fats
The whole milk and butter in this recipe provide beneficial saturated fats that support brain health. Unlike fried pastries, crepes cooked in minimal butter contain far less fat overall.
For an extra heart-healthy boost, I sometimes replace half the butter with olive oil—it maintains the same rich flavor while adding heart-healthy monounsaturated fats.
Energy-Boosting Carbs
The flour provides complex carbohydrates that give you steady energy throughout the morning. Unlike refined white flour, the all-purpose flour in this recipe contains some fiber, helping to balance blood sugar levels.
I’ve noticed that when I make these crepes with whole wheat flour (replacing half the all-purpose), they’re even more satisfying and keep me full longer.
Versatile Nutrition
These crepes serve as a perfect canvas for nutritional customization. For a high-protein breakfast, fill with Greek yogurt and berries. For a savory option, add spinach and feta for extra vitamins.
The beauty is that the crepe itself is simple but adaptable—you control what goes inside to match your dietary needs. It’s one of my favorite ways to make breakfast both delicious and nutritious. ✨
Nutrition facts
Frequently asked questions
Why does your recipe use only 2 eggs instead of 3?
Two eggs create the perfect balance of richness and lightness in each crepe. The recipe is designed to yield 8-10 delicate layers with just the right amount of set—any more eggs would make them too dense. The secret is in the thin batter consistency and proper resting time, which we’ve perfected for this exact egg ratio.
Can I make these crepes ahead of time?
The batter keeps well in the fridge for 24 hours covered, and cooked crepes can be stored for 3 days between clean kitchen towels. For longer storage, freeze them wrapped in plastic—thaw at room temperature before reheating. The key is to reheat gently in a dry skillet or microwave to maintain that silky texture.
What’s the best way to prevent crepes from sticking?
Use a properly heated 8-inch nonstick skillet with medium-low heat. Before pouring batter, wipe the pan with a damp paper towel to remove any residue, then add just 1 tablespoon butter and swirl to coat. Never overcrowd the pan—cook one crepe at a time for perfect results. A well-seasoned cast iron pan works too!
How do I know when to flip the crepes?
Flip when the edges lift easily and the bottom is golden brown (about 1-2 minutes). The top should look set but still slightly shiny. Use a thin spatula to lift one edge—if it releases cleanly, it’s ready. For beginners, watch the edges first as they’re the first to cook through.
Can I make these crepes without a blender?
Yes! This recipe requires only whisking—no blender needed. The batter should be smooth but slightly lumpy (that’s normal). For extra silkiness, press the batter through a fine-mesh sieve before cooking. The whisking method actually helps create those signature thin layers better than blending.

- 3 Overripe Bananas Recipe: Fluffy Pancakes With Zero Waste - November 17, 2026
- 2-Minute Pizza Recipe: Speedy Crispy Crust With Melted Cheese Magic - November 17, 2026
- 16 Chocolate Cupcakes Recipe: Triple-Layered Fudge Swirl Delight - November 17, 2026