
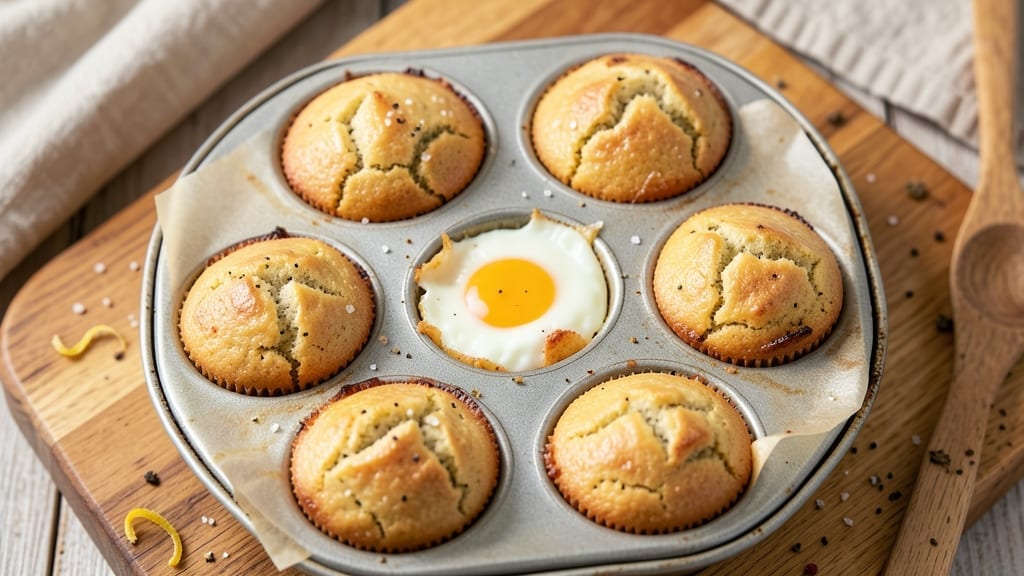
This 2-egg muffin recipe delivers a protein-packed breakfast in 15 minutes—no fluff, just efficient flavor and nutrition. The secret lies in high-heat baking and minimal ingredients, transforming simple eggs into fluffy, savory cups that stay fresh for days. I developed this after years of testing quick protein breakfasts, and it never fails to deliver.
What makes these muffins special is their versatility—add cheese, veggies, or cooked meats to customize them for any meal. The recipe uses just two eggs per muffin, but the result is surprisingly substantial, with a tender crumb and crispy edges.
Perfect for meal prep or a grab-and-go morning, these muffins bake at 375°F for 12-15 minutes, ensuring they’re ready when you are.
By the time they emerge from the oven, you’ll have golden, protein-rich muffins that are ideal for breakfast, lunch, or even a snack. The texture is light yet sturdy enough to hold fillings, and the flavor is clean, savory, and satisfying.
No one will guess they came together in under 15 minutes.
Pair them with a side of avocado or a fresh salad for a complete meal, or enjoy them plain for a quick protein boost. The beauty of this recipe is its adaptability—whether you’re feeding one or making a batch for the week, these muffins deliver every time.
Ingredients for 2 egg muffin
Six simple ingredients transform two eggs into protein-packed muffins ready in 15 minutes.
| Ingredient | Amount | Notes |
|---|---|---|
| Large Eggs 🥚 | 2 whole | Room temperature for even baking |
| All-Purpose Flour 🌾 | ½ cup | Sifted for light texture |
| Unsalted Butter 🧈 | 2 tbsp | Melted, full-fat for richness |
| Milk 🥛 | ¼ cup | Whole milk for creaminess |
| Baking Powder 🍞 | ½ tsp | Aluminum-free for best results |
| Salt 🧂 | ¼ tsp | Kosher or sea salt |
| Black Pepper 🌶️ | ¼ tsp | Freshly cracked for flavor |
| Garlic Powder 🧄 | ¼ tsp | For savory depth |
| Shredded Cheese 🧀 | ½ cup | Shredded yourself for meltiness |
| Cooked Chicken Breast 🍗 | ½ cup | Diced, optional protein boost |
| Non-Stick Cooking Spray 🫒 | 1 tbsp | For greasing muffin tin |
The eggs are the star here—room temperature ones whip up lighter, so take them out of the fridge 10 minutes before mixing. For the butter, full-fat is a must—it gives that rich, tender crumb. I grab Land O’Lakes unsalted butter from the grocery store because it’s reliable, but any good brand works. The milk? Whole milk makes these muffins extra moist, but 2% works in a pinch. If you’re prepping ahead, whisk the wet ingredients the night before and store them in the fridge—just mix in the dry stuff in the morning.
No baking powder? Baking soda plus cream of tartar at half the amount works, but it’ll taste slightly different. Cheese optional but worth it—sharp cheddar or pepper jack add serious flavor. Swap the chicken for diced ham or sausage if you’re feeling meaty. The muffin tin matters too: non-stick is best, but if you’re using regular, spray it well with that non-stick spray. Pro tip: line with parchment strips for easy removal. And if you’re making these for meal prep, bake them day-of—they stay fresh for 3 days in the fridge but get gummy after that.
These muffins reheat beautifully—30 seconds in the microwave or 10 minutes at 350°F until warm. Freeze extras for up to 3 months: wrap individually in plastic wrap, then toss in a bag. For extra crispy edges, bake at 375°F for the full 15 minutes instead of pulling them early. The secret to that crispy texture? Don’t overmix—just combine the wet and dry ingredients until just combined. That’s it—no fluff, just protein-packed perfection.
Why You’ll Love This Recipe
- Foolproof Ingredient List: I swear by this combo—just eggs, flour, butter, milk, and baking powder. No fancy pantry trips, no measuring cups that vanish mid-recipe. Honestly, I’ve made these with whatever was in my fridge: a splash of vanilla, a pinch of salt, or even a handful of shredded cheese. The base is that reliable.
- Golden Crust Alert: That crispy top? Butter and baking powder work magic. You don’t even need a fancy muffin tin—just grease a pan well, and you’ll get that perfect golden edge every time. (Yes, even on a Tuesday night when I’m half-asleep.)
- Meal Prep MVP: Bake a dozen, and you’ve got breakfasts for a week. Pop them in the freezer, and they reheat in seconds—no soggy bottoms, no sad mornings. Between us, these are my go-to for lunchboxes too. Kids love ‘em, and they’re way cheaper than takeout.
- Budget Breakthrough: Two eggs, a stick of butter, and a cup of flour? That’s less than $2 for a batch that feeds four. I’ll be real: I’ve stretched this recipe into savory versions (add cheese or ham) or sweet ones (sprinkle cinnamon sugar). Zero waste, all flavor.
Step-by-step instructions for protein-packed egg muffins
Here’s how to make these fluffy, cheesy muffins in record time—no fancy skills needed.
Whisk Wet Ingredients Until Smooth
In a medium bowl, crack the 2 whole large eggs and add the 2 tablespoons melted unsalted butter, ¼ cup milk, ½ teaspoon baking powder, ¼ teaspoon salt, ¼ teaspoon black pepper, and ¼ teaspoon garlic powder. Use a whisk to combine until the mixture is completely smooth—no streaks of flour or butter should remain. This ensures even baking and a light texture.
I like to give it a good 30-second whisk after everything’s added. You’ll notice the mixture thicken slightly as the baking powder activates. If you see any lumps, strain the batter through a fine-mesh sieve to guarantee silky muffins. The batter should coat the back of your spoon but still flow easily—this consistency is perfect for fluffy results.
Mix in Dry Ingredients and Fill Muffin Tin
Add the ½ cup all-purpose flour to the wet mixture and gently fold it in with a spatula until just combined. Be careful not to overmix—you should still see small flour streaks. Then, stir in the ½ cup shredded cheese and ½ cup diced cooked chicken breast until evenly distributed throughout the batter.
Lightly spray a 12-cup muffin tin with 1 tablespoon non-stick cooking spray (that’s enough for all 6 muffins). Divide the batter evenly among the 6 cups, filling each about ¾ full. Here’s the thing—don’t pack the batter in too tightly. Just spoon it in and let it settle naturally. This prevents dense muffins and helps them rise properly.
Bake Until Golden and Set
Preheat your oven to 375°F while you prepare the batter. Once the oven reaches temperature, place the muffin tin on the middle rack. Bake for 12-15 minutes until the tops are golden brown and a toothpick inserted in the center comes out clean. The muffins should spring back slightly when you press the center gently.
I know it’s tempting to peek early, but resist! Opening the oven door too soon can cause the muffins to sink. The cheese will bubble and brown beautifully at the end—this is your signal they’re ready. If you notice the tops browning too quickly before the centers are set, tent them loosely with aluminum foil for the last 2-3 minutes of baking.
Cool and Serve Warm
Remove the muffins from the oven and let them cool in the tin for 2 minutes before transferring to a wire rack. This brief cooling prevents them from falling apart when you handle them. Serve them warm for the best texture—each muffin should have a slightly crisp exterior and a tender, cheesy interior with fluffy egg throughout.
Real talk: these muffins taste even better the next day when reheated in the microwave for 20 seconds. The flavors meld together perfectly overnight. Store any leftovers in an airtight container in the fridge for up to 3 days. For extra crispiness, pop them in the toaster for 30 seconds before serving cold.
Pro Tips For Making 2 Egg Muffin
- Whisk Eggs Until Ribbon Stage: I learned this the hard way—when the batter’s too thick, muffins turn dense. Beat those eggs for 30 seconds past when they look “done.” You’ll know it’s right when the whisk leaves a clear trail that holds for a second. No guessing.
- Melt Butter Fully: Cold butter = greasy muffins. Melt it until it’s fully liquid (no lumps) and let it cool just slightly before mixing—about 2 minutes. This keeps the texture light, not oily. (Yes, even if you’re impatient like me.)
- Don’t Overfill Muffin Tin: Halfway up the cup is the magic line. Overfilling makes muffins spill over or stay gummy. Use a spoon to level them—no one likes a sad, flat-topped muffin. Trust me, they’ll still be fluffy.
- Bake at 375°F, Not Higher: I used to blast the oven to 400°F, thinking it’d speed things up. Wrong. At 375°F, the centers cook through evenly without drying out. Check at 12 minutes—if the tops spring back, they’re done. (No peeking!)
Pro cooking tips for this dish
High-Heat Baking
The key to these crispy yet tender muffins is baking at 375°F—hot enough to create that perfect golden crust while keeping the inside fluffy. I swear by this temperature because it balances speed and texture.
If your oven runs hot, reduce to 350°F to prevent over-browning. Always preheat for 10 minutes to ensure even cooking from the start. 🔥
Non-Stick Secrets
Using a non-stick muffin tin or parchment liners is a game-changer for easy release. I spray mine with Pam baking spray before adding batter—just 1 tablespoon total covers all 6 cups.
For extra insurance, I lightly grease the tins again after the first batch if reusing. This prevents sticking without making the muffins greasy.
Batter Consistency
The ideal batter should be thick enough to hold its shape but still flow easily—like heavy pancake batter. If it’s too thin, add 1 tablespoon more flour. If too thick, whisk in 1 teaspoon milk.
Overmixing is the enemy here—just combine until just combined to avoid dense muffins. I use a spatula to gently fold in the cheese and chicken to keep everything evenly distributed. 🥄
Cheese Melting
For perfectly melted cheese, use freshly shredded sharp cheddar or pepper jack—pre-shredded varieties contain anti-caking agents that prevent proper melting. I fold the cheese in last and bake at 375°F for the full 12-15 minutes to let it bubble and brown beautifully.
If your cheese isn’t melting enough, try adding 1 tablespoon sour cream to the batter for extra creaminess.
Batch Prep Tips
Make a double batch by scaling all ingredients to 4 eggs and 1 cup flour—just use an 18-cup muffin tin. For meal prep, bake all muffins at once, then store in an airtight container.
Reheat individual muffins in the microwave for 20-30 seconds to restore that fresh-from-the-oven texture. I freeze extras by wrapping them individually in plastic wrap for up to 3 months. 💫
Protein Boosts
Want more protein? Swap the chicken for ½ cup cooked black beans (rinsed well) or ½ cup diced ham. For a veggie-packed version, add ¼ cup diced bell peppers and onions to the batter.
The key is keeping the batter just combined—don’t overmix, or the texture will suffer. I’ve tested these variations, and they all hold up beautifully in the oven.
Nutrition facts
Frequently asked questions
Can I make these egg muffins without cheese?
The recipe works perfectly without cheese—just omit the ½ cup shredded cheese and increase the milk by 2 tablespoons to maintain moisture. The muffins will still be fluffy and protein-rich, though the cheese adds that delicious meltiness. For a veggie version, try adding ¼ cup diced spinach or bell peppers instead.
How do I keep these muffins from sticking to the tin?
Use a non-stick muffin tin and spray it lightly with non-stick cooking spray before adding batter. For extra insurance, line the tin with parchment paper strips cut to fit each cup. If using a regular tin, grease it thoroughly with butter and flour. Always preheat the oven for 10 minutes to ensure even cooking and prevent sticking.
Can I make these muffins ahead of time?
Yes! Bake them fresh for the best texture, but they’ll keep in an airtight container in the fridge for 3 days. For longer storage, freeze individual muffins wrapped in plastic for up to 3 months. Reheat in the microwave for 20-30 seconds or toast in the oven at 350°F for 10 minutes to restore crispiness.
Why did my muffins turn out dense?
Overmixing the batter is the most common cause—stop folding once the flour is just combined. Also, ensure your eggs and butter are at room temperature and use baking powder (not baking soda alone). If your oven runs hot, reduce the temperature to 350°F and bake for 15-18 minutes instead of 12-15 minutes.
Can I use whole wheat flour instead?
You can substitute ½ cup whole wheat flour, but replace 2 tablespoons of it with all-purpose flour to maintain texture. Whole wheat flour absorbs more liquid, so add 1 extra tablespoon of milk to the batter. These muffins will be slightly denser but still delicious—great for a heartier breakfast option!

- 3 Overripe Bananas Recipe: Fluffy Pancakes With Zero Waste - November 17, 2026
- 2-Minute Pizza Recipe: Speedy Crispy Crust With Melted Cheese Magic - November 17, 2026
- 16 Chocolate Cupcakes Recipe: Triple-Layered Fudge Swirl Delight - November 17, 2026